2012 SKODA ROOMSTER interior lights
[x] Cancel search: interior lightsPage 47 of 194

›
With the other hand unlock the locking button A
in the direction of arrow and
remove the wiper blade.
Attaching the wiper blade
› Position the wiper blade onto the wiper arm and lock the locking but-
ton A
» Fig. 32
.
› Check that the wiper blade is correctly attached.
› Fold the wiper arm back to the windscreen. ÐRear window
Manual dimming interior mirror
Basic setting
› Pull the lever on the bottom edge of the mirror forward.
Dimming mirror
› Push the lever on the bottom edge of the mirror backwards. ÐAdditional rear-view mirror
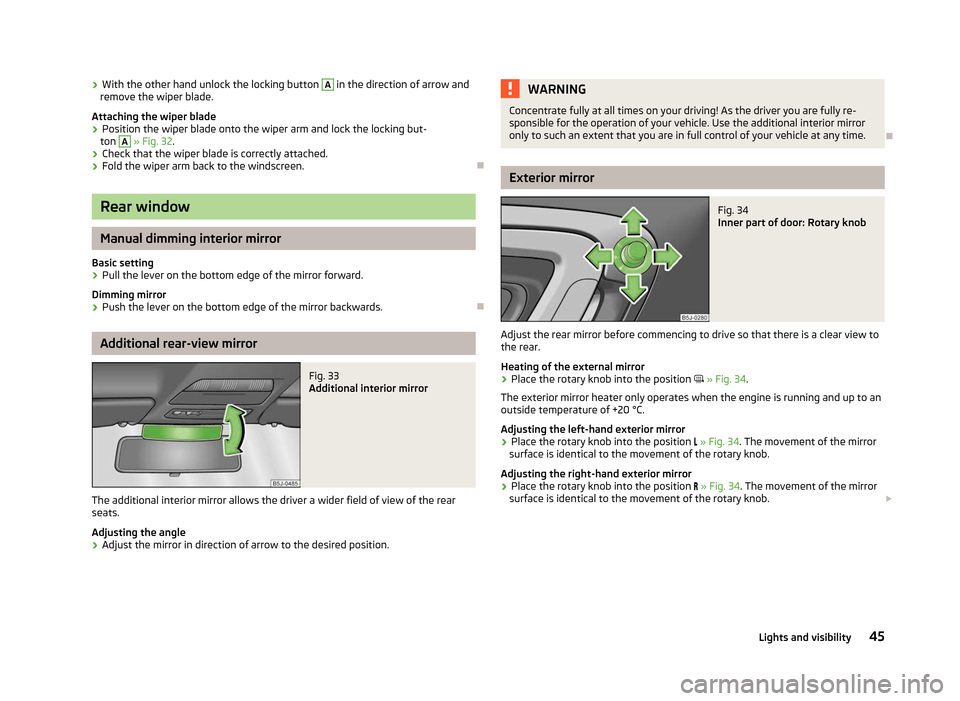
Fig. 33
Additional interior mirror
The additional interior mirror allows the driver a wider field of view of the rear
seats.
Adjusting the angle › Adjust the mirror in direction of arrow to the desired position. WARNING
Concentrate fully at all times on your driving! As the driver you are fully re-
sponsible for the operation of your vehicle. Use the additional interior mirror
only to such an extent that you are in full control of your vehicle at any time. Ð Exterior mirror
Fig. 34
Inner part of door: Rotary knob
Adjust the rear mirror before commencing to drive so that there is a clear view to
the rear.
Heating of the external mirror
› Place the rotary knob into the position
» Fig. 34.
The exterior mirror heater only operates when the engine is running and up to an
outside temperature of +20 °C.
Adjusting the left-hand exterior mirror
› Place the rotary knob into the position
» Fig. 34. The movement of the mirror
surface is identical to the movement of the rotary knob.
Adjusting the right-hand exterior mirror
› Place the rotary knob into the position
» Fig. 34. The movement of the mirror
surface is identical to the movement of the rotary knob. £
45
Lights and visibility
Page 87 of 194

START/STOP
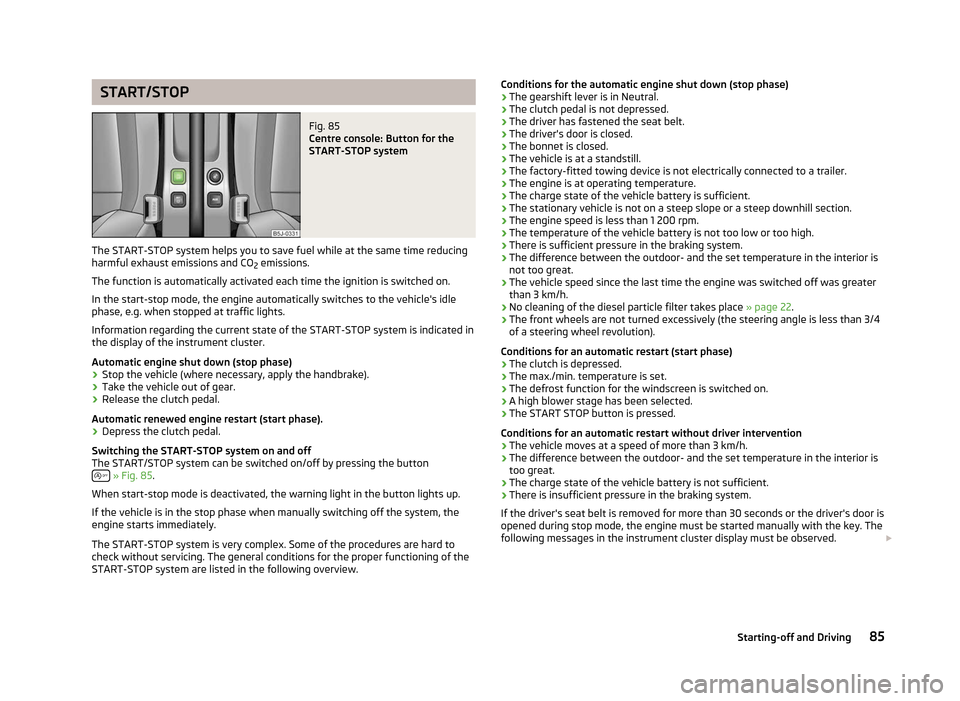
Fig. 85
Centre console: Button for the
START-STOP system
The START-STOP system helps you to save fuel while at the same time reducing
harmful exhaust emissions and CO 2 emissions.
The function is automatically activated each time the ignition is switched on.
In the start-stop mode, the engine automatically switches to the vehicle's idle
phase, e.g. when stopped at traffic lights.
Information regarding the current state of the
START-STOP system is indicated in
the display of the instrument cluster.
Automatic engine shut down (stop phase)
› Stop the vehicle (where necessary, apply the handbrake).
› Take the vehicle out of gear.
› Release the clutch pedal.
Automatic renewed engine restart (start phase).
› Depress the clutch pedal.
Switching the
START-STOP system on and off
The START/STOP system can be switched on/off by pressing the button » Fig. 85.
When start-stop mode is deactivated, the warning light in the button lights up.
If the vehicle is in the stop phase when manually switching off the system, the
engine starts immediately.
The
START-STOP system is very complex. Some of the procedures are hard to
check without servicing. The general conditions for the proper functioning of the
START-STOP system are listed in the following overview. Conditions for the automatic engine shut down (stop phase)
› The gearshift lever is in Neutral.
› The clutch pedal is not depressed.
› The driver has fastened the seat belt.
› The driver's door is closed.
› The bonnet is closed.
› The vehicle is at a standstill.
› The factory-fitted towing device is not electrically connected to a trailer.
› The engine is at operating temperature.
› The charge state of the vehicle battery is sufficient.
› The stationary vehicle is not on a steep slope or a steep downhill section.
› The engine speed is less than 1
200 rpm.
› The temperature of the vehicle battery is not too low or too high.
› There is sufficient pressure in the braking system.
› The difference between the outdoor- and the set temperature in the interior is
not too great.
› The vehicle speed since the last time the engine was switched off was greater
than 3 km/h.
› No cleaning of the diesel particle filter takes place
» page 22.
› The front wheels are not turned excessively (the steering angle is less than 3/4
of a steering wheel revolution).
Conditions for an automatic restart (start phase)
› The clutch is depressed.
› The max./min. temperature is set.
› The defrost function for the windscreen is switched on.
› A high blower stage has been selected.
› The START STOP button is pressed.
Conditions for an automatic restart without driver intervention
› The vehicle moves at a speed of more than 3 km/h.
› The difference between the outdoor- and the set temperature in the interior is
too great.
› The charge state of the vehicle battery is not sufficient.
› There is insufficient pressure in the braking system.
If the driver's seat belt is removed for more than 30 seconds or the driver's door is
opened during stop mode, the engine must be started manually with the key. The
following messages in the instrument cluster display must be observed. £
85
Starting-off and Driving
Page 169 of 194

Fuses in the dash panel
Fig. 139
Underside of the dash panel:
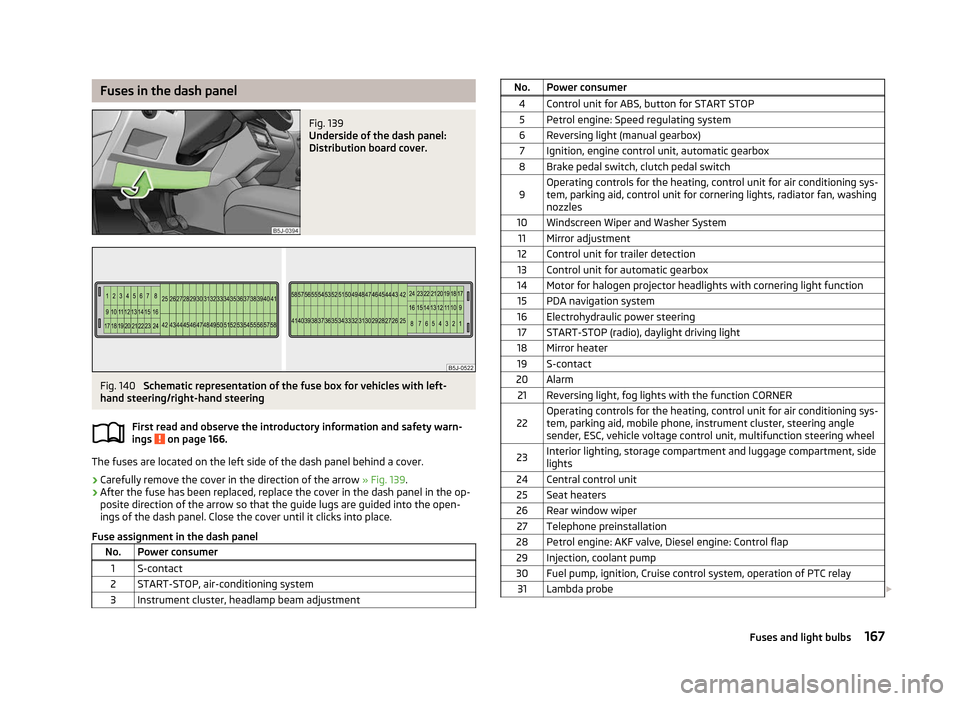
Distribution board cover. Fig. 140
Schematic representation of the fuse box for vehicles with left-
hand steering/right-hand steering
First read and observe the introductory information and safety warn-
ings on page 166.
The fuses are located on the left side of the dash panel behind a cover.
›
Carefully remove the cover in the direction of the arrow
» Fig. 139.
› After the fuse has been replaced, replace the cover in the dash panel in the op-
posite direction of the arrow so that the guide lugs are guided into the open-
ings of the dash panel. Close the cover until it clicks into place.
Fuse assignment in the dash panel No. Power consumer
1 S-contact
2 START-STOP, air-conditioning system
3 Instrument cluster, headlamp beam adjustment ä No. Power consumer
4 Control unit for ABS, button for START STOP5 Petrol engine: Speed regulating system
6 Reversing light (manual gearbox) 7 Ignition, engine control unit, automatic gearbox
8 Brake pedal switch, clutch pedal switch
9 Operating controls for the heating, control unit for air conditioning sys-
tem, parking aid, control unit for cornering lights, radiator fan, washing
nozzles
10 Windscreen Wiper and Washer System 11 Mirror adjustment
12 Control unit for trailer detection
13 Control unit for automatic gearbox
14 Motor for halogen projector headlights with cornering light function 15 PDA navigation system
16 Electrohydraulic power steering 17 START-STOP (radio), daylight driving light
18 Mirror heater 19 S-contact
20 Alarm 21 Reversing light, fog lights with the function CORNER
22 Operating controls for the heating, control unit for air conditioning sys-
tem, parking aid, mobile phone, instrument cluster, steering angle
sender, ESC, vehicle voltage control unit, multifunction steering wheel
23 Interior lighting, storage compartment and luggage compartment, side
lights
24 Central control unit 25 Seat heaters
26 Rear window wiper 27 Telephone preinstallation
28 Petrol engine: AKF valve, Diesel engine: Control flap 29 Injection, coolant pump
30 Fuel pump, ignition, Cruise control system, operation of PTC relay 31 Lambda probe £ 167
Fuses and light bulbs
Page 170 of 194

No. Power consumer
32 High pressure fuel pump, pressure valve
33 Engine control unit
34 Engine control unit, vacuum pump 35 Power supply of ignition lock
36 Main beam 37 Rear fog light, DC/DC converter START-STOP
38 Fog lights 39 Air blower for heating
40-41 Not assigned 42 Rear window heater
43 Horn
44 Windscreen wipers 45 Central control unit for convenience system
46 Engine control unit, fuel pump 47 Cigarette lighter, power socket in the luggage compartment
48 ABS, START-STOP (DC/DC) converter ESP 49 Turn signal lights, brake lights50 START-STOP (DC/DC) converter infotainment, radio 51 Electrical power window (front and rear) - left side
52 Electrical power window (front and rear) - right side
53 Parking light = left side, electrical sliding/tilting roof
54 START-STOP (instrument cluster), alarm 55 Control unit for automatic gearbox
56 Headlight cleaning system, parking light - right side 57 Left low beam, headlight range adjustment
58 Low beam on the right Ð Fuses in the engine compartment
Fig. 141
Vehicle battery: Distribution board cover. Fig. 142
Schematic representation of
fuse box in engine compartment
First read and observe the introductory information and safety warn-
ings on page 166.
›
Press together the circlips in the fuse box cover at the same time in the direc-
tion of arrow A
» Fig. 141
and remove the cover in the direction of arrow B
.
› Release the fixtures in the openings C
using a flat screwdriver and fold the
cover upwards in direction of arrow D
.
Fuse assignment in engine compartment No. Power consumer
1 Generator
2 Not assigned
3 Interior
4 Electrical auxiliary heating system 5 Interior £ ä
168 Do-it-yourself
Page 188 of 194

Front airbag 110
Front seats 47
Fuel 134
Diesel 136
Fuel gauge 9
gauge 9
refer to Fuel 134
Refuelling 134
Unleaded petrol 135
Fuel consumption 120
Fuses Assignment 166
Replacing 166
G
Gear Recommended gear 11
General view Cockpit 7
Glow plug system - indicator light 22
GSM 92
H
Handbrake 80
Head airbag 112
Headlight cleaning system Headlight cleaning system 44
Headlights Driving abroad 123
Headlight cleaning system 44
Head restraint 48
Heating 68
Defrosting windows 69
Exterior mirror 45
Rear window 42
Recirculated air mode 69
Seats 48
Heating rear window 42
Horn 7 I
Ignition 78
Ignition lock 78
Immobiliser 77
Information display see MAXI DOT 15
Instrument cluster 8
Interior light Praktik 174
Interior lighting Praktik 174
Interior monitor 31
ISOFIX 117
J
Jacking points Raise vehicle 159
Jump-starting 163
L
Lever Main beam 40
Turn signal 40
Light Cockpit 41
Daylight driving light 37
Fog lights 38
Fog lights with the function CORNER 38
Halogen projector headlights with cornering light function 37
Hazard warning light system 40
Headlight beam adjustment 39
Headlight flasher 40
Low beam 36
Main beam 40
Parking light 36, 37
Rear fog light 39
Replacing bulbs 169Tourist light 38
Turn signal 40
Lights switching on and off 36
Warning lights 17
Loads 176
Lock Central locking system 28
Locking Emergency locking 31
Remote control 29
without central locking 26
Locking and unlocking from the inside 28
M
MAXI DOT 15
Main menu 15
Settings 15
Maximum speed 180
MDI 99
Mirror Additional interior mirror 45
Exterior mirror 45
Manual dimming interior mirror 45
Vanity 42
Mobile phone 92
Connecting to the hands-free system 94
Multifunction display Functions 12
Memory 12
Operation 13
Multimedia 97
N
Net partition 54
186 Index
Page 189 of 194

O
Oil refer to Engine oil 139
Onboard computer see Multifunction display 12
Operation in winter De-icing windows 130
Diesel fuel 136
Vehicle battery 145
Outside temperature 13
Overview Engine compartment 138
Warning lights 17
P
Paint see Paint damage 129
Paint damage 129
Panorama roof 35
Parking Parking aid 82
Parking ticket holder 66
Passive Safety 100
Periodic wiping 43
Petrol refer to Fuel 135
Polishing the paintwork refer to Taking care of your vehicle 129
Power steering 77
Preservation refer to Taking care of your vehicle 129
R
Radiator fan 142
Radio reception Aerial 130
Functional fault 130Raise vehicle 159
Rear mirror Exterior mirror 45
Manual dimming interior mirror 45
Recirculated air mode Manual air conditioning system 72
Recommended gear 11
Refuelling 134
Fuel 134
Regulation Headlight beam 39
Remote control 29
Synchronisation process 30
Remote control key Replacing the battery 25
Replacement of parts 155
Replacing bulbs 169
Fuses 166
Vehicle battery 146
Windscreen wiper blade 44
Replenishing Coolant 141
Engine oil 139
Windscreen washer fluid 143
Running in Brake pads 119
Engine 119
The first 1 500 km 119
Tyres 119
S
Safe securing system 27
Safety 100
Child safety 115
Child safety seats 115
Head restraints 48
ISOFIX 117
TOP TETHER 118
Save electrical energy 120Seat
Adjusting 47
Seat belt Warning light 18
Seat belt height adjuster 107
Seat belts 104
Cleaning 133
fastening and unfastening 106
Height adjustment 107
Seats folding forward 49
Head restraints 48
Heating 48
Removing seats 50
Selector lever see selector lever positions 88
Selector lever positions 88
Service display 10
Setting Manual air conditioning system 72
Manual dimming interior mirror 45
Steering wheel 77
Setting temperature Heating 68
Setting the clock Clock 11
Shifting Diving economically 120
Gearshift lever 82
Side airbag 111
Snow chains 154
Spare wheel 151
Speedometer 9
START/STOP Function 85
Starting and stopping the engine 76
Starting engine Jump-starting 163
START STOP Jump-starting 164
187
Index