Page 53 of 112

52Navigation
Operating instructions
● Available characters on the keyboard block are entered in the input win-
dow when pressed.
● ALTERNATIVELY: You can select characters by turning and pressing the
setting knob ⇒ Fig. 1 10
.
Other control elements
Function buttonAction and meaningPress to switch between upper and lower case.
Press to open the input window for numbers and special
characters.
Or: A-ZPress to go back to the input window for letters.
and Press to move the cursor to the left or right on the input
line.
Press to enter a space.
Characters with
Hold down to display a pop-up window with special
characters based on this letter. Press the desired charac-
ter to enter it.
Press to briefly highlight all function buttons on which
special characters are available.
Press a function button to open a pop-up window for se-
lection of a special character.
Press to display Cyrillic characters on the input key-
board.
DeletePress to delete characters in the input line from right to
left.
Page 75 of 112

74Navigation
Ending demonstration mode
As a general rule, the Demo mode should be switched off after use, other-
wise you will always have to select between virtual navigation or normal
navigation before starting navigation to a destination.
Normally, the demonstration mode automatically ends on completion of the
route guidance programme or when a new navigation destination (not de-
tour) is entered. When the vehicle starts to move, or when the unit is switch-
ed off, the demonstration mode ends.
If necessary, switch off the demonstration mode in the navigation setup
menu.
● Press the SETUP
unit button in one of the navigation menus.
● Untick the checkbox for the
Demo mode function button.
Setup menu Navigation
Fig. 75 Navigation setup
menu.
Fig. 76 Navigation setup
menu.
Press the SETUP
unit button from any navigation menu to open the
Naviga-
tion setup menu ⇒ Fig. 75.
Function button: ResultRoute options: ⇒
page 64.Announcement volume: Turn the setting knob ⇒ Fig. 1 10 to adjust the vol-
ume of navigation announcements. To switch off, turn the knob to the left
until Off is displayed.
The volume of the navigation announcements can also be controlled from
the general volume settings ⇒ page 99.
Day / night
Automatic: the map mode changes from daytime to night-time view
as the dipped headlights are switched on.
Day: the map view remains in daytime mode (bright).Night: the map view remains in night-time mode (dark). POIs on map: Points of interest (petrol stations, car parks, Technical Serv-
ices) will be displayed as symbols on the map.
Autozoom: “automatic zoom” mode for activated map ⇒ page 66.
Page 86 of 112

85
Telephone control (Phone)
Instrument panel display
Telephone information display
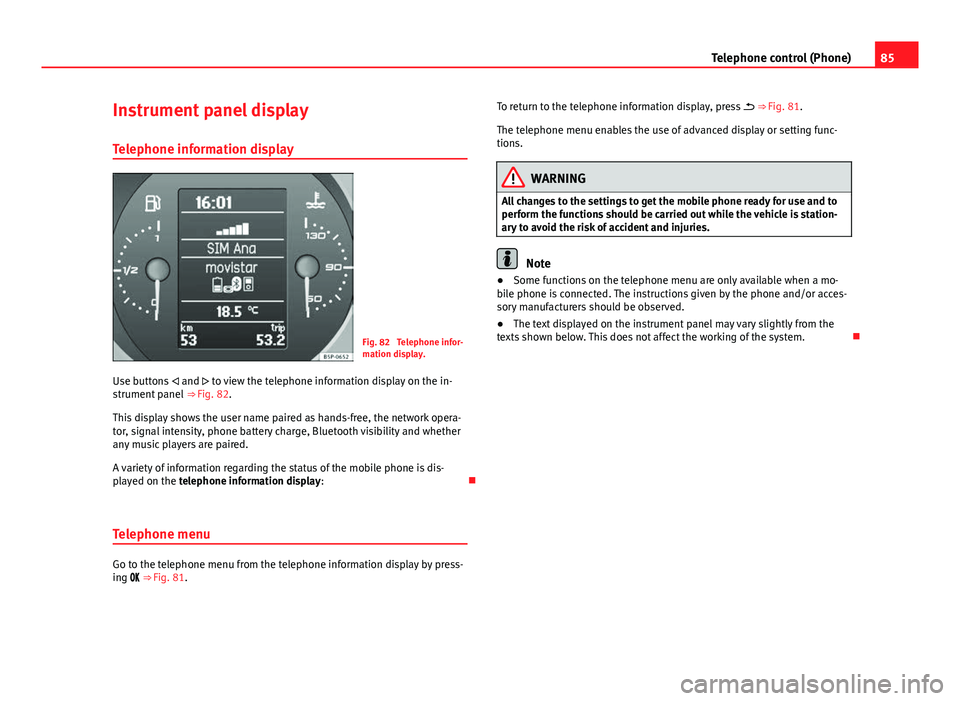
Fig. 82 Telephone infor-
mation display.
Use buttons and to view the telephone information display on the in-
strument panel ⇒ Fig. 82.
This display shows the user name paired as hands-free, the network opera-
tor, signal intensity, phone battery charge, Bluetooth visibility and whether
any music players are paired.
A variety of information regarding the status of the mobile phone is dis-
played on the telephone information display:
Telephone menu
Go to the telephone menu from the telephone information display by press-
ing ⇒ Fig. 81. To return to the telephone information display, press
⇒ Fig. 81.
The telephone menu enables the use of advanced display or setting func-
tions.
WARNING
All changes to the settings to get the mobile phone ready for use and to
perform the functions should be carried out while the vehicle is station-
ary to avoid the risk of accident and injuries.
Note
● Some functions on the telephone menu are only available when a mo-
bile phone is connected. The instructions given by the phone and/or acces-
sory manufacturers should be observed.
● The text displayed on the instrument panel may vary slightly from the
texts shown below. This does not affect the working of the system.
Page 89 of 112

88Telephone control (Phone)
Control from the navigation system
Telephone book
Fig. 83 PHONE main
menu
Fig. 84 Phone book After a mobile phone has been paired, the entries in the phone book can be
viewed and managed via the
PHONE telephone control.
● In the PHONE main menu, press the B
⇒ Fig. 83 function button to
open the phone book ⇒ Fig. 84.
● Scroll through the phone book using setting button ⇒ Fig. 1 10
, or by
moving the scroll marker ⇒ page 13.
● Press the setting button to select the highlighted entry in the phone
book.
● Alternatively: Press directly on the entry in the list.
If only one phone number is stored in an entry, this number is immediately
dialled.
If several numbers have been stored under the same entry, the entry is
marked with the symbol . When you select this entry, all the numbers stor-
ed there are displayed.
The number stored in an entry can be viewed and edited prior to dialling the
number ⇒ page 90
Note
The phone control (Phone) allows up to 2500 entries in the phone book.
Page 101 of 112

100Settings (SETUP)
Opening the Sound main menu ● Press the SETUP
unit button from any menu.
● Press the Sound function button at the bottom-left of the screen to open
the menu for changing sound and volume settings ⇒ Fig. 94.
The currently selected settings are indicated in the overview by the scale in
the circle next to the respective menu item ⇒ Fig. 94.
Changing the balance and fader settings
● Press the function buttons Treble
, Mid or Bass to open the respective
settings menus for adjusting the “tone” ⇒ Fig. 95.
● Turn the setting knob ⇒ Fig. 1 10
or press the function button
or to
alter the current setting.
● Press the function button Balance
or Fader to open the settings menu for
changing the sound focus to the left or right (balance) or to the front or rear
(fader).
● Turn the setting knob or press the appropriate function button to alter
the current setting.
Changing the volume settings and adjustments
The volume settings and adjustments can be pre-defined.
While you adjust volume settings, the currently active audio source is
played at the level of the setting as you change it.
● In the Sound main menu, press the Volume
function button ⇒
Fig. 94.
● Press the function button Max. switch-on volume, Traffic announcements (TP)⇒ page 23, Navigation volume or Speed-dependent vol. adjustment to open the cor-
responding settings menu.
● Turn the setting knob or press the
or function button.
● Pressing the vol. reduction function button opens a pop-up window in
which you can set the automatic audio volume reduction applied when the
parking distance warning system is active. When reverse gear is engaged,
the volume of the radio and navigation system is lowered to make manoeu-
vring easier and so that acoustic warnings are audible. If the maximum start-up volume is set very low, the navigation system an-
nouncements will also be lowered to this level. This may mean that the vol-
ume of the navigation system requires turning up each time the unit is
switched on.
Functional description of speed-dependent volume adjustment (GALA)
The speed dependent volume adjustment automatically increases the vol-
ume as the vehicle speed increases.
The degree to which the volume increases with speed is adjusted on a scale
between 1 and 7.
If a low value is set, the volume rises only slightly as the speed of the vehi-
cle increases. At a high setting the volume is increased more. At
0 speed-
dependent volume control is switched off (display: Off).
System settings
● Press the SETUP unit button and the System function button to open the
settings menu.
Resetting to factory settings
The restoration of the original settings deletes all the previous entries, des-
tinations and other settings .
● In the System settings menu , press the Factory settings
function button.
● Confirm the prompt by pressing Yes to reset the unit to its original set-
tings.
Other system settings
Function button: ResultLanguage: Press to select the desired language for text and voice output. ALTERNATIVELY: select Automatic to select the language programmed in
the instrument panel.