Page 10 of 276
6
7
6
6
Exterior
8
Opening the bonnet
11 8
Diesel engines
Petrol engine
11 9
147
Towing eye 11 7 Partially open the bonnet, lift the safety
catch and raise the bonnet. Secure the stay in one of the two notches,
according to the height required, to hold the
bonnet open. Lift the cover at the foot of the left-hand
seat and pull the release lever upwards.
At the front, unclip the cover by pressing it
at the bottom.
At the rear, unclip the cover using a coin or
the flat part of the towing eye. Take care when working under the bonnet.
Refer to "Levels" in section 6 for advice on use of the fluids.
Page 29 of 276

27
Access
READY TO SET OFF
2
HINGED REAR DOORS
When parked with the rear
doors open to 90°, the doors
mask the rear lamps.
To signal your position to
road users travelling in the
same direction who may
not have noticed that you
have stopped, use a warning
triangle or any other device
stipulated by the legislation
and regulations of your
country.
TAILGATE
From the outside
The two hinged doors open to 90°.
To open, pull the handle towards you then
pull the lever to open the left-hand door.
To close, start with the left-hand door then
close the right-hand door.
Opening to 180°
A retractable check strap system permits
extension of the opening from 90° to 180°.
Disengage the check strap towards you
when the door is partially open.
The check strap will re-attach automatically
on closing.
From the outside
If fitted on your vehicle, locking/unlocking is
via the remote control.
To open, press the control then raise the
tailgate.
A strap is provided to secure the tailgate in
the upper position.
From inside
Emergency control
In the event of a central unlocking operating
fault, this permits unlocking of the tailgate
from the inside.
Fold the rear seats to gain access to the lock.
Insert a small screwdriver in this opening to
unlock the tailgate.
Page 86 of 276

84
Practical information
Mat fitting/removal
When removing the front mat, push the
seats as far back as possible and remove
the fixings.
When refitting, position the mat correctly
on the pins and clip the fixings. Check that
the mat is secured correctly.
Areas for toll cards/car park tickets
The athermic windscreen has two
non-reflective zones located either side
of the base of the interior mirror.
They are intended for affixing toll cards
and/or car park tickets.
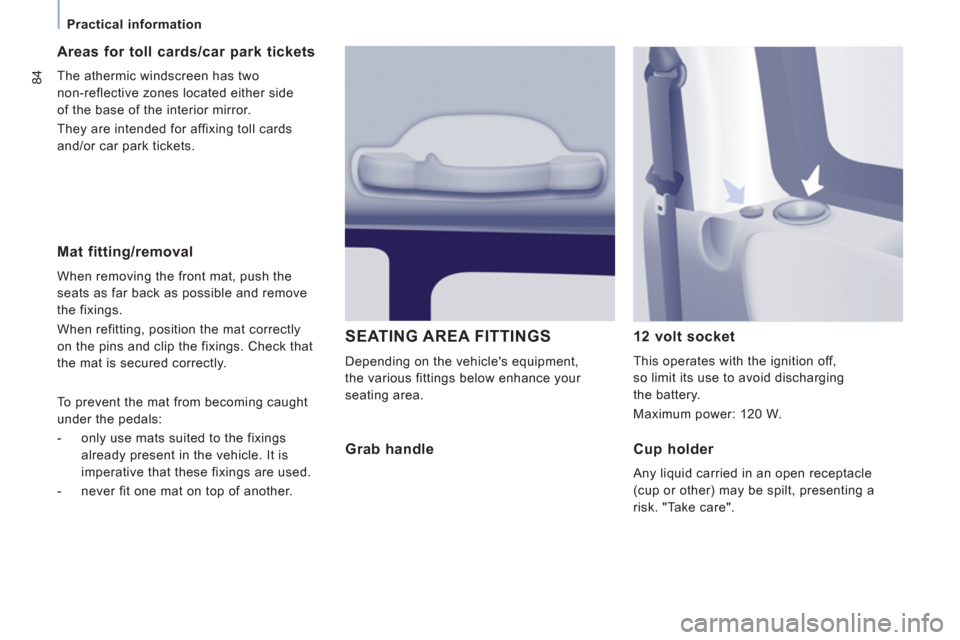
SEATING AREA FITTINGS
Depending on the vehicle's equipment,
the various fittings below enhance your
seating area.
12 volt socket
This operates with the ignition off,
so limit its use to avoid discharging
the battery.
Maximum power: 120 W. To prevent the mat from becoming caught
under the pedals:
- only use mats suited to the fixings
already present in the vehicle. It is
imperative that these fixings are used.
- never fit one mat on top of another.
Grab handle
Cup holder
Any liquid carried in an open receptacle
(cup or other) may be spilt, presenting a
risk. "Take care".
Page 88 of 276
Practical information
Load space cover
To install:
- position one end of the load space
cover roller in its notch,
- compress the opposite end of the roller
and put it in place,
- release it so that it engages,
- unroll the load space cover to the pillars,
- fix the two hooks on the pillars.
Stowing rings
Use the stowing rings on the rear floor
to fix the net, your loads or luggage.
For safety reasons, on sharp braking,
it is recommended that heavy objects are
placed as far forward as possible. To remove:
- pull the load space cover towards
you to disengage it from its fixings,
- reinsert the load space cover in its roller,
- compress it and remove it from its
support.
You are advised to immobilise the load
by securing it firmly using the stowing
rings on the floor.
Page 93 of 276
Mirrors and windows
EASE OF USE and COMFOR
T
3
Manual rear view mirror
The rear view mirror has two positions:
- day (normal),
- night (anti-dazzle).
To change from one to the other, push or
pull the lever on the lower edge of the mirror.
SURVEILLANCE MIRROR
This mirror, placed on top of the central
mirror, enables the driver or front passenger
to observe all the rear seats.
Fitted on its own ball joint, it’s manual
adjustment is simple and provides a view
of the rear interior of the vehicle.
It can also be adjusted for improved
visibility during manoeuvres or when
overtaking.
REAR WINDOWS
2nd row side windows
If fitted on your vehicle, the 2nd row side
windows can be opened.
Squeeze the two controls then move the
window sideways. 4 notches are available.
While driving, the window must be closed or
secured on one of the 4 notches.
3rd row rear quarter lights
These are fixed.
Page 101 of 276

99
Seat belts
SAFETY
4
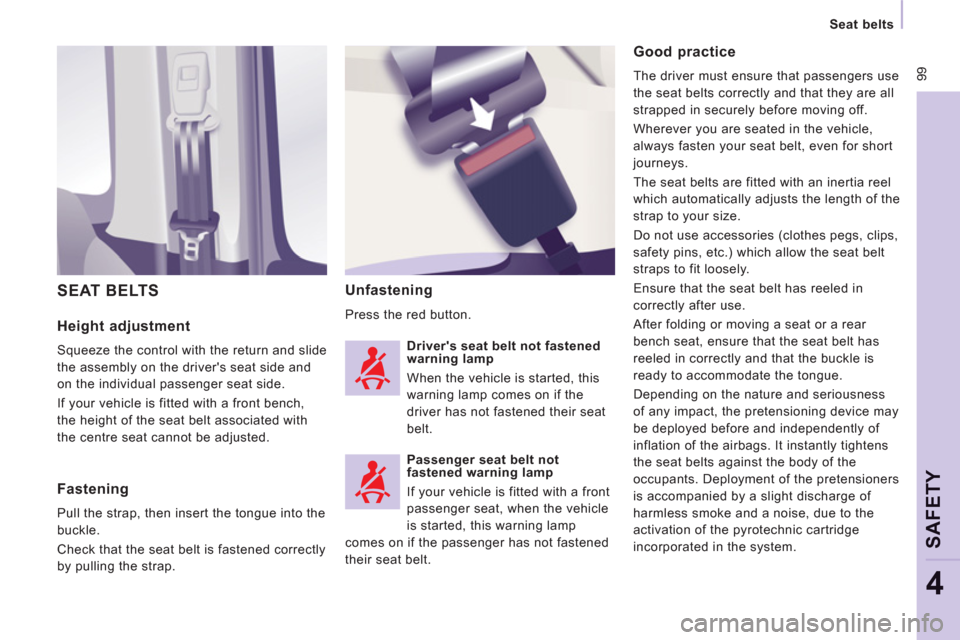
Height adjustment
Squeeze the control with the return and slide
the assembly on the driver's seat side and
on the individual passenger seat side.
If your vehicle is fitted with a front bench,
the height of the seat belt associated with
the centre seat cannot be adjusted.
Unfastening
Press the red button.
SEAT BELTS
Good practice
The driver must ensure that passengers use
the seat belts correctly and that they are all
strapped in securely before moving off.
Wherever you are seated in the vehicle,
always fasten your seat belt, even for short
journeys.
The seat belts are fitted with an inertia reel
which automatically adjusts the length of the
strap to your size.
Do not use accessories (clothes pegs, clips,
safety pins, etc.) which allow the seat belt
straps to fit loosely.
Ensure that the seat belt has reeled in
correctly after use.
After folding or moving a seat or a rear
bench seat, ensure that the seat belt has
reeled in correctly and that the buckle is
ready to accommodate the tongue.
Depending on the nature and seriousness
of any impact, the pretensioning device may
be deployed before and independently of
inflation of the airbags. It instantly tightens
the seat belts against the body of the
occupants. Deployment of the pretensioners
is accompanied by a slight discharge of
harmless smoke and a noise, due to the
activation of the pyrotechnic cartridge
incorporated in the system.
Fastening
Pull the strap, then insert the tongue into the
buckle.
Check that the seat belt is fastened correctly
by pulling the strap.
Driver's seat belt not fastened
warning lamp
When the vehicle is started, this
warning lamp comes on if the
driver has not fastened their seat
belt.
Passenger seat belt not
fastened warning lamp
If your vehicle is fitted with a front
passenger seat, when the vehicle
is started, this warning lamp
comes on if the passenger has not fastened
their seat belt.
Page 103 of 276
101
Improved safety and security
SAFETY
4
IMPROVED SAFETY AND SECURITY
In situations of extreme transverse
acceleration, this module limits the risks
of the vehicle rolling over by acting on
the brakes.
Roll Over Mitigation *
This system, linked with the ESP,
supplements the ABS-EBFD, ASR-ESP and
EBA braking functions, already covered in
this document, to guarantee a high level
of active safety. Indeed, the ROM system
was intended originally for top-of-the-range
4x4 type vehicles and today it is fitted on
your vehicle.
*
Roll-over prevention system.
Page 105 of 276

103
Airbags
SAFETY
4
Good practice
Sit in a normal upright position.
Wear a correctly adjusted seat belt.
Do not leave anything between the
occupants and the airbags (a child, pet,
object...). This could hinder the operation of
the airbags or injure the occupants.
After an accident or if the vehicle has been
stolen or broken into, have the airbag
systems checked.
All work on the airbag system is strictly
forbidden unless it is carried out by qualified
personnel at a PEUGEOT dealer or a
qualified workshop.
Lateral airbags
Only put recommended covers on the seats.
These will not hinder inflation of the lateral
airbags. Contact a PEUGEOT dealer or a
qualified workshop.
Do not fix or attach anything to the seat
backs. This could cause injury to the chest
or arms when the lateral airbag inflates.
Do not sit with the upper part of the body
any nearer to the door than necessary.
Front airbags
Do not drive holding the steering wheel
by its spokes or resting your hands on the
centre part of the wheel.
Do not allow passengers to place their feet
on the dashboard, they risk serious injury if
the airbag is deployed.
Smoke as little as possible as deployment
of the airbags can cause burns or the risk of
injury from a cigarette or pipe.
Never remove or pierce the steering wheel
or hit it violently.
Even if all of the precautions mentioned are
observed, a risk of injury or of minor burns
to the head, chest or arms when an airbag
is deployed cannot be ruled out. In fact, the
bag inflates almost instantly (within a few
milliseconds) then deflates within the same
time discharging the hot gas via openings
provided for this purpose.
Curtain airbags
Do not fix or attach anything to the roof. This
could cause injury to the head when the
curtain airbag inflates.
Do not remove the grab handles installed
on the roof, they play a part in securing the
curtain airbags.