2012 Peugeot Boxer Benne steering wheel
[x] Cancel search: steering wheelPage 82 of 184
80
Mode
MODE
Confi
guration - Personalisation
If your vehicle is fitted with the control panel
located to the left of the steering wheel, this
provides access to menus which permit the
personalisation of some of your equipment.
Seven languages are offered: Italian,
English, German, French, Spanish,
Portuguese, Dutch.
As a safety precaution, some menus can
only be accessed when the ignition is off.
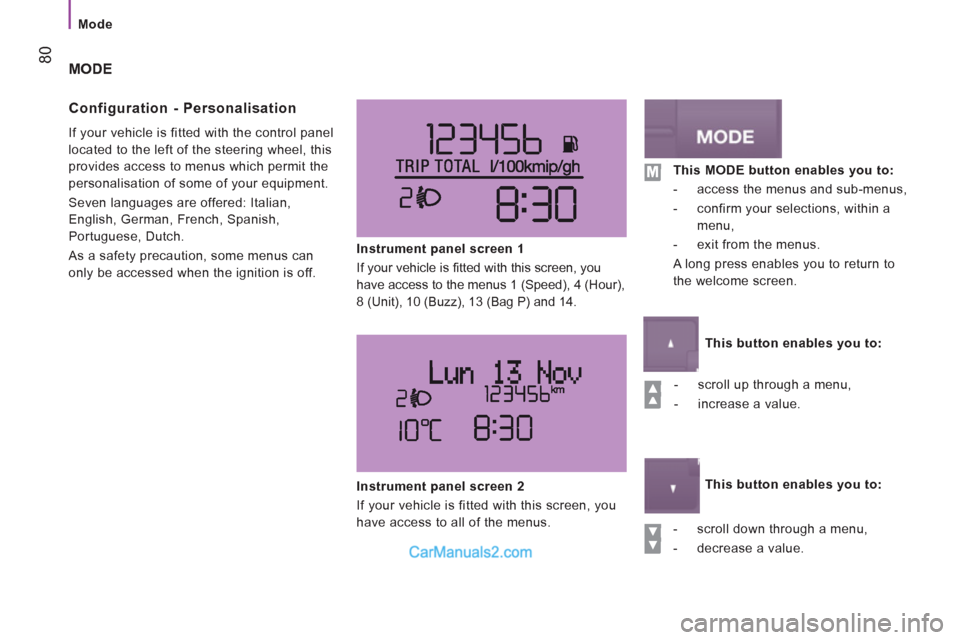
Instrument panel screen 1
If your vehicle is fi tted with this screen, you
have access to the menus 1 (Speed), 4 (Hour),
8 (Unit), 10 (Buzz), 13 (Bag P) and 14.
- scroll up through a menu,
- increase a value.
- scroll down through a menu,
- decrease a value.
Instrument panel screen 2
If your vehicle is fitted with this screen, you
have access to all of the menus.
This MODE button enables you to:
- access the menus and sub-menus,
- confirm your selections, within a
menu,
- exit from the menus.
A long press enables you to return to
the welcome screen.
This button enables you to:
This button enables you to:
Page 99 of 184
97
Bluetooth hands-free system
4
TECHNOLOGY
on
BOARD
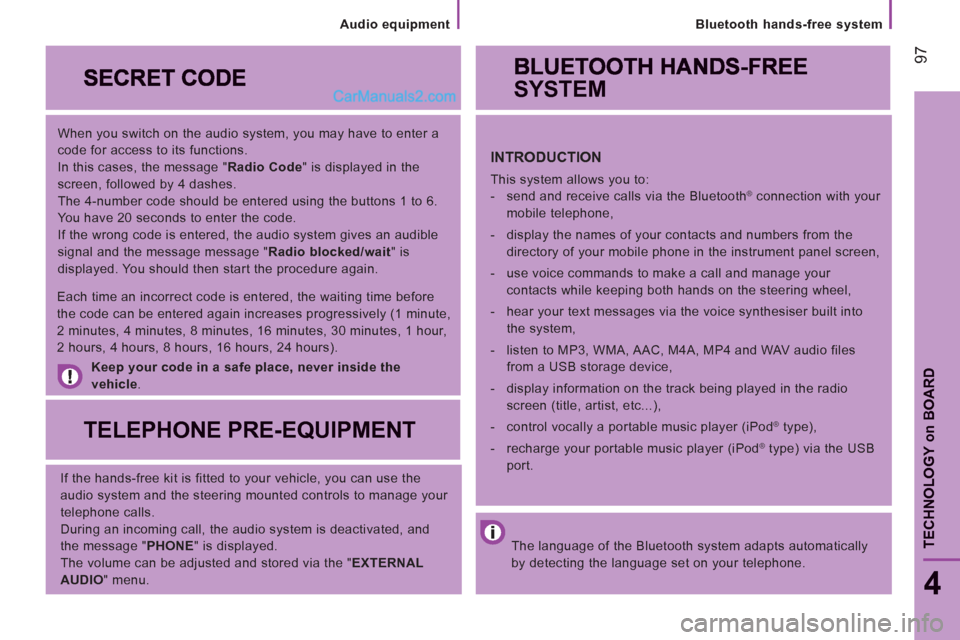
When you switch on the audio system, you may have to enter a
code for access to its functions.
In this cases, the message " Radio Code
" is displayed in the
screen, followed by 4 dashes.
The 4-number code should be entered using the buttons 1 to 6.
You have 20 seconds to enter the code.
If the wrong code is entered, the audio system gives an audible
signal and the message message " Radio blocked/wait
" is
displayed. You should then start the procedure again.
Keep your code in a safe place, never inside the
vehicle
.
TELEPHONE PRE-EQUIPMENT
If the hands-free kit is fitted to your vehicle, you can use the
audio system and the steering mounted controls to manage your
telephone calls.
During an incoming call, the audio system is deactivated, and
the message " PHONE
" is displayed.
The volume can be adjusted and stored via the " EXTERNAL
AUDIO
" menu.
Each time an incorrect code is entered, the waiting time before
the code can be entered again increases progressively (1 minute,
2 minutes, 4 minutes, 8 minutes, 16 minutes, 30 minutes, 1 hour,
2 hours, 4 hours, 8 hours, 16 hours, 24 hours).
The language of the Bluetooth system adapts automatically
by detecting the language set on your telephone.
SYSTEM
INTRODUCTION
This system allows you to:
- send and receive calls via the Bluetooth® connection with your
mobile telephone,
- display the names of your contacts and numbers from the
directory of your mobile phone in the instrument panel screen,
- use voice commands to make a call and manage your
contacts while keeping both hands on the steering wheel,
- hear your text messages via the voice synthesiser built into
the system,
- listen to MP3, WMA, AAC, M4A, MP4 and WAV audio files
from a USB storage device,
- display information on the track being played in the radio
screen (title, artist, etc...),
- control vocally a portable music player (iPod
® type),
- recharge your portable music player (iPod
® type) via the USB
port.
Audio equipment
Page 117 of 184
11
5
5
SAFETY
HORN
Press the centre of the steering wheel.
ANTI-LOCK BRAKING SYSTEM(ABS - EBFD)
The ABS and EBFD (electronic brake force
distribution) systems improve the stability
and manoeuvrability of your vehicle on
braking, in particular on poor or slippery
surfaces.
The ABS prevents locking of the wheels, the
EBFD provides full control of the braking
pressure wheel by wheel.
EMERGENCY BRAKING ASSISTANCE
SYSTEM (EBA)
In an emergency, this system enables the
optimum braking pressure to be reached more
quickly, press the pedal fi rmly without releasing it.
It is triggered by the speed at which the brake
pedal is activated.
This alters the resistance of the brake pedal
under your foot.
To prolong the operation of the emergency
braking assistance system: keep your foot on
the brake pedal.
Good practice
The anti-lock braking system comes into
operation automatically when there is a risk
of wheel lock. It does not reduce the braking
distance.
On very slippery surfaces (ice, oil, etc...)
the ABS may increase the braking distance.
When braking in an emergency, do not
hesitate to press the brake pedal firmly,
without releasing the pressure, even on a
slippery surface, you will then be able to
continue to steer the vehicle to avoid an
obstacle.
Normal operation of the ABS may be felt by
slight vibration of the brake pedal.
When changing wheels (tyres and rims),
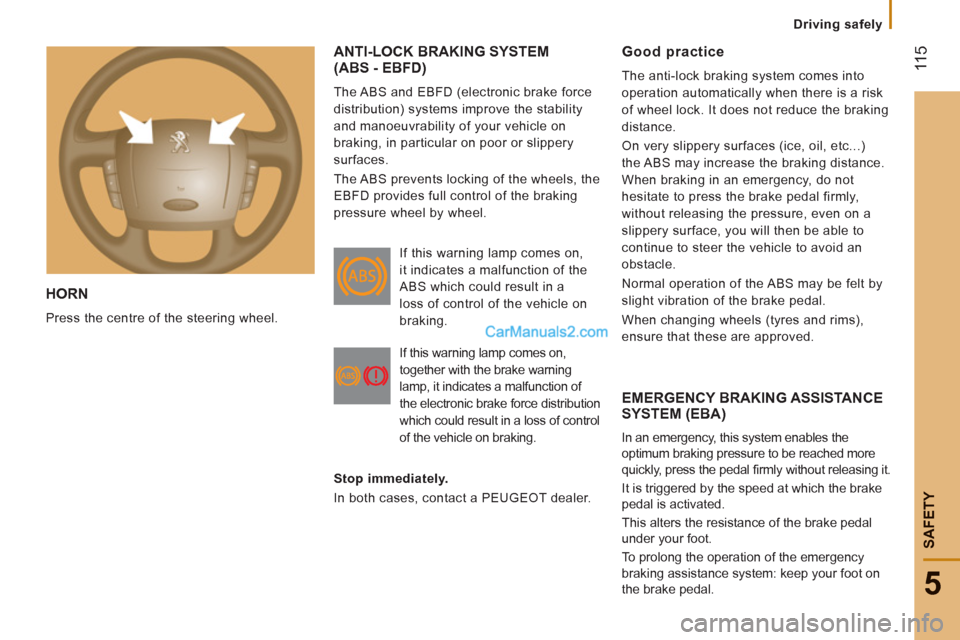
ensure that these are approved. If this warning lamp comes on,
it indicates a malfunction of the
ABS which could result in a
loss of control of the vehicle on
braking.
If this warning lamp comes on,
together with the brake warning
lamp, it indicates a malfunction of
the electronic brake force distribution
which could result in a loss of control
of the vehicle on braking.
Stop immediately.
In both cases, contact a PEUGEOT dealer.
Drivin
g safely
Page 124 of 184
122
Airbags
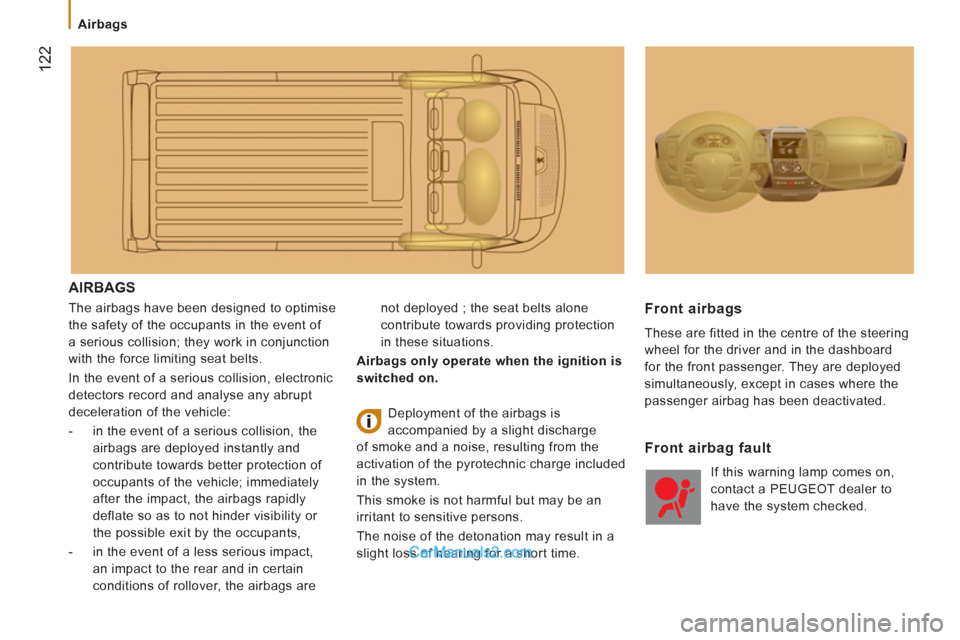
AIRBAGS
The airbags have been designed to optimise
the safety of the occupants in the event of
a serious collision; they work in conjunction
with the force limiting seat belts.
In the event of a serious collision, electronic
detectors record and analyse any abrupt
deceleration of the vehicle:
- in the event of a serious collision, the
airbags are deployed instantly and
contribute towards better protection of
occupants of the vehicle; immediately
after the impact, the airbags rapidly
deflate so as to not hinder visibility or
the possible exit by the occupants,
- in the event of a less serious impact,
an impact to the rear and in certain
conditions of rollover, the airbags are not deployed ; the seat belts alone
contribute towards providing protection
in these situations.
Airbags only operate when the ignition is
switched on.
Front airbags
These are fitted in the centre of the steering
wheel for the driver and in the dashboard
for the front passenger. They are deployed
simultaneously, except in cases where the
passenger airbag has been deactivated.
Deployment of the airbags is
accompanied by a slight discharge
of smoke and a noise, resulting from the
activation of the pyrotechnic charge included
in the system.
This smoke is not harmful but may be an
irritant to sensitive persons.
The noise of the detonation may result in a
slight loss of hearing for a short time.
Front airbag fault
If this warning lamp comes on,
contact a PEUGEOT dealer to
have the system checked.
Page 126 of 184
124
Airbags
Good practice
If your vehicle is fitted with front, lateral
and curtain airbags, in order for these to
be fully effective, observe the following
safety rules:
Wear a correctly adjusted seat belt.
Sit in a normal upright position.
Do not leave anything between the
occupants and the airbags (child, animal,
object...).
This could hamper the operation of the
airbags or injure the occupants.
All work on the airbag systems is strictly
prohibited unless it is carried out by qualified
personnel of the PEUGEOT network.
After an accident or if the vehicle has been
stolen or broken into, have the airbag
systems checked.
Do not drive holding the steering wheel
by its spokes or resting your hands on the
centre part of the wheel.
Passengers must not place their feet on the
dashboard.
Smoke as little as possible; deployment of
the airbags can cause burns or the risk of
injury from a cigarette or pipe.
Never remove or pierce the steering wheel
or hit it violently.
Lateral airbags
Only put approved covers on the front seats.
Consult a PEUGEOT dealer.
Do not fix or attach anything to the front seat
backs. This could cause injury to the chest
or arms when the lateral airbag is deployed.
Do not sit with the upper part of the body
any nearer to the door than necessary.
Curtain airbags
Do not fix or attach anything to the pillars or
the roof. This could cause injury to the head
when the curtain airbag is deployed.
Do not remove the bolts from the grab
handles installed on the roof, they play a
part in securing the curtain airbags.
Page 156 of 184
Changing a bulb
154
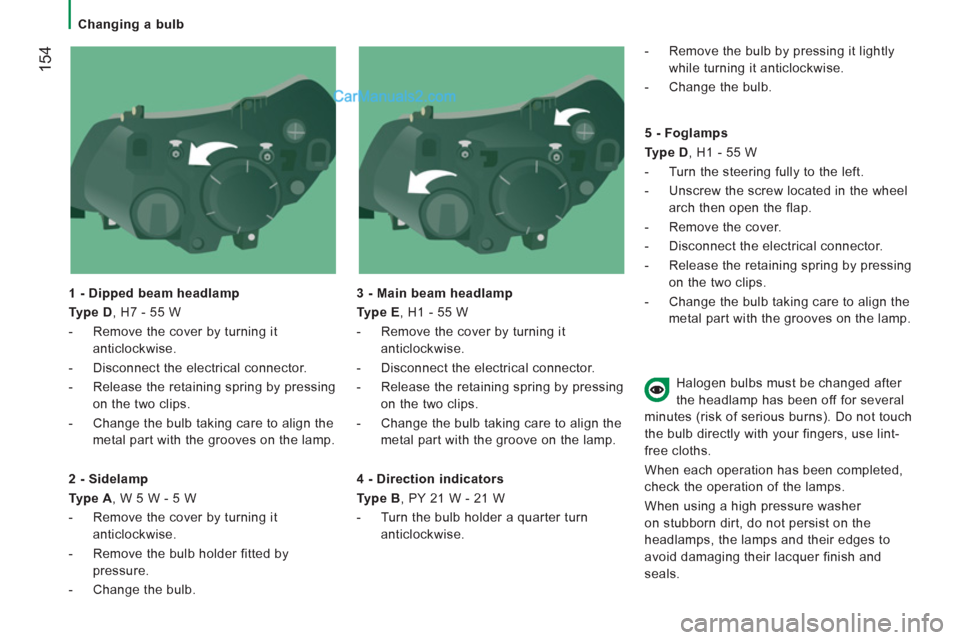
1 - Dipped beam headlamp
Type D
, H7 - 55 W
- Remove the cover by turning it
anticlockwise.
- Disconnect the electrical connector.
- Release the retaining spring by pressing
on the two clips.
- Change the bulb taking care to align the
metal part with the grooves on the lamp.
3 - Main beam headlamp
Type E
, H1 - 55 W
- Remove the cover by turning it
anticlockwise.
- Disconnect the electrical connector.
- Release the retaining spring by pressing
on the two clips.
- Change the bulb taking care to align the
metal part with the groove on the lamp.
2 - Sidelamp
Type A
, W 5 W - 5 W
- Remove the cover by turning it
anticlockwise.
- Remove the bulb holder fitted by
pressure.
- Change the bulb.
4 - Direction indicators
Type B
, PY 21 W - 21 W
- Turn the bulb holder a quarter turn
anticlockwise.
- Remove the bulb by pressing it lightly
while turning it anticlockwise.
- Change the bulb.
5 - Foglamps
Type D
, H1 - 55 W
- Turn the steering fully to the left.
- Unscrew the screw located in the wheel
arch then open the flap.
- Remove the cover.
- Disconnect the electrical connector.
- Release the retaining spring by pressing
on the two clips.
- Change the bulb taking care to align the
metal part with the grooves on the lamp.
Halogen bulbs must be changed after
the headlamp has been off for several
minutes (risk of serious burns). Do not touch
the bulb directly with your fingers, use lint-
free cloths.
When each operation has been completed,
check the operation of the lamps.
When using a high pressure washer
on stubborn dirt, do not persist on the
headlamps, the lamps and their edges to
avoid damaging their lacquer finish and
seals.
Page 164 of 184
Having your vehicle towed
162
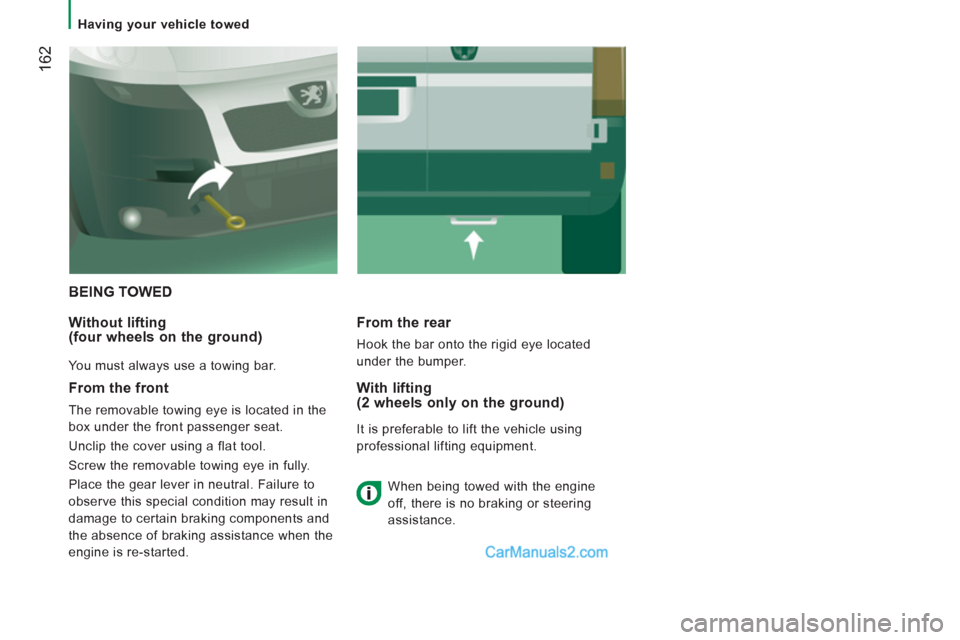
BEING TOWED
Without liftin
g (four wheels on the ground)
You must always use a towing bar.
From the rear
Hook the bar onto the rigid eye located
under the bumper.
From the front
The removable towing eye is located in the
box under the front passenger seat.
Unclip the cover using a flat tool.
Screw the removable towing eye in fully.
Place the gear lever in neutral. Failure to
observe this special condition may result in
damage to certain braking components and
the absence of braking assistance when the
engine is re-started.
With lifting(2 wheels only on the ground)
It is preferable to lift the vehicle using
professional lifting equipment.
When being towed with the engine
off, there is no braking or steering
assistance.
Page 177 of 184
17
5
Instruments and controls
10
VISUAL SEARCH
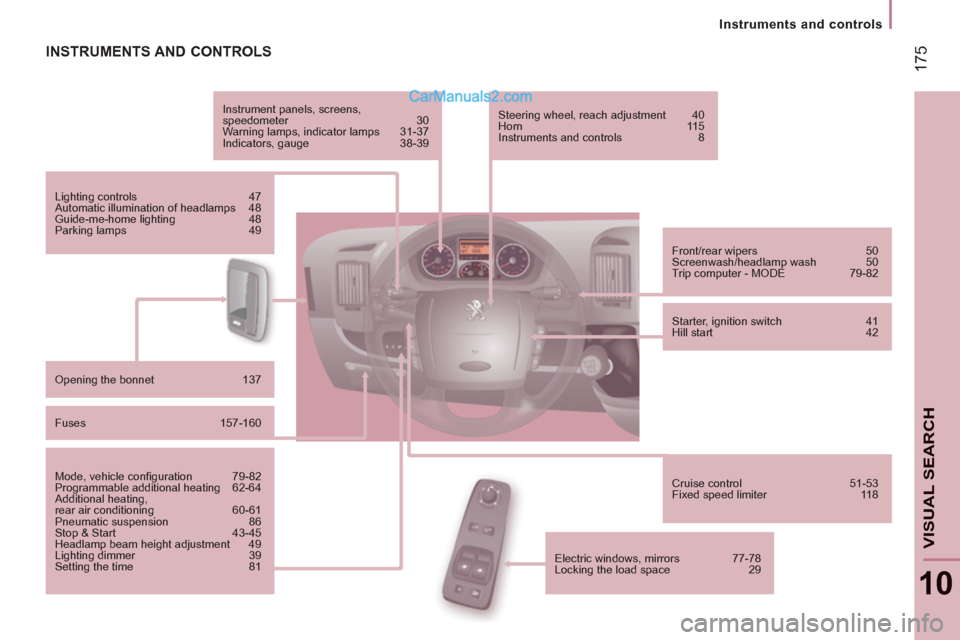
INSTRUMENTS AND CONTROLS
Instrument panels, screens,
speedometer 30
Warning lamps, indicator lamps 31-37
Indicators, gauge 38-39
Lighting controls 47
Automatic illumination of headlamps 48
Guide-me-home lighting 48
Parking lamps 49
Opening the bonnet 137
Fuses 157-160
Mode, vehicle confi guration 79-82
Programmable additional heating 62-64
Additional heating,
rear air conditioning 60-61
Pneumatic suspension 86
Stop & Start 43-45
Headlamp beam height adjustment 49
Lighting dimmer 39
Setting the time 81
Front/rear wipers 50
Screenwash/headlamp wash 50
Trip computer - MODE 79-82
Starter, ignition switch 41
Hill start 42
Cruise control 51-53
Fixed speed limiter 118
Steering wheel, reach adjustment 40
Horn 115
Instruments and controls 8
Electric windows, mirrors 77-78
Locking the load space 29