2012 Peugeot 508 RXH rear view mirror
[x] Cancel search: rear view mirrorPage 17 of 304
.
15
Familiarisation
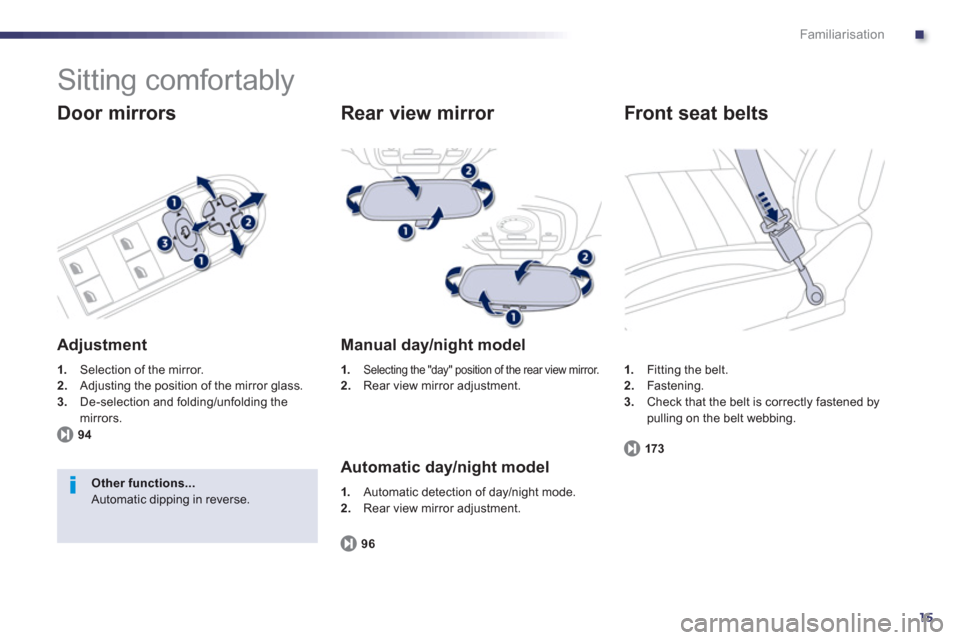
Sitting comfortably
Door mirrors
Adjustment
1.
Selection of the mirror. 2.Adjusting the position of the mirror glass. 3.De-selection and folding/unfolding the mirrors.
94
Other functions... Automatic dipping in reverse.
Rear view mirror
Manual day/night model
1.Selecting the "day" position of the rear view mirror. 2.
Rear view mirror adjustment.
Automatic day/night model
96
1.Automatic detection of day/night mode.
2. Rear view mirror adjustment. 1
. Fitting the belt.2.Fastening.3.Check that the belt is correctly fastened by pulling on the belt webbing.
Front seat belts
173
Page 49 of 304

1
47
Instruments and controls
Operation indicator lamps
If one of the following indicator lamps comes on in the instrument panel and/or instrument panel screen, this confirms that the corresponding system has come into operation.
Warning / indicator lampStateCauseAction / Observations
Left-hand direction indicato
r
flashing with buzzer. The lighting stalk is pushed down.
Right-handdirection indicator flashing with buzzer. The lighting stalk is pushed up.
Sidelamps
fixed. The lighting stalk is in the
"Sidelamps" position.
Dipped beamheadlamps
fixed. The lighting stalk is in the "Dipped
beam headlamps" position.
Main beam headlamps fixed. The lighting stalk is pulled towards
you. Pull the stalk to return to dipped beam headlamps.
Ready fixed. The vehicle is ready to move off; you can press the accelerator. It comes on once high voltage is established in the
vehicle.
Rear foglamps
fixed. The rear foglamps are switched on. Turn the ring on the stalk rear wards to switch off the
rear foglamps.
For more information on the lighting controls, refer to the "Visibility" section.
Adaptive lighting
fixed. The lighting stalk has been pulled
towar
ds you and the button has been pressedIts warning lamp is on. The camera
, located in the interior rear view mirror,
authorises or not switching between main and dippedbeam, depending on the exterior lighting and thedriving conditions.
Pulling the lighting stalk to return to dipped beam.
Page 98 of 304
96
Comfort
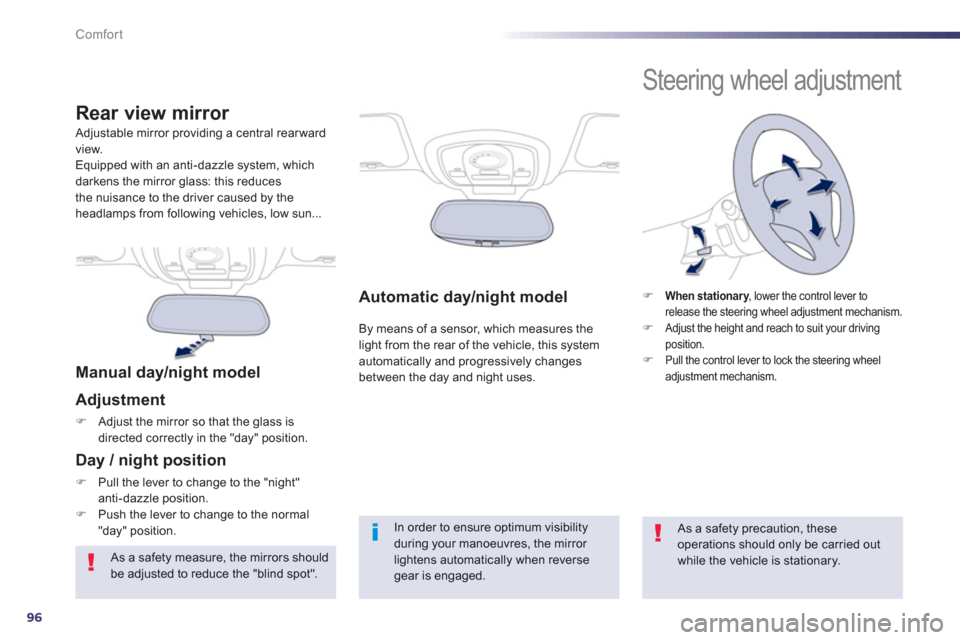
Automatic day/night model
By means of a sensor, which measures thelight from the rear of the vehicle, this system
automatically and progressively changes between the day and night uses.
Adjustable mirror providing a central rear ward
view.
Equipped with an anti-dazzle system, which
darkens the mirror glass: this reduces
the nuisance to the driver caused by theheadlamps from following vehicles, low sun...
Rear view mirror
Manual day/night model
Adjustment
�)Adjust the mirror so that the glass is
directed correctl
y in the "day" position.
Day / night position
�)Pull the lever to change to the "night"anti-dazzle position. �)Push the lever to change to the normal"day" position.In order to ensure optimum visibility during your manoeuvres, the mirror lightens automatically when reversegear is engaged.
Steering wheel adjustment
�) When stationary, lower the control lever to yrelease the steering wheel adjustment mechanism. �)Adjust the height and reach to suit your driving position.�)Pull the control lever to lock the steering wheel
adjustment mechanism.
As a safety precaution, these operations should only be carried out while the vehicle is stationary.
As a safety measure, the mirrors should be adjusted to reduce the "blind spot".
Page 149 of 304
5
147
Visibility
The sidelamps and dipped beam headlamps are
switched on automatically, without any action
on the part of the driver, when a low level of external light is detected or in certain cases of
activation of the windscreen wipers.
As soon as the brightness returns to a sufficient
level or after the windscreen wipers are switched
o
ff, the lamps are switched off automatically.
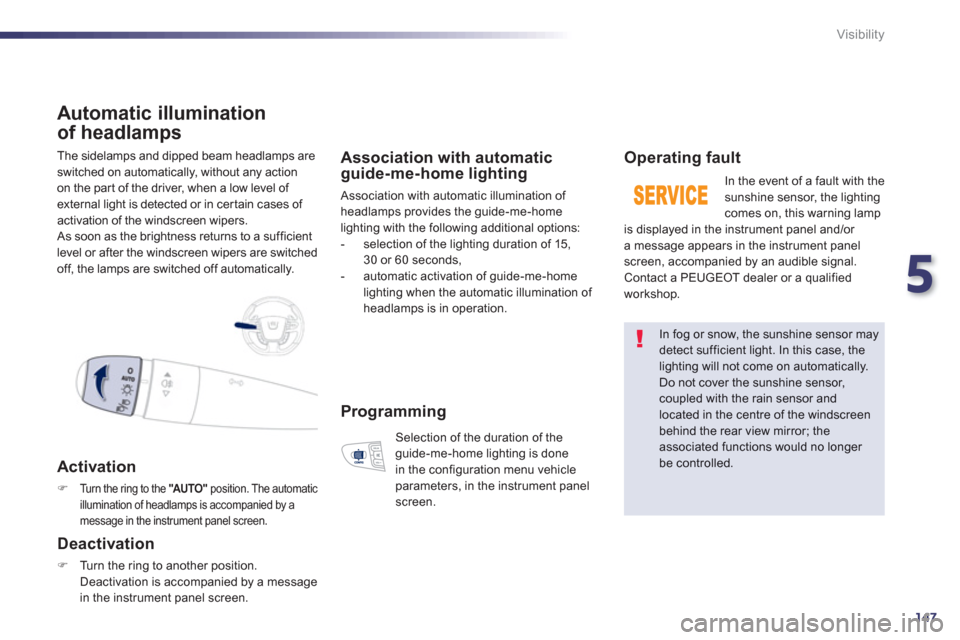
Automatic illumination
of headlam
ps
Activation
�)Turn the ring to the "AUTO"position. The automatic
illumination of headlamps is accompanied by a message in the instrument panel screen.
Deactivation
�)Turn the ring to another position.
Deactivation is accompanied by a message
in the instrument panel screen.
Association with automaticguide-me-home lighting
Association with automatic illumination of headlamps provides the guide-me-home lighting with the following additional options:
- selection of the lighting duration of 15,
30 or 60 seconds,
- automatic activation o
f guide-me-home lighting when the automatic illumination of
headlamps is in operation.
Operating fault
In the event of a fault with the sunshine sensor, the lighting comes on, this warning lamp
is displayed in the instrument panel and/or
a message appears in the instrument panel screen, accompanied by an audible signal.
Contact a PEUGEOT dealer or a qualified
workshop.
In fog or snow, the sunshine sensor maydetect sufficient light. In this case, the lighting will not come on automatically. Do not cover the sunshine sensor,coupled with the rain sensor and located in the centre of the windscreenbehind the rear view mirror; theassociated functions would no longer be controlled.
Programming
Selection of the duration of theguide-me-home lighting is done
in the configuration menu vehicle
parameters, in the instrument panel screen.
Page 150 of 304
148
Visibility
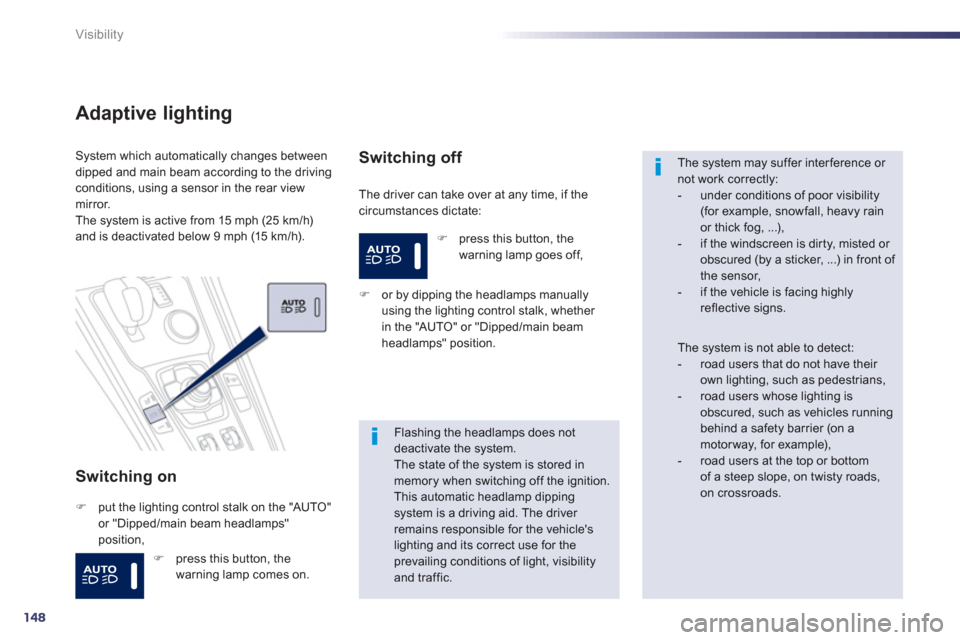
Adaptive lighting
Switching on
The driver can take over at any time, if thecircumstances dictate:
System which automatically changes betweendipped and main beam according to the driving conditions, using a sensor in the rear view mirror.
The system is active from 15 mph (25 km/h) and is deactivated below 9 mph (15 km / h).
�)put the lighting control stalk on the "AUTO"
or "Dipped/main beam headlamps"
position,
Switching off
�)
or by dipping the headlamps manually using the lighting control stalk, whether
in the "AUTO" or "Dipped/main beam
headlamps" position.
Flashing the headlamps does notdeactivate the system.The state of the system is stored in memory when switching off the ignition. This automatic headlamp dipping system is a driving aid. The driver remains responsible for the vehicle'slighting and its correct use for theprevailing conditions of light, visibility and traffic.
The system may suffer interference or not work correctly:
- under conditions of poor visibility(for example, snowfall, heavy rain or thick fog, ...),
- if the windscreen is dir ty, misted or obscured (by a sticker, ...) in front of the sensor,
- if the vehicle is facing highly reflective signs.
The system is not able to detect:
- road users that do not have their own lighting, such as pedestrians,
- road users whose lighting isobscured, such as vehicles running behind a safety barrier (on amotorway, for example),
- road users at the top or bottomof a steep slope, on twisty roads, on crossroads.
�)press this button, the
warning lamp goes off,
�) press this button, the
warning lamp comes on.
Page 156 of 304
154
Visibility
Automatic rain sensitive
windscreen wi
pers
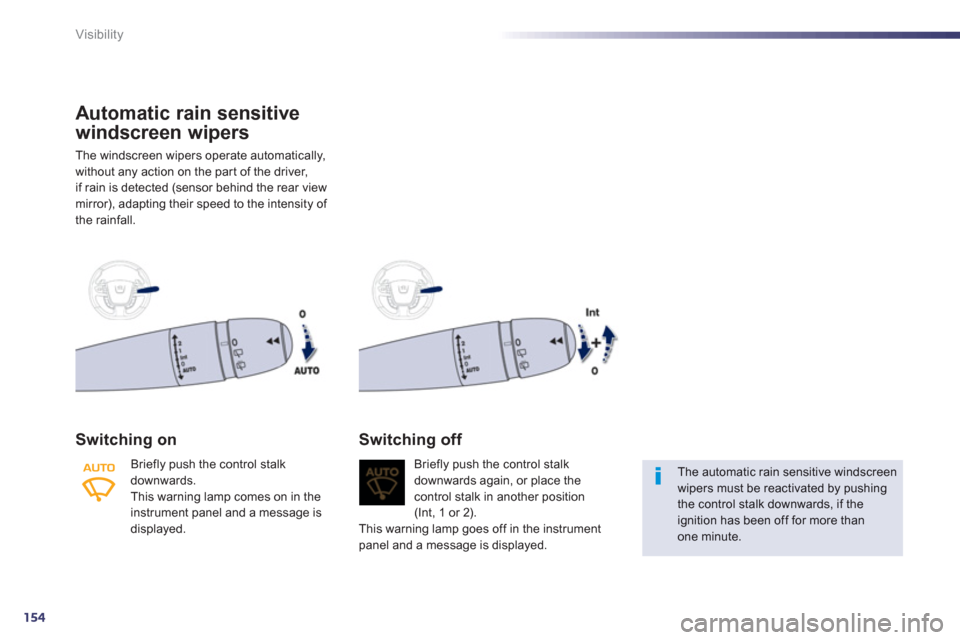
The windscreen wipers operate automatically,
without an
y action on the par t of the driver,
if rain is detected (sensor behind the rear viewmirror), adapting their speed to the intensity of
the rainfall.
Switching on
Briefly push the control stalkdownwards.
This warning lamp comes on in the
instrument panel and a message is
displayed. Brie
fly push the control stalk
downwards again, or place thecontrol stalk in another position(Int, 1 or 2).
This warning lamp goes off in the instrument
pane
l and a message is displayed.
Switching off
The automatic rain sensitive windscreenwipers must be reactivated by pushing the control stalk downwards, if the ignition has been off for more thanone minute.
Page 157 of 304
5
155
Visibility
Do not cover the rain sensor, linked with the sunshine sensor and located in the centre of the windscreen behind the rear view mirror. Switch off the automatic rain sensitivewipers when using an automatic car wash.
In winter, it is advisable to wait until the windscreen is completely clear of ice before activating the automatic rainsensitive wipers.
Operating fault
If a fault occurs with the automatic rain
sensitive wipers, the wipers will operate in intermittent mode.
Have it checked by PEUGEOT dealer or a qualified workshop.
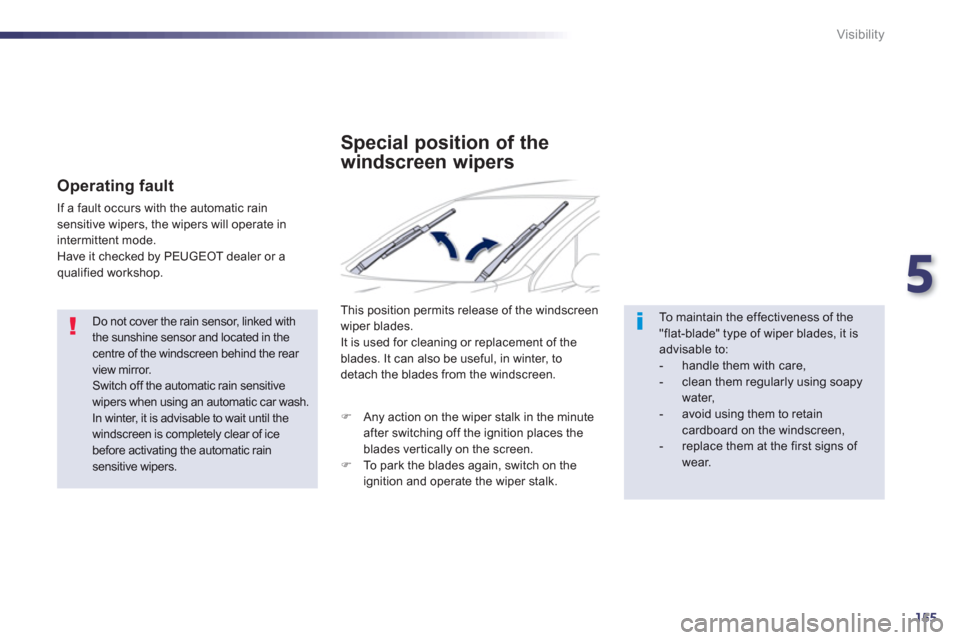
Special position of the
w
indscreen wipers
This position permits release of the windscreenwiper blades.
It is used for cleaning or replacement of the
blades. It can also be useful, in winter, to detach the blades from the windscreen.
To maintain the effectiveness of the"flat-blade" type of wiper blades, it isadvisable to:
- handle them with care,
- clean them regularly using soapywater,
- avoid using them to retain cardboard on the windscreen,
- replace them at the first signs of wear.
�)
Any action on the wiper stalk in the minute
after switching off the ignition places the blades ver tically on the screen.�) To park the blades again, switch on theignition and operate the wiper stalk.
Page 293 of 304
.
291 Alphabetical index
Labels, identification.....................................229Lamps, warning and indicator.............r46,50, 51LED daytime running lamps..........................145Level, brake fluid ...........................................219Level, headlamp wash..........................153,220Level, power steering fluid............................219Levels and checks.................................218-221Lighting, guide-me home......................146, 147Lighting, interior....................................r156,157Lighting bulbs (replacement)........191, 195, 197Lighting control stalk.............................142, 146Lighting on reminder.....................................r14 4
Loading....................................................37, 212Load reduction mode....................................205Load space cover..........................................r102Locating your vehicle......................................72Long objects, transpor ting..............................99Luggage retaining strap................................100
Main beam ............................... 47, 142, 191-194Maintenance....................................................37Map reading lamps ....................................... 156Markings, identification.................................229Massage function...........................................91Mat..................................................................98Mini fuel level..................................................85Mirror, rear view..............................................96Mirrors, door..............................................r94,95Motorised boot ..........................................81,82Motorway function(direction indicators) ................................... 168Mountings for ISOFIX seats.........................164Music media players.....................................272
Navigation.............................................241, 242Number plate lamps......................................197
Oil filter..........................................................r222Oil level....................................................61,219Opening the boot...............................66,69,80Opening the doors ..........................................66Opening the panoramic sunroof blind ............84Operation indicator lamps............46,48, 50,53
Radio.....................................................269, 270Ready..............................................................29Ready lamp...............................................29, 85Rear foglamp .................................................195Rear screen (demisting)..........................94, 116Recharging the battery ........................202, 204Reduction of electrical load ..........................205Regeneration of the par ticle emissions filter....................r223Reinitialising the remote control...............73, 74Remote control..............................66-68, 70, 75Removable screen (snow shield) ..................210Removing a wheel ........................................187Removing the mat...........................................98Repair kit, puncture.......................................180Replacing bulbs ............................ 191, 195, 197Replacing fuses............................................198Replacing the air filter...................................r222Replacing the oil filter...................................r222Replacing the passenger compartment filter......................................r222Replacing wiper blades .........................155,206Reset history.............................................39, 63Resetting the service indicator.......................r60Reversing lamp.............................................195Roof bars.......................................................212Roof blind........................................................84Routine checks.....................................222-224Running out of fuel (Diesel)..........................217
Safety for children .................................162, 167Screen, colour and mapping .................239, 280Screen, instrument panel ..........................46, 62
L
M
N
O
R
S
Paint colour code ..........................................229Panoramic glass sunroof................................f84Parking brake ............................... 122, 223,224Parking brake, electric .................................. 119Parking lamps...............................................146Parking sensors, front...................................139Parking sensors, rear....................................r138Parking space sensor ..................................140Particle emission filter..........................r221, 223Passenger compartment filter......................r222PEUGEOT CONNECT ASSISTANCE ..........232Peugeot Connect Navigation (RT6) ..............235PEUGEOT CONNECT SOS.........................232Port, USB........................................................99Power..............................................................r32Priming the fuel system................................217Programmable heating (Webasto)................117Protecting children ........158,162, 164-166,176Puncture ........................................................180
P