Page 12 of 340
10
Familiarisation
9.Fusebox.
10. Front door window demisting/defrostingvent.
11.Windscreen demisting/defrosting vent. 12 .Steering lock and star ting with the key.
13. Starting using the electronic key. 14 .
Audio equipment steering wheel controls.
15. Wiper / screenwash / trip computer stalk.
16.Central locking and hazard warningbuttons.
17. Multifunction screen.
Instruments and controls
1.
Cruise control / speed limiter controls. 2.
Headlamp height adjustment. 3.
Lighting and direction indicator stalk
4.
Instrument panel. 5.
Driver's airbag.Horn.
6.Gear lever.
7. 12 V accessory socket
USB por t / auxiliary socket. 8.Bonnet release lever.
18.Central adjustable air vents.19. Passenger's airbag.20.
Side adjustable air vents.
21.Glove box / Passenger's airbag deactivation. 22.
Electric parking brake. 23.
Central armrest with storage. 24.
Storage (according to version).25.Audio system. 26.Heating / air conditioning controls.
Page 19 of 340
.
17
Familiarisation
Passenger safety
1.
Open the glove box. 2.Inser t the key. 3.Select position:"ON"(activation), with front passenger or
"for wards facing" child seat, "OFF"(deactivation), with "rear facing" child seat.4.
Remove the key keeping the switch in the
new position.
Front passenger's airbag
175
A.
Front seat belts not fastened or unfastenedwarning lamp.
Front seat belts and
passen
ger's front airbag
175 B
. Airbag fault warning lamp.
C.
Front passenger's airbag activationindicator lamp.
172
Page 28 of 340

26
Instruments and controls
Warning / indicator lampStateCauseAction / Observations
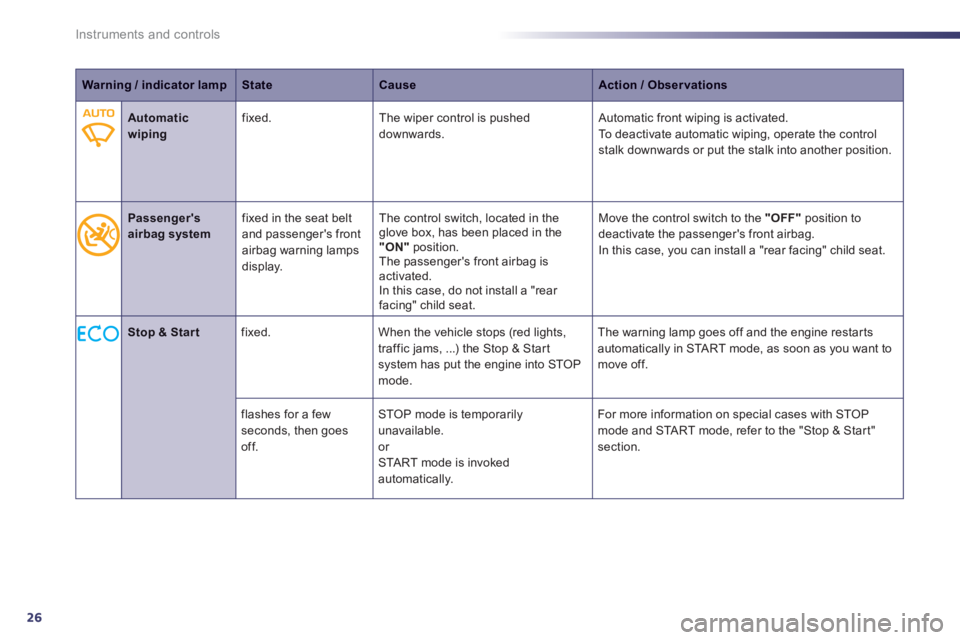
Automatic wipingfixed.The wiper control is pushed downwards. Automatic front wiping is activated. To deactivate automatic wiping, operate the controlstalk downwards or put the stalk into another position.
Passenger's
airbag systemfix
ed in the seat belt
and passenger's front airbag warning lampsdisplay.The control switch, located in the
glove box, has been placed in the "ON"position.
The passenger's front airbag is activated.
In this case, do not install a "rear
facin
g" child seat.M
ove the control switch to the "OFF"
position to
deactivate the passen
ger's front airbag.
In this case, you can install a "rear facing" child seat.
Stop & Start
fixed. When the vehicle stops (red lights,
traffic jams, ...) the Stop & Star t system has put the engine into STOP mode. The warnin
g lamp goes off and the engine restarts
automatically in START mode, as soon as you want to
move off.
fl
ashes for a few seconds, then goes off. STOP mode is temporaril
y unavailable.
or
STA R T mode is invoked
automatically. For more information on special cases with STOP
mode and
START mode, refer to the "Stop & Start"section.
Page 29 of 340

1
27
Instruments and controls
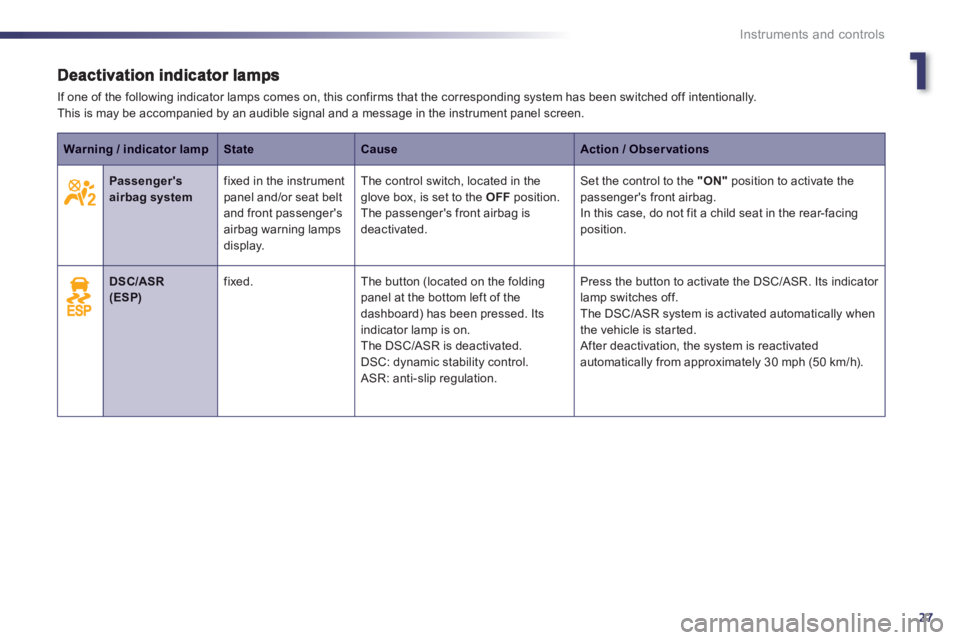
If one of the following indicator lamps comes on, this confirms that the corresponding system has been switched off intentionally.This is may be accompanied by an audible signal and a message in the instrument panel screen.
Warning / indicator lampStateCauseAction / Observations
Passenger's airbag system fixed in the instrument
panel and/or seat belt
and front passen
ger's
airbag warning lamps
display.The control switch, located in the
glove box, is set to the OFF
position.
The passenger's front airbag is deactivated.
Set the control to the "ON"position to activate the passenger's front airbag.
In this case, do not fit a child seat in the rear-facing position.
DSC/ASR(ESP)
fixed. The button (located on the foldingpanel at the bottom left of the
dashboard) has been pressed. Its
indicator lamp is on.
The D
SC/ASR is deactivated.
DSC: dynamic stability control.
ASR: anti-slip regulation. Press the button to activate the DSC/ASR. Its indicator
lamp switches off.
The DSC/ASR s
ystem is activated automatically when
the vehicle is started.
After deactivation, the system is reactivated
automatically from approximately 30 mph (50 km/h).
Page 79 of 340
3
77
Comfort
Interior fi ttings
1.Cooled glove box It has a ventilation nozzle which can be closed using a thumb wheel. It deliverscooled air. 2.Storage(according to version)
3. Retractable cup holderr Press the cover to open the cup holder 4.Removable ashtray Press the lid to open the ashtray.
To empty it, pull it out by pulling it upwards.
5.Coin holder6.Storage with sliding cover
7.Front armrest8.12 V accessory socket(120 W) Observe the maximum power rating toavoid damaging your accessory 9.Peugeot Connect USB
Page 176 of 340

174
Safety
Airbags
System designed to maximise the safety of the
occupants (with the exception of the rear centrepassenger) in the event of violent collisions.
It supplements the action of the force-limiting seat belts (with the exception of the rear centrepassenger).
If a collision occurs, the electronic detectors record and analyse the front and side impacts sustained in the impact detection zones:
- in the case of a serious impact, the airbagsare deployed instantly and protect the
occupants of the vehicle (with the exception
of the rear centre passenger); immediately after the impact, the airbags deflate rapidlyso that they do not hinder visibility or the
exit of the occupants,
- in the case of a minor or rear impact or incer tain roll-over conditions, the airbags
will not be deployed; the seat belt alone is
sufficient to provide optimum protection in
th
ese situations.
The airbags do not operate when the ignition is switched off. This equipment will only deploy once. If a second impact occurs (during thesame or a subsequent accident), theairbag will not be deployed again.
Deployment of the airbag(s) is accompanied by a slight emission of harmless smoke and a noise, due to theactivation of the pyrotechnic cartridgeincorporated in the system.This smoke is not harmful, but sensitiveindividuals may experience slight irritation. The noise of the detonation may result in a slight loss of hearing for a shorttime.
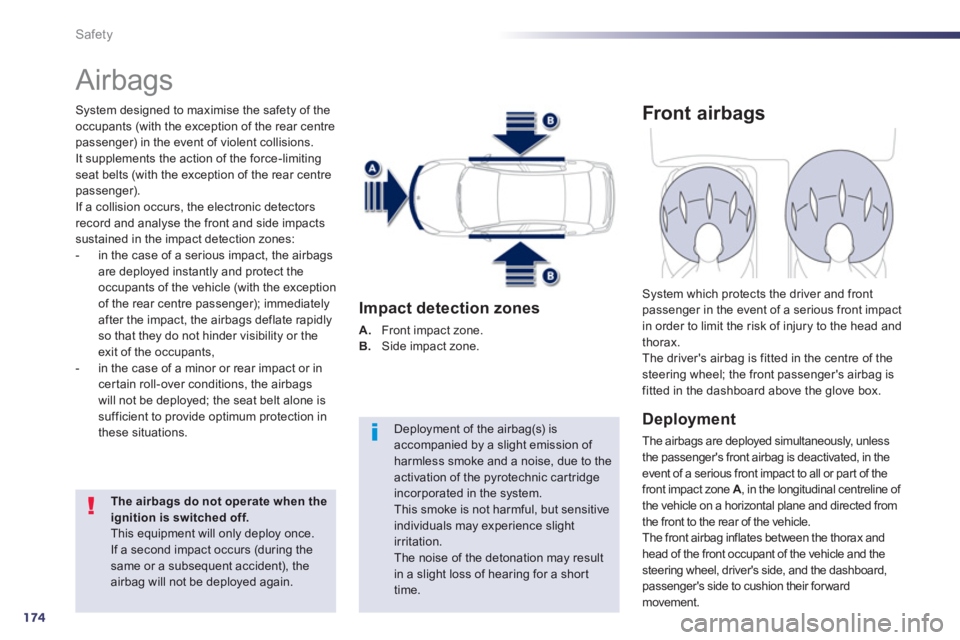
Impact detection zones
A.
Front impact zone. B.
Side impact zone.
Front airbags
Deployment
The airbags are deployed simultaneously, unless
the passenger's front airbag is deactivated, in the event of a serious front impact to all or part of thefront impact zone A , in the longitudinal centreline of
the vehicle on a horizontal plane and directed from
the front to the rear of the vehicle.
The front airbag inflates between the thorax and head of the front occupant of the vehicle and thesteering wheel, driver's side, and the dashboard,passenger's side to cushion their forward movement.
System which protects the driver and frontpassenger in the event of a serious front impact
in order to limit the risk of injury to the head and
thorax.
The driver's airbag is fitted in the centre of the steering wheel; the front passenger's airbag isfitted in the dashboard above the glove box.
Page 186 of 340
184
Practical information
Changing a wheel Procedure for changing a faulty wheel for the spare wheel using the tools provided with the vehicle.
Th
e tools are installed in the boot under the
floor.
To gain access to them: �)open the boot, �)position the floor ver tically (SW: in itsguide) for access to the tools.
Access to the tools
List of tools
All of these tools are specific to your vehicle andcan vary according to the level of equipment. Do
not use them for other purposes.
1.Wheelbrace.
For removing the wheel trim and removing
the wheel bolts.
2. Jack with integral handle.
For raising the vehicle.
3."Bolt cover" tool.
For removing the bolt protectors
(covers)
on alloy wheels.4. Socket for the security bolts (located in the glove box).
For adapting the wheelbrace to the special
"security" bolts.
5. One wheel chock for immobilising the
vehicle.
6.Towing eye.
See "Towing the vehicle".
Page 202 of 340

200
Practical information
Changing a fuse Procedure for replacing a failed fuse with a new fuse to rectify a failure of the corresponding function.
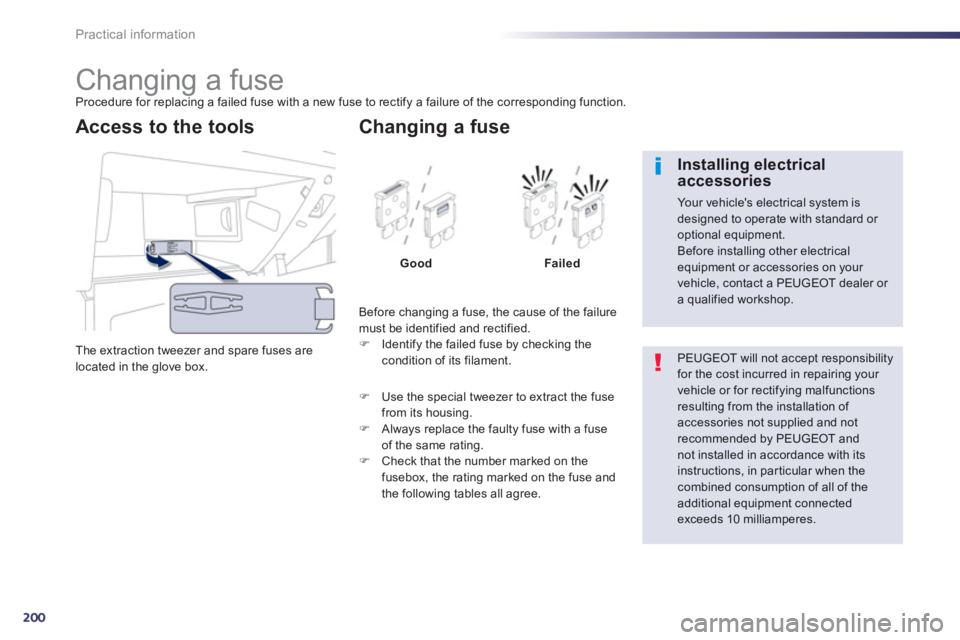
The extraction tweezer and spare
fuses are
located in the glove box.
Access to the tools
Before changing a fuse, the cause of the failure
must be identified and rectified. �) Identify the failed fuse by checking thecondition of its filament.
Changing a fuse
Good Failed
�)
Use the special tweezer to extract the fuse from its housing.�)
Always replace the faulty fuse with a fuse of the same rating.�)
Check that the number marked on thefusebox, the rating marked on the fuse and
the following tables all agree.
PEUGEOT will not accept responsibilityfor the cost incurred in repairing your vehicle or for rectifying malfunctions resulting from the installation of accessories not supplied and not
recommended by PEUGEOT andnot installed in accordance with its instructions, in par ticular when thecombined consumption of all of the additional equipment connectedexceeds 10 milliamperes.
Installing electricalaccessories
Your vehicle's electrical system isdesigned to operate with standard or optional equipment.
Before installing other electrical equipment or accessories on your vehicle, contact a PEUGEOT dealer or a qualified workshop.