2012 NISSAN XTERRA change wheel
[x] Cancel search: change wheelPage 215 of 341
MANUAL TRANSMISSION (if so
equipped)
WARNING
●Do not downshift abruptly on slippery
roads. This may cause a loss of control.
● Do not over-rev the engine when shift-
ing to a lower gear. This may cause a
loss of control or engine damage.
CAUTION
● Do not rest your foot on the clutch pedal
while driving. This may cause clutch
damage.
● Fully depress the clutch pedal before
shifting to help prevent transmission
damage.
● Stop your vehicle completely before
shifting into R (Reverse) .
● When the vehicle is stopped with the
engine running (for example, at a stop
light) , shift to N (Neutral) and release
the clutch pedal with the foot brake
applied.
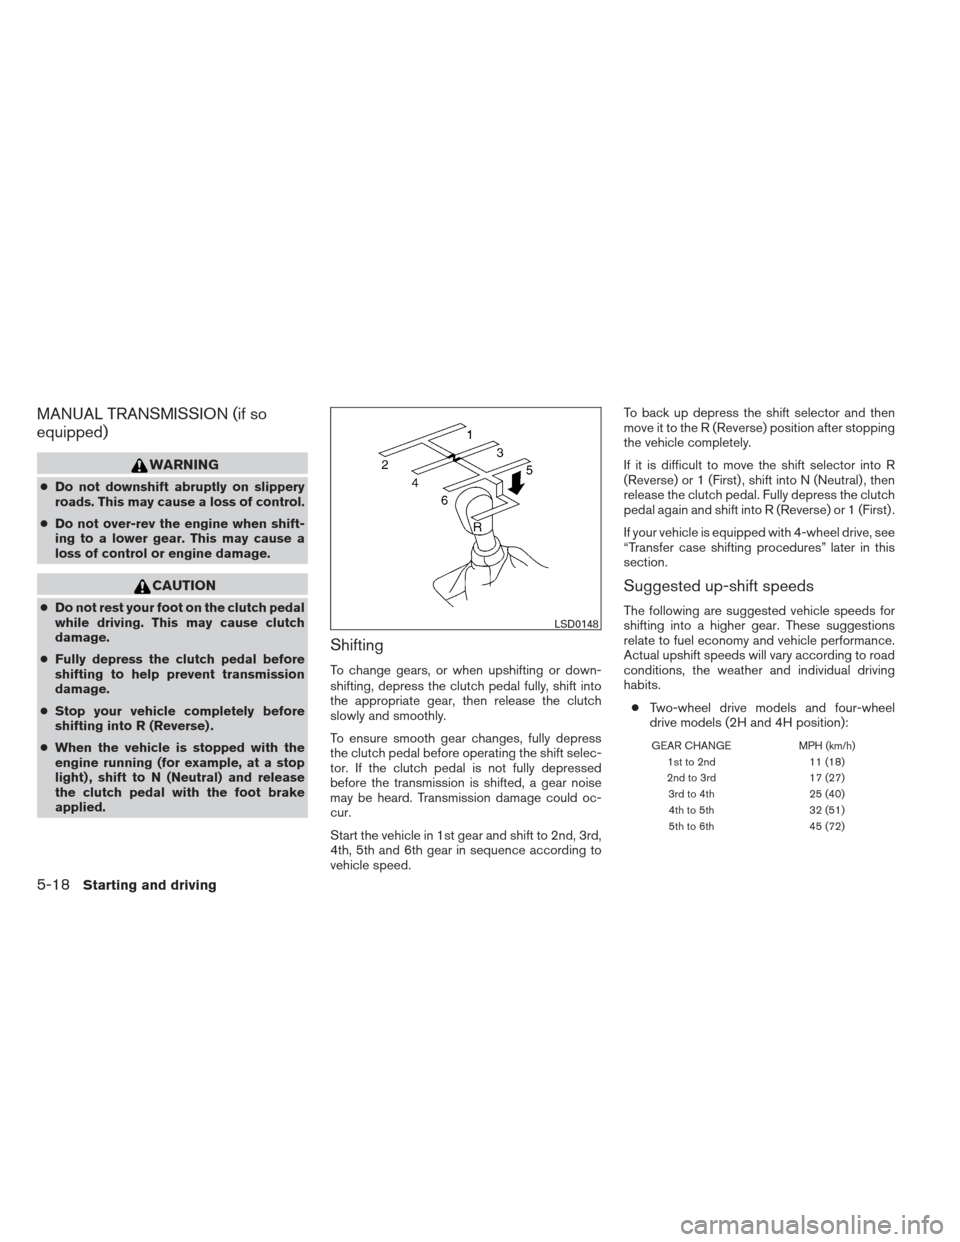
Shifting
To change gears, or when upshifting or down-
shifting, depress the clutch pedal fully, shift into
the appropriate gear, then release the clutch
slowly and smoothly.
To ensure smooth gear changes, fully depress
the clutch pedal before operating the shift selec-
tor. If the clutch pedal is not fully depressed
before the transmission is shifted, a gear noise
may be heard. Transmission damage could oc-
cur.
Start the vehicle in 1st gear and shift to 2nd, 3rd,
4th, 5th and 6th gear in sequence according to
vehicle speed. To back up depress the shift selector and then
move it to the R (Reverse) position after stopping
the vehicle completely.
If it is difficult to move the shift selector into R
(Reverse) or 1 (First) , shift into N (Neutral) , then
release the clutch pedal. Fully depress the clutch
pedal again and shift into R (Reverse) or 1 (First) .
If your vehicle is equipped with 4-wheel drive, see
“Transfer case shifting procedures” later in this
section.
Suggested up-shift speeds
The following are suggested vehicle speeds for
shifting into a higher gear. These suggestions
relate to fuel economy and vehicle performance.
Actual upshift speeds will vary according to road
conditions, the weather and individual driving
habits.
● Two-wheel drive models and four-wheel
drive models (2H and 4H position):
GEAR CHANGE MPH (km/h)
1st to 2nd 11 (18)
2nd to 3rd 17 (27)
3rd to 4th 25 (40)
4th to 5th 32 (51)
5th to 6th 45 (72)
LSD0148
5-18Starting and driving
Page 216 of 341
●4–wheel drive model (4L position):
GEAR CHANGE MPH (km/h)
1st to 2nd —
2nd to 3rd —
3rdto4th —
4thto5th —
5thto6th —
Suggested maximum speed in each
gear
Downshift to a lower gear if the engine is not
running smoothly, or if you need to accelerate.
Do not exceed the maximum suggested speed
(shown below) in any gear. For level road driving,
use the highest gear suggested for that speed.
Always observe posted speed limits, and drive
according to the road conditions, which will en-
sure safe operation. Do not over-rev the engine
when shifting to a lower gear as it may cause
engine damage or loss of vehicle control. Allowable maximum speed in each gear:
2–wheel drive models
GEAR
MPH (km/h)
1st 35 (56)
2nd 60 (97)
3rd 87 (141)
4th —
5th —
6th —
4–wheel drive models
2H/4H position
GEARMPH (km/h)
1st 34 (55)
2nd 60 (97)
3rd 87 (140)
4th —
5th —
6th —
4L position
GEARMPH (km/h)
1st 13 (21)
2nd 22 (36)
3rd 33 (53)
4th 45 (72)
5th 57 (93)
6th —
WARNING
●Be sure the parking brake is fully re-
leased before driving. Failure to do so
can cause brake failure and lead to an
accident.
● Do not release the parking brake from
outside the vehicle.
● Do not use the shift selector in place of
the parking brake. When parking, be
sure the parking brake is fully engaged.
● Do not leave children unattended in a
vehicle. They could release the parking
brake and cause an accident.
PARKING BRAKE
Starting and driving5-19
Page 223 of 341
The transfer case 4WD shift switch is used to
select either 2WD or 4WD depending on the
driving conditions. There are three types of drive
modes available, 2WD, 4H and 4LO.
The 4WD shift switch electronically controls the
transfer case operation. Rotate the switch to
move between each mode, 2WD, 4H and 4LO.
To change into or out of 4LO, the vehicle
MUST be stationary, shift the shift selector
to N (Neutral) position, and for automatic
transmission vehicles depress the brake
pedal or for manual transmission vehicles
depress the clutch pedal. The switch must
be depressed and turned when changing
into or out of 4LO.
WARNING
●When parking, apply the parking brake
before stopping the engine and make
sure that the 4WD shift indicator light is
on and the ATP warning light goes off.
Otherwise, the vehicle could unexpect-
edly move even if the automatic trans-
mission is in the P position. ●
The 4LO indicator light must stop blink-
ing and remain illuminated or turn off
before shifting the transmission into
gear. If the shift selector is shifted from
the (N) position to any other gear when
the 4LO indicator light is blinking, the
vehicle may move unexpectedly.
CAUTION
● Never shift the 4WD shift switch be-
tween 4LO and 4H while driving.
● The 4H position provides greater trac-
tion. Avoid excessive speed, as it will
cause increased fuel consumption and
higher oil temperatures, and could
damage drivetrain components.
Speeds over 62 MPH (100 km/h) in 4H is
not recommended
● The 4LO position provides maximum
power and traction. Avoid raising ve-
hicle speed excessively, as the maxi-
mum speed is approximately 31 MPH
(50 km/h) .
● When driving straight, shift the 4WD
shift switch to the 2WD or 4H position.
Do not move the 4WD shift switch when
making a turn or reversing. ●
Do not shift the 4WD shift switch (be-
tween 2WD and 4H) while driving on
steep downhill grades. Use the engine
brake and low automatic transmission
gears (D1 or D2) or manual transmis-
sion (1st gear or 2nd gear) for engine
braking.
● Do not operate the 4WD shift switch
(between 2WD and 4H) with the rear
wheels spinning.
● Do not drive on dry hard surface roads
in the 4H or 4LO position. Driving on dry
hard surfaces in 4H or 4LO may cause
unnecessary noise and tire wear.
NISSAN recommends driving in the
2WD position under these conditions.
● The 4WD transfer case may not be
shifted between 4H and 4LO at low am-
bient temperatures and the transfer
4LO position indicator light may blink
even when the 4WD shift switch is
shifted. After driving for a while you can
change the 4WD transfer case between
4H and 4LO.
When driving on rough roads, ● Set the 4WD shift switch to 4H or 4LO.
● Drive carefully according to the road surface
conditions.
5-26Starting and driving
Page 225 of 341
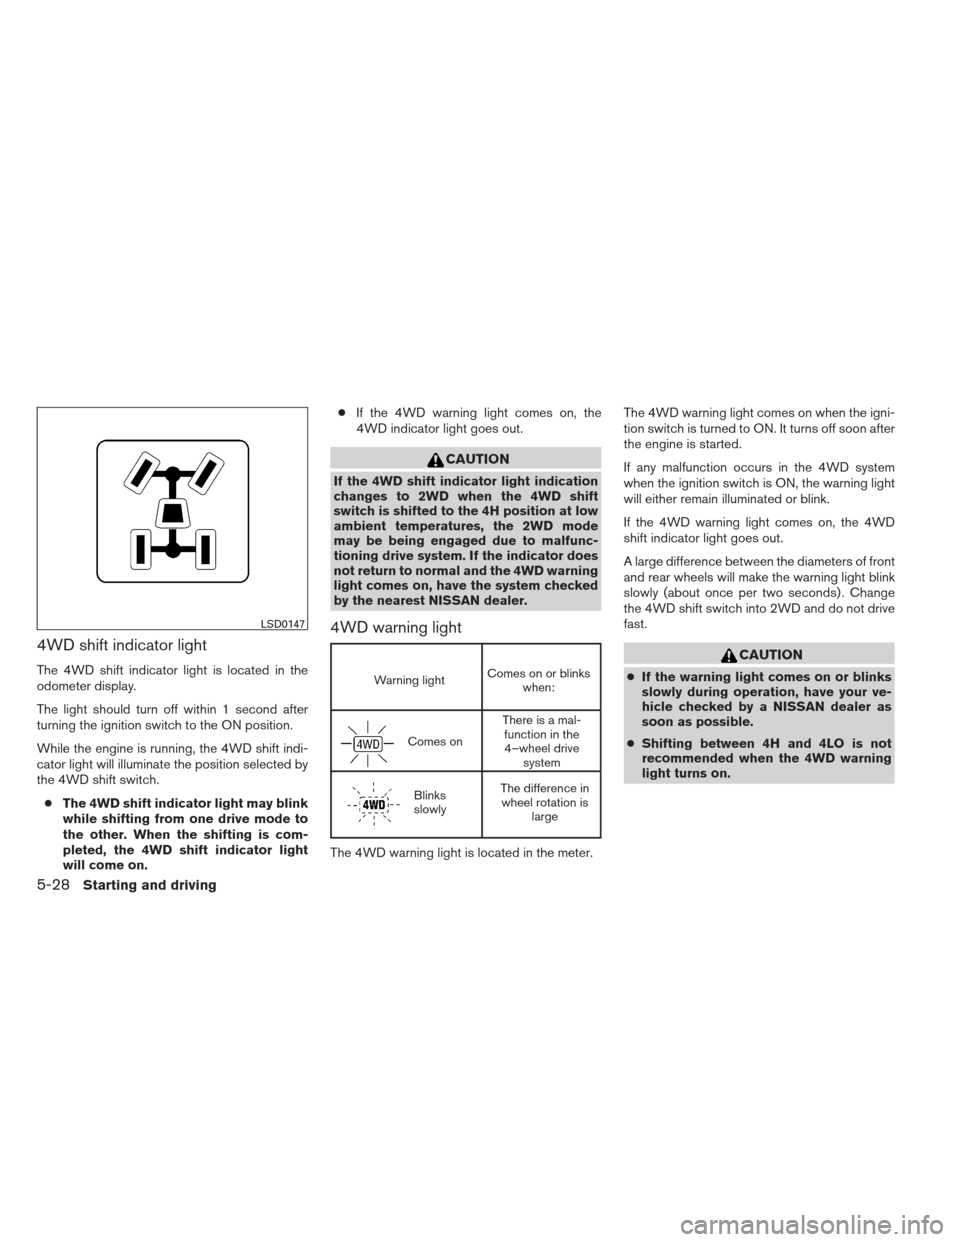
4WD shift indicator light
The 4WD shift indicator light is located in the
odometer display.
The light should turn off within 1 second after
turning the ignition switch to the ON position.
While the engine is running, the 4WD shift indi-
cator light will illuminate the position selected by
the 4WD shift switch.● The 4WD shift indicator light may blink
while shifting from one drive mode to
the other. When the shifting is com-
pleted, the 4WD shift indicator light
will come on. ●
If the 4WD warning light comes on, the
4WD indicator light goes out.
CAUTION
If the 4WD shift indicator light indication
changes to 2WD when the 4WD shift
switch is shifted to the 4H position at low
ambient temperatures, the 2WD mode
may be being engaged due to malfunc-
tioning drive system. If the indicator does
not return to normal and the 4WD warning
light comes on, have the system checked
by the nearest NISSAN dealer.
4WD warning light
Warning light Comes on or blinks
when:
Comes on There is a mal-
function in the4–wheel drive system
Blinks
slowly The difference in
wheel rotation is large
The 4WD warning light is located in the meter. The 4WD warning light comes on when the igni-
tion switch is turned to ON. It turns off soon after
the engine is started.
If any malfunction occurs in the 4WD system
when the ignition switch is ON, the warning light
will either remain illuminated or blink.
If the 4WD warning light comes on, the 4WD
shift indicator light goes out.
A large difference between the diameters of front
and rear wheels will make the warning light blink
slowly (about once per two seconds) . Change
the 4WD shift switch into 2WD and do not drive
fast.
CAUTION
●
If the warning light comes on or blinks
slowly during operation, have your ve-
hicle checked by a NISSAN dealer as
soon as possible.
● Shifting between 4H and 4LO is not
recommended when the 4WD warning
light turns on.
LSD0147
5-28Starting and driving
Page 240 of 341
WARNING
●If the low tire pressure warning light
illuminates while driving, avoid sudden
steering maneuvers or abrupt braking,
reduce vehicle speed, pull off the road
to a safe location and stop the vehicle
as soon as possible. Driving with under-
inflated tires may permanently damage
the tires and increase the likelihood of
tire failure. Serious vehicle damage
could occur and may lead to an acci-
dent and could result in serious per-
sonal injury. Check the tire pressure for
all four tires. Adjust the tire pressure to
the recommended COLD tire pressure
shown on the Tire and Loading Informa-
tion label to turn the low tire pressure
warning light OFF. If you have a flat tire,
replace it with a spare tire as soon as
possible.
● When a spare tire is mounted or a wheel
is replaced, the TPMS will not function
and the low tire pressure warning light
will flash for approximately 1 minute.
The light will remain on after 1 minute.
Contact your NISSAN dealer as soon as
possible for tire replacement and/or
system resetting. ●
Replacing tires with those not originally
specified by NISSAN could affect the
proper operation of the TPMS.
● Do not inject any tire liquid or aerosol
tire sealant into the tires, as this may
cause a malfunction of the tire pressure
sensors.
CHANGING A FLAT TIRE
If you have a flat tire, follow the instructions be-
low:
Stopping the vehicle
1. Safely move the vehicle off the road and away from traffic.
2. Turn on the hazard warning flashers.
3. Park on a level surface and apply the parking brake. Shift the manual transmission into R
(Reverse) , or the automatic transmission
into P (Park) .
4. Turn off the engine.
5. Raise the hood to warn other traffic and to signal professional road assistance person-
nel that you need assistance.
6. Have all passengers get out of the vehicle and stand in a safe place, away from traffic
and clear of the vehicle.
WARNING
●Make sure the parking brake is securely
applied and the manual transmission is
shifted into R (Reverse) , or the auto-
matic transmission into P (Park) .
● Never change tires when the vehicle is
on a slope, ice or slippery areas. This is
hazardous.
● Never change tires if oncoming traffic is
close to your vehicle. Wait for profes-
sional road assistance.
In case of emergency6-3
Page 243 of 341
CAUTION
●Be sure to center the spare tire sus-
pending plate on the wheel and then lift
the spare tire.
● Failure to use the spacer may allow the
chain to get stuck on the wheel nut
holes.
Jacking up vehicle and removing the
damaged tire
WARNING
● Never get under the vehicle while it is
supported only by the jack. If it is nec-
essary to work under the vehicle, sup-
port it with safety stands.
● Use only the jack provided with your
vehicle to lift the vehicle. Do not use the
jack provided with your vehicle on other
vehicles. The jack is designed for lifting
only your vehicle during a tire change.
● Use the correct jack-up points. Never
use any other part of the vehicle for jack
support.
● Never jack up the vehicle more than
necessary.
● Never use blocks on or under the jack. ●
Do not start or run the engine while
vehicle is on the jack. It may cause the
vehicle to move. This is especially true
for vehicles with limited slip
differentials.
● Do not allow passengers to stay in the
vehicle while it is on the jack.
● Never run the engine with a wheel(s) off
the ground. It may cause the vehicle to
move.
Always refer to the illustration for the correct
placement and jack-up points for your specific
vehicle model and jack type.
Carefully read the caution label attached to
the jack body and the following instruc-
tions. 1. Loosen each wheel nut one or two turns by turning counterclockwise with the wheel nut
wrench. Do not remove the wheel nuts
until the tire is off the ground.
6-6In case of emergency
Page 263 of 341
Seat beltsCheck that all parts of the seat belt
system (for example, buckles, anchors, adjusters
and retractors) operate properly and smoothly,
and are installed securely. Check the belt web-
bing for cuts, fraying, wear or damage.
Steering wheel Check for changes in the steer-
ing system, such as excessive freeplay, hard
steering or strange noises.
Warning lights and chimes Make sure all
warning lights and chimes are operating properly.
Windshield wiper and washer* Check that
the wipers and washer operate properly and that
the wipers do not streak.
Windshield defroster Check that the air
comes out of the defroster outlets properly and in
sufficient quantity when operating the heater or
air conditioner.
Under the hood and vehicle
The maintenance items listed here should be
checked periodically (for example, each time you
check the engine oil or refuel) .
Battery* Check the fluid level in each cell. It
should be between the MAX and MIN lines. Ve-
hicles operated in high temperatures or under
severe conditions require frequent checks of the
battery fluid level. Brake and clutch (if so equipped) fluid lev-
els*
Make sure that the brake and clutch fluid
level is between the MIN and MAX lines on the
reservoir.
Engine coolant level* Check the coolant level
when the engine is cold.
Engine drive belts* Make sure the drive belts
are not frayed, worn, cracked or oily.
Engine oil level* Check the level after parking
the vehicle on a level surface with the engine off.
Wait more than 10 minutes for the oil to drain
back into the oil pan.
Exhaust system Make sure there are no loose
supports, cracks or holes. If the sound of the
exhaust seems unusual or there is a smell of
exhaust fumes, immediately have the exhaust
system inspected by a NISSAN dealer. See the
carbon monoxide warning in the “Starting and
driving” section of this manual.
Fluid leaks Check under the vehicle for fuel, oil,
water or other fluid leaks after the vehicle has
been parked for a while. Water dripping from the
air conditioner after use is normal. If you should
notice any leaks or if gasoline fumes are evident,
check for the cause and have it corrected imme-
diately. Power steering fluid level* and lines
Check
the level when the fluid is cold, with the engine
off. Check the lines for proper attachment, leaks,
cracks, etc.
Radiator and hoses Check the front of the
radiator and clean off any dirt, insects, leaves,
etc., that may have accumulated. Make sure the
hoses have no cracks, deformation, rot or loose
connections.
Underbody The underbody is frequently ex-
posed to corrosive substances such as those
used on icy roads or to control dust. It is very
important to remove these substances from the
underbody, otherwise rust may form on the floor
pan, frame, fuel lines and exhaust system. At the
end of winter, the underbody should be thor-
oughly flushed with plain water, in those areas
where mud and dirt may have accumulated. See
the “Appearance and care” section of this
manual.
Windshield-washer fluid* Check that there is
adequate fluid in the reservoir.
8-4Maintenance and do-it-yourself
Page 300 of 341
Replacing wheels and tires
When replacing a tire, use the same size, tread
design, speed rating and load carrying capacity
as originally equipped. Recommended types and
sizes are shown in “Wheels and tires” in the
“Technical and consumer information” section of
this manual.
WARNING
●The use of tires other than those recom-
mended or the mixed use of tires of
different brands, construction (bias,
bias-belted or radial) , or tread patterns
can adversely affect the ride, braking,
handling, VDC system, ground clear-
ance, body-to-tire clearance, tire chain
clearance, speedometer calibration,
headlight aim and bumper height.
Some of these effects may lead to acci-
dents and could result in serious per-
sonal injury.
● If your vehicle was originally equipped
with 4 tires that were the same size and
you are only replacing 2 of the 4 tires,
install the new tires on the rear axle.
Placing new tires on the front axle may
cause loss of vehicle control in some
driving conditions and cause an acci-
dent and personal injury. ●
If the wheels are changed for any rea-
son, always replace with wheels which
have the same off-set dimension.
Wheels of a different off-set could
cause premature tire wear, degrade ve-
hicle handling characteristics, affect
the VDC system and/or interference
with the brake discs/drums. Such inter-
ference can lead to decreased braking
efficiency and/or early brake pad/shoe
wear. Refer to “Wheels and tires” in the
“Technical and consumer information”
section of this manual for wheel off-set
dimensions.
● When a spare tire is mounted or a wheel
is replaced, tire pressure will not be
indicated, the TPMS will not function
and the low tire pressure warning light
will flash for approximately 1 minute.
The light will remain on after 1 minute.
Contact your NISSAN dealer as soon as
possible for tire replacement and/or
system resetting.
● Replacing tires with those not originally
specified by NISSAN could affect the
proper operation of the TPMS. ●
Do not install a damaged or deformed
wheel or tire even if it has been re-
paired. Such wheels or tires could have
structural damage and could fail with-
out warning.
● The use of retread tires is not
recommended.
● For additional information regarding
tires, refer to “Important Tire Safety In-
formation” (US) or “Tire Safety Informa-
tion” (Canada) in the Warranty Informa-
tion Booklet.
Four-wheel drive models
CAUTION
Always use tires of the same type, size,
brand, construction (bias, bias-belted or
radial) , and tread pattern on all four
wheels. Failure to do so may result in a
circumference difference between tires
on the front and rear axles which will
cause excessive tire wear and may dam-
age the transmission, transfer case and
differential gears.
Maintenance and do-it-yourself8-41