Page 155 of 406
3. Press the loose fuel cap warning reset but-ton
�Aon the instrument panel located be-
hind the steering wheel for about 1 second
to turn off the LOOSE FUEL CAP warning
�Bafter tightening the fuel-filler cap.
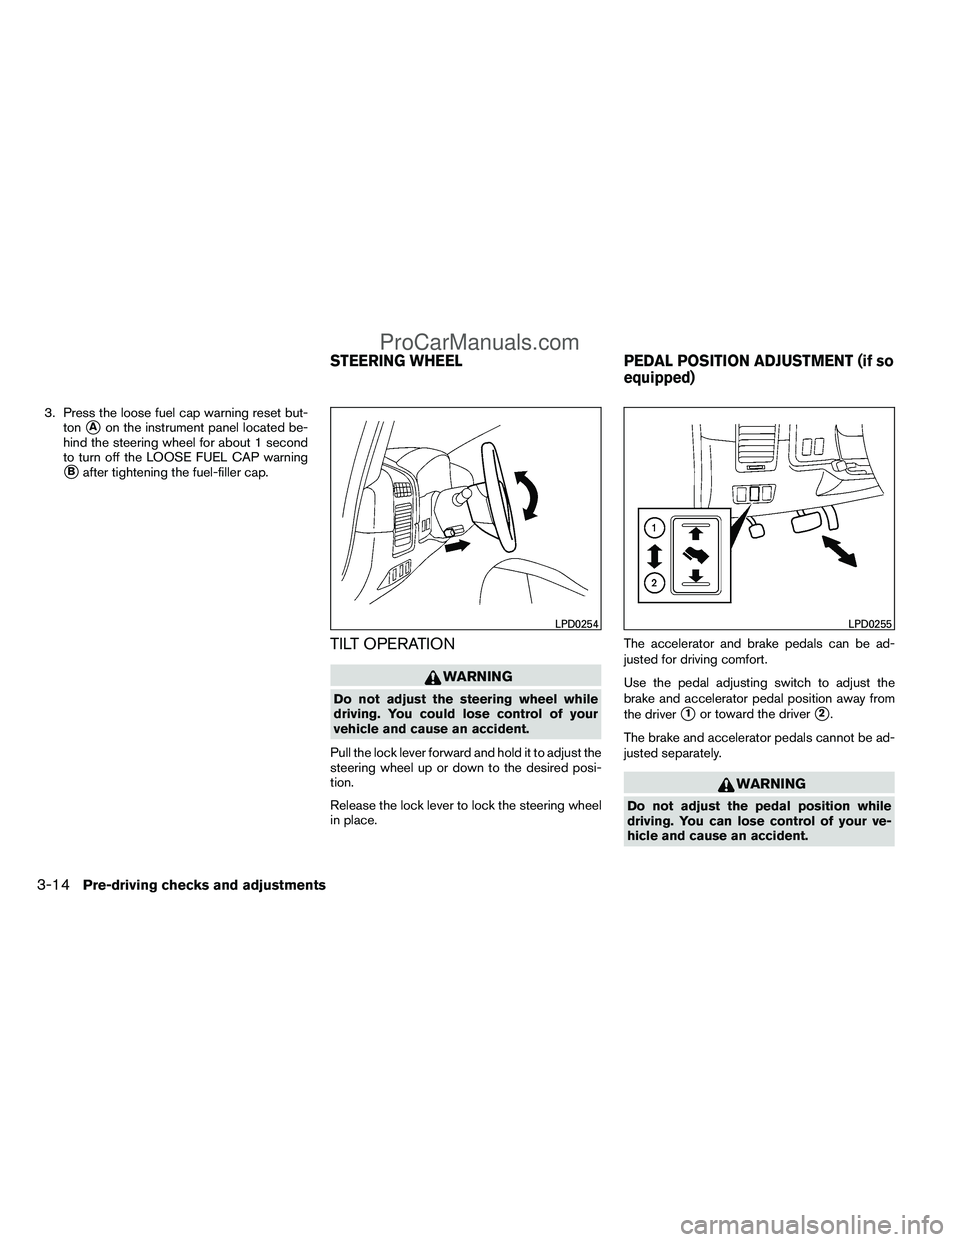
TILT OPERATION
WARNING
Do not adjust the steering wheel while
driving. You could lose control of your
vehicle and cause an accident.
Pull the lock lever forward and hold it to adjust the
steering wheel up or down to the desired posi-
tion.
Release the lock lever to lock the steering wheel
in place. The accelerator and brake pedals can be ad-
justed for driving comfort.
Use the pedal adjusting switch to adjust the
brake and accelerator pedal position away from
the driver
�1or toward the driver�2.
The brake and accelerator pedals cannot be ad-
justed separately.
WARNING
Do not adjust the pedal position while
driving. You can lose control of your ve-
hicle and cause an accident.
LPD0254LPD0255
STEERING WHEEL PEDAL POSITION ADJUSTMENT (if so
equipped)
3-14Pre-driving checks and adjustments
ProCarManuals.com
Page 158 of 406
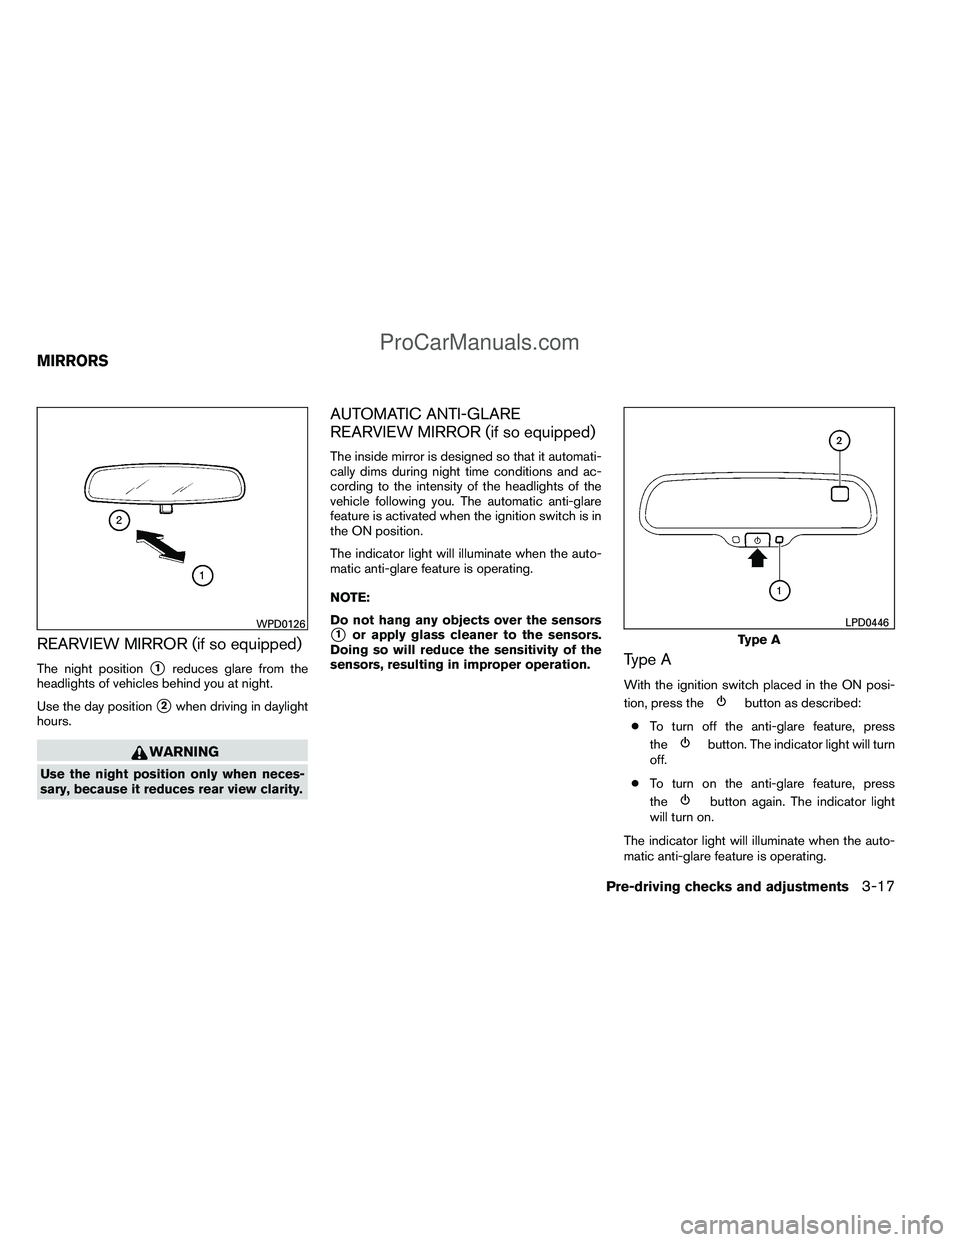
REARVIEW MIRROR (if so equipped)
The night position�1reduces glare from the
headlights of vehicles behind you at night.
Use the day position
�2when driving in daylight
hours.
WARNING
Use the night position only when neces-
sary, because it reduces rear view clarity.
AUTOMATIC ANTI-GLARE
REARVIEW MIRROR (if so equipped)
The inside mirror is designed so that it automati-
cally dims during night time conditions and ac-
cording to the intensity of the headlights of the
vehicle following you. The automatic anti-glare
feature is activated when the ignition switch is in
the ON position.
The indicator light will illuminate when the auto-
matic anti-glare feature is operating.
NOTE:
Do not hang any objects over the sensors
�1or apply glass cleaner to the sensors.
Doing so will reduce the sensitivity of the
sensors, resulting in improper operation.
Type A
With the ignition switch placed in the ON posi-
tion, press the
button as described:
● To turn off the anti-glare feature, press
the
button. The indicator light will turn
off.
● To turn on the anti-glare feature, press
the
button again. The indicator light
will turn on.
The indicator light will illuminate when the auto-
matic anti-glare feature is operating.
WPD0126
Type A
LPD0446
MIRRORS
Pre-driving checks and adjustments3-17
ProCarManuals.com
Page 159 of 406
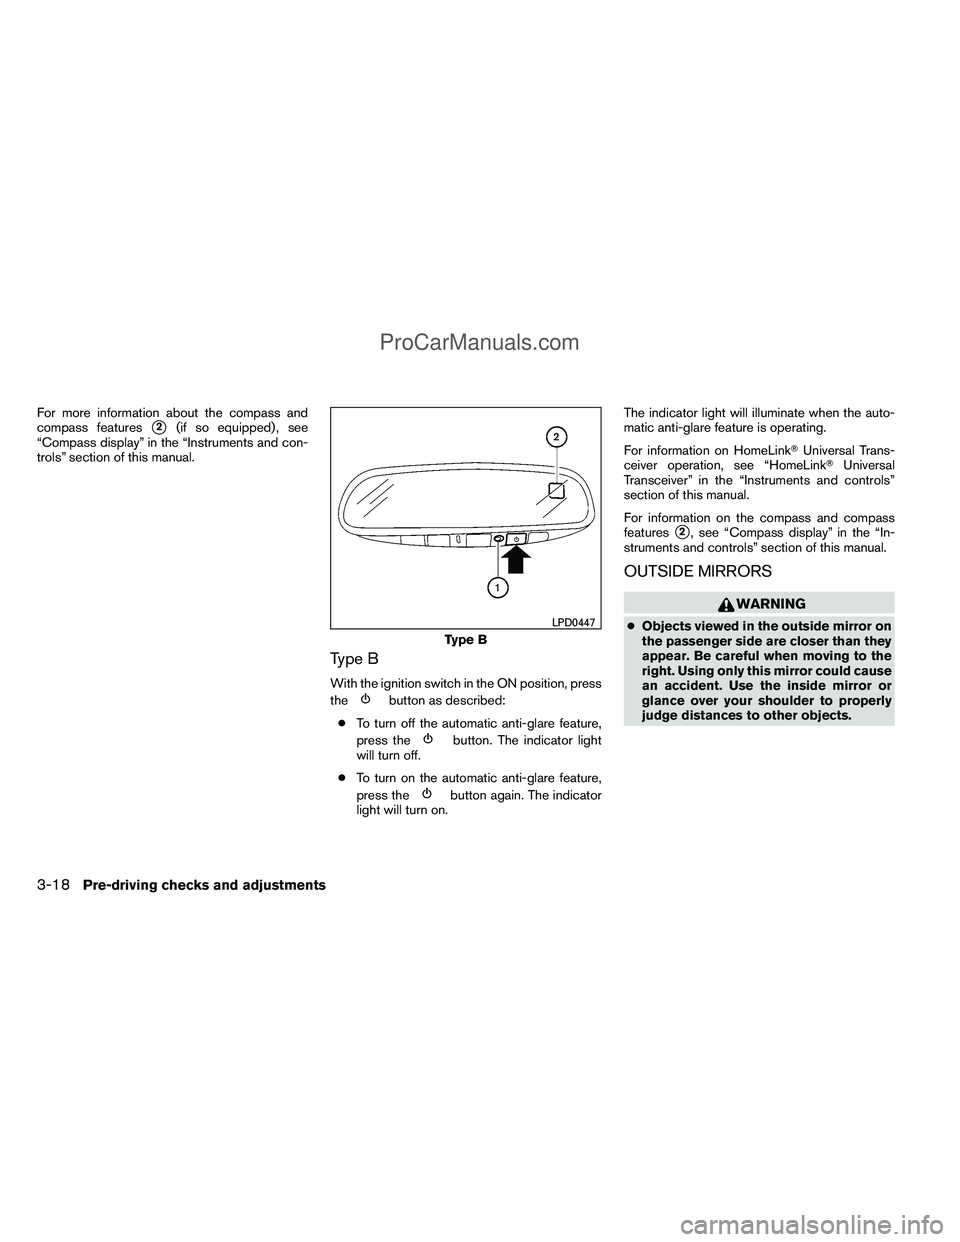
For more information about the compass and
compass features
�2(if so equipped) , see
“Compass display” in the “Instruments and con-
trols” section of this manual.
Type B
With the ignition switch in the ON position, press
the
button as described:
● To turn off the automatic anti-glare feature,
press the
button. The indicator light
will turn off.
● To turn on the automatic anti-glare feature,
press the
button again. The indicator
light will turn on. The indicator light will illuminate when the auto-
matic anti-glare feature is operating.
For information on HomeLink�
Universal Trans-
ceiver operation, see “HomeLink� Universal
Transceiver” in the “Instruments and controls”
section of this manual.
For information on the compass and compass
features
�2, see “Compass display” in the “In-
struments and controls” section of this manual.
OUTSIDE MIRRORS
WARNING
● Objects viewed in the outside mirror on
the passenger side are closer than they
appear. Be careful when moving to the
right. Using only this mirror could cause
an accident. Use the inside mirror or
glance over your shoulder to properly
judge distances to other objects.Type B
LPD0447
3-18Pre-driving checks and adjustments
ProCarManuals.com
Page 160 of 406
Manual control type (if so equipped)
The outside mirror can be moved in any direction
for a better rear view.
Electric control type (if so equipped)
The outside mirror remote control will operate
only when the ignition switch is placed in the
ACC or ON position.
Move the small switch
�1to select the right or left
mirror. Adjust each mirror to the desired position
using the large switch
�2.
Trailer tow mirrors (if so equipped)
WARNING
Objects viewed in the convex portion of
the trailer tow mirror are closer than they
appear. Be careful when changing lanes
or turning. Using only the convex mirror
could cause an accident. Use the other
mirrors or glance over your shoulder to
properly judge distances to other objects.
Use the outside mirror remote control to adjust
the top portion of the trailer tow mirror.
WPD0170LPD0237LPD0279
Pre-driving checks and adjustments3-19
ProCarManuals.com
Page 161 of 406
The lower portion of the trailer tow mirror can be
moved manually in any direction for a better rear
view.Pull the trailer tow mirror outward to extend it to
the desired position for better visibility while tow-
ing a trailer.
WARNING
Do not extend or retract mirrors while driv-
ing. You may lose control of your vehicle
and cause an accident.
CAUTION
Driving in tight spaces with mirrors ex-
tended may cause damage to the vehicle.
Manual folding outside mirrors (if so
equipped)
Pull the outside mirror toward the door to fold it.
LPD0268
Type A
LPD0259
3-20Pre-driving checks and adjustments
ProCarManuals.com
Page 163 of 406
Heated mirrors (if so equipped)
Some outside mirrors can be heated to defrost,
defog, or de-ice for improved visibility. For addi-
tional information, see “Rear window and outside
mirror defroster switch” in the “Instruments and
controls” section of this manual.
TAILGATE
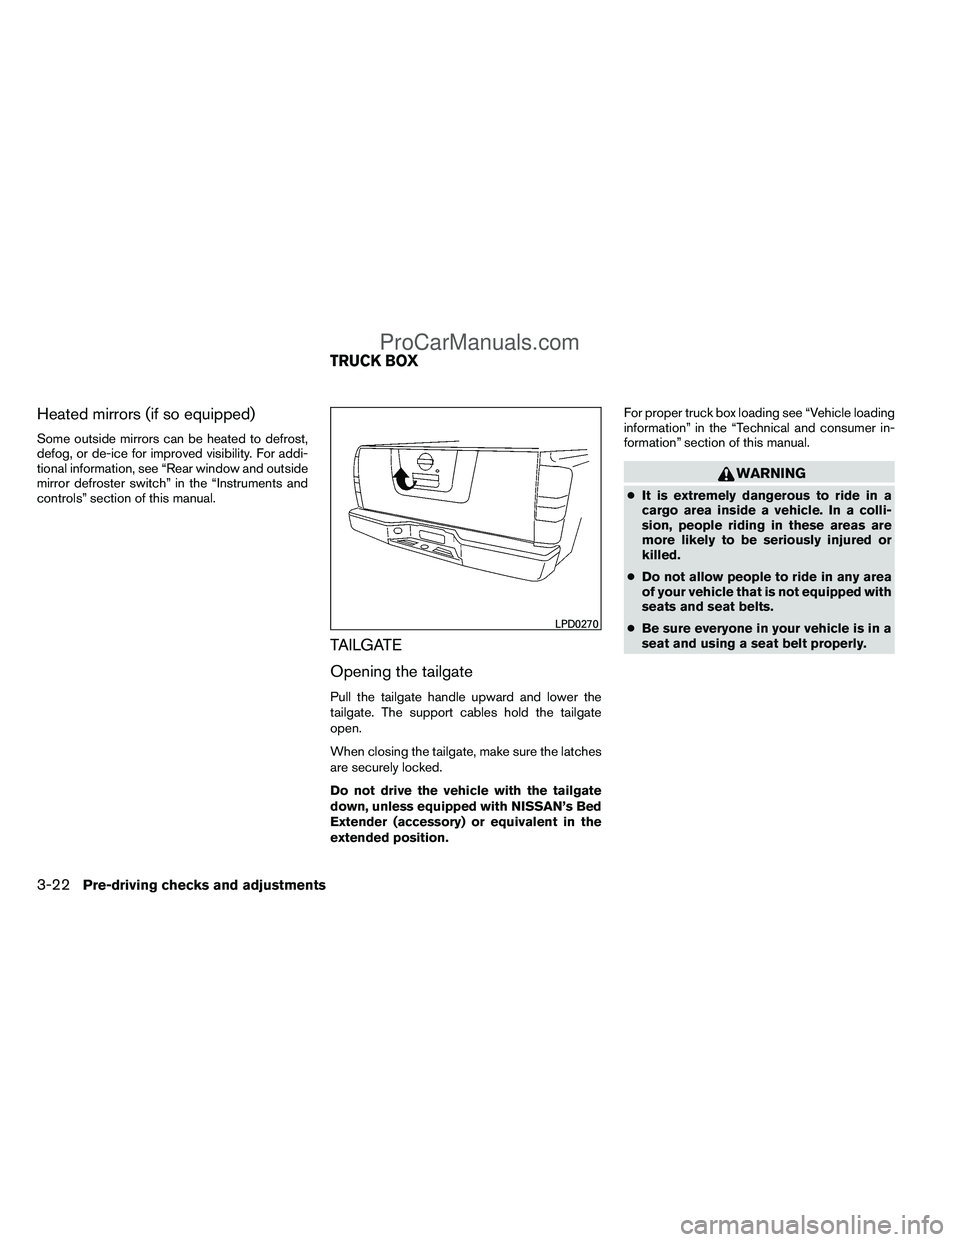
Opening the tailgate
Pull the tailgate handle upward and lower the
tailgate. The support cables hold the tailgate
open.
When closing the tailgate, make sure the latches
are securely locked.
Do not drive the vehicle with the tailgate
down, unless equipped with NISSAN’s Bed
Extender (accessory) or equivalent in the
extended position.For proper truck box loading see “Vehicle loading
information” in the “Technical and consumer in-
formation” section of this manual.
WARNING
●
It is extremely dangerous to ride in a
cargo area inside a vehicle. In a colli-
sion, people riding in these areas are
more likely to be seriously injured or
killed.
● Do not allow people to ride in any area
of your vehicle that is not equipped with
seats and seat belts.
● Be sure everyone in your vehicle is in a
seat and using a seat belt properly.
LPD0270
TRUCK BOX
3-22Pre-driving checks and adjustments
ProCarManuals.com
Page 165 of 406
TIE DOWN HOOKS
For your convenience, tie down hooks are placed
at each corner of the truck box. These may be
used to help secure cargo loaded into the truck
box.● The weight of the cargo load must be evenly
distributed over both the front and the rear
axles.
● All cargo should be securely fastened with
ropes or straps to prevent it from shifting or
sliding within the vehicle.
WARNING
● Properly secure all cargo with ropes or
straps to help prevent it from sliding or
shifting. In a sudden stop or collision,
unsecured cargo could cause personal
injury. The automatic drive positioner system has two
features:
● Memory storage function
● Entry/exit function
LTI0102
AUTOMATIC DRIVE POSITIONER (if
so equipped)
3-24Pre-driving checks and adjustments
ProCarManuals.com
Page 171 of 406
WARNING
●Positioning of the heating or air condi-
tioning controls and display controls
should not be done while driving in or-
der that full attention may be given to
the driving operation.
● Do not disassemble or modify this sys-
tem. If you do, it may result in accidents,
fire, or electrical shock.
● Do not use this system if you notice any
abnormality, such as a frozen screen or
lack of sound. Continued use of the
system may result in accident, fire or
electric shock.
● In case you notice any foreign object in
the system hardware, spill liquid on it,
or notice smoke or smell coming from
it, stop using the system immediately
and contact your nearest NISSAN
dealer. Ignoring such conditions may
lead to accidents, fire or electrical
shock.
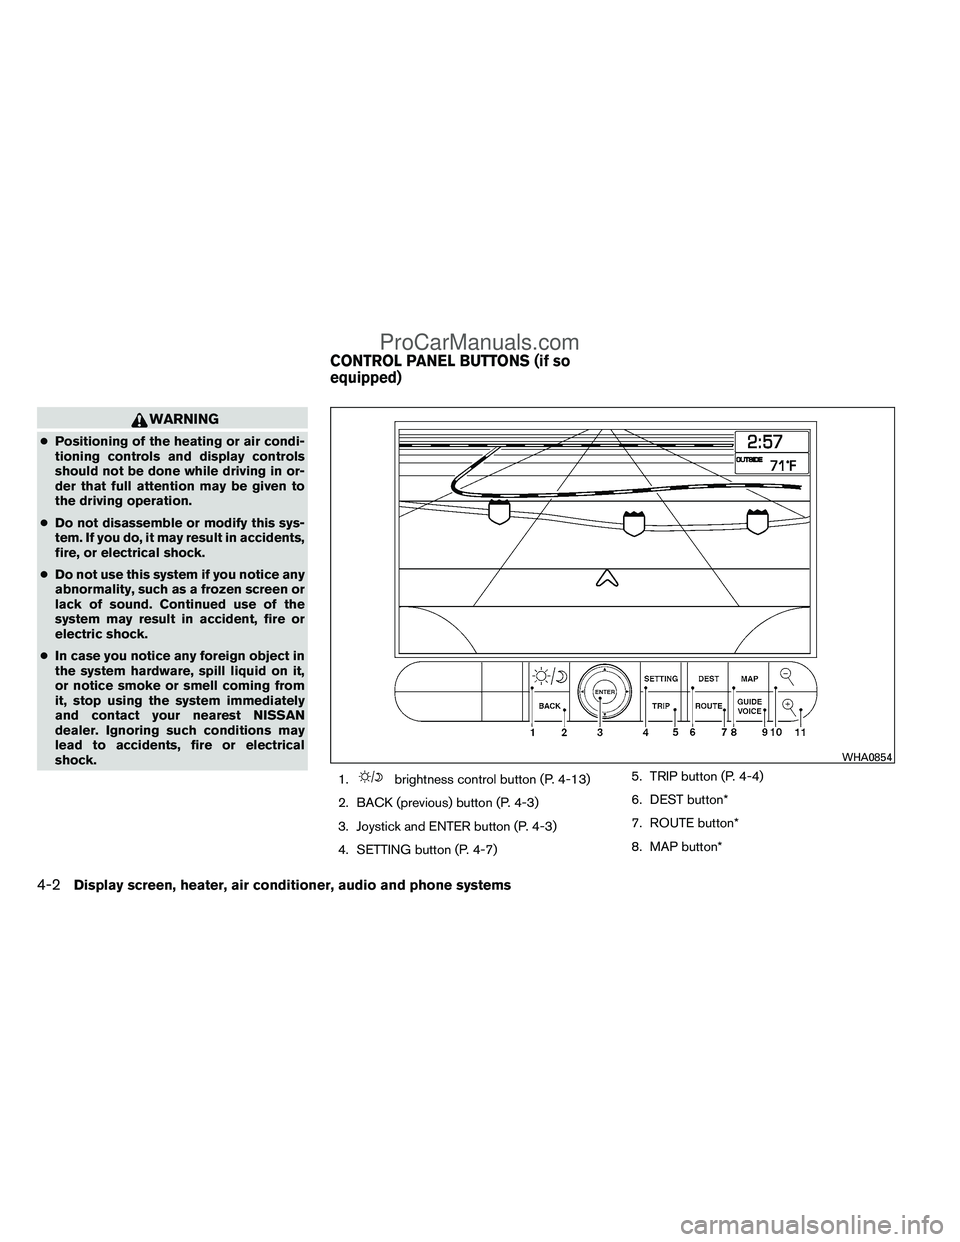
1.
brightness control button (P. 4-13)
2. BACK (previous) button (P. 4-3)
3. Joystick and ENTER button (P. 4-3)
4. SETTING button (P. 4-7) 5. TRIP button (P. 4-4)
6. DEST button*
7. ROUTE button*
8. MAP button*
WHA0854
CONTROL PANEL BUTTONS (if so
equipped)
4-2Display screen, heater, air conditioner, audio and phone systems
ProCarManuals.com