2012 NISSAN QASHQAI interior light
[x] Cancel search: interior lightPage 35 of 297

Downloaded from www.Manualslib.com manuals search engine AIR BAG WARNING LABELS
Warning labels about the air bag system are placed
in the vehicle. Warning labels are for your safety and
the safety of your passengers; do not remove them.
Child restraint on front passenger seat
NISSAN recommends that infants or small children
be seated in a child restraint system on the rear seat
if available. According to accident statistics, chil-
dren are safer when properly restrained in the rear
seat rather than in the front seat.
Front passenger air bag:
Your vehicle is equipped with a front passenger air
bag, you will find an air bag warning label attached
to the passenger side of the instrument panel as
shown in the previous illustration.
This label warns:
“Extreme Hazard! Do not use a rearward facing
child restraint on a seat protected by an air bag
in front of it!”
This label warns NOT to fit a rearward facing child
restraint on the front passenger seat without first
deactivating the front passenger air bag.
For instructions on deactivating the front passenger
air bag see “Front passenger air bag deactivation
system” later in this section.
When installing child restraints in your vehicle, al-
ways carefully observe the manufacturer’s instruc-
tions.For more details on the installation of child restraints,
see also “Child restraints” later in this section.
Side air bags:
Your vehicle is equipped with side air bags. You will
find a side air bag warning label attached to the
vehicle’s interior as shown in the previous illustra-
tion.
This label warns you not to let infants or small chil-
dren sit on the front passenger seat as the air bag
may cause serious injury in case of deployment dur-
ing a collision.
AIR BAG WARNING LIGHT
The Supplemental Restraint System (SRS) air bag
warning light, displayingin the instrument
panel, monitors the circuits of the front air bag sys-
tem, the side and curtain air bag systems and the
pre-tensioner seat belt system. The circuits moni-
tored by the SRS air bag warning light are: all sen-
sors, air bag modules and all related wiring, and the
pre-tensioner seat belt. After turning the ignition switch to the ON or
START position, the supplemental air bag warn-
ing light illuminates. The air bag warning light will
turn off after approximately 7 seconds if the sys-
tem is operational.
Take your vehicle to the nearest NISSAN dealer or
qualified workshop to have the air bag systems and
pre-tensioner seat belt serviced if the SRS air bag
warning light:
Remains on after approximately 7 seconds
Flashes intermittently
Does not come on at all
Under these conditions, the front air bags, side and
curtain air bags and/or pre-tensioner seat belt will
not operate properly. They must be checked and
repaired.
Repair and replacement procedure
The front air bags, side air bags, curtain air bags,
and pre-tensioner seat belt system are designed to
activate on a one-time-only basis. As a reminder,
unless it is damaged, the air bag warning light will
remain illuminated after inflation has occurred. Re-
pair and replacement of the air bag system should
be done only by a NISSAN dealer or qualified work-
shop.
When maintenance work is required on the vehicle,
the air bag systems, related parts and pre-tensioner
seat belt should be pointed out to the person con-
NPA993
1-16Safety — seats, seat belts and supplemental restraint system
Page 49 of 297

Downloaded from www.Manualslib.com manuals search engine 2Instruments and controls
Instruments and controls
Meters and gauges .................................................. 2-2
Speedometer...................................................... 2-2
Fuel gauge ......................................................... 2-2
Tachometer ........................................................ 2-2
Engine coolant temperature gauge ...................... 2-2
Warning/indicator lights and audible reminders ........ 2-3 Checking bulbs .................................................. 2-3
Warning lights .................................................... 2-3
Indicator lights .................................................... 2-7
Audible reminders............................................... 2-9
Vehicle information display ....................................... 2-11 Warnings and alerts............................................ 2-12
Odometer/twin trip odometer .............................. 2-16
Brightness control .............................................. 2-16
Trip computer ..................................................... 2-16
Settings menu .................................................... 2-18
Cruise control/Speed limiter indicator (where
fitted).................................................................. 2-21
Wiper and washer switch ........................................ 2-21 Windscreen ........................................................ 2-22
Rear window ...................................................... 2-23
Defogger switch ...................................................... 2-23 Rear window defogger ....................................... 2-23
Outside mirror defogger (where fitted) ................ 2-24
Headlight and turn signal switch............................... 2-24 Xenon headlights (where fitted) ........................... 2-24
Headlight switch ................................................. 2-24
Turn signal switch ............................................... 2-26
Fog light switch ....................................................... 2-26 Front fog light (where fitted) ................................ 2-26 Rear fog light ...................................................... 2-27
Headlight aiming control .......................................... 2-27 Headlight aiming control switch (where fitted) ..... 2-27
Automatic aiming control (xenon headlights) ........ 2-27
Headlight cleaner (where fitted) ............................... 2-28
Hazard warning flasher switch ................................. 2-28
Horn ........................................................................\
2-29
Seat heating (where fitted) ....................................... 2-29
Power outlet ............................................................ 2-30
Storage ................................................................... 2-31 Storage trays ...................................................... 2-31
Glove box ........................................................... 2-31
Console box ....................................................... 2-32
Cup holders ....................................................... 2-32
Bottle holder ....................................................... 2-32
Map pocket (where fitted) ................................... 2-32
Seat pocket (where fitted)................................... 2-32
Roof rail (where fitted) ........................................ 2-32
Rear parcel shelf (where fitted) ................................ 2-33
Tonneau cover (where fitted).................................... 2-33
Windows ................................................................. 2-34 Power windows .................................................. 2-34
C-View® glass roof (where fitted) ............................ 2-36 Sunshade operation ............................................ 2-36
System reinitialisation.......................................... 2-37
Interior lights ............................................................ 2-37 Front Room light ................................................. 2-37
Map lights (where fitted) ..................................... 2-38
Rear room/reading light ...................................... 2-38
Luggage compartment light ................................ 2-38
Page 75 of 297

Downloaded from www.Manualslib.com manuals search engine Battery save function for external lights:
If the ignition switch is turned to the “OFF” position
but the external lights are accidentally left on, the
external lights will automatically be switched off as
soon as the driver’s door is opened.
It is possible to leave the external lights on perma-
nently by switching them back on using the head-
light switch while the ignition switch is still in the
LOCK or “OFF” position. In this case, the light re-
minder chime will sound when the driver’s door is
opened.
Battery save function for interior light:
The interior light will automatically be switched off
after approximately 15 minutes if it has been acci-
dentally left on.
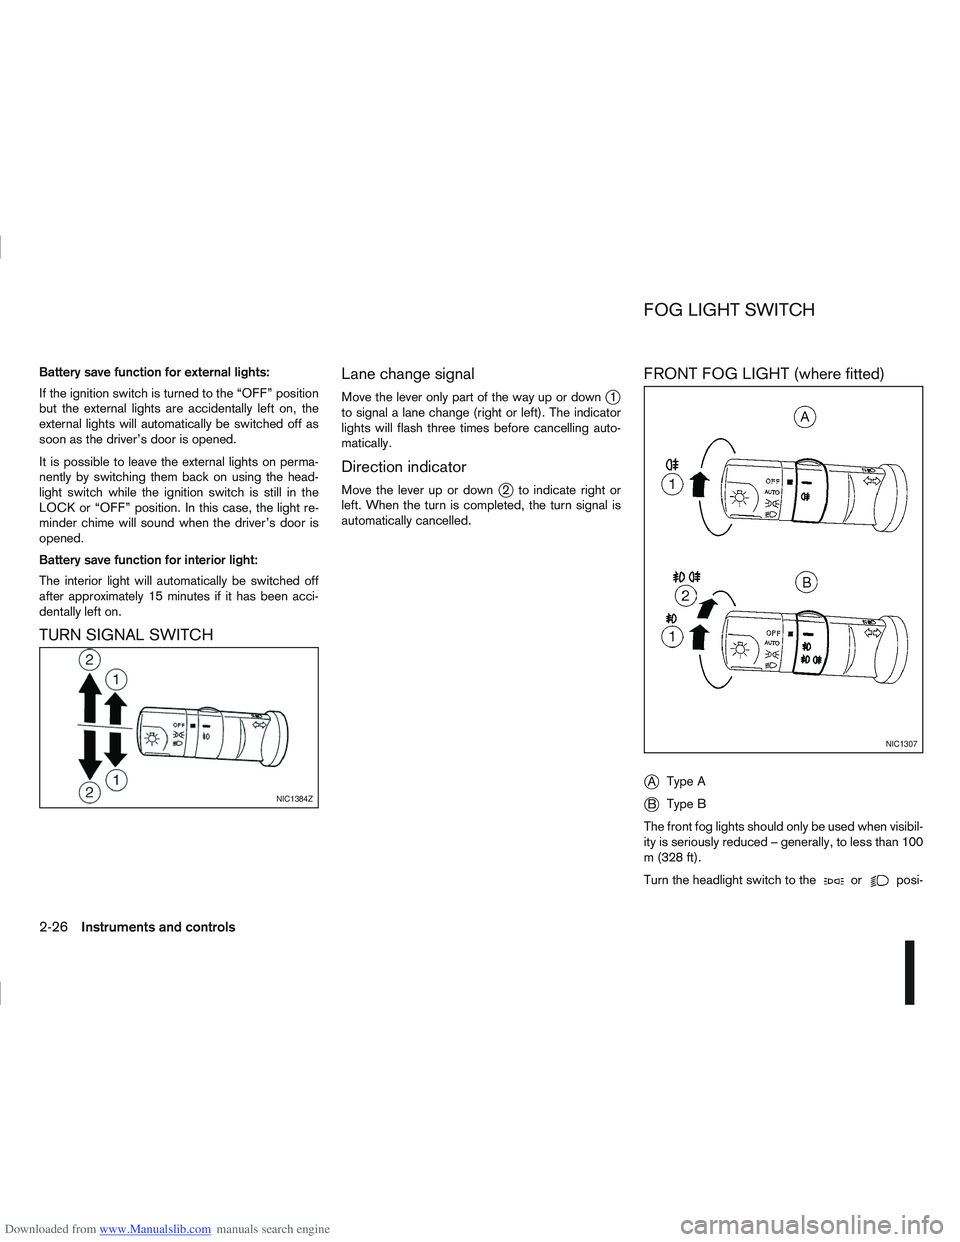
TURN SIGNAL SWITCHLane change signal
Move the lever only part of the way up or downj1
to signal a lane change (right or left). The indicator
lights will flash three times before cancelling auto-
matically.
Direction indicator
Move the lever up or downj2 to indicate right or
left. When the turn is completed, the turn signal is
automatically cancelled.
FRONT FOG LIGHT (where fitted)
j
A Type A
jB Type B
The front fog lights should only be used when visibil-
ity is seriously reduced – generally, to less than 100
m (328 ft).
Turn the headlight switch to the
orposi-
NIC1384Z
NIC1307
FOG LIGHT SWITCH
2-26Instruments and controls
Page 86 of 297

Downloaded from www.Manualslib.com manuals search engine SYSTEM REINITIALISATION
The C-View® sunshade will require reinitialisation
whenever:
The sunshade system does not function prop-
erly.
The battery cable is reconnected.
The fuse is replaced.
Perform the following procedure to initialise the sun-
shade system.
1. Make sure the vehicle battery is connected.
2. Turn the ignition switch to the ON position.
3. Press and hold the “CLOSE” side of the switch. The system will now proceed as follows:
a. If open, the sunshade will start moving to the closed position.
b. After a few seconds, the system will fully open the sunshade.
c. From the fully open position, it returns to the closed position.
4. After reaching the closed position, release the sunshade switch.
5. The sunshade system is now reinitialised. NOTE
Do not disconnect the power for at least 2
seconds. If the reinitialisation procedure cannot be performed
successfully, take your vehicle to a NISSAN dealer
or qualified workshop.
CAUTION
Do not use for extended periods of time with the
engine stopped. This could discharge the bat-
tery.
NOTE
The interior lights will go off after approximately
15 minutes unless the ignition switch is in the
Acc or ON position.
FRONT ROOM LIGHT
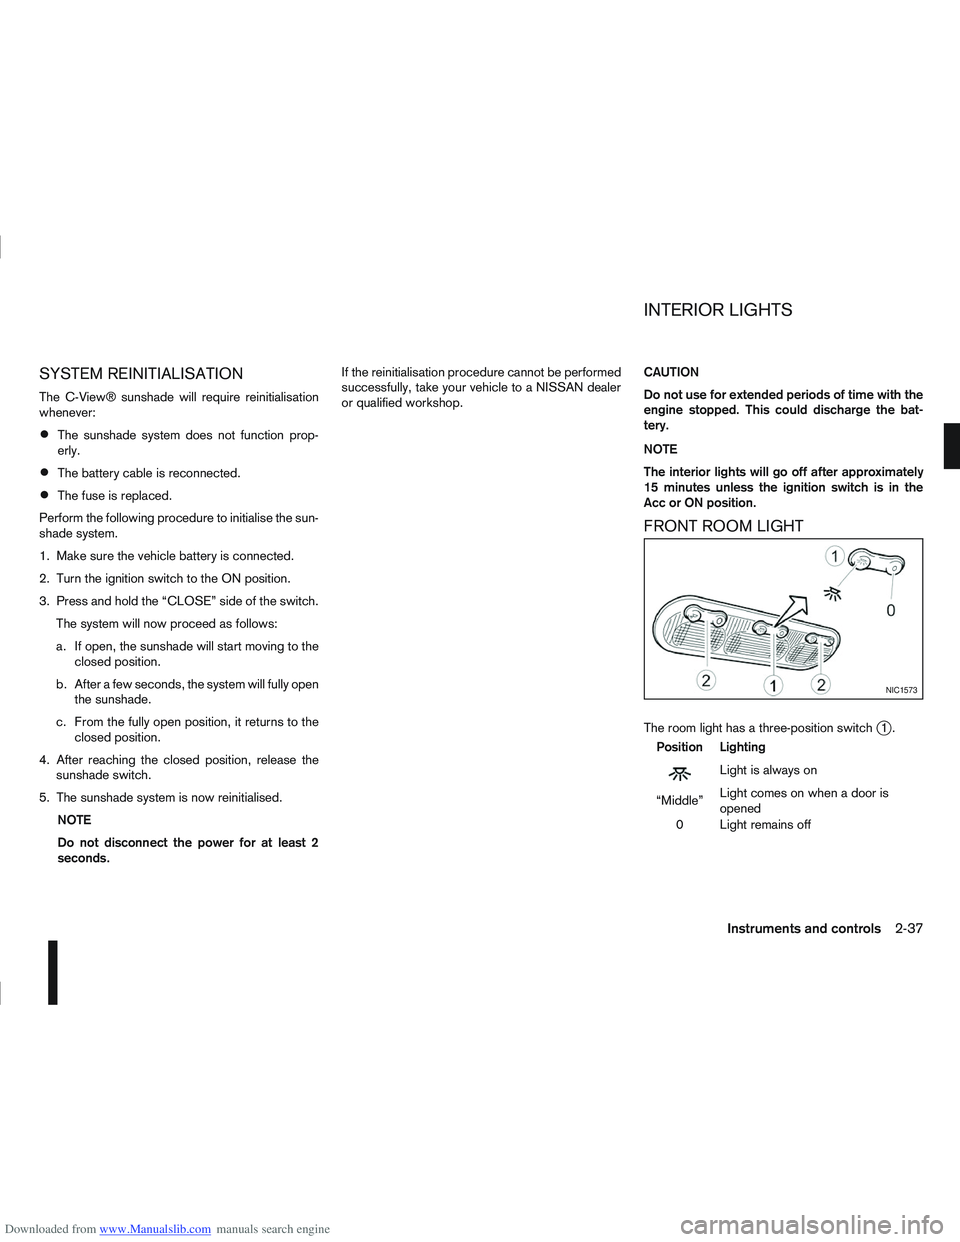
The room light has a three-position switchj1.
Position Lighting
mLightisalwayson
“Middle” Light comes on when a door is
opened
0 Light remains off
NIC1573
INTERIOR LIGHTS
Instruments and controls2-37
Page 87 of 297

Downloaded from www.Manualslib.com manuals search engine Room light timer (where fitted)
The room light will stay on for approximately 30 sec-
onds when:
The ignition is switched off.
The doors are unlocked.
Any door is opened and then closed.
The timer is cancelled, and the interior light will turn
off when:
The doors are locked.
The ignition switch is turned to the ON position.
MAP LIGHTS (where fitted)
To switch on the map light, press eitherorof
the switchesj2.
To turn the map light off, press 0
REAR ROOM/READING LIGHT
The light can be switched on or off by pressing the
switchj3.
LUGGAGE COMPARTMENT LIGHT
The light comes on automatically when the back
door is opened.
VANITY MIRROR LIGHT (where fitted)
The light on the vanity mirror will turn on when the
cover is opened.
NIC1258Z
Room light (where fitted)
NIC1256Z
Reading light (where fitted)
NIC1257Z
2-38Instruments and controls
Page 121 of 297

Downloaded from www.Manualslib.com manuals search engine Air flow control dial:
Use this dial to manually select the air flow from the
air outlets as described below.
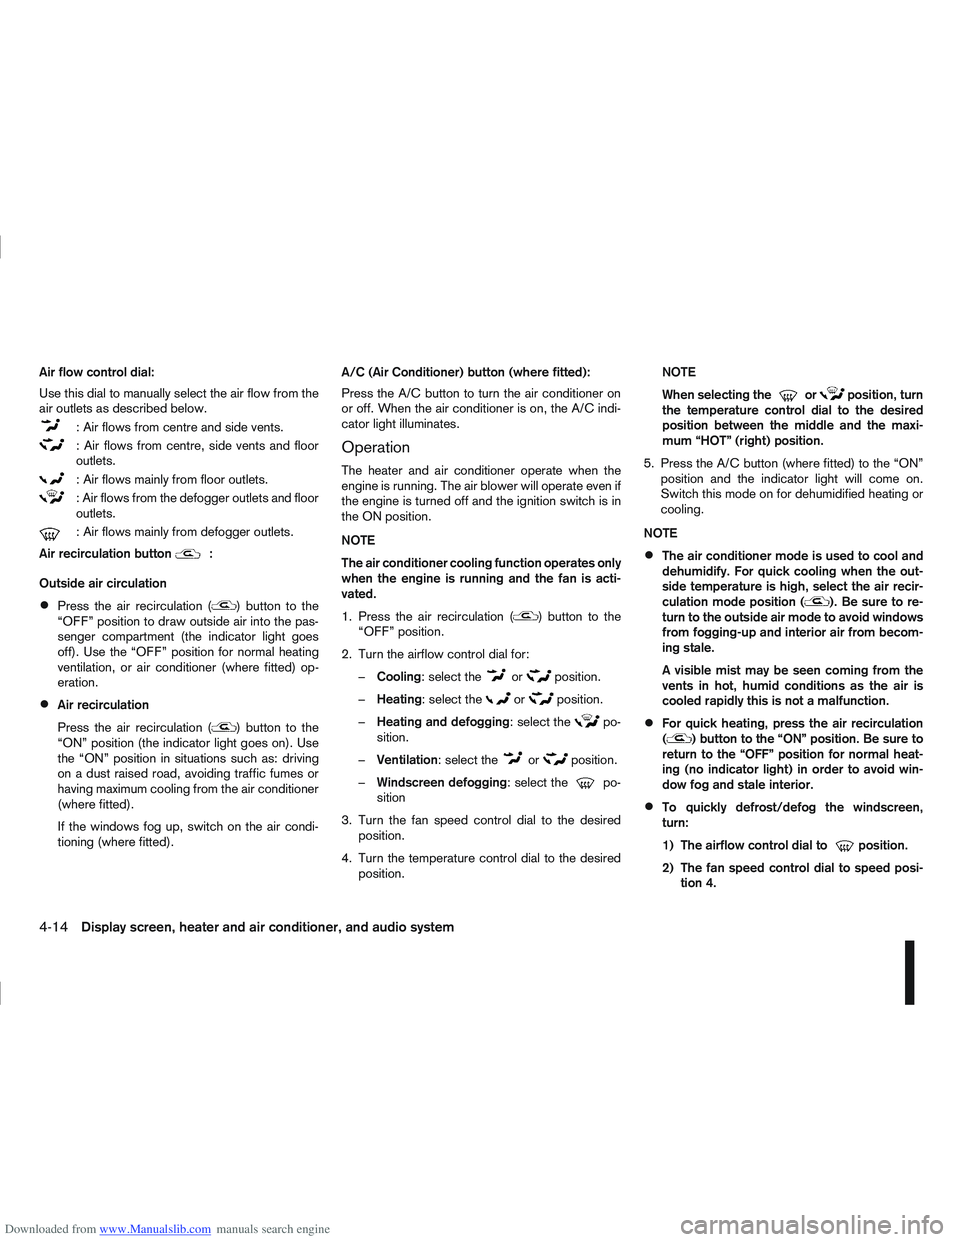
: Air flows from centre and side vents.
: Air flows from centre, side vents and floor
outlets.
: Air flows mainly from floor outlets.
: Air flows from the defogger outlets and floor
outlets.
: Air flows mainly from defogger outlets.
Air recirculation button
m:
Outside air circulation
Press the air recirculation () button to the
“OFF” position to draw outside air into the pas-
senger compartment (the indicator light goes
off). Use the “OFF” position for normal heating
ventilation, or air conditioner (where fitted) op-
eration.
Air recirculation
Press the air recirculation (
) button to the
“ON” position (the indicator light goes on). Use
the “ON” position in situations such as: driving
on a dust raised road, avoiding traffic fumes or
having maximum cooling from the air conditioner
(where fitted).
If the windows fog up, switch on the air condi-
tioning (where fitted). A/C (Air Conditioner) button (where fitted):
Press the A/C button to turn the air conditioner on
or off. When the air conditioner is on, the A/C indi-
cator light illuminates.
Operation
The heater and air conditioner operate when the
engine is running. The air blower will operate even if
the engine is turned off and the ignition switch is in
the ON position.
NOTE
The air conditioner cooling function operates only
when the engine is running and the fan is acti-
vated.
1. Press the air recirculation (
) button to the
“OFF” position.
2. Turn the airflow control dial for: – Cooling: select the
orposition.
– Heating: select the
orposition.
– Heating and defogging : select the
po-
sition.
– Ventilation : select the
orposition.
– Windscreen defogging : select the
po-
sition
3. Turn the fan speed control dial to the desired position.
4. Turn the temperature control dial to the desired position. NOTE
When selecting the
orposition, turn
the temperature control dial to the desired
position between the middle and the maxi-
mum “HOT” (right) position.
5. Press the A/C button (where fitted) to the “ON” position and the indicator light will come on.
Switch this mode on for dehumidified heating or
cooling.
NOTE
The air conditioner mode is used to cool and
dehumidify. For quick cooling when the out-
side temperature is high, select the air recir-
culation mode position (
). Be sure to re-
turn to the outside air mode to avoid windows
from fogging-up and interior air from becom-
ing stale.
A visible mist may be seen coming from the
vents in hot, humid conditions as the air is
cooled rapidly this is not a malfunction.
For quick heating, press the air recirculation
() button to the “ON” position. Be sure to
return to the “OFF” position for normal heat-
ing (no indicator light) in order to avoid win-
dow fog and stale interior.
To quickly defrost/defog the windscreen,
turn:
1) The airflow control dial to
position.
2) The fan speed control dial to speed posi- tion 4.
4-14Display screen, heater and air conditioner, and audio system
Page 127 of 297

Downloaded from www.Manualslib.com manuals search engine 2. To switch off, press either thebutton to
return to the previous mode or the AUTO button
for the auto climate control mode.
To quickly defrost/defog the windscreen, set the
fan speed to the maximum position.
As soon as possible after the windscreen has
been cleared of ice or fog, press either the
windscreen defogger button or AUTO button.
When the windscreen defogging mode is acti-
vated, the air conditioner will automatically switch
on at outside temperatures [above -2°C (28°F)]
and the air recirculation mode will be switched
off.
Outside air is drawn into the passenger com-
partment to improve the defogging performance.
Heating and defogging (Manual mode):
This mode heats the interior and defogs the wind-
screen.
The outside air is drawn inside the passenger com-
partment when the
button is pressed. Switch
on the air-conditioning to improve the defogging and
adjust the preferred fan speed and temperature.
Fan speed control
m(Manual mode):
Turn the fan speed control dial anticlockwise or
clockwise to adjust the fan speed.
Press the AUTO button to change the fan speed to
automatic mode. Air recirculation:
Use this mode to recirculate interior air inside the
passenger compartment in situations such as driv-
ing on a dust raised road, avoiding traffic fumes or
having maximum cooling from the air conditioner.
Press the
<
>button to recirculate interior air.
The indicator light illuminates and the air conditioner
will automatically come on.
When the air recirculation mode is switched off, out-
side air is drawn into the passenger compartment.
Outside air circulation:
Use this mode to draw outside air into the passen-
ger compartment for normal heating, ventilation or
air conditioner operation.
Press the <
>button to change the air intake
from the air recirculation to the outside air mode.
The indicator light (
) turns off. To turn the system on/off:
Press the “ON/OFF” (
) button to turn the system
on or off.
The sensor
jA (next to the tweeter speaker) helps
the air conditioning system to maintain a constant
cabin temperature. Do not put anything on or around
this sensor and ensure that items nearby on the
windscreen do not shade it.
Operating tips
In order to improve the heater operation, clear
the snow and ice from the wiper blade and air
inlet in front of the windscreen.
When the engine coolant temperature and out-
side air temperature are low, the airflow from the
floor outlets may not operate for a maximum of
150 seconds. However, this is not a malfunction.
After the coolant temperature has warmed up,
the airflow from the floor outlets will operate nor-
mally.
NAA967Z
4-20Display screen, heater and air conditioner, and audio system
Page 231 of 297

Downloaded from www.Manualslib.com manuals search engine 8Maintenance and do-it-yourself
Maintenance and do-it-yourself
Maintenance requirements ....................................... 8-2
Scheduled maintenance...................................... 8-2
General maintenance .......................................... 8-2
Where to go for service ...................................... 8-2
General maintenance ............................................... 8-2 Explanation of general maintenance items ........... 8-2
Maintenance precautions ......................................... 8-4
Engine compartment ................................................ 8-5
Engine cooling system ............................................. 8-6 Checking engine coolant level............................. 8-6
Changing engine coolant .................................... 8-6
Engine oil................................................................. 8-8 Checking engine oil level .................................... 8-8
Changing engine oil ............................................ 8-9
Changing engine oil filter .................................... 8-11
Protect the environment ...................................... 8-13
Fuel filter (Diesel engine models) ............................. 8-13 Draining water .................................................... 8-13
Bleeding the fuel system ..................................... 8-14
Automatic transmission fluid (ATF) ........................... 8-14
Continuously variable transmission (CVT) fluid ......... 8-14
Brakes ..................................................................... 8-15 Checking brake pedal......................................... 8-15
Checking handbrake........................................... 8-15
Brake and clutch fluid .............................................. 8-15
Window washer fluid/headlight cleaner fluid
(where fitted) ........................................................... 8-16
Battery..................................................................... 8-17 Vehicle battery .................................................... 8-17
Jump-starting ...................................................... 8-19 Integrated keyfob/Intelligent Key battery
replacement........................................................ 8-19
Drive belts ............................................................... 8-21
Spark plugs (Petrol engine models).......................... 8-21
Air cleaner filter........................................................ 8-21 Viscous paper type ............................................. 8-22
Dry paper type (where fitted) .............................. 8-22
Wiper blades ........................................................... 8-22 Cleaning ............................................................. 8-22
Front window wiper replacement ........................ 8-22
Back door window wiper replacement ................ 8-23
Windscreen washer nozzle ................................. 8-23
Fuses ...................................................................... 8-23 Passenger compartment ..................................... 8-23
Engine compartment ........................................... 8-24
Lights ...................................................................... 8-25 Headlights .......................................................... 8-25
Exterior lights ...................................................... 8-27
Interior lights....................................................... 8-27
Light locations .................................................... 8-27
Wheels and tyres ..................................................... 8-31 Tyre inflation pressure......................................... 8-31
Types of tyres ..................................................... 8-31
Snow chains....................................................... 8-32
Tyre rotation ....................................................... 8-32
Tyre wear and damage ....................................... 8-33
Tyre age ............................................................. 8-33
Changing tyres and wheels ................................. 8-33
Four-wheel drive (4WD) models ......................... 8-33
Wheel balance.................................................... 8-33