2012 NISSAN QASHQAI Close
[x] Cancel search: ClosePage 196 of 297
Downloaded from www.Manualslib.com manuals search engine The new set speed limit valuej9 will be displayed
in the combination meter display.
Cancelling a speed limit
To cancel a set speed limit, push the CANCEL
switchj3 . The SET indicatorj8 in the combination
meter will be turned off. The set speed valuej9 will
remain displayed.
It is also possible to override the speed limiter by
fully depressing the accelerator pedal beyond the
resistance point.
WARNING
The vehicle may accelerate when the speed
limiter cancels.
When additional floor mats are used, be sure
that they are correctly secured and that they
cannot interfere with the accelerator pedal.
Mats not adapted to the vehicle may prevent
proper operation of the speed limiter.
Fully depress the accelerator pedal beyond the re-
sistance point. The speed limiter will be suspended
to allow driving above the set speed. The set speed
value
j9 will flash. The speed limiter will automati-
cally resume when the vehicle speed drops below
the set speed limit.
Resuming a previous set speed
If a set speed limit has been cancelled, the set speed
valuej9 will remain displayed in the combination
meter and the speed will be stored in the speed lim-
iter memory. This speed limit can be reactivated by pressing the
RES (Resume) switch
j1 upwards.
If the current vehicle speed is higher than the previ-
ous set speed, the accelerator pedal will not work
and the set speed value
j9 will flash until the vehicle
speed drops below the set speed limit.
Turning the speed limiter off
The speed limiter system will be turned off when
one of the following operations is performed:
Push the speed limiter main “ON/OFF” switchj4 . The speed limiter symbolj7 , the LIMIT indi-
catorj6 , the SET indicatorj8 , and the set
speed valuej9 will turn off in the combination
meter display.
Push the cruise control main “ON/OFF” switchj5 . The speed limiter information in the combi-
nation meter will be replaced with the cruise con-
trol information. For details see “Cruise control
(where fitted)” earlier in this section.
When the vehicle is stopped and the ignition is
turned to the off position.
Turning off the speed limiter will erase the set
speed limit memory.
Speed limiter malfunction
If the speed limiter malfunctions, the set indicatorj8 in the combination meter display will flash.
Turn the speed limiter off by pushing the speed lim-
iter main “ON/OFF” switch
j4 and have the system
checked by a NISSAN dealer or qualified workshop.
WARNING
Do not park the vehicle over flammable mate-
rials, such as dry grass, waste paper, or rags.
They may ignite and cause a fire.
Safe parking procedures require that:
– The handbrake is applied.
– The gear lever is placed in an appropriate gear for manual transmission models.
– The selector lever is placed in the P (Park) position for automatic transmission or con-
tinuously variable transmission models.
Failure to follow the above recommenda-
tions could cause the vehicle to move un-
expectedly or roll away and result in an
accident.
Never leave the engine running while the ve-
hicle is unattended.
Do not leave children or adults who would
normally require the support of others alone
in your vehicle. Pets should also not be left
alone either. On hot, sunny days, tempera-
tures in a closed vehicle could quickly be-
come high enough to cause severe or possi-
bly fatal injuries to people or animals.
Manual transmission models:
Depress the clutch pedal and place the gear
lever in the R (Reverse) position. When parking
on an uphill gradient, place the gear lever in the
1st (Low gear) position.
PARKING
Starting and driving5-33
Page 201 of 297
Downloaded from www.Manualslib.com manuals search engine When leaving your vehicle unoccupied:
Always remove the ignition key or Intelligent Key
(where fitted) and take it with you – even in your
own garage.
Close all windows completely and lock all doors.
Always park your vehicle where it can be seen.
At night, park in a well lit area.
If the vehicle is equipped with an alarm or immo-
bilization device, use it – even for short periods.
Do not leave children and pets in the vehicle
unattended.
Do not leave valuables on view to tempt a thief.
Always take your valuables with you. If you must
leave something in your vehicle, lock it in the lug-
gage compartment or hide it out of sight.
Do not leave the vehicle documents in your ve-
hicle. In the unfortunate event of your vehicle
being stolen, the documents will only help a thief
to sell the vehicle.
Do not leave articles on a roof rack as they are
particularly vulnerable. If possible, remove them
from the rack and lock them inside the vehicle.
Do not leave the spare key or Intelligent Key in
the vehicle – keep it in a safe place at home.
Do not leave a note of your vehicle’s key number
in the vehicle. A thief may break into the vehicle,
note the key number and return with a new key
and drive the vehicle.
WARNING
If the Electrically Power Assisted Steering
warning light (EPAS) illuminates while driv-
ing, the power assist for steering will be dis-
abled. Greater steering efforts are required to
operate the steering wheel, especially in
sharp turns and at low speed. Stop the ve-
hicle as soon as safely possible and contact a
NISSAN dealer or qualified workshop for fur-
ther assistance.
In certain circumstances, factors external to
the EPAS system may contribute to the illumi-
nation of the warning light. If the warning light
illuminates, stop the vehicle as soon as safely
possible if driving. Turn the ignition switch to
the “OFF” position and wait for approximately
20 seconds, then turn the ignition switch to
the ON position again. If the light remains illu-
minated, we recommend you to contact a
NISSAN dealer or qualified workshop. See
“Warning/indicator lights and audible
reminders” in the “2. Instruments and
controls” section for further details regarding
the EPAS warning light.
The EPAS (Electrically Power Assisted Steering)
system is designed to assist steering.
The steering may appear to feel slightly stiff follow-
ing parking manoeuvres including a great deal of
steering. This is not a malfunction; it is caused by a
control system designed to prevent the motor from overheating. No servicing is required. The EPAS
system will return to normal operation the next time
the vehicle is driven.
Similarly, the EPAS system may not provide full as-
sistance during periods of reduced battery voltage
but will recover once normal battery voltage is re-
stored.
If the EPAS warning light comes on while the engine
is running, it may indicate that the EPAS system is
not working properly. As result greater steering ef-
forts are required to steer the steering wheel, espe-
cially in sharp turns and at low speeds. Have the
system checked by a NISSAN dealer or qualified
workshop as soon as possible.
NOTE
Incorrectly inflated tyres can lead to poor steer-
ing ability and make the driver suspect a steering
problem: keep the vehicle’s tyres inflated to the
correct pressure at all times.
CAUTION
Any malfunction or accident that could have dam-
aged the steering components (including actual
or attempted theft damage) should be reported
to a NISSAN dealer or qualified workshop.
VEHICLE SECURITY
POWER STEERING SYSTEM
5-38Starting and driving
Page 203 of 297

Downloaded from www.Manualslib.com manuals search engine and varies the brake fluid pressure to prevent each
wheel from locking and sliding. By preventing each
wheel from locking, the system helps the driver to
maintain steering control and helps to minimise
swerving and spinning on slippery surfaces.
Using the system
Depress the brake pedal and hold it down. Depress
the brake pedal with firm steady pressure, but do
not pump the brakes. The ABS will operate to pre-
vent the wheels from locking up. Steer the vehicle to
avoid obstacles.
WARNING
Do not pump the brake pedal. Doing so may in-
crease the stopping distance.
Self-test feature
The ABS includes electronic sensors, electric
pumps, hydraulic solenoids and a computer. The
computer has a built-in diagnostic feature that tests
the system each time you start the engine and move
thevehicleatalowspeedinforwardorreverse.
When the self-test occurs, you may hear a “clunk”
noise and/or feel a pulsation in the brake pedal. This
is normal and does not indicate a malfunction. If the
computer senses a malfunction, it switches the ABS
off and illuminates the ABS warning light on the
instrument panel. The brake system then operates
normally, but without anti-lock assistance.
If the ABS warning light illuminates during the self-
test or while driving, have the vehicle checked by a
NISSAN dealer or qualified workshop.
Normal operation
The ABS will not initiate at speeds below 5 to 10
km/h (3 to 6 MPH). The speeds will vary according
to road conditions.
When the ABS senses that one or more wheels are
close to locking up, the actuator rapidly applies and
releases hydraulic pressure. This action is similar to
pumping the brakes very quickly. You may feel a
pulsation in the brake pedal and hear a noise from
the actuator under the bonnet when it is operating.
This is normal and indicates that the ABS is working
properly. However, the pulsation may indicate that
road conditions are hazardous and extra care is re-
quired while driving. When accelerating, driving on slippery surfaces or
suddenly avoiding obstacles on roads, the vehicle
might swerve or slip. The Electronic Stability Pro-
gramme (ESP) system continuously monitors and
compares the driver’s intended speed and the travel
direction. The system adjusts wheel brake pressure
and engine torque to assist in improving vehicle sta-
bility.
When the ESP system is operating, the “SLIP”
indicator light () in the combination meter
blinks.
When only the traction control (TCS) system in
the ESP system is operating, the “SLIP” indica-
tor light (
) in the combination meter will also
blink.
If the “SLIP” indicator light () blinks, the
road conditions are slippery. Be sure to drive
carefully. See “Warning/indicator lights and au-
dible reminders” in the “2. Instruments and
controls” section.
Indicator light
If a malfunction occurs in the system, the “SLIP”
indicator light (
) and the ESP indicator light
() come on in the combination meter.
As long as these indicator lights are on, the trac-
tion control function is cancelled.
The ESP system uses Active Brake Limited Slip
(ABLS) system to improve vehicle traction. The Ac-
tive Brake Limited Slip (ABLS) system works when
one of the driving wheels is spinning on a slippery
ELECTRONIC STABILITY
PROGRAMME (ESP) SYSTEM
(where fitted)
5-40Starting and driving
Page 209 of 297
Downloaded from www.Manualslib.com manuals search engine TEMPORARY-USE SPARE TYRE
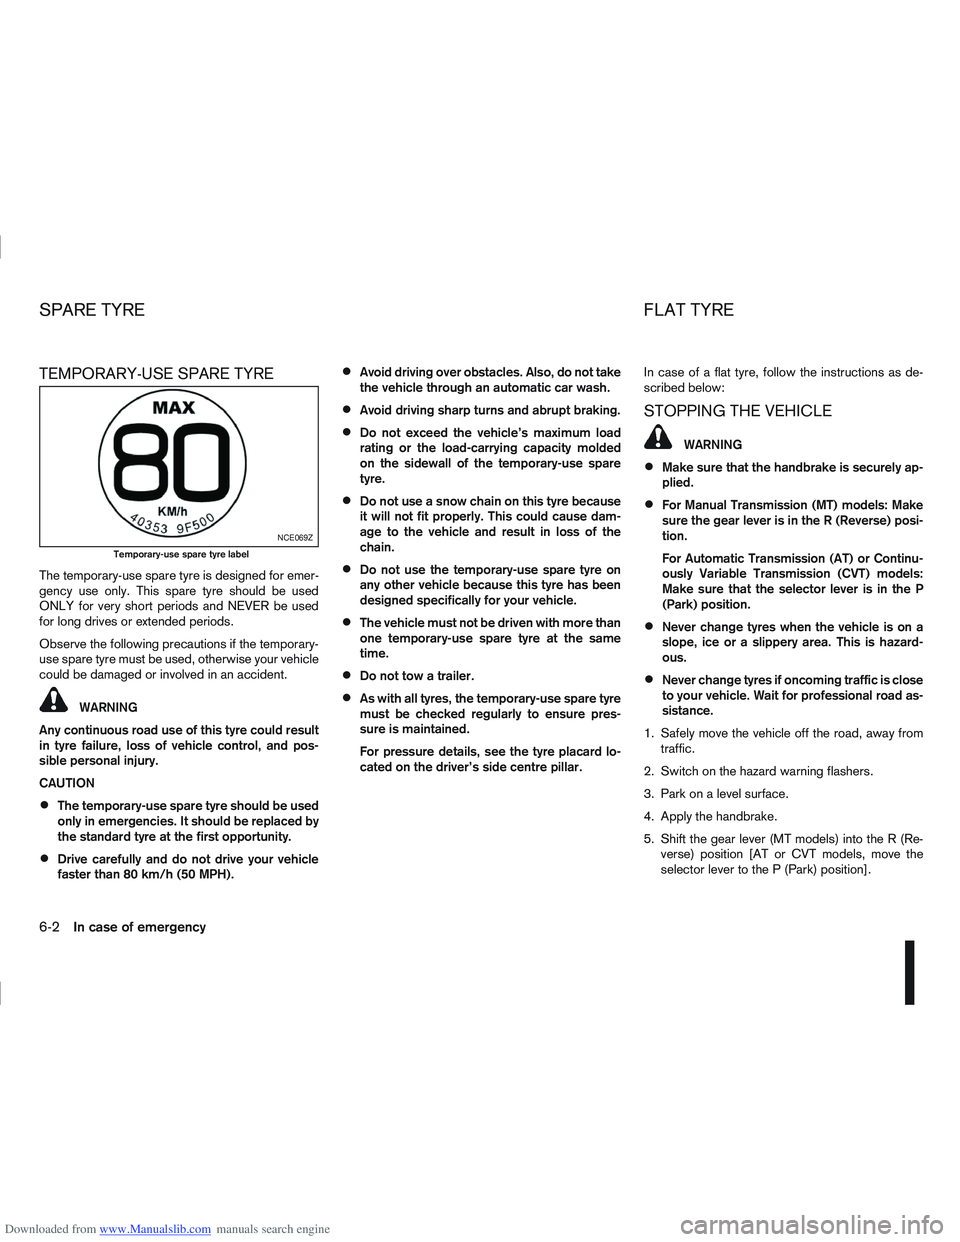
The temporary-use spare tyre is designed for emer-
gency use only. This spare tyre should be used
ONLY for very short periods and NEVER be used
for long drives or extended periods.
Observe the following precautions if the temporary-
use spare tyre must be used, otherwise your vehicle
could be damaged or involved in an accident.
WARNING
Any continuous road use of this tyre could result
in tyre failure, loss of vehicle control, and pos-
sible personal injury.
CAUTION
The temporary-use spare tyre should be used
only in emergencies. It should be replaced by
the standard tyre at the first opportunity.
Drive carefully and do not drive your vehicle
faster than 80 km/h (50 MPH).
Avoid driving over obstacles. Also, do not take
the vehicle through an automatic car wash.
Avoid driving sharp turns and abrupt braking.
Do not exceed the vehicle’s maximum load
rating or the load-carrying capacity molded
on the sidewall of the temporary-use spare
tyre.
Do not use a snow chain on this tyre because
it will not fit properly. This could cause dam-
age to the vehicle and result in loss of the
chain.
Do not use the temporary-use spare tyre on
any other vehicle because this tyre has been
designed specifically for your vehicle.
The vehicle must not be driven with more than
one temporary-use spare tyre at the same
time.
Do not tow a trailer.
As with all tyres, the temporary-use spare tyre
must be checked regularly to ensure pres-
sure is maintained.
For pressure details, see the tyre placard lo-
cated on the driver’s side centre pillar. In case of a flat tyre, follow the instructions as de-
scribed below:
STOPPING THE VEHICLE
WARNING
Make sure that the handbrake is securely ap-
plied.
For Manual Transmission (MT) models: Make
sure the gear lever is in the R (Reverse) posi-
tion.
For Automatic Transmission (AT) or Continu-
ously Variable Transmission (CVT) models:
Make sure that the selector lever is in the P
(Park) position.
Never change tyres when the vehicle is on a
slope, ice or a slippery area. This is hazard-
ous.
Never change tyres if oncoming traffic is close
to your vehicle. Wait for professional road as-
sistance.
1. Safely move the vehicle off the road, away from traffic.
2. Switch on the hazard warning flashers.
3. Park on a level surface.
4. Apply the handbrake.
5. Shift the gear lever (MT models) into the R (Re- verse) position [AT or CVT models, move the
selector lever to the P (Park) position].
NCE069Z
Temporary-use spare tyre label
SPARE TYRE FLAT TYRE
6-2In case of emergency
Page 218 of 297

Downloaded from www.Manualslib.com manuals search engine 6. Open the bonnet. For details, see “Bonnetrelease” in the “3. Pre-driving checks and
adjustments” section.
7. Remove the vent caps (where fitted) on the bat- tery and cover the battery with an old cloth.
8. Connect the jump leads in the sequence (
j1 →j2→j3→j4 ) as illustrated.
CAUTION
Always connect positivej+ to positivej+
and negativej- to body ground (for ex-
ample, engine lift bracket, etc.) – not to
the battery’s negative
j-.
An incorrect connection could damage the
charging system.
Be sure that the jumper cables do not
touch moving parts in the engine compart-
ment.
Be careful not to allow contact between
the positive jump lead connector and the
vehicle or the negative lead during con-
nection and disconnection.
9. Start the engine of the other vehicle
jA and let it
run for a few minutes. Keep the engine speed at
about 2,000 rpm.
10. Start the engine of your vehicle
jB in the nor-
mal way. CAUTION
Do not keep the starter motor engaged for
more than 10 seconds. If the engine does not
start immediately, turn the ignition switch to
“OFF” and wait 10 seconds before trying
again.
11. After starting the engine of your vehicle, care- fully disconnect the negative lead and then the
positive lead (
j4→j3→j2→j1).
12. Remove and dispose of the cloth that was used to cover the vent holes as it may be contami-
nated with corrosive acid.
13. Install the vent caps (where fitted).
14. Close the bonnet.
NOTE
For models which incorporate the Stop/Start
System:
Ensure that the battery fitted is the special
battery that is enhanced with regard to the
charge-discharge capacity and life perfor-
mance. Avoid using any other battery for the
Stop/Start System, as this may cause early
deterioration of the battery or a malfunction
of the Stop/Start System. It is recommended
that a Genuine NISSAN battery is fitted. For
more information, contact a NISSAN dealer or
qualified workshop
If the battery terminal is disconnected (for bat-
tery replacement, etc.) and then reconnected,
there may be some delay before the Stop/
Start System reactivates.
In case of emergency6-11
Page 220 of 297
Downloaded from www.Manualslib.com manuals search engine 14. If the level is low, remove the engine coolantreservoir cap and add coolant slowly into the
reservoir. After refilling the reservoir to the MAX
level, install the reservoir cap.
WARNING
Before removing the engine coolant reservoir
cap and to avoid the danger of being scalded,
cover the reservoir cap with a rag and loosen
the reservoir cap to the first notch to allow the
steam to escape.
15. Close the bonnet.
Have your vehicle inspected or repaired by a
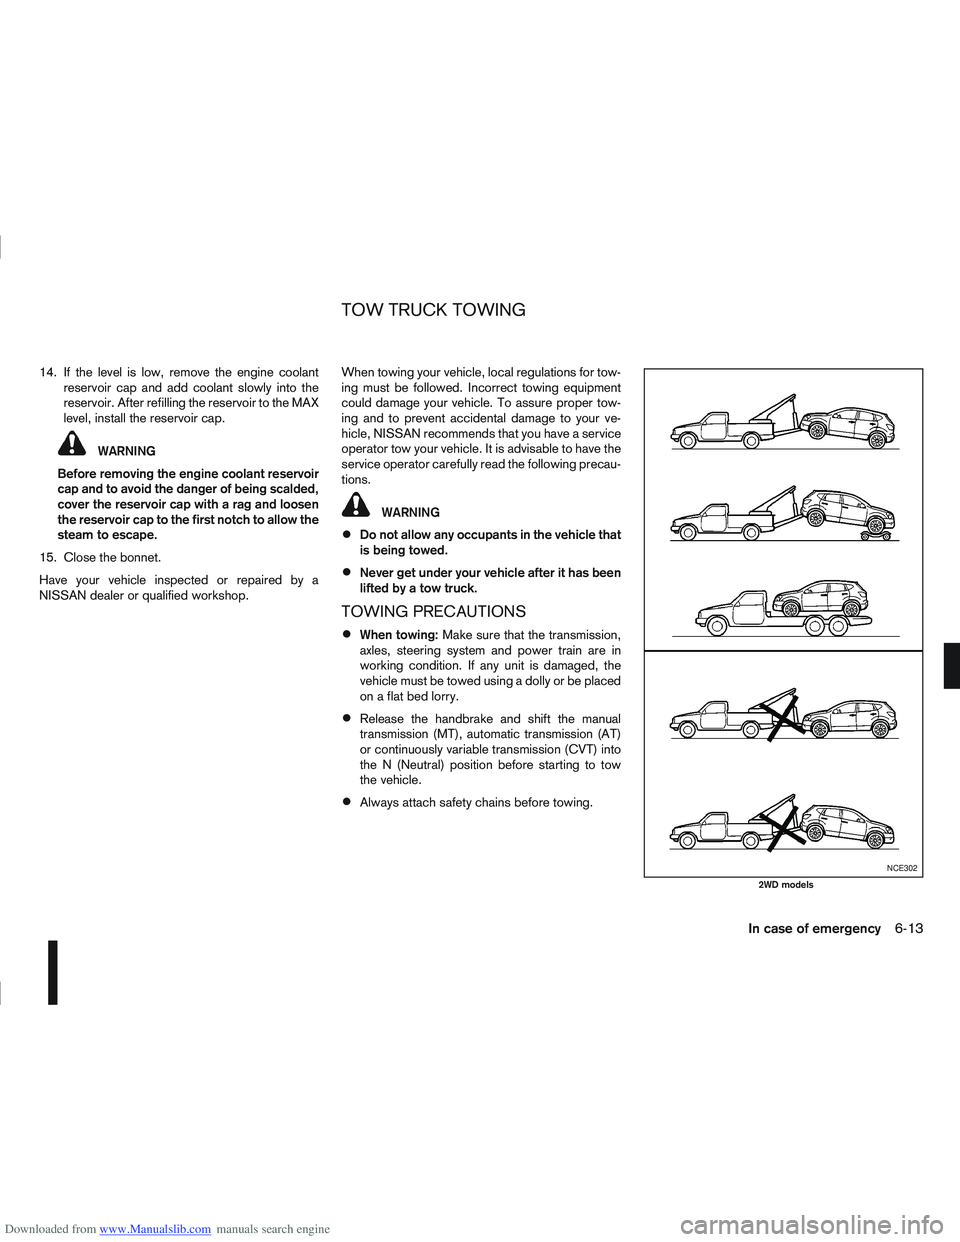
NISSAN dealer or qualified workshop. When towing your vehicle, local regulations for tow-
ing must be followed. Incorrect towing equipment
could damage your vehicle. To assure proper tow-
ing and to prevent accidental damage to your ve-
hicle, NISSAN recommends that you have a service
operator tow your vehicle. It is advisable to have the
service operator carefully read the following precau-
tions.
WARNING
Do not allow any occupants in the vehicle that
is being towed.
Never get under your vehicle after it has been
lifted by a tow truck.
TOWING PRECAUTIONS
When towing:
Make sure that the transmission,
axles, steering system and power train are in
working condition. If any unit is damaged, the
vehicle must be towed using a dolly or be placed
on a flat bed lorry.
Release the handbrake and shift the manual
transmission (MT), automatic transmission (AT)
or continuously variable transmission (CVT) into
the N (Neutral) position before starting to tow
the vehicle.
Always attach safety chains before towing.
NCE302
2WD models
TOW TRUCK TOWING
In case of emergency6-13
Page 233 of 297

Downloaded from www.Manualslib.com manuals search engine Your new NISSAN has been designed to have mini-
mum maintenance requirements with longer service
intervals, to save you both time and money. How-
ever, some day-to-day and regular maintenance is
essential to maintain your NISSAN’s good mechani-
cal condition, as well as its emission and engine
performance.
It is the owner’s responsibility to make sure that the
specified maintenance, as well as general mainte-
nance, is performed.
As the vehicle owner, you are the only one who can
ensure that your vehicle receives the proper mainte-
nance care.
SCHEDULED MAINTENANCE
For your convenience, the required scheduled main-
tenance items are described and listed in the sepa-
rate Warranty Information and Maintenance book-
let. You must refer to that booklet to ensure that
necessary maintenance is performed on your
NISSAN vehicle at regular intervals.
GENERAL MAINTENANCE
General maintenance includes those items which
should be checked during normal day-to-day opera-
tion of the vehicle. They are essential if your vehicle
is to continue to operate properly. It is your respon-
sibility to perform these procedures regularly as pre-
scribed.
Performing general maintenance checks requires
minimal mechanical skill and a few general automo-
tive tools.These checks or inspections can be done by your-
self, a qualified technician or, if you prefer, your
NISSAN dealer or qualified workshop.
WHERE TO GO FOR SERVICE
If maintenance service is required or your vehicle
appears to malfunction, have the systems checked
and tuned by an authorised NISSAN dealer or quali-
fied workshop.
During the normal day-to-day operation of the ve-
hicle, general maintenance should be performed
regularly as prescribed in this section. If you detect
any unusual sounds, vibrations or smell, be sure to
check for the cause or have a NISSAN dealer or
qualified workshop do it promptly. In addition, you
should notify a NISSAN dealer or qualified work-
shop if repairs are required.
When performing any checks or maintenance work,
closely observe the “Maintenance precautions” later
in this section.
EXPLANATION OF GENERAL
MAINTENANCE ITEMS
Additional information on the following items with
an asterisk (*) is found later in this section.
The maintenance items listed here should be per-
formed from time to time, unless otherwise speci-
fied.
Outside the vehicle
Back door, doors and bonnet:
Check that the back door, all doors and the bonnet
operate properly. Also ensure that all latches lock
securely. Lubricate hinges and latches if necessary.
Make sure that the secondary latch keeps the bon-
net from opening when the primary latch is released.
When driving in areas using road salt or other cor-
rosive materials, check for lubrication frequently.
MAINTENANCE REQUIREMENTS
GENERAL MAINTENANCE
8-2Maintenance and do-it-yourself
Page 235 of 297
Downloaded from www.Manualslib.com manuals search engine Handbrake*:
Confirm that your vehicle is held securely on a fairly
steep hill with only the handbrake applied.
Seats:
Check seat position controls such as seat adjust-
ers, seatback recliner, etc. to ensure they operate
smoothly and all latches lock securely in every posi-
tion. Check that the head restraints move up and
down smoothly and the locks hold securely in all
latched positions.
Seat belts:
Check that all parts of the seat belt system (e.g.
buckles, anchors, adjusters and retractors) operate
properly and smoothly, and are installed securely.
Check the belt webbing for cuts, fraying, wear or
damage. See “Seat belts” in the “1. Safety — seats,
seat belts and supplemental restraint system” sec-
tion for further details.
Steering wheel:
Check for any change in the steering conditions,
such as excessive free play, hard steering or strange
noises.
Warning lights and audible reminders:
Make sure that all warning/indicator lights and au-
dible reminders are operating properly.
Windscreen defogger:
Check that the air comes out of the defogger outlets
properly when operating the heater or air condi-
tioner.Windscreen wiper and washer*:
Check that the wipers and washer operate properly
and that the wipers do not streak.
When performing any inspection or maintenance
work on your vehicle, always take care to prevent
serious accidental injury to yourself or damage to
the vehicle. The following are general precautions
which should be closely observed.
Park the vehicle on a level surface, apply the
handbrake securely and block the wheels to
prevent the vehicle from moving. For a manual
transmission models, move the gear lever to
N (Neutral) position.[For automatic transmis-
sion or continuously variable transmission
models: move the selector lever to P (Park)
position.]
Do not work under the engine bonnet while
the engine is hot. Turn off the engine and wait
until it cools down.
Be sure to turn the ignition switch to the “OFF”
or LOCK position.
When the ignition switch is in the ON or Acc
position, the cooling fan may start to operate
suddenly even when the engine is not run-
ning. To avoid injury, always disconnect the
negative battery cable before working near
the engine.
If you must work with the engine running,
keep your hands, clothing, hair and tools away
from moving fans, belts and any other moving
parts.
It is advisable to remove ties and any jewel-
lery, such as rings, watches, etc. before work-
ing on your vehicle.
MAINTENANCE PRECAUTIONS
8-4Maintenance and do-it-yourself