2012 NISSAN QASHQAI sound
[x] Cancel search: soundPage 139 of 297
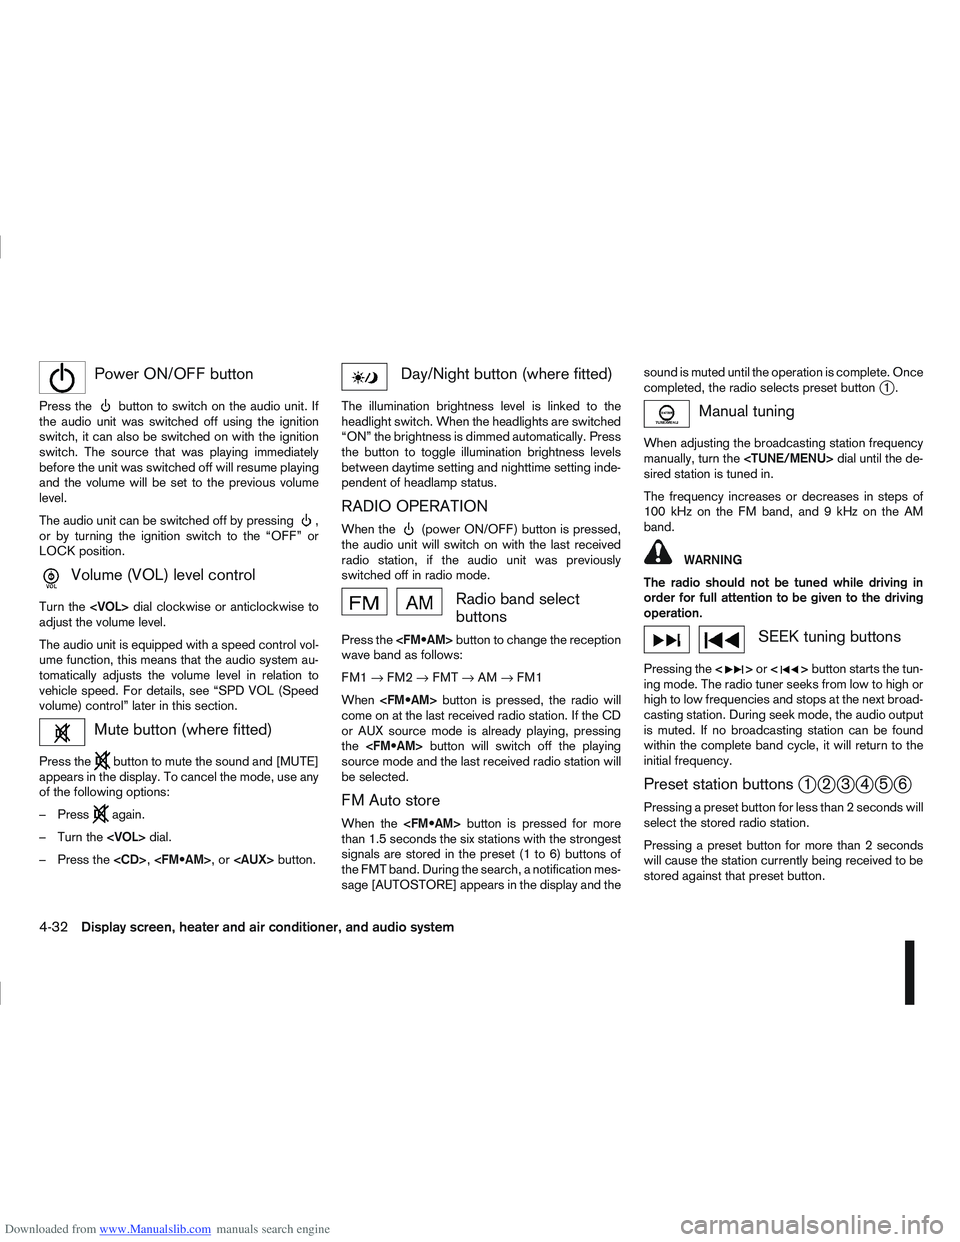
Downloaded from www.Manualslib.com manuals search engine mPower ON/OFF button
Press thebutton to switch on the audio unit. If
the audio unit was switched off using the ignition
switch, it can also be switched on with the ignition
switch. The source that was playing immediately
before the unit was switched off will resume playing
and the volume will be set to the previous volume
level.
The audio unit can be switched off by pressing
,
or by turning the ignition switch to the “OFF” or
LOCK position.
mVolume (VOL) level control
Turn the
adjust the volume level.
The audio unit is equipped with a speed control vol-
ume function, this means that the audio system au-
tomatically adjusts the volume level in relation to
vehicle speed. For details, see “SPD VOL (Speed
volume) control” later in this section.
Mute button (where fitted)
Press thebutton to mute the sound and [MUTE]
appears in the display. To cancel the mode, use any
of the following options:
– Press
again.
– Turn the
– Press the
Day/Night button (where fitted)
The illumination brightness level is linked to the
headlight switch. When the headlights are switched
“ON” the brightness is dimmed automatically. Press
the button to toggle illumination brightness levels
between daytime setting and nighttime setting inde-
pendent of headlamp status.
RADIO OPERATION
When the(power ON/OFF) button is pressed,
the audio unit will switch on with the last received
radio station, if the audio unit was previously
switched off in radio mode.
Radio band select
buttons
Press the button to change the reception
wave band as follows:
FM1 →FM2 →FMT →AM →FM1
When button is pressed, the radio will
come on at the last received radio station. If the CD
or AUX source mode is already playing, pressing
the button will switch off the playing
source mode and the last received radio station will
be selected.
FM Auto store
When the button is pressed for more
than 1.5 seconds the six stations with the strongest
signals are stored in the preset (1 to 6) buttons of
the FMT band. During the search, a notification mes-
sage [AUTOSTORE] appears in the display and the sound is muted until the operation is complete. Once
completed, the radio selects preset button
j1.
Manual tuning
When adjusting the broadcasting station frequency
manually, turn the
sired station is tuned in.
The frequency increases or decreases in steps of
100 kHz on the FM band, and 9 kHz on the AM
band.
WARNING
The radio should not be tuned while driving in
order for full attention to be given to the driving
operation.
SEEK tuning buttons
Pressing the <>or <>button starts the tun-
ing mode. The radio tuner seeks from low to high or
high to low frequencies and stops at the next broad-
casting station. During seek mode, the audio output
is muted. If no broadcasting station can be found
within the complete band cycle, it will return to the
initial frequency.
Preset station buttonsj1j2j3j4j5j6
Pressing a preset button for less than 2 seconds will
select the stored radio station.
Pressing a preset button for more than 2 seconds
will cause the station currently being received to be
stored against that preset button.
4-32Display screen, heater and air conditioner, and audio system
Page 141 of 297

Downloaded from www.Manualslib.com manuals search engine Bass control:
Use this control to enhance or attenuate bass re-
sponse sound.
Turn the
clockwise to adjust the bass settings then press
Treble control:
Use this control to enhance or attenuate the treble.
Turn the
clockwise to adjust the treble settings then press
Balance control:
Use this control to adjust the balance of the volume
between the left and right speakers.
Turn the
clockwise to adjust the left/right balance then press
Fade (Fader) control:
Use this control to adjust the balance of the volume
between the front and rear (where fitted) speakers.
Turn the
clockwise to adjust the front/rear balance then press
Use this control to adjust the volume output from the
auxiliary source.
Turn the
clockwise to select [LO], [MID], or [HI] mode then
press
SPD VOL (Speed volume) control:
This mode controls the volume output from the
speakers automatically in relation to vehicle speed.
When [SPD VOL] is displayed, turn the
the volume level.
Adjusting the setting to 0 (zero) turns off the speed
volume feature. Increasing the speed volume setting
results in the audio volume increasing more rapidly
with vehicle speed. Once chosen, press
to save the setting.
Clock setting
The [Clock] set up screen will appear when select-
ing the [Clock] item from the set up menu.
[Set Time]:
Select [Set Time] then adjust the clock as follows:
1. The hour display will start flashing. Turn the
2. Press the
will start flashing.
3. Turn the
minute. 4. Press
[On/Off]:
Set the clock display between on or off when the
audio unit is turned off.
If set in the [ON] position, the clock will be dis-
played when the audio unit is turned off either by
pressing the
button or when the ignition switch
is placed in the “OFF” position.
[Clock Format):
Set the clock display between 24-hour mode and
12-hour clock mode.
Bluetooth®
For activation or deactivation details, see “Blue-
tooth® operation” later in this section.
Language
Select the appropriate language and press the
automatically adapt the language setting.
[French]
[English]
[German]
[Spanish]
[Portuguese]
[Italian]
[Dutch]
[Turkish]
4-34Display screen, heater and air conditioner, and audio system
Page 166 of 297
Downloaded from www.Manualslib.com manuals search engine WARNING
Do not leave children or adults who would
normally require the support of others alone
in your vehicle. Pets should also not be left
alone. They could accidentally injure them-
selves or others through inadvertent opera-
tion of the vehicle. Also, on hot, sunny days,
temperatures in a closed vehicle could quickly
become high enough to cause severe or pos-
sibly fatal injuries to people or animals.
To prevent luggage or packages from sliding
forward during braking, do not stack anything
in the cargo area higher than the seatbacks.
Secure all cargo with ropes or straps to pre-
vent it from sliding or shifting.
Failure to follow proper seating instructions
see “Seats” in the “1. Safety — seats, seat
belts and supplemental restraint system” sec-
tion, could result in serious personal injury in
an accident or sudden stop.
EXHAUST GAS (Carbon Monoxide)
WARNING
Do not breathe exhaust gases; they contain
colourless and odourless carbon monoxide.
Carbon monoxide is a dangerous gas and can
cause unconsciousness or death.
If you suspect that exhaust fumes are enter-
ing the vehicle, drive with all windows fully
open and have the vehicle inspected immedi-
ately.
Do not run the engine in closed spaces, such
as a garage, for any longer than is absolutely
necessary.
Do not park the vehicle with the engine run-
ning for any extended length of time.
Keep the back door closed while driving, oth-
erwise exhaust gases could be drawn into the
passenger compartment. If you must drive in
this way for some reason, take the following
steps:
1) Open all the windows.
2) Set the air recirculation mode (
)tothe
“OFF” position.
3) Set the fan speed control to the maximum position to circulate the air.
If electrical wiring or other cable connections
must pass to a trailer through the seal of the
body, follow the manufacturer’s recommen-
dations to prevent carbon monoxide entry into
the vehicle.
When a vehicle has been stopped in an open
area with its engine running for any significant
length of time, turn the fan on to force outside
air into the vehicle.
The exhaust system and body should be in-
spected by a NISSAN dealer or qualified work-
shop whenever:
– the vehicle is raised for service.
– you suspect that exhaust fumes are enter-ing into the passenger compartment.
– you notice a change in the sound of the exhaust system.
– you have had an accident involving dam- age to the exhaust system, underbody, or
rear of the vehicle.
PRECAUTIONS WHEN STARTING
AND DRIVING
Starting and driving5-3
Page 171 of 297
Downloaded from www.Manualslib.com manuals search engine For additional information, see “NISSAN Anti-Theft
System (NATS)” in the “3. Pre-driving checks and
adjustments” section.
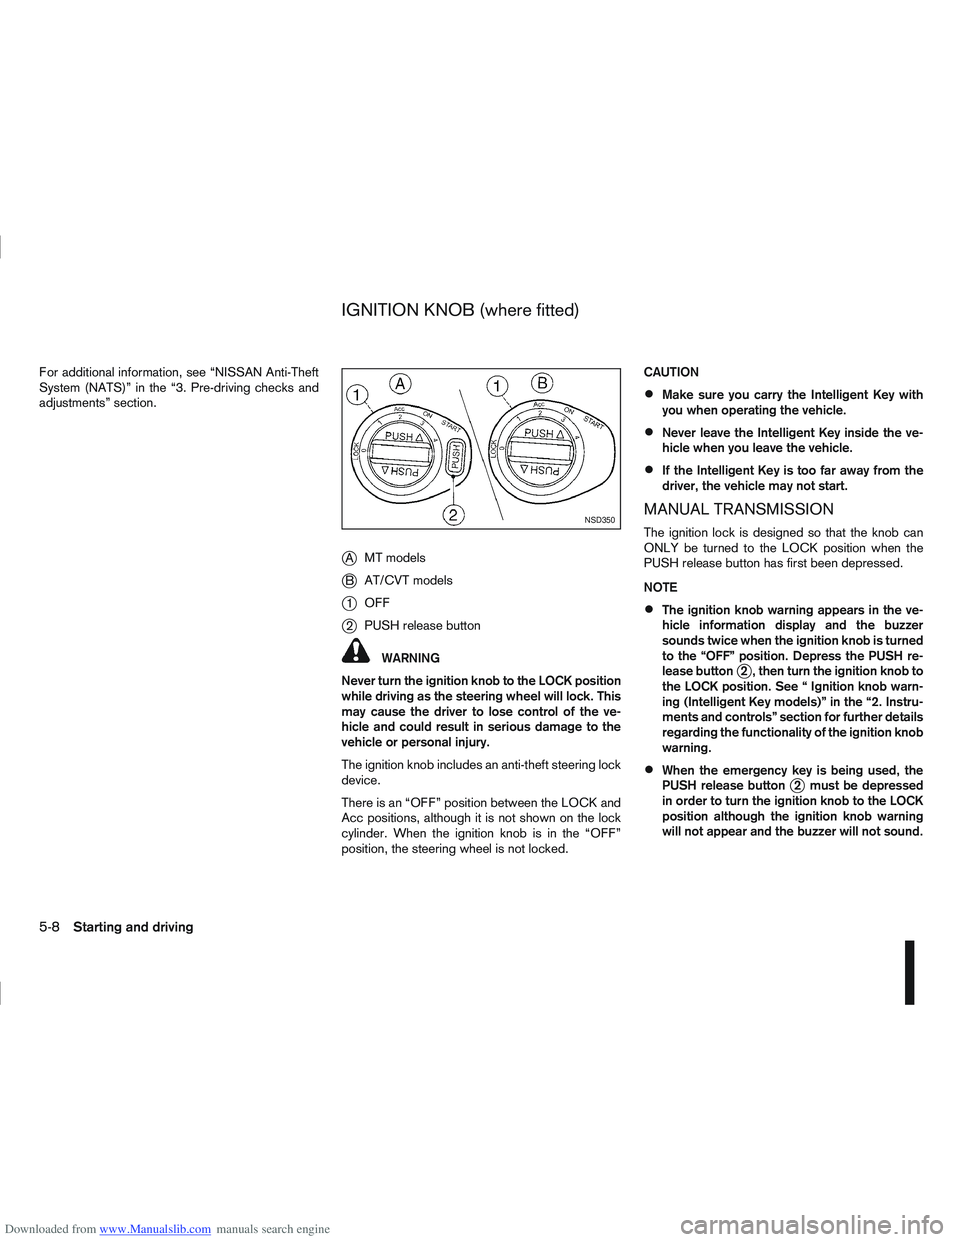
jAMT models
jB AT/CVT models
j1OFF
j2PUSH release button
WARNING
Never turn the ignition knob to the LOCK position
while driving as the steering wheel will lock. This
may cause the driver to lose control of the ve-
hicle and could result in serious damage to the
vehicle or personal injury.
The ignition knob includes an anti-theft steering lock
device.
There is an “OFF” position between the LOCK and
Acc positions, although it is not shown on the lock
cylinder. When the ignition knob is in the “OFF”
position, the steering wheel is not locked. CAUTION
Make sure you carry the Intelligent Key with
you when operating the vehicle.
Never leave the Intelligent Key inside the ve-
hicle when you leave the vehicle.
If the Intelligent Key is too far away from the
driver, the vehicle may not start.
MANUAL TRANSMISSION
The ignition lock is designed so that the knob can
ONLY be turned to the LOCK position when the
PUSH release button has first been depressed.
NOTE
The ignition knob warning appears in the ve-
hicle information display and the buzzer
sounds twice when the ignition knob is turned
to the “OFF” position. Depress the PUSH re-
lease button
j2 , then turn the ignition knob to
the LOCK position. See “ Ignition knob warn-
ing (Intelligent Key models)” in the “2. Instru-
ments and controls” section for further details
regarding the functionality of the ignition knob
warning.
When the emergency key is being used, the
PUSH release buttonj2 must be depressed
in order to turn the ignition knob to the LOCK
position although the ignition knob warning
will not appear and the buzzer will not sound.
NSD350
IGNITION KNOB (where fitted)
5-8Starting and driving
Page 172 of 297
Downloaded from www.Manualslib.com manuals search engine AUTOMATIC TRANSMISSION OR
CONTINUOUSLY VARIABLE
TRANSMISSION
The ignition knob is designed so that it cannot be
turned to the LOCK position until the selector lever
is moved to the P (Park) position. The selector lever
can only be moved from the P (Park) position when
the ignition knob is in the ON position and the
footbrake pedal is depressed.
NOTE
The ignition knob warning appears and a buzzer
sounds twice when the ignition knob is turned to
the “OFF” position. Make sure that the selector
lever is in the P (Park) position, then turn the igni-
tion knob to the LOCK position. See “Warnings
and alerts” in the “2. Instruments and controls”
section for further details regarding the function-
ality of the ignition knob warning.
STEERING LOCK
To lock the steering wheel
In the LOCK position, turn the steering wheel 1/6 of
a turn from the straight up position.
To unlock the steering wheel
Depress the brake pedal, push the ignition knob and
turn it towards the Acc position while gently rotating
the steering wheel right or left.
IGNITION KNOB POSITION
LOCK (Normal parking position) (0)
The steering lock can only be locked in this position.
“OFF” (1)
The engine can be turned off without locking the
steering wheel.
Acc (Accessories) (2)
This position activates electrical accessories, such
as the radio, when the engine is not running.
ON (Normal operating position) (3)
This position turns on the ignition system and the
electrical accessories.
START (4)
The engine starter activates and the engine will start.
As soon as the engine has started, release the knob
immediately. It will return to the ON position.
NOTE
For vehicles fitted with Stop/Start System:
When the engine is automatically stopped by the
Stop/Start System the ignition knob can still be
operated as usual.
At the end of a journey turn the ignition OFF to
avoid a flat battery. The Stop/Start System does
not automatically turn ignition off.
Starting and driving5-9
Page 185 of 297
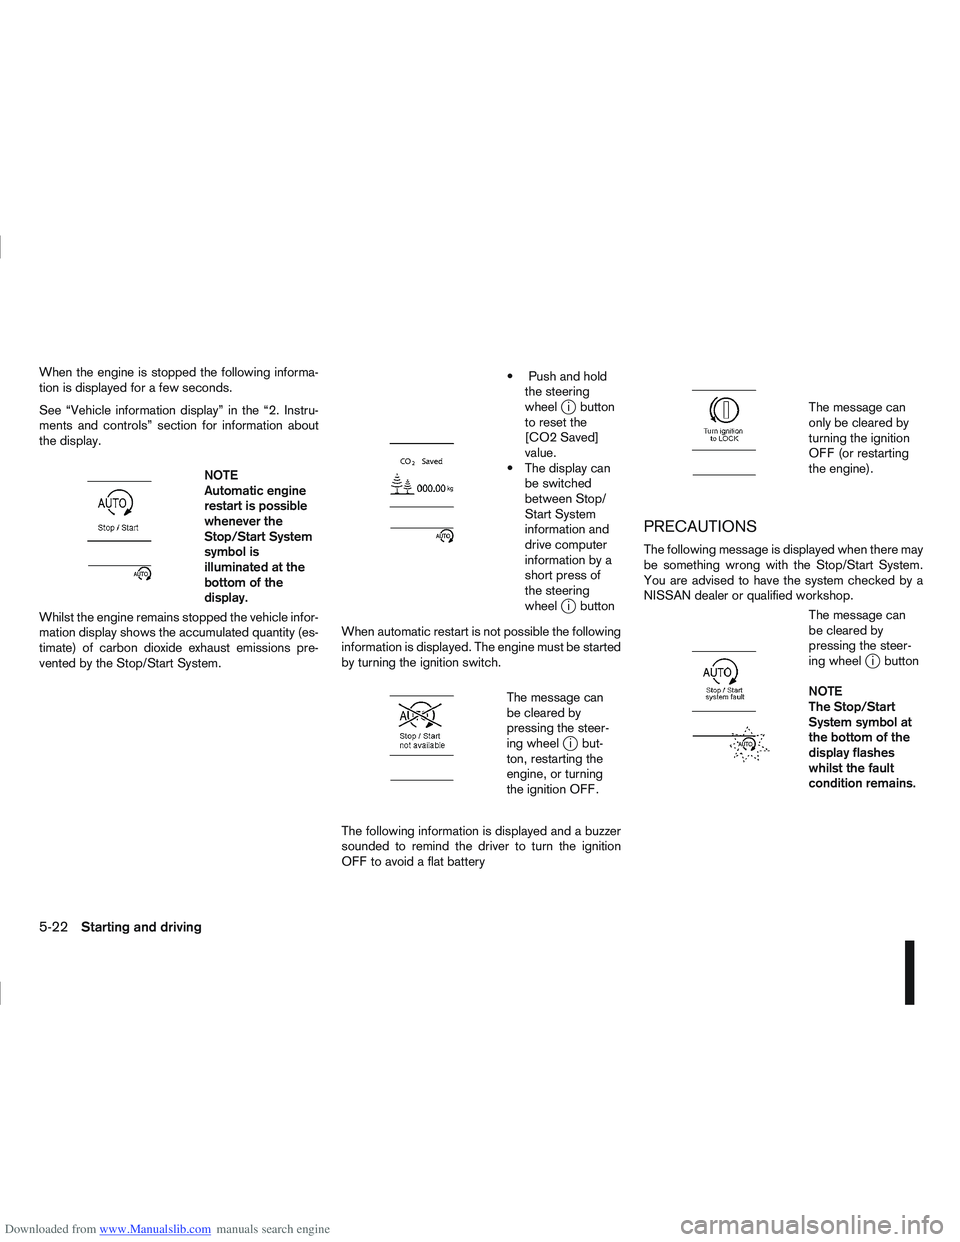
Downloaded from www.Manualslib.com manuals search engine When the engine is stopped the following informa-
tion is displayed for a few seconds.
See “Vehicle information display” in the “2. Instru-
ments and controls” section for information about
the display.
m
NOTE
Automatic engine
restart is possible
whenever the
Stop/Start System
symbol is
illuminated at the
bottomofthe
display.
Whilst the engine remains stopped the vehicle infor-
mation display shows the accumulated quantity (es-
timate) of carbon dioxide exhaust emissions pre-
vented by the Stop/Start System.
m
Push and hold the steering
wheel
ji button
to reset the
[CO2 Saved]
value.
The display can be switched
between Stop/
Start System
information and
drive computer
information by a
short press of
the steering
wheel
ji button
When automatic restart is not possible the following
information is displayed. The engine must be started
by turning the ignition switch.
m
The message can
be cleared by
pressing the steer-
ing wheel
ji but-
ton, restarting the
engine, or turning
the ignition OFF.
The following information is displayed and a buzzer
sounded to remind the driver to turn the ignition
OFF to avoid a flat battery
m
The message can
only be cleared by
turning the ignition
OFF (or restarting
the engine).
PRECAUTIONS
The following message is displayed when there may
be something wrong with the Stop/Start System.
You are advised to have the system checked by a
NISSAN dealer or qualified workshop.
m
The message can
be cleared by
pressing the steer-
ing wheel
ji button
NOTE
The Stop/Start
System symbol at
the bottom of the
display flashes
whilst the fault
condition remains.
5-22Starting and driving
Page 187 of 297
![NISSAN QASHQAI 2012 Owners Manual Downloaded from www.Manualslib.com manuals search engine – [Total Saving]
Estimated CO2 exhaust emissions pre-
vented.
Time that the engine has been stopped by
the Stop/Start System.
NOTE
The [Total NISSAN QASHQAI 2012 Owners Manual Downloaded from www.Manualslib.com manuals search engine – [Total Saving]
Estimated CO2 exhaust emissions pre-
vented.
Time that the engine has been stopped by
the Stop/Start System.
NOTE
The [Total](/manual-img/5/56764/w960_56764-186.png)
Downloaded from www.Manualslib.com manuals search engine – [Total Saving]
Estimated CO2 exhaust emissions pre-
vented.
Time that the engine has been stopped by
the Stop/Start System.
NOTE
The [Total Saving] values cannot be reset
and show accumulated Stop/Start System
information since the vehicle was built.Ultrasonic sensors
jA , fitted in the vehicle’s rear
bumper, measure the distance between the vehicle
and an obstacle when reversing. When reverse gear
is engaged a beeping sound is heard. The frequency
of the beeps will increase the closer you come to
the obstacle until, the sound becomes a constant
beep when, the vehicle is approximately 30 cm (12
in) from the obstacle.
NOTE
This system is intended as an aid to reversing,
to be used in conjunction with your rear view
mirror.
Make sure that the ultrasonic sensors are not
obscured (by dirt, mud, snow, etc.). The Four Wheel Drive (4WD) system is used to
select 2WD, AUTO, or LOCK depending on the
driving conditions.
The Four Wheel Drive (4WD) system controls the
coupling operation. Turn the control (located on the
centre console) to select each mode: 2WD, AUTO
or LOCK depending on the driving conditions.
AUTO: Turn the 4WD mode control to the neutral
(AUTO) position and the Four-Wheel Drive (4WD)
AUTO indicator light
on the combination meter
illuminates.
2WD: Turn the control clockwise to the 2WD posi-
tion.
LOCK: When the control is turned anticlockwise to
the LOCK position, it springs back to the AUTO
position when released. The 4WD LOCK mode in-
dicator light
illuminates on the combination
meter, to show LOCK mode is engaged. To disen-
gage LOCK mode, turn the control anticlockwise
again to the LOCK position and release. The 4WD
LOCK mode indicator light will go out.
NSD300ZNSD297Z
ULTRASONIC PARKING SENSOR
(where fitted) FOUR-WHEEL DRIVE (4WD)
(where fitted)
5-24Starting and driving
Page 233 of 297

Downloaded from www.Manualslib.com manuals search engine Your new NISSAN has been designed to have mini-
mum maintenance requirements with longer service
intervals, to save you both time and money. How-
ever, some day-to-day and regular maintenance is
essential to maintain your NISSAN’s good mechani-
cal condition, as well as its emission and engine
performance.
It is the owner’s responsibility to make sure that the
specified maintenance, as well as general mainte-
nance, is performed.
As the vehicle owner, you are the only one who can
ensure that your vehicle receives the proper mainte-
nance care.
SCHEDULED MAINTENANCE
For your convenience, the required scheduled main-
tenance items are described and listed in the sepa-
rate Warranty Information and Maintenance book-
let. You must refer to that booklet to ensure that
necessary maintenance is performed on your
NISSAN vehicle at regular intervals.
GENERAL MAINTENANCE
General maintenance includes those items which
should be checked during normal day-to-day opera-
tion of the vehicle. They are essential if your vehicle
is to continue to operate properly. It is your respon-
sibility to perform these procedures regularly as pre-
scribed.
Performing general maintenance checks requires
minimal mechanical skill and a few general automo-
tive tools.These checks or inspections can be done by your-
self, a qualified technician or, if you prefer, your
NISSAN dealer or qualified workshop.
WHERE TO GO FOR SERVICE
If maintenance service is required or your vehicle
appears to malfunction, have the systems checked
and tuned by an authorised NISSAN dealer or quali-
fied workshop.
During the normal day-to-day operation of the ve-
hicle, general maintenance should be performed
regularly as prescribed in this section. If you detect
any unusual sounds, vibrations or smell, be sure to
check for the cause or have a NISSAN dealer or
qualified workshop do it promptly. In addition, you
should notify a NISSAN dealer or qualified work-
shop if repairs are required.
When performing any checks or maintenance work,
closely observe the “Maintenance precautions” later
in this section.
EXPLANATION OF GENERAL
MAINTENANCE ITEMS
Additional information on the following items with
an asterisk (*) is found later in this section.
The maintenance items listed here should be per-
formed from time to time, unless otherwise speci-
fied.
Outside the vehicle
Back door, doors and bonnet:
Check that the back door, all doors and the bonnet
operate properly. Also ensure that all latches lock
securely. Lubricate hinges and latches if necessary.
Make sure that the secondary latch keeps the bon-
net from opening when the primary latch is released.
When driving in areas using road salt or other cor-
rosive materials, check for lubrication frequently.
MAINTENANCE REQUIREMENTS
GENERAL MAINTENANCE
8-2Maintenance and do-it-yourself