2012 NISSAN QASHQAI automatic transmission
[x] Cancel search: automatic transmissionPage 179 of 297

Downloaded from www.Manualslib.com manuals search engine Manual shift mode
When the selector lever is shifted from D (Drive) to
the manual shift gate with the vehicle stopped or
while driving, the transmission enters manual shift
mode. Shift range can be selected manually.
In manual shift mode, the selected gear is displayed
on the position indicator in the combination meter.
Shift ranges up or down one by one as follows:
1st⇔2nd ⇔3rd ⇔4th ⇔5th ⇔6th
When shifting up, move the selector lever to the
+ (up) side. (Shifts to higher range).
When shifting down, move the selector lever to
the – (down) side. (Shifts to lower range).
Moving the selector lever rapidly to the same
side twice will shift the ranges in succession.
Use the 1st position when driving slowly on steep
hills, slow driving through deep snow, sand or
mud, or for maximum engine braking on steep
downhill grades.
Use the 2nd, 3rd or 4th position when driving
steep hills or for engine braking on steep down-
hill grades.
Use the 5th position for driving up or down long
slopes.
Use the 6th position for all normal forward driv-
ing. However, you need to shift down the gears
when accelerating or passing another vehicle.
When cancelling manual shift mode, return the
selector lever to the D (Drive) position. The trans-
mission returns to the normal driving mode.
In manual shift mode, the transmission may
not shift to the selected gear under certain
circumstances. This helps maintain driving
performance and reduces the chance of ve-
hicle damage or loss of control.
If the engine is revving up to a hazardous
speed in manual shift mode, the transmission
may shift up automatically. When the vehicle
speed decreases, the transmission automati-
cally shifts down and shifts to 1st gear before
the vehicle comes to a stop.
Accelerator downshift – In the D (Drive)
position
For rapid passing or driving uphill, fully depress the
accelerator pedal to the floor. This shifts the trans-
mission down into a lower gear, depending on the
vehicle speed.
Shift lock release
If the battery is discharged, the selector lever can-
not be moved from the P (Park) position even with
the brake pedal depressed and the ignition switch in
the ON position.
To move the selector lever, remove the cap
j1
(where fitted) then push the shift lock release button
jA with a suitable toolj2 (as illustrated) and press
the selector lever buttonj3 . It is now possible to
move the selector lever to the N (Neutral) position
j4.
For your safety, make sure the handbrake is applied
and the brake pedal is depressed during the opera-
tion.
If there is any problem moving the lever out of the P
(Park) position, have a NISSAN dealer or qualified
workshop to check the automatic transmission sys-
tem as soon as possible.
NSD347
Cap (where fitted)
5-16Starting and driving
Page 180 of 297
Downloaded from www.Manualslib.com manuals search engine Fail-safe
AT models:
When the fail-safe operation occurs, the AT CHECK
indicator light comes on for 2 seconds and the auto-
matic transmission will be locked in the third gear.
Have a NISSAN dealer or qualified workshop check
and repair the transmission.
CVT models:
When the fail-safe operation occurs, the vehicle
speed will be decreased automatically to reduce the
chance of transmission damage. Vehicle speed can
be controlled with the accelerator pedal, but the
engine power may be limited. Have a NISSAN dealer
or qualified workshop check and repair the trans-
mission.
AT or CVT models:
If the vehicle is driven under extreme conditions,
such as excessive wheel spinning and subse-
quent hard braking, the Fail-safe system may be
activated. This will occur even if all electrical cir-
cuits are functioning properly. In this case, turn
the ignition switch “OFF” and wait for 10 sec-
onds. Then turn the key back to the ON position.
The vehicle should return to its normal operating
condition. If it does not return to its normal oper-
ating condition have your NISSAN dealer or quali-
fied workshop check the transmission and have
the transmission repaired by a NISSAN dealer or
qualified workshop, if necessary.WARNING
When the fail safe operation occurs, the vehicle
speed may be lower than other traffic, which
could increase the chance of a collision. Be es-
pecially careful when driving. If necessary, drive
to the side of the road at a safe place and away
from traffic, to allow the transmission to return to
normal operation, or have the transmission re-
paired by a NISSAN dealer or qualified workshop,
if necessary.
DRIVING WITH CONTINUOUSLY
VARIABLE TRANSMISSION (CVT)
(Models without manual shift)
The Continuously Variable Transmission (CVT) in
your vehicle is electronically controlled to produce
maximum power and smooth operation.
The recommended operating procedures for this
transmission are shown on the following pages. Fol-
low these procedures for maximum vehicle perfor-
mance and driving enjoyment.
WARNING
Do not downshift abruptly on slippery roads. This
may cause a loss of control.
CAUTION
The cold engine idle speed is high, so use
caution when shifting the transmission into a
forward or reverse position before the engine
has warmed up.
Avoid revving up the engine while the vehicle
is stopped. This could cause unexpected ve-
hicle movement.
Never shift to either the P (Park) or R (Re-
verse) position while the vehicle is moving.
This could cause serious damage to the trans-
mission.
Start the engine in either the P (Park) or N
(Neutral) position. The engine will not start in
any other position. If it does, have your ve-
hicle checked by a NISSAN dealer or qualified
workshop.
Shift into the P (Park) position and apply the
handbrake when at a standstill for longer than
a short waiting period.
Keep the engine at idling speed while shifting
from the N (Neutral) position to any driving
position.
When stopping the vehicle on an uphill grade,
do not hold the vehicle by depressing the ac-
celerator pedal. The footbrake pedal should
be depressed in this situation.
Starting vehicle
1. After starting the engine, fully depress the foot- brake pedal before moving the selector lever out
of the P (Park) position.
2. Keep the footbrake pedal depressed and move the selector lever to a driving position.
3. Release the handbrake, the footbrake pedal, and then gradually start the vehicle in motion.
Starting and driving5-17
Page 182 of 297

Downloaded from www.Manualslib.com manuals search engine Place the ignition switch in the “OFF” position.
Models without Intelligent Key system:
Place the ignition switch in the LOCK position.
P (Park):
Use this position when the vehicle is parked or when
starting the engine. Make sure that the vehicle is
completely stopped and move the selector lever
into the P (Park) position. Apply the handbrake.
When parking on a hill, first depress the footbrake
pedal, apply the handbrake, and then move the se-
lector lever into the P (Park) position.
R (Reverse):
Use this position to reverse. Make sure that the
vehicle is completely stopped before selecting the R
(Reverse) position.
When the selector lever is in the R (Reverse) posi-
tion, either the NISSAN Connect monitor (where fit-
ted) or the ultra sonic parking sensor (where fitted)
will be activated. For details, see “Rear-view moni-
tor (where fitted)” or “Around view monitor (where
fitted)” earlier in this section or “Ultrasonic Parking
Sensor (where fitted)” later in this section
N (Neutral):
Neither the forward nor reverse gear is engaged.
The engine can be started in this position. You may
shift to the N (Neutral) position and restart a stalled
engine while the vehicle is moving.
D (Drive):
Use this position for all normal forward driving. L (Low):
Use this position when climbing steep hills slowly or
driving slowly through deep snow, sand or mud, or
for maximum engine braking on steep downhill
grades.
SPORT mode switch
To select the SPORT mode, push the SPORT mode
switch with the selector lever in the D (Drive) posi-
tion. The SPORT mode indicator light
in the
meter panel illuminates. To turn off the SPORT
mode, push the SPORT mode switch again. The
SPORT mode indicator light will turn off. When the
selector lever is shifted to any position other than D,
the SPORT mode will be automatically turned off.
OFF position:
For normal driving and fuel economy, use the OFF
position. ON position:
For driving up or down long slopes where engine
braking is necessary, or for powerful acceleration,
use the ON position. The transmission will automati-
cally select a different gear ratio, allowing the en-
gine to provide high output.
When driving conditions change, push the switch to
turn the SPORT mode off.
Remember not to drive at high speeds for extended
periods of time with the SPORT mode in the ON
position. This reduces fuel economy.
Accelerator downshift
- in the D position -
For passing or climbing hills, depress the accelera-
tor pedal to the floor. This shifts the transmission
down into a lower gear, depending on the vehicle
speed.NSD399
Left-Hand Drive (LHD) model
NSD400
Starting and driving5-19
Page 192 of 297

Downloaded from www.Manualslib.com manuals search engine The cruise control system allows driving at constant
speeds without keeping your foot on the accelerator
pedal.
WARNING
The cruise control system ONLY maintains a
constant vehicle speed, it does not replace
the driver.
Always observe the posted speed limits and
do not set the speed above them.
Do not use the cruise control system when
driving under the following conditions. Doing
so could cause a loss of vehicle control and
result in an accident.
– When it is not possible to keep the vehicleat a constant speed
– When driving in heavy traffic
– When driving in traffic that varies speed
– When driving in windy areas
– When driving on winding or hilly roads
– When driving on slippery (rain, snow, ice, etc.) roads
CAUTION
On manual transmission models, do not shift into
N (Neutral) without depressing the clutch pedal
when the cruise control is set. Should this occur,
depress the clutch pedal and turn the cruise con-
trol main switch off immediately. Failure to do so
may cause engine damage. When the cruise control system is on the speed lim-
iter cannot be operated.
The cruise control system operation switches are
located on the steering wheel (right side).
1.
RES (Resume) switch
2. SET switch
3. CANCEL switch
4. Speed limiter main “ON/OFF” switch (For
details, see “Speed limiter” later in this sec-
tion)
5. Cruise control main “ON/OFF” switch 6.
CRUISE indicator
7. Cruise control symbol
8. SET indicator
9. Set speed value
The cruise control system operating condition is
shown in the vehicle information display. For details,
see “Cruise control/Speed limiter indicator (where
fitted)” in the “2. Instruments and controls” section.
PRECAUTIONS ON CRUISE
CONTROL
The cruise control system will be automatically
cancelled when there is a malfunction. Have the
system checked by a NISSAN dealer or quali-
fied workshop.
To properly set the cruise control system, per-
form the steps as described in “Cruise control
system operations” later in this section.
NSD373
NSD375
CRUISE CONTROL (where fitted)
Starting and driving5-29
Page 196 of 297
Downloaded from www.Manualslib.com manuals search engine The new set speed limit valuej9 will be displayed
in the combination meter display.
Cancelling a speed limit
To cancel a set speed limit, push the CANCEL
switchj3 . The SET indicatorj8 in the combination
meter will be turned off. The set speed valuej9 will
remain displayed.
It is also possible to override the speed limiter by
fully depressing the accelerator pedal beyond the
resistance point.
WARNING
The vehicle may accelerate when the speed
limiter cancels.
When additional floor mats are used, be sure
that they are correctly secured and that they
cannot interfere with the accelerator pedal.
Mats not adapted to the vehicle may prevent
proper operation of the speed limiter.
Fully depress the accelerator pedal beyond the re-
sistance point. The speed limiter will be suspended
to allow driving above the set speed. The set speed
value
j9 will flash. The speed limiter will automati-
cally resume when the vehicle speed drops below
the set speed limit.
Resuming a previous set speed
If a set speed limit has been cancelled, the set speed
valuej9 will remain displayed in the combination
meter and the speed will be stored in the speed lim-
iter memory. This speed limit can be reactivated by pressing the
RES (Resume) switch
j1 upwards.
If the current vehicle speed is higher than the previ-
ous set speed, the accelerator pedal will not work
and the set speed value
j9 will flash until the vehicle
speed drops below the set speed limit.
Turning the speed limiter off
The speed limiter system will be turned off when
one of the following operations is performed:
Push the speed limiter main “ON/OFF” switchj4 . The speed limiter symbolj7 , the LIMIT indi-
catorj6 , the SET indicatorj8 , and the set
speed valuej9 will turn off in the combination
meter display.
Push the cruise control main “ON/OFF” switchj5 . The speed limiter information in the combi-
nation meter will be replaced with the cruise con-
trol information. For details see “Cruise control
(where fitted)” earlier in this section.
When the vehicle is stopped and the ignition is
turned to the off position.
Turning off the speed limiter will erase the set
speed limit memory.
Speed limiter malfunction
If the speed limiter malfunctions, the set indicatorj8 in the combination meter display will flash.
Turn the speed limiter off by pushing the speed lim-
iter main “ON/OFF” switch
j4 and have the system
checked by a NISSAN dealer or qualified workshop.
WARNING
Do not park the vehicle over flammable mate-
rials, such as dry grass, waste paper, or rags.
They may ignite and cause a fire.
Safe parking procedures require that:
– The handbrake is applied.
– The gear lever is placed in an appropriate gear for manual transmission models.
– The selector lever is placed in the P (Park) position for automatic transmission or con-
tinuously variable transmission models.
Failure to follow the above recommenda-
tions could cause the vehicle to move un-
expectedly or roll away and result in an
accident.
Never leave the engine running while the ve-
hicle is unattended.
Do not leave children or adults who would
normally require the support of others alone
in your vehicle. Pets should also not be left
alone either. On hot, sunny days, tempera-
tures in a closed vehicle could quickly be-
come high enough to cause severe or possi-
bly fatal injuries to people or animals.
Manual transmission models:
Depress the clutch pedal and place the gear
lever in the R (Reverse) position. When parking
on an uphill gradient, place the gear lever in the
1st (Low gear) position.
PARKING
Starting and driving5-33
Page 197 of 297
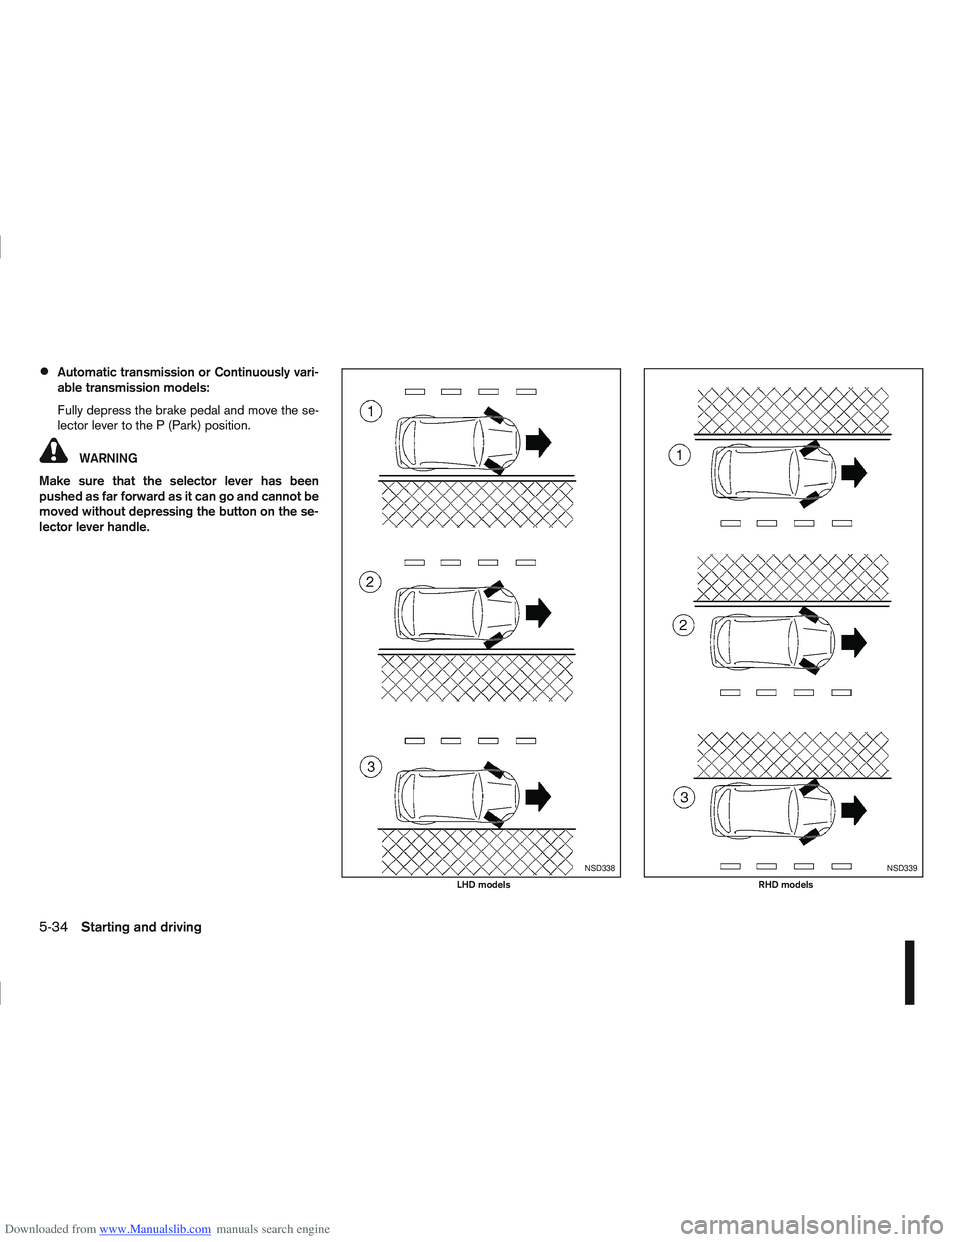
Downloaded from www.Manualslib.com manuals search engine Automatic transmission or Continuously vari-
able transmission models:
Fully depress the brake pedal and move the se-
lector lever to the P (Park) position.
WARNING
Make sure that the selector lever has been
pushed as far forward as it can go and cannot be
moved without depressing the button on the se-
lector lever handle.
NSD338
LHD models
NSD339
RHD models
5-34Starting and driving
Page 209 of 297
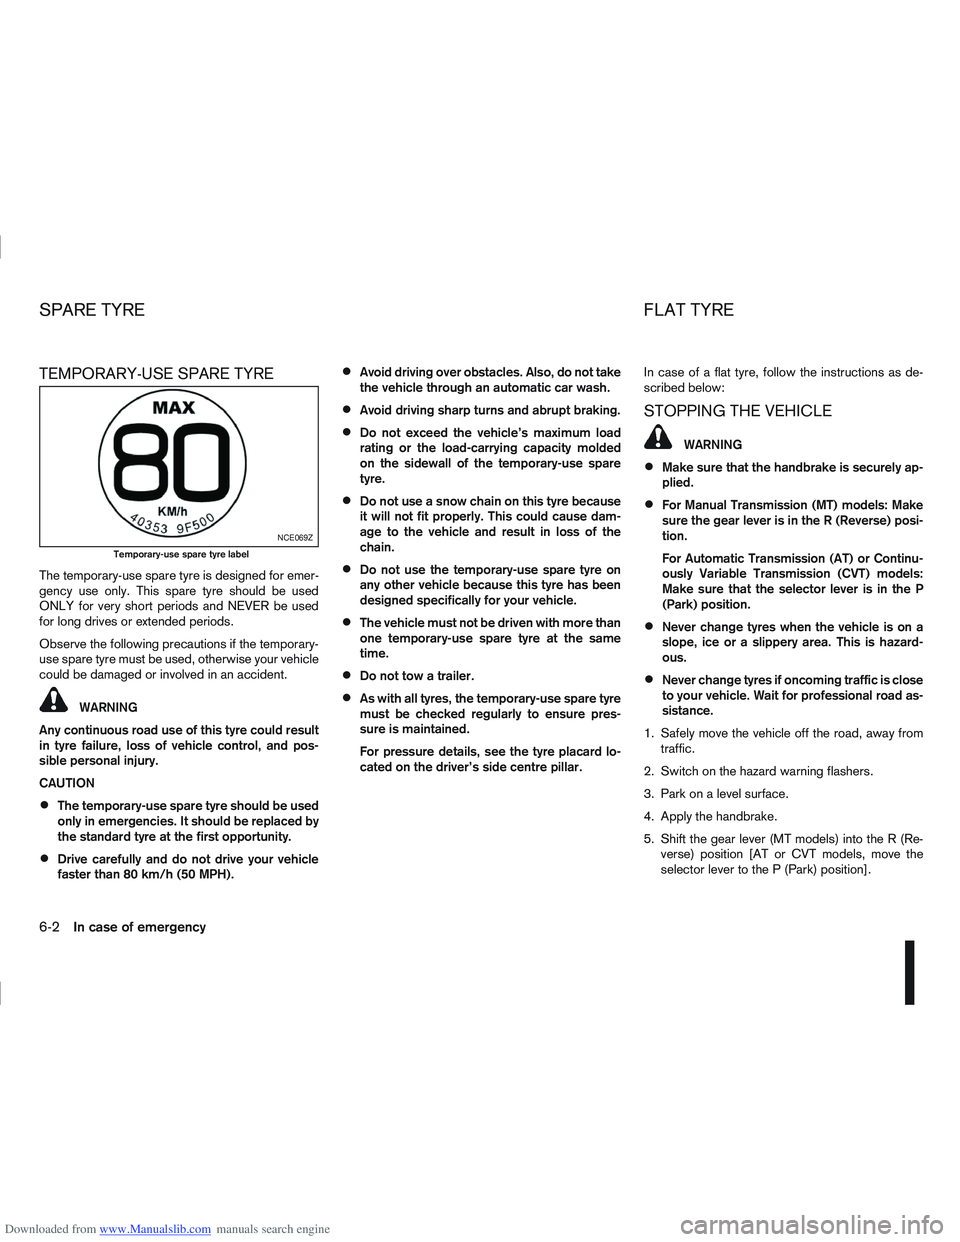
Downloaded from www.Manualslib.com manuals search engine TEMPORARY-USE SPARE TYRE
The temporary-use spare tyre is designed for emer-
gency use only. This spare tyre should be used
ONLY for very short periods and NEVER be used
for long drives or extended periods.
Observe the following precautions if the temporary-
use spare tyre must be used, otherwise your vehicle
could be damaged or involved in an accident.
WARNING
Any continuous road use of this tyre could result
in tyre failure, loss of vehicle control, and pos-
sible personal injury.
CAUTION
The temporary-use spare tyre should be used
only in emergencies. It should be replaced by
the standard tyre at the first opportunity.
Drive carefully and do not drive your vehicle
faster than 80 km/h (50 MPH).
Avoid driving over obstacles. Also, do not take
the vehicle through an automatic car wash.
Avoid driving sharp turns and abrupt braking.
Do not exceed the vehicle’s maximum load
rating or the load-carrying capacity molded
on the sidewall of the temporary-use spare
tyre.
Do not use a snow chain on this tyre because
it will not fit properly. This could cause dam-
age to the vehicle and result in loss of the
chain.
Do not use the temporary-use spare tyre on
any other vehicle because this tyre has been
designed specifically for your vehicle.
The vehicle must not be driven with more than
one temporary-use spare tyre at the same
time.
Do not tow a trailer.
As with all tyres, the temporary-use spare tyre
must be checked regularly to ensure pres-
sure is maintained.
For pressure details, see the tyre placard lo-
cated on the driver’s side centre pillar. In case of a flat tyre, follow the instructions as de-
scribed below:
STOPPING THE VEHICLE
WARNING
Make sure that the handbrake is securely ap-
plied.
For Manual Transmission (MT) models: Make
sure the gear lever is in the R (Reverse) posi-
tion.
For Automatic Transmission (AT) or Continu-
ously Variable Transmission (CVT) models:
Make sure that the selector lever is in the P
(Park) position.
Never change tyres when the vehicle is on a
slope, ice or a slippery area. This is hazard-
ous.
Never change tyres if oncoming traffic is close
to your vehicle. Wait for professional road as-
sistance.
1. Safely move the vehicle off the road, away from traffic.
2. Switch on the hazard warning flashers.
3. Park on a level surface.
4. Apply the handbrake.
5. Shift the gear lever (MT models) into the R (Re- verse) position [AT or CVT models, move the
selector lever to the P (Park) position].
NCE069Z
Temporary-use spare tyre label
SPARE TYRE FLAT TYRE
6-2In case of emergency
Page 219 of 297
Downloaded from www.Manualslib.com manuals search engine CAUTION
Three-way catalyst equipped models should
not be started by pushing the vehicle as the
three-way catalyst may be damaged.
Automatic transmission (AT) or continuously
variable transmission (CVT) models cannot be
started by pushing the vehicle. This may cause
transmission damage.
Never try to start the vehicle by towing it; when
the engine starts, the forward surge could
cause the vehicle to collide with the tow ve-
hicle.
WARNING
Never continue driving if the engine of your
vehicle overheats. Doing so could cause a ve-
hicle fire.
Never open the bonnet if steam is coming
out.
Never remove engine coolant reservoir cap
when the engine is hot. If the engine coolant
reservoir cap is removed while the engine is
hot, pressurised hot water will spurt out and
possibly cause burning, scalding or serious
injury.
If steam or coolant is coming out of the en-
gine, stand clear of the vehicle to prevent get-
ting injured.
The engine cooling fan will start whenever the
coolant temperature exceeds preset degrees.
Be careful not to allow your hands, hair, jewel-
lery or clothing to come into contact with, or
get caught in, the cooling fan or drive belts.
If the engine of your vehicle is overheating (indi-
cated by the engine coolant temperature gauge) or
if you feel a lack of engine power, detect unusual
noise, etc., proceed as follows:
1. Move and park the vehicle safely off the road and away from traffic.
2. Turn on the hazard warning flasher lights.
3. Apply the handbrake. 4. Shift the gear lever (MT models) into the N (Neu-
tral) position [AT or CVT models, move the se-
lector lever to the P (Park) position].
DO NOT STOP THE ENGINE.
5. Open all windows.
6. Switch off the air conditioner system (where fit- ted).
7. Set the heater or air conditioner temperature control to maximum “HOT” and fan speed con-
trol to maximum speed.
8. Exit the vehicle.
9. Visually inspect and listen for steam or coolant escaping from the radiator before opening the
bonnet. Wait until no steam or coolant can be
seen before proceeding.
10. Open the bonnet. For details, see “Bonnet release” in the “3. Pre-driving checks and
adjustments” section.
11. Visually check if the cooling fan is running.
12. Visually check the radiator and radiator hoses for leakage.
WARNING
If coolant is leaking, the cooling fan belt is
missing or loose or the cooling fan is not run-
ning, stop the engine.
13. After the engine cools down, check the coolant level in the engine coolant reservoir with the
engine running.
PUSH-STARTING ENGINE OVERHEAT
6-12In case of emergency