2012 NISSAN NOTE Switch
[x] Cancel search: SwitchPage 28 of 235

•The air bag warning light remains on after ap-
proximately 7 seconds.
•The air bag warning light flashes intermittently.
•The air bag warning light does not come on at
all.
Unless checked and repaired, the Supplemental Re-
straint System (SRS) and/or pre-tensioner seat belt
may not function properly. It must be checked and
repaired.
When selling your vehicle, we request that you in-
form the buyer about the pre-tensioner seat belt sys-
tem and guide the buyer to the appropriate sections
in this Owner’s Manual.This Supplemental Restraint System (SRS) section
contains important information concerning the driver
and front passenger air bags, side air bags, curtain
air bags and pre-tensioner seat belt system.
Front air bag system:this system can help cushion
the impact force to the face and chest of the driver
and front passenger in certain frontal collisions.
NOTE
It is possible to disable the front passenger air
bag. See “Front passenger air bag indicator light”
later in this section for further details.
Side air bag system:this system can help cushion
the impact force to the chest area of the driver and
front passenger in certain side impact collisions.
The side air bag is designed to inflate on the side
where the vehicle is impacted.
Curtain air bag system (where fitted):this system
can help cushion the impact force to the head of
occupants in the front and rear outer seating posi-
tion. Curtain air bags are designed to inflate on the
side where the vehicle is impacted.
SRS is designed tosupplementthe crash protec-
tion provided by the driver and front passenger seat
belts and isnot designed to substitutethem. Seat
belts should always be correctly worn and the driver
and front passenger seated a suitable distance away
from the steering wheel, instrument panel and front
door finishers. For additional information, see “Seat
belts” earlier in this section.
After turning the ignition switch to the ON or
START position, the air bag warning light illumi-nates. The air bag warning light will turn off after
approximately 7 seconds if the system is opera-
tional. See “Warning/indicator lights and audible
reminders” in the “2. Instruments and controls”
sectionfor further details.
The air bag will operate only when the ignition
switch is in the ON or START position.
WARNING
Driver and front passenger air bags.
•The air bags ordinarily will not inflate in the
event of a side impact, rear impact, roll over,
or lower severity frontal collision. Always wear
your seat belts to help reduce the risk or se-
verity of injury in various kinds of accidents.
•The seat belts and the air bags are most ef-
fective when you are sitting back and upright
in the seat. Air bags inflate with great force. If
you are unrestrained, leaning forward, sitting
sideways or out of position in any way, you
are at greater risk of injury or death in a crash
and may also receive serious or fatal injuries
from the air bag if you are up against it when
it inflates.
SUPPLEMENTAL RESTRAINT
SYSTEM (air bag system)
1-10Safety — seats, seat belts and supplemental restraint system
Page 32 of 235

monitored by the SRS air bag warning light are: all
sensors, air bag modules and all related wiring, and
the pre-tensioner seat belt.
After turning the ignition switch to the ON or
START position, the supplemental air bag warn-
ing light illuminates. The air bag warning light will
turn off after approximately 7 seconds if the sys-
tem is operational.
If any of the following conditions occurs, the front air
bag, side and curtain air bag systems (where fitted)
and pre-tensioner seat belt need servicing and
should be taken to the nearest NISSAN dealer or
qualified workshop:
•The SRS air bag warning light remains on after
approximately 7 seconds.
•The SRS air bag warning light flashes intermit-
tently.
•The SRS air bag warning light does not come on
at all.
Under these conditions, the front air bags, side and
curtain air bags (where fitted) and/or pre-tensioner
seat belt will not operate properly. They must be
checked and repaired.
Repair and replacement procedure
The front air bags, side air bags (where fitted), cur-
tain air bags (where fitted) and pre-tensioner seat
belt are designed to activate on a one-time-only ba-
sis. As a reminder, unless it is damaged, the air bag
warning light will remain illuminated after inflationhas occurred. Repair and replacement of the air bag
system should be done only by a NISSAN dealer or
qualified workshop.
When maintenance work is required on the vehicle,
the air bag systems, related parts and pre-tensioner
seat belt should be pointed out to the person con-
ducting the maintenance. The ignition switch should
always be in the LOCK position when working un-
der the bonnet or inside the vehicle.
WARNING
•Once the air bag has inflated or the pre-ten-
sioner seat belt has been activated, the air
bag module and pre-tensioner seat belt will
not function again and must be replaced. The
air bag module should be replaced by a
NISSAN dealer or qualified workshop. The air
bag module cannot be repaired.
•All air bag systems should be inspected by a
NISSAN dealer or qualified workshop if there
is any damage to the front end portion of the
vehicle.
•When selling your vehicle, we request that you
inform the buyer about the air bag system and
guide the buyer to the appropriate sections in
this Owner’s Manual.
•If you need to dispose of an air bag or scrap
the vehicle, contact a NISSAN dealer or quali-
fied workshop. Correct air bag disposal pro-
cedures are set forth in the appropriate
NISSAN Service Manual. Incorrect disposal
procedures could cause personal injury.Note that the above illustration is for LHD models.
FRONT PASSENGER AIR BAG
INDICATOR LIGHT
WARNING
•Since your vehicle is equipped with a front
passenger air bag, it is not permitted to install
a rear facing child restraint on the front pas-
senger seat unless the front passenger air bag
has been previously deactivated.
•Do not fit a rear facing child seat on the front
passenger seat if the air bag activation/deac-
tivation system is malfunctioning. Your ve-
hicle must be immediately taken to a NISSAN
dealer or qualified workshop in such situa-
tion.
The front passenger air bag indicator light
lo-
cated on the centre console illuminates for approxi-
mately 7 seconds and then goes off. This means the
system is operational.
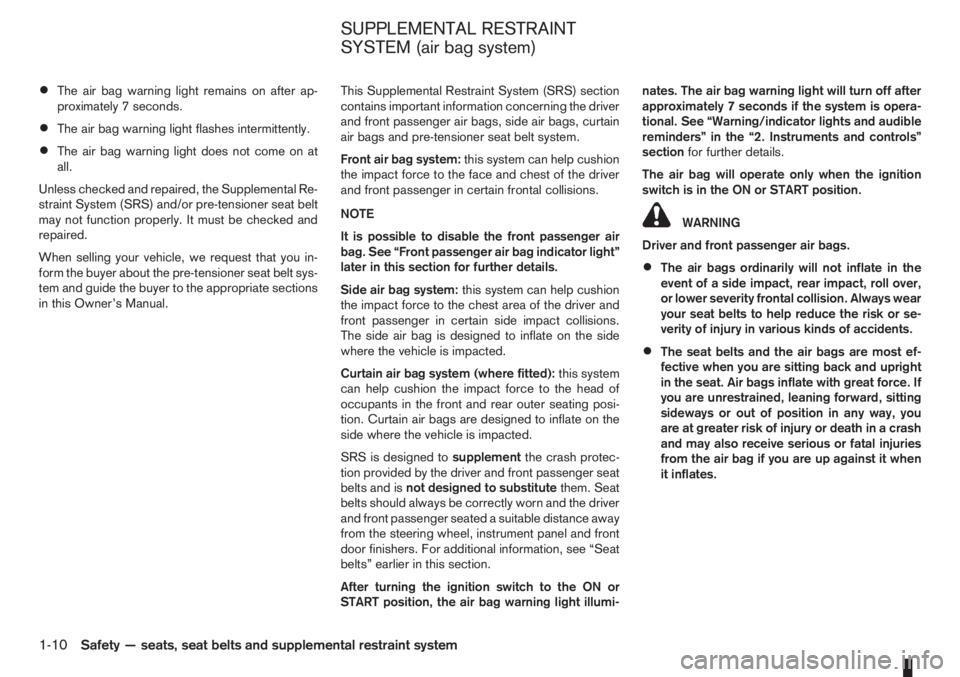
NPA732Z
1-14Safety — seats, seat belts and supplemental restraint system
Page 33 of 235

The front passenger air bag indicator light warns of
front passenger air bag status. If the front passen-
ger air bag has been deactivated, the light comes on
and stays on as long as the front passenger air bag
switch remains in the OFF position.
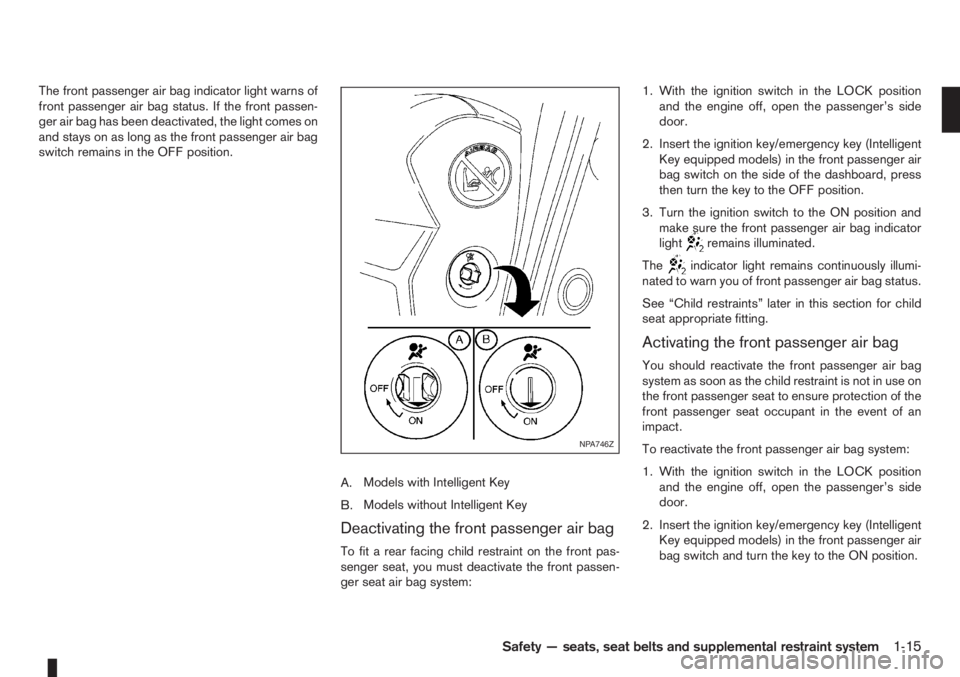
A.Models with Intelligent Key
B.Models without Intelligent Key
Deactivating the front passenger air bag
To fit a rear facing child restraint on the front pas-
senger seat, you must deactivate the front passen-
ger seat air bag system:1. With the ignition switch in the LOCK position
and the engine off, open the passenger’s side
door.
2. Insert the ignition key/emergency key (Intelligent
Key equipped models) in the front passenger air
bag switch on the side of the dashboard, press
then turn the key to the OFF position.
3. Turn the ignition switch to the ON position and
make sure the front passenger air bag indicator
light
remains illuminated.
The
indicator light remains continuously illumi-
nated to warn you of front passenger air bag status.
See “Child restraints” later in this section for child
seat appropriate fitting.
Activating the front passenger air bag
You should reactivate the front passenger air bag
system as soon as the child restraint is not in use on
the front passenger seat to ensure protection of the
front passenger seat occupant in the event of an
impact.
To reactivate the front passenger air bag system:
1. With the ignition switch in the LOCK position
and the engine off, open the passenger’s side
door.
2. Insert the ignition key/emergency key (Intelligent
Key equipped models) in the front passenger air
bag switch and turn the key to the ON position.
NPA746Z
Safety — seats, seat belts and supplemental restraint system1-15
Page 34 of 235

3. Turn the ignition switch to the ON position and
make sure the front passenger air bag indicator
light
illuminates for a few seconds and then
turns off.
WARNING
If any of the following conditions occur after the
ignition switch has been turned to the ON posi-
tion, the front passenger air bag system needs
servicing and your vehicle must be taken to the
nearest NISSAN dealer or qualified workshop.
•The front passenger air bag indicator light
comes on and remains illuminated after ap-
proximately 7 seconds while the front pas-
senger air bag switch is ON.
•The front passenger air bag indicator light
does not come on at all while the front pas-
senger air bag switch is ON.
Unless checked and repaired, the front passenger
air bag system may not function properly.
PRECAUTIONS ON CHILD
RESTRAINT USAGE
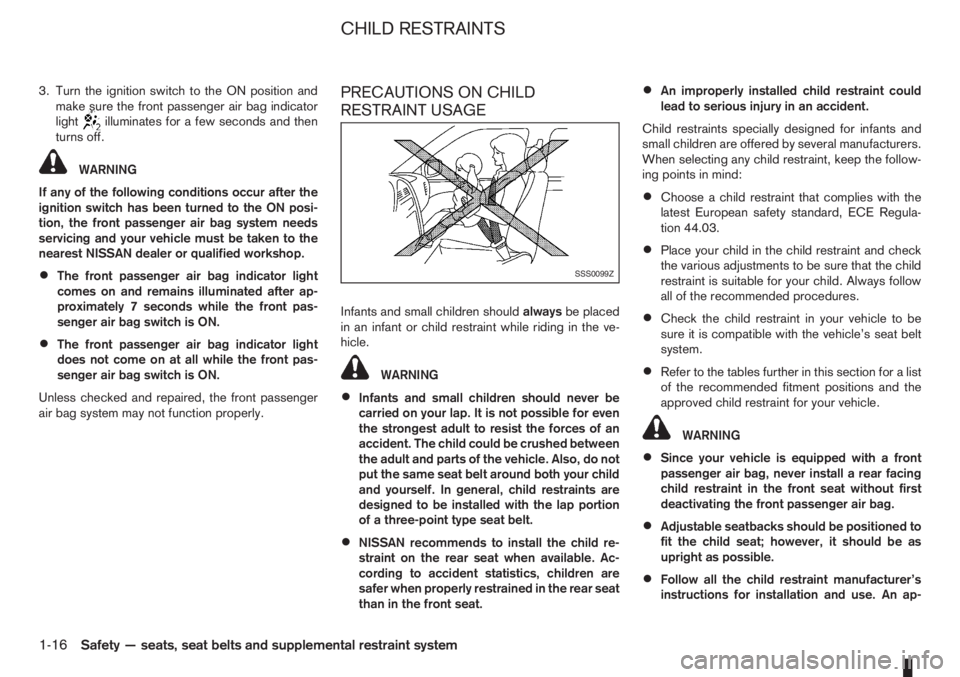
Infants and small children shouldalwaysbe placed
in an infant or child restraint while riding in the ve-
hicle.
WARNING
•Infants and small children should never be
carried on your lap. It is not possible for even
the strongest adult to resist the forces of an
accident. The child could be crushed between
the adult and parts of the vehicle. Also, do not
put the same seat belt around both your child
and yourself. In general, child restraints are
designed to be installed with the lap portion
of a three-point type seat belt.
•NISSAN recommends to install the child re-
straint on the rear seat when available. Ac-
cording to accident statistics, children are
safer when properly restrained in the rear seat
than in the front seat.
•An improperly installed child restraint could
lead to serious injury in an accident.
Child restraints specially designed for infants and
small children are offered by several manufacturers.
When selecting any child restraint, keep the follow-
ing points in mind:
•Choose a child restraint that complies with the
latest European safety standard, ECE Regula-
tion 44.03.
•Place your child in the child restraint and check
the various adjustments to be sure that the child
restraint is suitable for your child. Always follow
all of the recommended procedures.
•Check the child restraint in your vehicle to be
sure it is compatible with the vehicle’s seat belt
system.
•Refer to the tables further in this section for a list
of the recommended fitment positions and the
approved child restraint for your vehicle.
WARNING
•Since your vehicle is equipped with a front
passenger air bag, never install a rear facing
child restraint in the front seat without first
deactivating the front passenger air bag.
•Adjustable seatbacks should be positioned to
fit the child seat; however, it should be as
upright as possible.
•Follow all the child restraint manufacturer’s
instructions for installation and use. An ap-
SSS0099Z
CHILD RESTRAINTS
1-16Safety — seats, seat belts and supplemental restraint system
Page 43 of 235

2Instruments and controlsInstruments and controls
Meters and gauges .................................................. 2-2
Speedometer...................................................... 2-2
Tachometer ........................................................ 2-2
Fuel gauge ......................................................... 2-2
Combination meter display (LCD) ....................... 2-3
Odometer/twin trip odometer .............................. 2-3
Trip computer (where fitted)................................ 2-3
Outside temperature display ............................... 2-4
Engine oil level information (where fitted)............. 2-4
Digital clock ........................................................ 2-5
Warning/indicator lights and audible reminders ........ 2-7
Checking bulbs .................................................. 2-7
Warning lights .................................................... 2-7
Indicator lights .................................................... 2-11
Audible reminders............................................... 2-12
Wiper and washer switch ........................................ 2-13
Windscreen wiper and washer switch ................. 2-13
Rear window ...................................................... 2-14
Defogger switch ...................................................... 2-15
Rear window defogger ....................................... 2-15
Outside mirror defogger (where fitted) ................ 2-15
Headlight and turn signal switch............................... 2-16
Headlight switch ................................................. 2-16
Turn signal switch ............................................... 2-17
Fog light switch ....................................................... 2-17
Front fog light (where fitted) ................................ 2-17Rear fog light switch ........................................... 2-18
Headlight aiming control .......................................... 2-18
Headlight aiming control switch........................... 2-18
Hazard warning flasher switch ................................. 2-19
Horn ........................................................................ 2-19
Seat heating (where fitted) ....................................... 2-19
Power outlet ............................................................ 2-20
Storage ................................................................... 2-21
Glove box ........................................................... 2-21
Centre console storage box ................................ 2-22
Cup holder ......................................................... 2-22
Rear foldable tables (where fitted)....................... 2-23
Seat pockets (where fitted) ................................. 2-23
Convenience hook (where fitted)......................... 2-23
Under seat storage tray (where fitted) ................. 2-23
“Flexi-board” System (where fitted) ..................... 2-24
Utility hooks (where fitted)................................... 2-25
Power windows ....................................................... 2-25
Driver’s side main switch .................................... 2-26
Passenger’s side switch ..................................... 2-26
Automatic operation ............................................ 2-26
Interior lights ............................................................ 2-27
Room light .......................................................... 2-27
Map light (where fitted) ....................................... 2-28
Luggage compartment light ................................ 2-28
Page 44 of 235

For an overview of the instruments of the instru-
ments and controls, see “Instrument and control
layout” in the “0. Illustrated table of contents” sec-
tion.
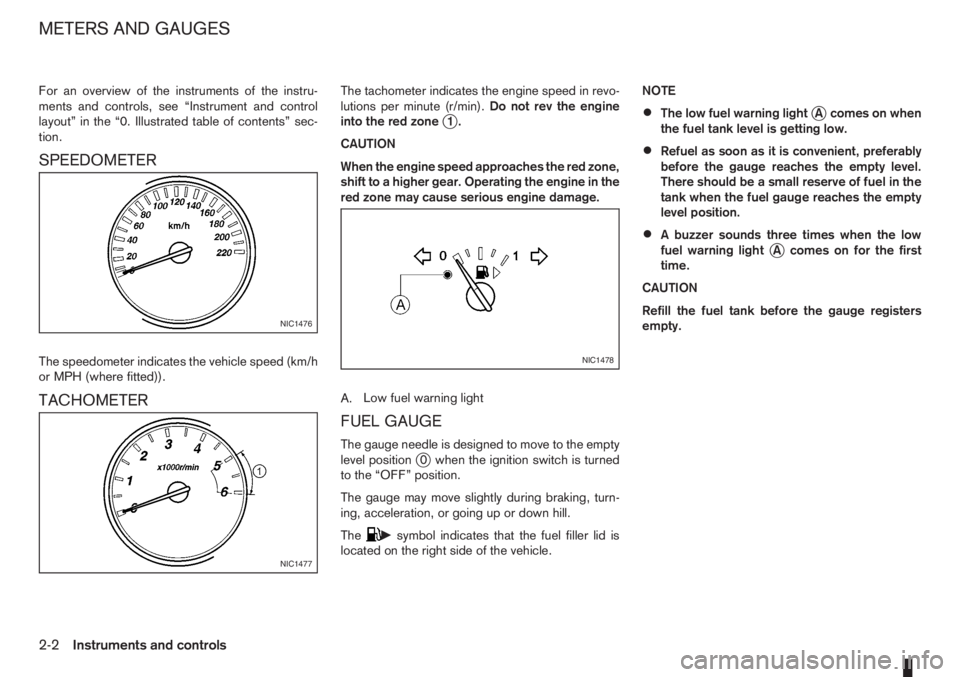
SPEEDOMETER
The speedometer indicates the vehicle speed (km/h
or MPH (where fitted)).
TACHOMETER
The tachometer indicates the engine speed in revo-
lutions per minute (r/min).Do not rev the engine
into the red zone
j1.
CAUTION
When the engine speed approaches the red zone,
shift to a higher gear. Operating the engine in the
red zone may cause serious engine damage.
A.Low fuel warning light
FUEL GAUGE
The gauge needle is designed to move to the empty
level positionj0 when the ignition switch is turned
to the “OFF” position.
The gauge may move slightly during braking, turn-
ing, acceleration, or going up or down hill.
The
csymbol indicates that the fuel filler lid is
located on the right side of the vehicle.NOTE
•The low fuel warning lightjA comes on when
the fuel tank level is getting low.
•Refuel as soon as it is convenient, preferably
before the gauge reaches the empty level.
There should be a small reserve of fuel in the
tank when the fuel gauge reaches the empty
level position.
•A buzzer sounds three times when the low
fuel warning lightjA comes on for the first
time.
CAUTION
Refill the fuel tank before the gauge registers
empty.
NIC1476
NIC1477
NIC1478
METERS AND GAUGES
2-2Instruments and controls
Page 45 of 235

COMBINATION METER DISPLAY
(LCD)
1.The TRIP button/Steering wheelswitch*
toggles between:
Twin trip odometer setting
TRIP computer setting
2.Clock setting/Oil change schedule setting*
switchA.Clock display
B.Cruise control/Speed limiter display
For further information see “Speed limiter” in
the “5. Starting and driving” section and
“Cruise control system” in the “5. Starting and
driving” section.
C.Outside temperature display
D.Odometer/distance to oil change information*
E.Twin trip odometer/Trip computer mode*
F.Oil level status (HR16DE or K9K engine
equipped models only)
*where fitted
NOTE
The LCD display information comes on only when
the ignition switch is turned to the ON position.
ODOMETER/TWIN TRIP ODOMETER
Odometer
jD
The odometer records the total distance the vehicle
has been drivenjD.
Twin trip odometerjE
The twin trip odometer records the distance of indi-
vidual trips.
The odometer/twin trip odometer is displayed in
jE
when the ignition switch is in the ON position.Changing the display:
Press the TRIP button/Steering wheel
switch
to change the display as follows:
TripA⇒TripB⇒Trip Computer modes (where fit-
ted)
Resetting the trip odometer:
In the Trip A or Trip B mode, press the TRIP button/
Steering wheel
switch for more than 1 second
to reset the trip odometer to zero.
TRIP COMPUTER (where fitted)
When the ignition switch is turned to the ON posi-
tion, modes of the trip computer can be selected by
pressing the TRIP button/Steering wheel
switch.
The following modes can be selected:
•Distance to empty
•Average fuel consumption
•Average speed
•Journey time
Distance to emptym(km or mls)
The distance to empty provides an estimation of the
distance that can be driven before refuelling. The
range is constantly being calculated, based on the
amount of fuel in the fuel tank and the actual fuel
consumption.
The distance to empty includes a low range warning
feature: when the fuel level is low, the distance to
NIC1483
NIC1484
Instruments and controls2-3
Page 46 of 235

empty is automatically selected and the digits blink
in order to draw the driver’s attention. Press the
TRIP button/Steering wheel
switch if you wish
to return to the mode that was selected before the
warning occurred.
When the fuel level drops even lower, the distance
to empty will display
along within a
flashing mode.
Average fuel consumption (l/100 km or
mpg)
The average fuel consumption mode shows the av-
erage fuel consumption since the last reset. The dis-
played average fuel consumption can be reset by
pressing the TRIP button/Steering wheel
switch for more than 1 second.
Average speed (km/h or MPH)
The average speed mode shows the average ve-
hicle speed since the last reset. The displayed aver-
age speed can be reset by pressing the TRIP but-
ton/Steering wheel
switch for more than 1
second.
Journey timem
The journey time mode shows the time since the last
reset in minutes and seconds. The displayed time
can be reset by pressing the TRIP button/Steering
wheel
switch for more than 1 second.
Trip computer reset
Pushing the TRIP button/Steering wheelswitch for more than 3 seconds will reset all modes
except Trip A and distance to empty.
OUTSIDE TEMPERATURE DISPLAY
The outside temperature function provides a displayjC of the outside temperature (ºC) when the ignition
switch is in the ON position.
The display of positive temperatures is unsigned
(blank), negative temperatures are prefixed with a
minus sign.
Low temperature warning
Above 4°C the display remains steady.
The display will flash to indicate a low outside air
temperature, and the possibility of icy or slippery
road conditions:
•When the outside temperature drops between
–3°C and 3°C.
•When starting the vehicle below –3°C.
The temperature display will not flash:
•After approximately 20 seconds, when starting
the vehicle and the outside temperature is below
–3°C.
•When the outside temperature rises from below
–3°C into the range between –3°C and 3°C.
•While driving, when the outside temperature
drops below –3°C.CAUTION
Even if the display is not flashing, there is no
guarantee that the road is free of hazards caused
by inclement weather.
NOTE
The outside air temperature sensor is located at
the front of the vehicle. At low speeds the sensor
can be affected by engine heat, heat reflected
from the road surface and exhaust from other
vehicles, these influences can cause the display
to be inaccurate. To compensate, the outside air
temperature display is designed to react slowly
to increasing temperatures, but quickly to falling
temperatures.
ENGINE OIL LEVEL INFORMATION
(where fitted)
When the ignition is turned to the ON position, dis-
tance to oil change informationand oil level sta-
tus are displayed on the LCD displayjE in the fol-
lowing order:
– Distance to oil change (with a wrench symbol
)
– Oil level status (“Oil Good” or “Oil Lo”)
Only for models with HR16DE or K9K engine.
For details, see “HR16DE or K9K engine oil level
status” later in this section.
After the oil level status (where fitted), the LCD dis-
play switches to the last twin trip odometer/trip com-
2-4Instruments and controls