2012 NISSAN CUBE lock
[x] Cancel search: lockPage 93 of 331
FCC Notice:
For USA:
This device complies with Part 15 of the
FCC Rules. Operation is subject to the
following two conditions: (1) This device
may not cause harmful interference, and
(2) this device must accept any interfer-
ence received, including interference that
may cause undesired operation.
NOTE:
Changes or modifications not expressly
approved by the party responsible for
compliance could void the user’s authority
to operate the equipment.
For Canada:
This device complies with RSS-210 of
Industry Canada. Operation is subject to
the following two conditions: (1) this
device may not cause interference, and
(2) this device must accept any interfer-
ence, including interference that may
cause undesired operation of the device.
SIC2045
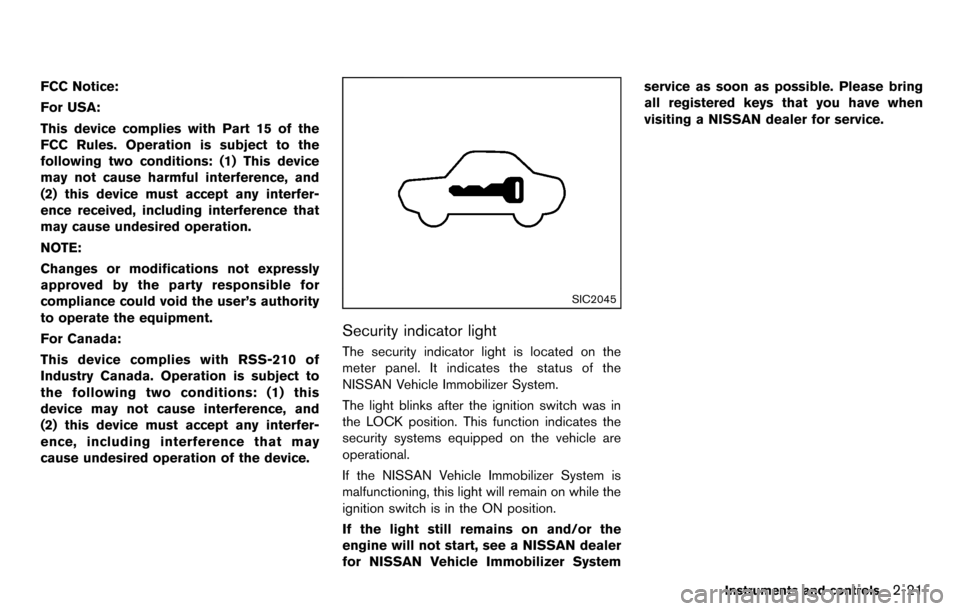
Security indicator light
The security indicator light is located on the
meter panel. It indicates the status of the
NISSAN Vehicle Immobilizer System.
The light blinks after the ignition switch was in
the LOCK position. This function indicates the
security systems equipped on the vehicle are
operational.
If the NISSAN Vehicle Immobilizer System is
malfunctioning, this light will remain on while the
ignition switch is in the ON position.
If the light still remains on and/or the
engine will not start, see a NISSAN dealer
for NISSAN Vehicle Immobilizer Systemservice as soon as possible. Please bring
all registered keys that you have when
visiting a NISSAN dealer for service.
Instruments and controls2-21
Page 95 of 331
WARNING
In freezing temperatures the washer
solution may freeze on the rear window
glass and obscure your vision. Warm
the rear window with the defroster
before you wash the rear window.
CAUTION
.Do not operate the washer continu-
ously for more than 30 seconds.
. Do not operate the washer if the
reservoir tank is empty.
. Do not fill the window washer
reservoir tank with washer fluid
concentrates at full strength. Some
methyl alcohol based washer fluid
concentrates may permanently stain
the grille if spilled while filling the
window washer reservoir tank.
. Pre-mix washer fluid concentrates
with water to the manufacturer’s
recommended levels before pouring
the fluid into the window washer
reservoir tank. Do not use the window washer reservoir tank to
mix the washer fluid concentrate
and water.
If the rear window wiper operation is
interrupted by snow or ice, the wiper may
stop moving to protect its motor. If this
occurs, turn the wiper switch to the OFF
position and remove the snow or ice that is
on and around the wiper arms. In approxi-
mately 1 minute, turn the switch on again
to operate the wiper.SIC3666
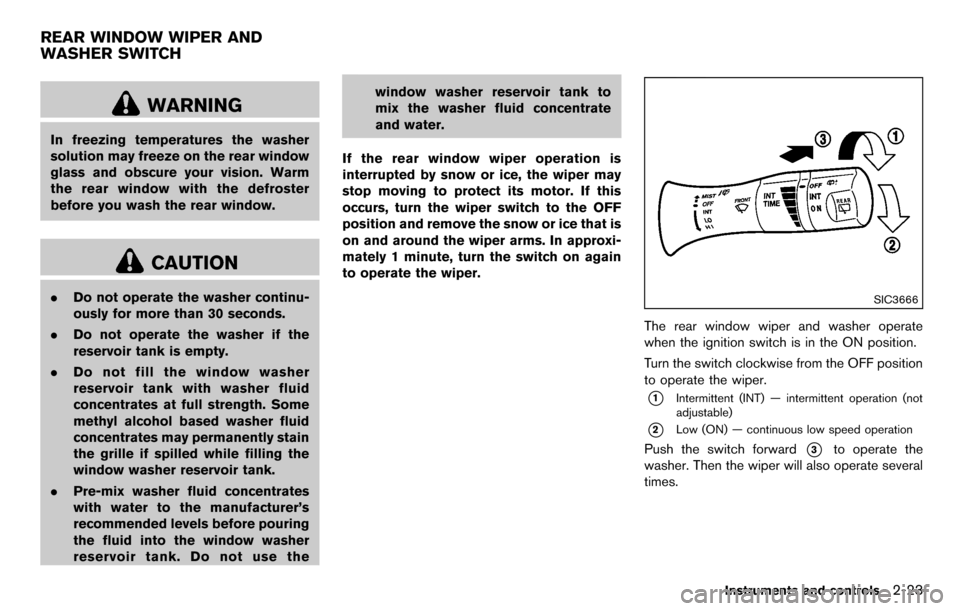
The rear window wiper and washer operate
when the ignition switch is in the ON position.
Turn the switch clockwise from the OFF position
to operate the wiper.
*1Intermittent (INT) — intermittent operation (not
adjustable)
*2Low (ON) — continuous low speed operation
Push the switch forward*3to operate the
washer. Then the wiper will also operate several
times.
Instruments and controls2-23
REAR WINDOW WIPER AND
WASHER SWITCH
Page 105 of 331
SIC4137
Door (front and rear)
SIC4136
Rear of center console
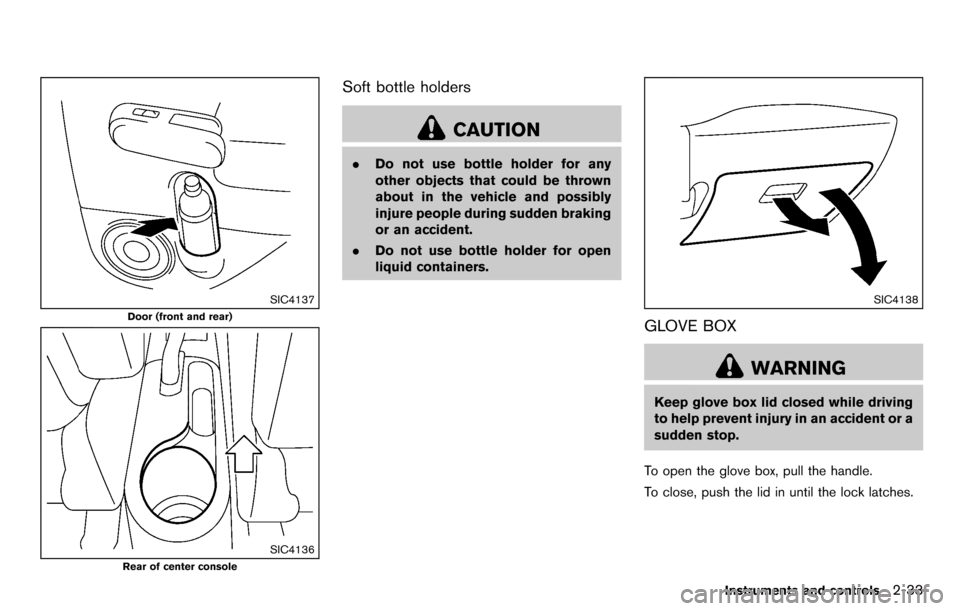
Soft bottle holders
CAUTION
.Do not use bottle holder for any
other objects that could be thrown
about in the vehicle and possibly
injure people during sudden braking
or an accident.
. Do not use bottle holder for open
liquid containers.
SIC4138
GLOVE BOX
WARNING
Keep glove box lid closed while driving
to help prevent injury in an accident or a
sudden stop.
To open the glove box, pull the handle.
To close, push the lid in until the lock latches.
Instruments and controls2-33
Page 108 of 331
2-36Instruments and controls
POWER WINDOWS
WARNING
.Make sure that all passengers have
their hands, etc. inside the vehicle
while it is in motion and before
closing the windows. Use the win-
dow lock switch to prevent unex-
pected use of the power windows.
. Do not leave children unattended
inside the vehicle. They could un-
knowingly activate switches or con-
trols and become trapped in the
window. Unattended children could
become involved in serious acci-
dents.
The power windows operate when the ignition
switch is in the ON position, or for about 45
seconds after the ignition switch is placed in the
OFF position. If the driver’s or front passenger’s
door is opened during this period of about 45
seconds, power to the windows is canceled.
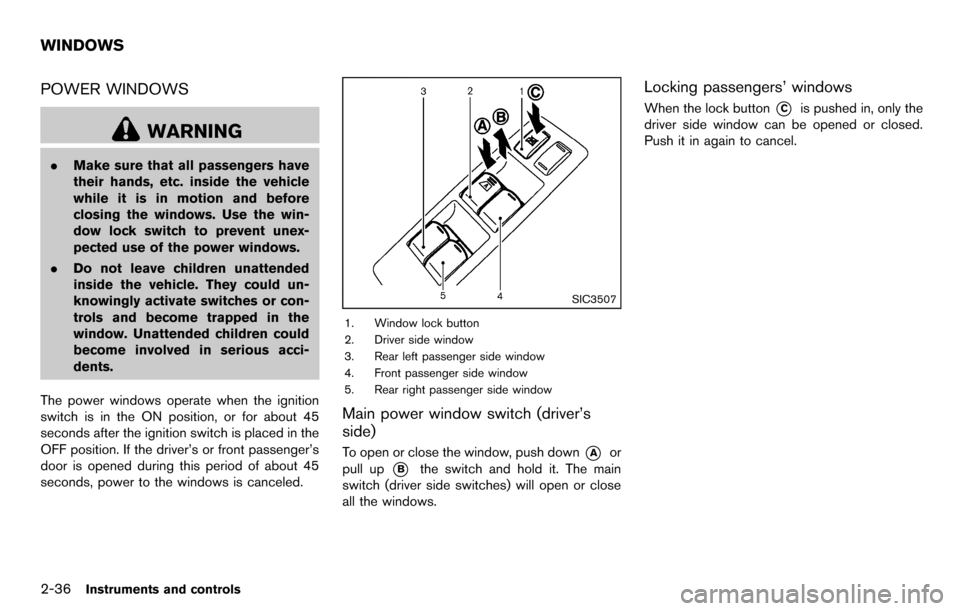
SIC3507
1. Window lock button
2. Driver side window
3. Rear left passenger side window
4. Front passenger side window
5. Rear right passenger side window
Main power window switch (driver’s
side)
To open or close the window, push down*Aor
pull up
*Bthe switch and hold it. The main
switch (driver side switches) will open or close
all the windows.
Locking passengers’ windows
When the lock button*Cis pushed in, only the
driver side window can be opened or closed.
Push it in again to cancel.
WINDOWS
Page 111 of 331
SIC4573
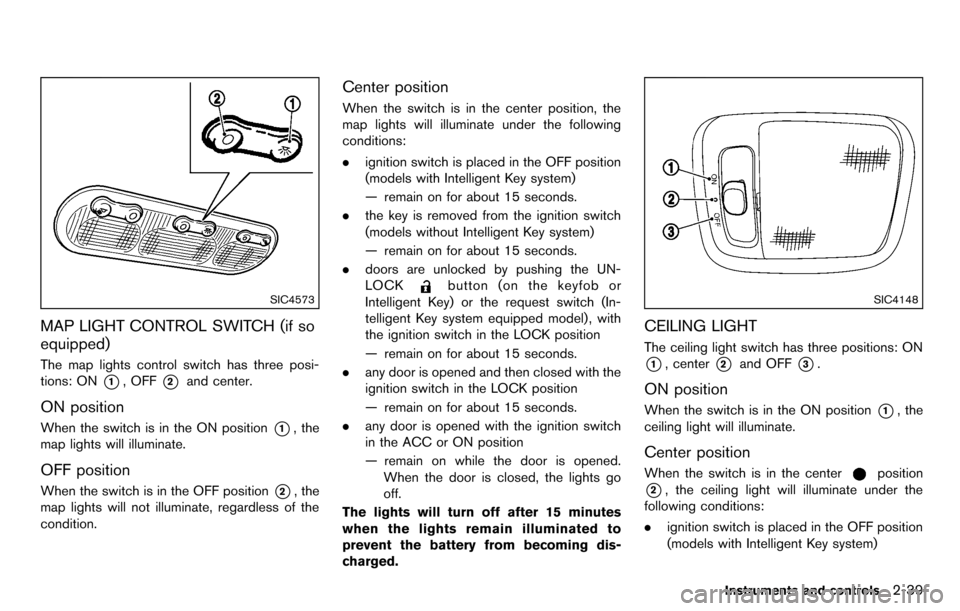
MAP LIGHT CONTROL SWITCH (if so
equipped)
The map lights control switch has three posi-
tions: ON
*1, OFF*2and center.
ON position
When the switch is in the ON position*1, the
map lights will illuminate.
OFF position
When the switch is in the OFF position*2, the
map lights will not illuminate, regardless of the
condition.
Center position
When the switch is in the center position, the
map lights will illuminate under the following
conditions:
. ignition switch is placed in the OFF position
(models with Intelligent Key system)
— remain on for about 15 seconds.
. the key is removed from the ignition switch
(models without Intelligent Key system)
— remain on for about 15 seconds.
. doors are unlocked by pushing the UN-
LOCK
button (on the keyfob or
Intelligent Key) or the request switch (In-
telligent Key system equipped model) , with
the ignition switch in the LOCK position
— remain on for about 15 seconds.
. any door is opened and then closed with the
ignition switch in the LOCK position
— remain on for about 15 seconds.
. any door is opened with the ignition switch
in the ACC or ON position
— remain on while the door is opened.
When the door is closed, the lights go
off.
The lights will turn off after 15 minutes
when the lights remain illuminated to
prevent the battery from becoming dis-
charged.SIC4148
CEILING LIGHT
The ceiling light switch has three positions: ON
*1, center*2and OFF*3.
ON position
When the switch is in the ON position*1, the
ceiling light will illuminate.
Center position
When the switch is in the centerposition
*2, the ceiling light will illuminate under the
following conditions:
. ignition switch is placed in the OFF position
(models with Intelligent Key system)
Instruments and controls2-39
Page 112 of 331
2-40Instruments and controls
— remain on for about 15 seconds.
. the key is removed from the ignition switch
(models without Intelligent Key system)
— remain on for about 15 seconds.
. doors are unlocked by pushing the UN-
LOCK
button (on the keyfob or
Intelligent Key) or the request switch (In-
telligent Key system equipped model) , with
the ignition switch in the LOCK position
— remain on for about 15 seconds.
. any door is opened and then closed with the
ignition switch in the LOCK position
— remain on for about 15 seconds.
. any door is opened with the ignition switch
in the ACC or ON position
— remain on while the door is opened.
When the door is closed, the lights go
off.
The light will turn off after 15 minutes
when the lights remain illuminated to
prevent the battery from becoming dis-
charged.
OFF position
When the switch is in the OFF position*3, the
ceiling light will not illuminate, regardless of the
condition.
JVI0358X
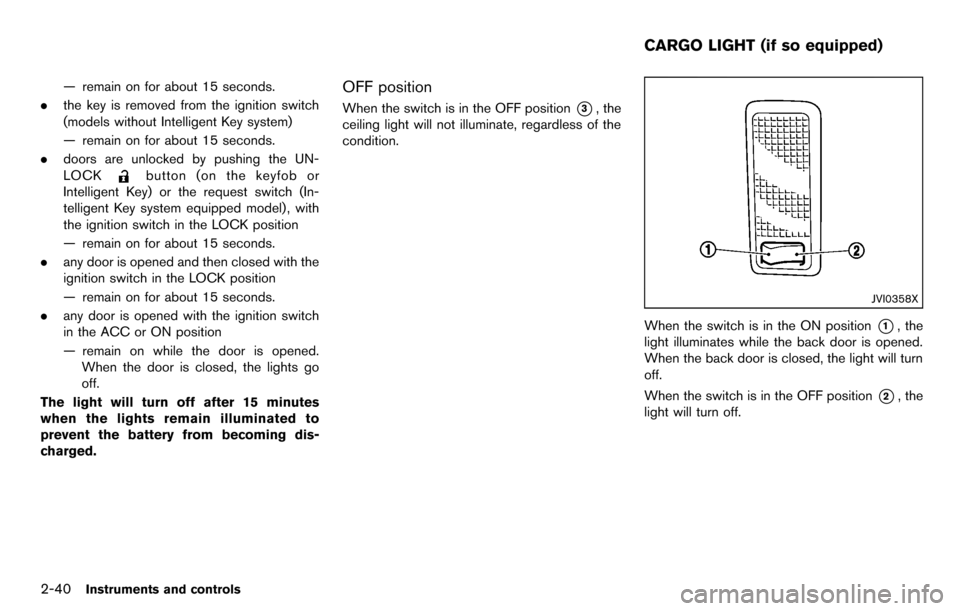
When the switch is in the ON position*1, the
light illuminates while the back door is opened.
When the back door is closed, the light will turn
off.
When the switch is in the OFF position
*2, the
light will turn off.
CARGO LIGHT (if so equipped)
Page 113 of 331
3 Pre-driving checks and adjustments
Keys ........................................................................\
...................... 3-2NISSAN Vehicle Immobilizer System keys ................... 3-2
Intelligent Keys (if so equipped) ..................................... 3-3
Doors ........................................................................\
.................... 3-4 Locking with key .................................................................. 3-5
Locking with inside lock knob .......................................... 3-5
Locking with power door lock switch ............................ 3-5
Automatic door locks ......................................................... 3-6
Child safety rear door lock ............................................... 3-6
Remote keyless entry system (if so equipped) ................. 3-7
How to use remote keyless entry system ..................... 3-8
Intelligent Key system (if so equipped) ............................ 3-10 Intelligent Key operating range ..................................... 3-12
Door locks/unlocks precaution .................................... 3-12
Intelligent Key operation ................................................. 3-13
Battery saver system ....................................................... 3-14 Warning lights and audible reminders ...................... 3-14
Troubleshooting guide .................................................. 3-15
How to use remote keyless entry function .............. 3-16
Hood ........................................................................\
................. 3-19
Back door ........................................................................\
........ 3-20
Fuel-filler door ........................................................................\
3-21
Opening the fuel-filler door ......................................... 3-21
Fuel-filler cap .................................................................. 3-21
Tilt steering column .............................................................. 3-23 Tilt operation ................................................................... 3-23
Sun visors ........................................................................\
........ 3-24
Mirrors ........................................................................\
............. 3-24 Inside mirror ..................................................................... 3-24
Outside mirrors ............................................................... 3-25
Vanity mirror (if so equipped) ..................................... 3-26
Page 115 of 331
SPA2406
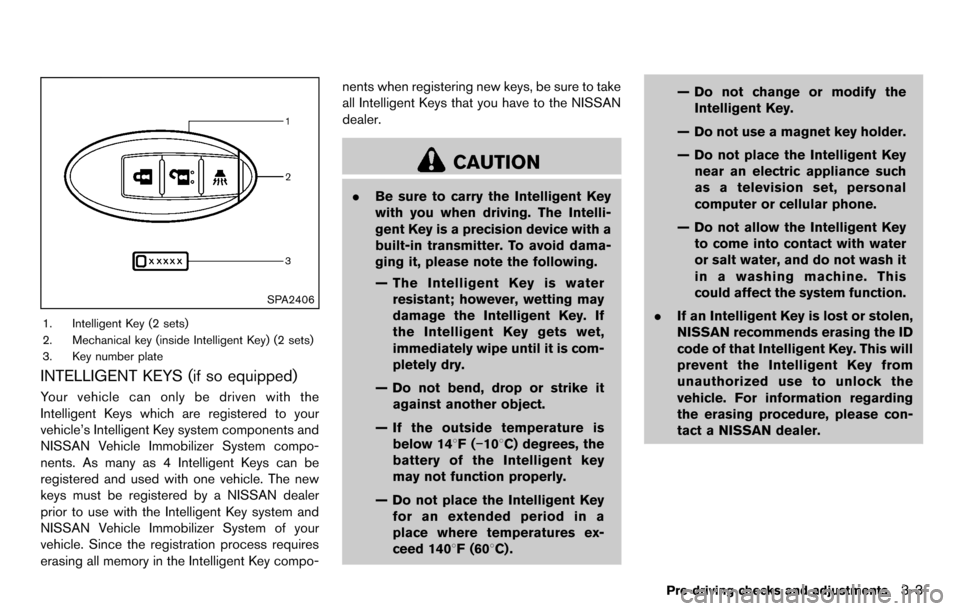
1. Intelligent Key (2 sets)
2. Mechanical key (inside Intelligent Key) (2 sets)
3. Key number plate
INTELLIGENT KEYS (if so equipped)
Your vehicle can only be driven with the
Intelligent Keys which are registered to your
vehicle’s Intelligent Key system components and
NISSAN Vehicle Immobilizer System compo-
nents. As many as 4 Intelligent Keys can be
registered and used with one vehicle. The new
keys must be registered by a NISSAN dealer
prior to use with the Intelligent Key system and
NISSAN Vehicle Immobilizer System of your
vehicle. Since the registration process requires
erasing all memory in the Intelligent Key compo-nents when registering new keys, be sure to take
all Intelligent Keys that you have to the NISSAN
dealer.
CAUTION
.
Be sure to carry the Intelligent Key
with you when driving. The Intelli-
gent Key is a precision device with a
built-in transmitter. To avoid dama-
ging it, please note the following.
— The Intelligent Key is water
resistant; however, wetting may
damage the Intelligent Key. If
the Intelligent Key gets wet,
immediately wipe until it is com-
pletely dry.
— Do not bend, drop or strike it against another object.
— If the outside temperature is below 148F( −108C) degrees, the
battery of the Intelligent key
may not function properly.
— Do not place the Intelligent Key for an extended period in a
place where temperatures ex-
ceed 1408F (608C) . — Do not change or modify the
Intelligent Key.
— Do not use a magnet key holder.
— Do not place the Intelligent Key near an electric appliance such
as a television set, personal
computer or cellular phone.
— Do not allow the Intelligent Key to come into contact with water
or salt water, and do not wash it
in a washing machine. This
could affect the system function.
. If an Intelligent Key is lost or stolen,
NISSAN recommends erasing the ID
code of that Intelligent Key. This will
prevent the Intelligent Key from
unauthorized use to unlock the
vehicle. For information regarding
the erasing procedure, please con-
tact a NISSAN dealer.
Pre-driving checks and adjustments3-3