2012 NISSAN CUBE window
[x] Cancel search: windowPage 108 of 331
2-36Instruments and controls
POWER WINDOWS
WARNING
.Make sure that all passengers have
their hands, etc. inside the vehicle
while it is in motion and before
closing the windows. Use the win-
dow lock switch to prevent unex-
pected use of the power windows.
. Do not leave children unattended
inside the vehicle. They could un-
knowingly activate switches or con-
trols and become trapped in the
window. Unattended children could
become involved in serious acci-
dents.
The power windows operate when the ignition
switch is in the ON position, or for about 45
seconds after the ignition switch is placed in the
OFF position. If the driver’s or front passenger’s
door is opened during this period of about 45
seconds, power to the windows is canceled.
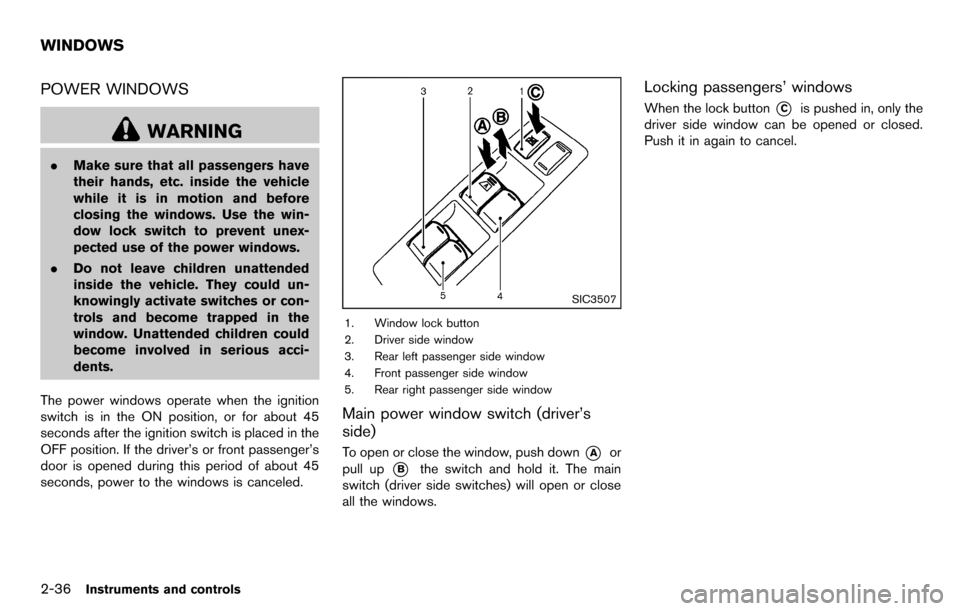
SIC3507
1. Window lock button
2. Driver side window
3. Rear left passenger side window
4. Front passenger side window
5. Rear right passenger side window
Main power window switch (driver’s
side)
To open or close the window, push down*Aor
pull up
*Bthe switch and hold it. The main
switch (driver side switches) will open or close
all the windows.
Locking passengers’ windows
When the lock button*Cis pushed in, only the
driver side window can be opened or closed.
Push it in again to cancel.
WINDOWS
Page 109 of 331
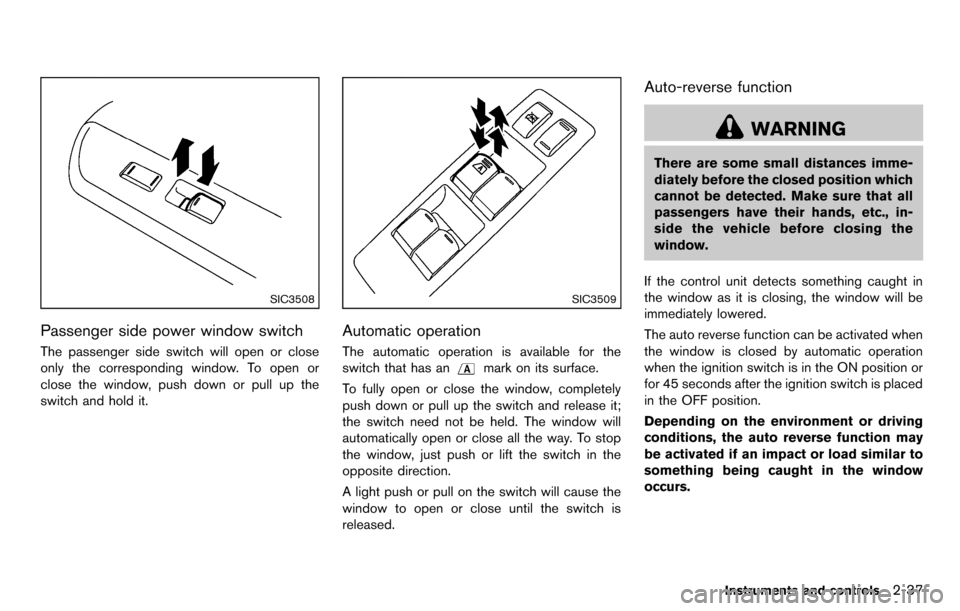
SIC3508
Passenger side power window switch
The passenger side switch will open or close
only the corresponding window. To open or
close the window, push down or pull up the
switch and hold it.
SIC3509
Automatic operation
The automatic operation is available for the
switch that has an
mark on its surface.
To fully open or close the window, completely
push down or pull up the switch and release it;
the switch need not be held. The window will
automatically open or close all the way. To stop
the window, just push or lift the switch in the
opposite direction.
A light push or pull on the switch will cause the
window to open or close until the switch is
released.
Auto-reverse function
WARNING
There are some small distances imme-
diately before the closed position which
cannot be detected. Make sure that all
passengers have their hands, etc., in-
side the vehicle before closing the
window.
If the control unit detects something caught in
the window as it is closing, the window will be
immediately lowered.
The auto reverse function can be activated when
the window is closed by automatic operation
when the ignition switch is in the ON position or
for 45 seconds after the ignition switch is placed
in the OFF position.
Depending on the environment or driving
conditions, the auto reverse function may
be activated if an impact or load similar to
something being caught in the window
occurs.
Instruments and controls2-37
Page 110 of 331
2-38Instruments and controls
If the windows do not close automatically
If the power window automatic function (closing
only) does not operate properly, perform the
following procedure to initialize the power
window system.
1. Place the ignition switch in the ON position.
2. Close the door.
3. Open the window completely by operatingthe power window switch.
4. Pull the power window switch and hold it to close the window, and then hold the switch
more than 3 seconds after the window is
closed completely.
5. Release the power window switch. Operate the window by the automatic function to
confirm the initialization is complete.
If the power window automatic function does
not operate properly after performing the pro-
cedure above, have your vehicle checked by a
NISSAN dealer.CAUTION
Do not use for extended periods of time
with the engine stopped. This could
result in a discharged battery.
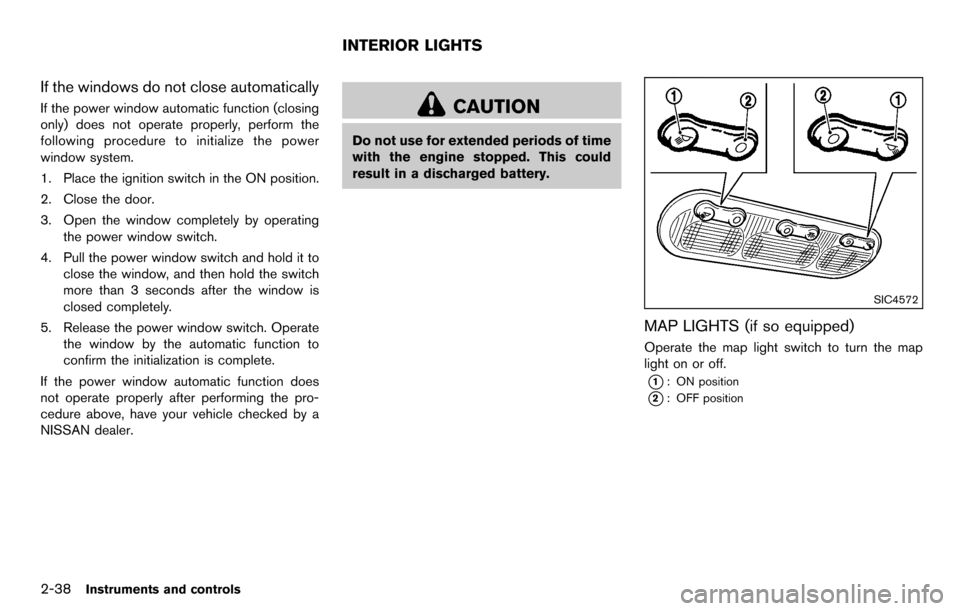
SIC4572
MAP LIGHTS (if so equipped)
Operate the map light switch to turn the map
light on or off.
*1: ON position
*2: OFF position
INTERIOR LIGHTS
Page 137 of 331
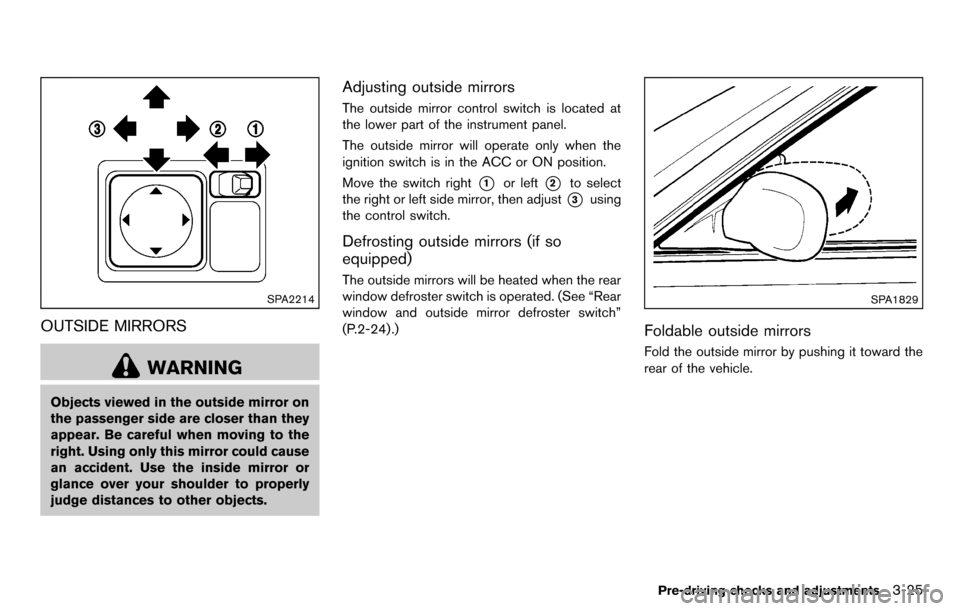
SPA2214
OUTSIDE MIRRORS
WARNING
Objects viewed in the outside mirror on
the passenger side are closer than they
appear. Be careful when moving to the
right. Using only this mirror could cause
an accident. Use the inside mirror or
glance over your shoulder to properly
judge distances to other objects.
Adjusting outside mirrors
The outside mirror control switch is located at
the lower part of the instrument panel.
The outside mirror will operate only when the
ignition switch is in the ACC or ON position.
Move the switch right
*1or left*2to select
the right or left side mirror, then adjust
*3using
the control switch.
Defrosting outside mirrors (if so
equipped)
The outside mirrors will be heated when the rear
window defroster switch is operated. (See “Rear
window and outside mirror defroster switch”
(P.2-24) .)
SPA1829
Foldable outside mirrors
Fold the outside mirror by pushing it toward the
rear of the vehicle.
Pre-driving checks and adjustments3-25
Page 152 of 331
4-12Center display, heater, air conditioner, audio and phone systems
course.
HOW TO ADJUST THE SCREEN
To adjust the Brightness and Contrast of the
RearView Monitor, push theSETUPbutton until
the desired mode is displayed with the RearView
Monitor on, and turn the TUNE control dial to
adjust the brightness and contrast of the screen
to the preferred level.
OPERATING TIPS
. When the selector lever is shifted to the R
(Reverse) position, the monitor screen auto-
matically changes to the RearView Monitor
mode. However, the radio can be heard.
. It may take some time until the RearView
Monitor or the normal screen is displayed
after the selector lever has been shifted to R
from another position or to another position
from R. Objects may be distorted momenta-
rily until the RearView Monitor screen is
displayed completely.
. When the temperature is extremely high or
low, the screen may not clearly display
objects. This is not a malfunction.
. When strong light directly enters the cam-
era, objects may not be displayed clearly.
This is not a malfunction.
. Vertical lines may be seen in objects on the
screen. This is due to strong reflected light from the bumper. This is not a malfunction.
. The screen may flicker under fluorescent
light. This is not a malfunction.
. The colors of objects on the RearView
Monitor may differ somewhat from those of
the actual object.
. Objects on the monitor may not be clear in a
dark place or at night. This is not a
malfunction.
. If dirt, rain or snow attaches to the camera,
the RearView Monitor may not clearly dis-
play objects. Clean the camera.
. Do not use alcohol, benzine or thinner to
clean the camera. This will cause discolora-
tion. To clean the camera, wipe with a cloth
dampened with diluted mild cleaning agent
and then wipe with a dry cloth.
. Do not damage the camera as the monitor
screen may be adversely affected.
. Do not use wax on the camera window.
Wipe off any wax with a clean cloth
dampened with mild detergent diluted with
water.
SAA2343
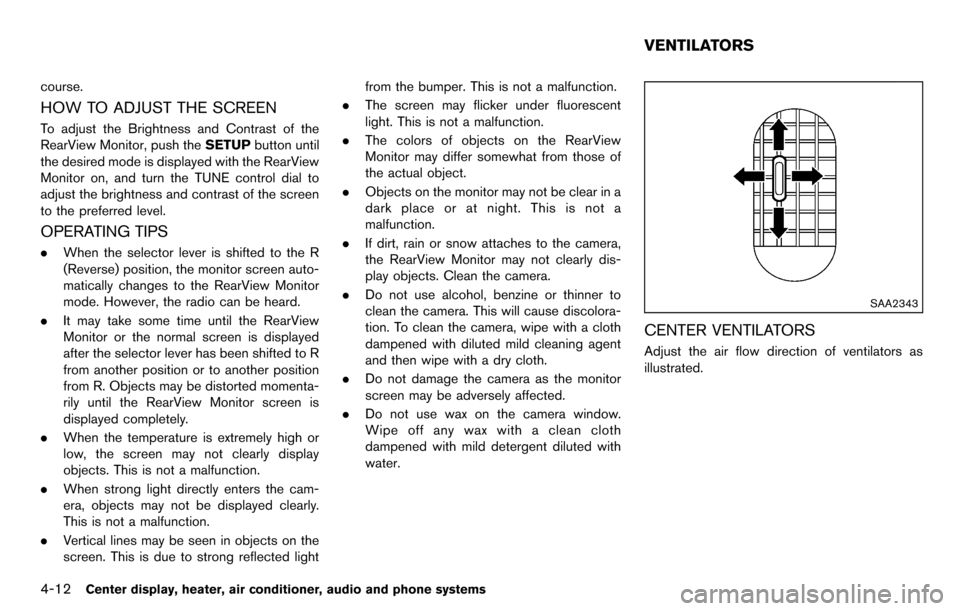
CENTER VENTILATORS
Adjust the air flow direction of ventilators as
illustrated.
VENTILATORS
Page 153 of 331
SAA2344
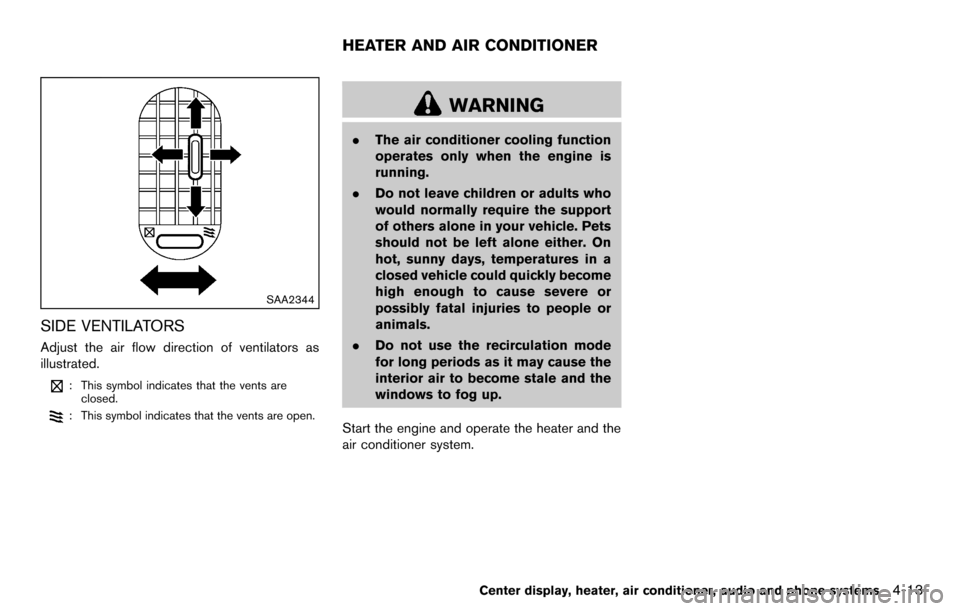
SIDE VENTILATORS
Adjust the air flow direction of ventilators as
illustrated.
: This symbol indicates that the vents areclosed.
: This symbol indicates that the vents are open.
WARNING
. The air conditioner cooling function
operates only when the engine is
running.
. Do not leave children or adults who
would normally require the support
of others alone in your vehicle. Pets
should not be left alone either. On
hot, sunny days, temperatures in a
closed vehicle could quickly become
high enough to cause severe or
possibly fatal injuries to people or
animals.
. Do not use the recirculation mode
for long periods as it may cause the
interior air to become stale and the
windows to fog up.
Start the engine and operate the heater and the
air conditioner system.
Center display, heater, air conditioner, audio and phone systems4-13
HEATER AND AIR CONDITIONER
Page 154 of 331
4-14Center display, heater, air conditioner, audio and phone systems
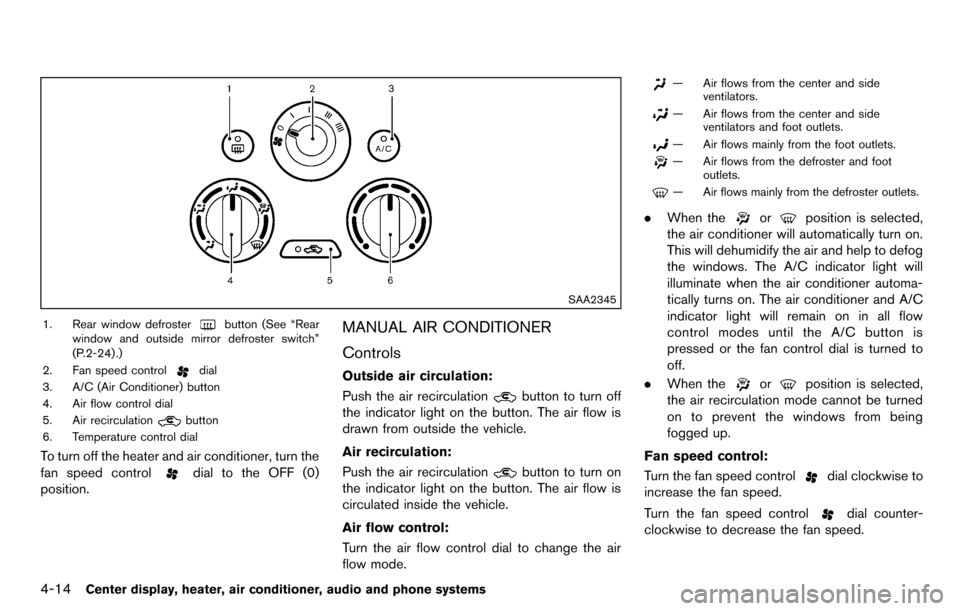
SAA2345
1. Rear window defrosterbutton (See “Rear
window and outside mirror defroster switch”
(P.2-24) .)
2. Fan speed control
dial
3. A/C (Air Conditioner) button
4. Air flow control dial
5. Air recirculation
button
6. Temperature control dial
To turn off the heater and air conditioner, turn the
fan speed control
dial to the OFF (0)
position.
MANUAL AIR CONDITIONER
Controls
Outside air circulation:
Push the air recirculation
button to turn off
the indicator light on the button. The air flow is
drawn from outside the vehicle.
Air recirculation:
Push the air recirculation
button to turn on
the indicator light on the button. The air flow is
circulated inside the vehicle.
Air flow control:
Turn the air flow control dial to change the air
flow mode.
— Air flows from the center and side ventilators.
— Air flows from the center and sideventilators and foot outlets.
— Air flows mainly from the foot outlets.
— Air flows from the defroster and footoutlets.
— Air flows mainly from the defroster outlets.
.When theorposition is selected,
the air conditioner will automatically turn on.
This will dehumidify the air and help to defog
the windows. The A/C indicator light will
illuminate when the air conditioner automa-
tically turns on. The air conditioner and A/C
indicator light will remain on in all flow
control modes until the A/C button is
pressed or the fan control dial is turned to
off.
. When the
orposition is selected,
the air recirculation mode cannot be turned
on to prevent the windows from being
fogged up.
Fan speed control:
Turn the fan speed control
dial clockwise to
increase the fan speed.
Turn the fan speed control
dial counter-
clockwise to decrease the fan speed.
Page 155 of 331
A/C (Air Conditioner) operation:
Push the A/C button to turn on or off the air
conditioner. When the air conditioner is on, the
A/C indicator light on the button illuminates.
Temperature control:
Turn the temperature control dial to set the
desired temperature. Turn the dial between the
middle and the right position (in red) to select
the hot temperature. Turn the dial between the
middle and the left position (in blue) to select the
cool temperature.
Heater operation
Heating:
This mode is used to direct heated air to the foot
outlets.
1. Push the air recirculation
button to
switch to the outside air circulation mode.
(The indicator light turns off.)
2. Turn the air flow control dial to the
position.
3. Turn the fan speed control
dial to the
desired position.
4. Turn the temperature control dial to the desired position between the middle and the
hot (right) position. Ventilation:
This mode directs outside air to the side and
center ventilators.
1. Push the air recirculation
button to
switch to the outside air circulation mode.
(The indicator light turns off.)
2. Turn the air flow control dial to the
position.
3. Turn the fan speed control
dial to the
desired position.
Defrosting or defogging:
This mode directs the air to the defroster outlets
to defrost/defog the windows.
1. Turn the air flow control dial to the
position.
2. Turn the fan speed control
dial to the
desired position.
3. Turn the temperature control dial to the desired position between the middle and the
hot (right) position.
. To remove frost from the outside surface of
the windshield quickly, turn the temperature
control dial to the maximum hot position and
the fan speed control
dial to maximum
(IIII) position.
. When the
position is selected, the air
conditioner will automatically turn on. This will dehumidify the air and help to defog the
windows. The A/C indicator light will illumi-
nate when the air conditioner automatically
turns on. The air conditioner and A/C
indicator light will remain on in all flow
control modes until the A/C button is
pressed or the fan control dial is turned to
off.
Bi-level heating:
This mode directs cool air from the side and
center vents and warm air from the foot outlets.
When the temperature control dial is turned to
the maximum hot or cool position, the air
between the ventilators and the foot outlets is
the same temperature.
1. Push the air recirculation
button to
switch to the outside air circulation mode.
(The indicator light turns off.)
2. Turn the air flow control dial to the
position.
3. Turn the fan speed control
dial to the
desired position.
4. Turn the temperature control dial to the desired position.
Heating and defogging:
This mode heats the interior and defogs the
windows.
Center display, heater, air conditioner, audio and phone systems4-15