2012 NISSAN CUBE buttons
[x] Cancel search: buttonsPage 183 of 331
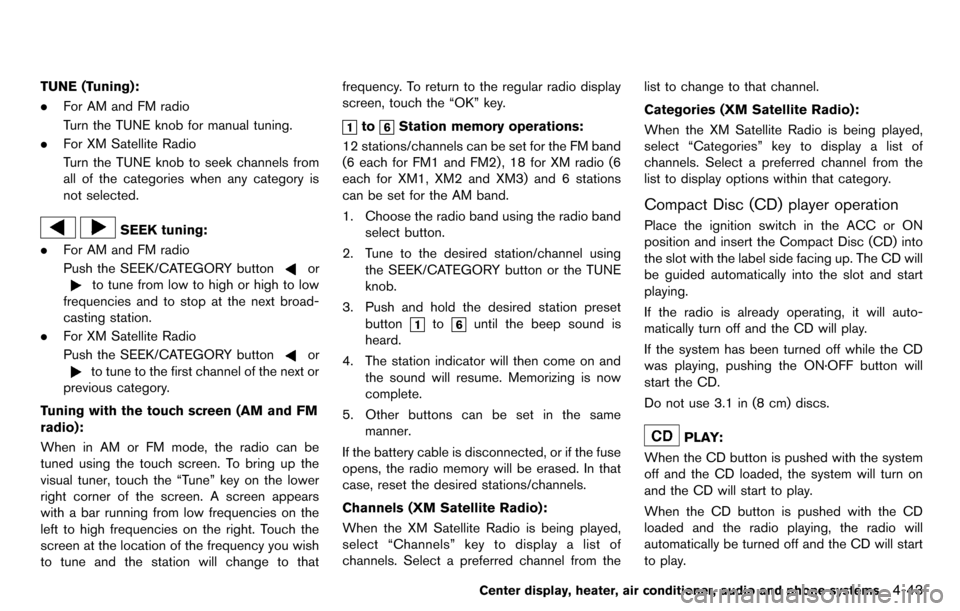
TUNE (Tuning):
.For AM and FM radio
Turn the TUNE knob for manual tuning.
. For XM Satellite Radio
Turn the TUNE knob to seek channels from
all of the categories when any category is
not selected.
SEEK tuning:
. For AM and FM radio
Push the SEEK/CATEGORY button
or
to tune from low to high or high to low
frequencies and to stop at the next broad-
casting station.
. For XM Satellite Radio
Push the SEEK/CATEGORY button
or
to tune to the first channel of the next or
previous category.
Tuning with the touch screen (AM and FM
radio):
When in AM or FM mode, the radio can be
tuned using the touch screen. To bring up the
visual tuner, touch the “Tune” key on the lower
right corner of the screen. A screen appears
with a bar running from low frequencies on the
left to high frequencies on the right. Touch the
screen at the location of the frequency you wish
to tune and the station will change to that frequency. To return to the regular radio display
screen, touch the “OK” key.
toStation memory operations:
12 stations/channels can be set for the FM band
(6 each for FM1 and FM2), 18 for XM radio (6
each for XM1, XM2 and XM3) and 6 stations
can be set for the AM band.
1. Choose the radio band using the radio band select button.
2. Tune to the desired station/channel using the SEEK/CATEGORY button or the TUNE
knob.
3. Push and hold the desired station preset button
tountil the beep sound is
heard.
4. The station indicator will then come on and the sound will resume. Memorizing is now
complete.
5. Other buttons can be set in the same manner.
If the battery cable is disconnected, or if the fuse
opens, the radio memory will be erased. In that
case, reset the desired stations/channels.
Channels (XM Satellite Radio):
When the XM Satellite Radio is being played,
select “Channels” key to display a list of
channels. Select a preferred channel from the list to change to that channel.
Categories (XM Satellite Radio):
When the XM Satellite Radio is being played,
select “Categories” key to display a list of
channels. Select a preferred channel from the
list to display options within that category.
Compact Disc (CD) player operation
Place the ignition switch in the ACC or ON
position and insert the Compact Disc (CD) into
the slot with the label side facing up. The CD will
be guided automatically into the slot and start
playing.
If the radio is already operating, it will auto-
matically turn off and the CD will play.
If the system has been turned off while the CD
was playing, pushing the ON·OFF button will
start the CD.
Do not use 3.1 in (8 cm) discs.
PLAY:
When the CD button is pushed with the system
off and the CD loaded, the system will turn on
and the CD will start to play.
When the CD button is pushed with the CD
loaded and the radio playing, the radio will
automatically be turned off and the CD will start
to play.
Center display, heater, air conditioner, audio and phone systems4-43
Page 188 of 331
4-48Center display, heater, air conditioner, audio and phone systems
.Podcasts
The following touch-panel buttons shown on the
screen are also available:
.
: returns to the previous screen.
.
: plays/pauses the music selected.
SEEK/CATEGORY button:
Push the FF or REW button for more than 1.5
seconds while an iPod
®is playing to fast-
forward or rewind through the track. When the
button is released, the iPod
®will return to the
normal play speed.
SAA3492
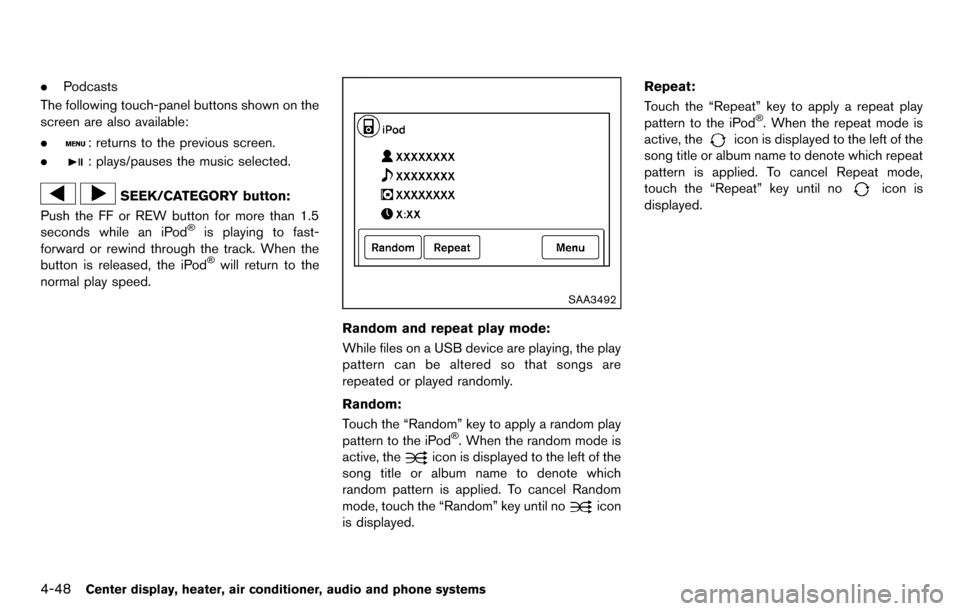
Random and repeat play mode:
While files on a USB device are playing, the play
pattern can be altered so that songs are
repeated or played randomly.
Random:
Touch the “Random” key to apply a random play
pattern to the iPod
®. When the random mode is
active, the
icon is displayed to the left of the
song title or album name to denote which
random pattern is applied. To cancel Random
mode, touch the “Random” key until no
icon
is displayed. Repeat:
Touch the “Repeat” key to apply a repeat play
pattern to the iPod
®. When the repeat mode is
active, the
icon is displayed to the left of the
song title or album name to denote which repeat
pattern is applied. To cancel Repeat mode,
touch the “Repeat” key until no
icon is
displayed.
Page 196 of 331
4-56Center display, heater, air conditioner, audio and phone systems
SAA2351
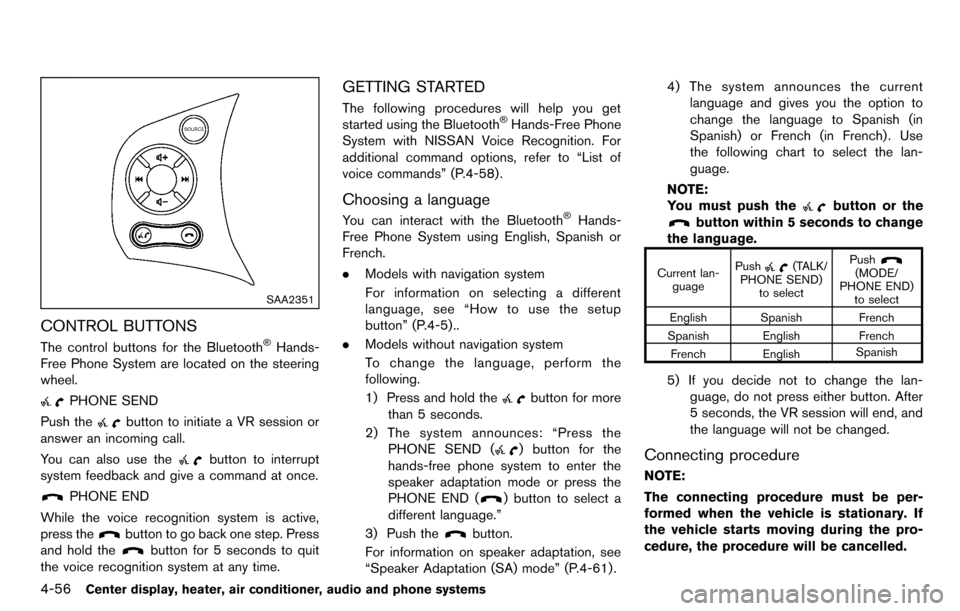
CONTROL BUTTONS
The control buttons for the Bluetooth®Hands-
Free Phone System are located on the steering
wheel.
PHONE SEND
Push the
button to initiate a VR session or
answer an incoming call.
You can also use the
button to interrupt
system feedback and give a command at once.
PHONE END
While the voice recognition system is active,
press the
button to go back one step. Press
and hold the
button for 5 seconds to quit
the voice recognition system at any time.
GETTING STARTED
The following procedures will help you get
started using the Bluetooth®Hands-Free Phone
System with NISSAN Voice Recognition. For
additional command options, refer to “List of
voice commands” (P.4-58) .
Choosing a language
You can interact with the Bluetooth®Hands-
Free Phone System using English, Spanish or
French.
. Models with navigation system
For information on selecting a different
language, see “How to use the setup
button” (P.4-5)..
. Models without navigation system
To change the language, perform the
following.
1) Press and hold the
button for more
than 5 seconds.
2) The system announces: “Press the PHONE SEND (
) button for the
hands-free phone system to enter the
speaker adaptation mode or press the
PHONE END (
) button to select a
different language.”
3) Push the
button.
For information on speaker adaptation, see
“Speaker Adaptation (SA) mode” (P.4-61) . 4) The system announces the current
language and gives you the option to
change the language to Spanish (in
Spanish) or French (in French) . Use
the following chart to select the lan-
guage.
NOTE:
You must push the
button or the
button within 5 seconds to change
the language.
Current lan- guage Push(TALK/
PHONE SEND) to select Push(MODE/
PHONE END) to select
English Spanish French
Spanish English French
French English Spanish
5) If you decide not to change the lan-
guage, do not press either button. After
5 seconds, the VR session will end, and
the language will not be changed.
Connecting procedure
NOTE:
The connecting procedure must be per-
formed when the vehicle is stationary. If
the vehicle starts moving during the pro-
cedure, the procedure will be cancelled.
Page 286 of 331
8-24Maintenance and do-it-yourself
SDI2134
KEYFOB
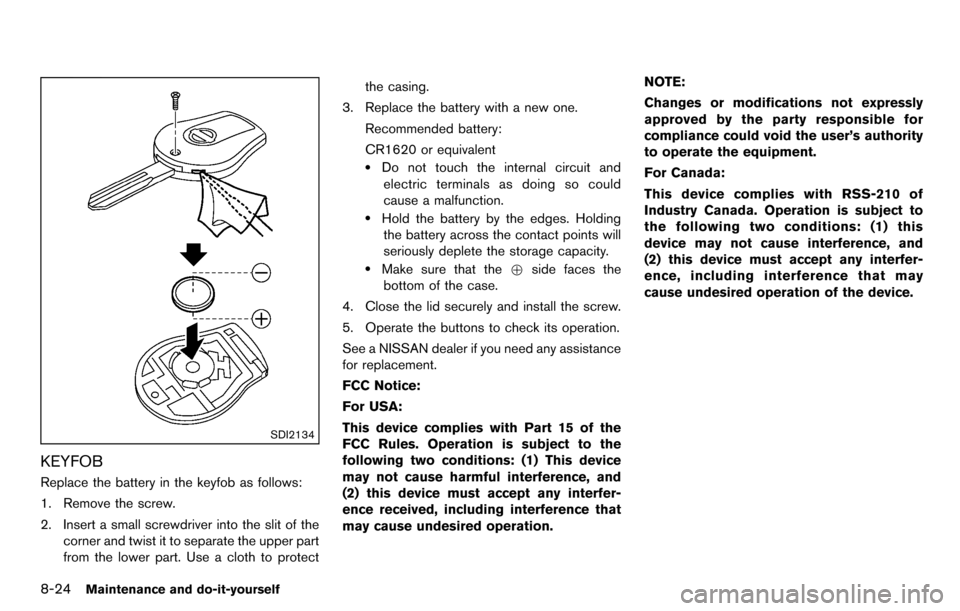
Replace the battery in the keyfob as follows:
1. Remove the screw.
2. Insert a small screwdriver into the slit of thecorner and twist it to separate the upper part
from the lower part. Use a cloth to protect the casing.
3. Replace the battery with a new one.
Recommended battery:
CR1620 or equivalent
.Do not touch the internal circuit andelectric terminals as doing so could
cause a malfunction.
.Hold the battery by the edges. Holdingthe battery across the contact points will
seriously deplete the storage capacity.
.Make sure that the +side faces the
bottom of the case.
4. Close the lid securely and install the screw.
5. Operate the buttons to check its operation.
See a NISSAN dealer if you need any assistance
for replacement.
FCC Notice:
For USA:
This device complies with Part 15 of the
FCC Rules. Operation is subject to the
following two conditions: (1) This device
may not cause harmful interference, and
(2) this device must accept any interfer-
ence received, including interference that
may cause undesired operation. NOTE:
Changes or modifications not expressly
approved by the party responsible for
compliance could void the user’s authority
to operate the equipment.
For Canada:
This device complies with RSS-210 of
Industry Canada. Operation is subject to
the following two conditions: (1) this
device may not cause interference, and
(2) this device must accept any interfer-
ence, including interference that may
cause undesired operation of the device.
Page 287 of 331
SDI2451
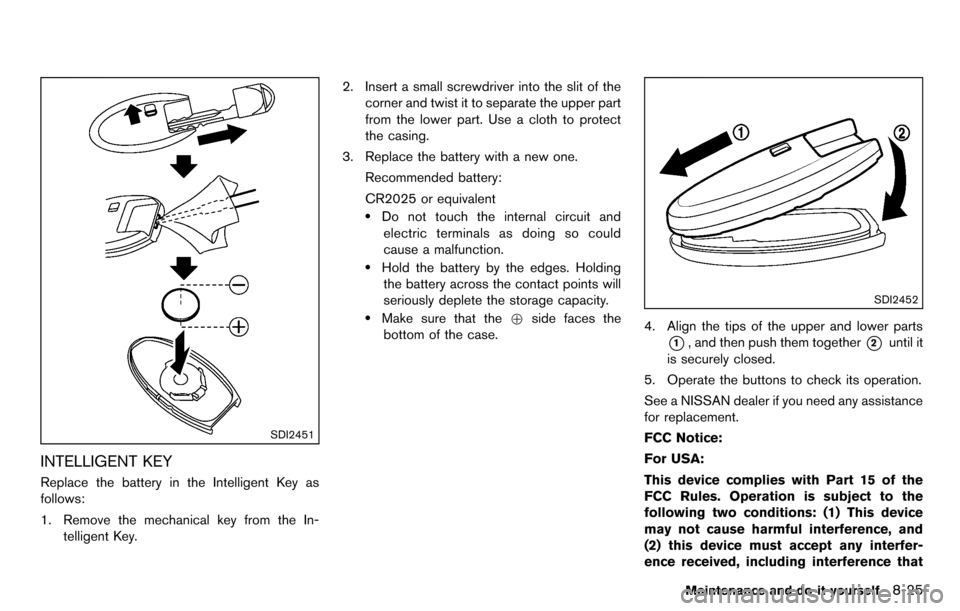
INTELLIGENT KEY
Replace the battery in the Intelligent Key as
follows:
1. Remove the mechanical key from the In-telligent Key. 2. Insert a small screwdriver into the slit of the
corner and twist it to separate the upper part
from the lower part. Use a cloth to protect
the casing.
3. Replace the battery with a new one. Recommended battery:
CR2025 or equivalent
.Do not touch the internal circuit andelectric terminals as doing so could
cause a malfunction.
.Hold the battery by the edges. Holdingthe battery across the contact points will
seriously deplete the storage capacity.
.Make sure that the +side faces the
bottom of the case.
SDI2452
4. Align the tips of the upper and lower parts
*1, and then push them together*2until it
is securely closed.
5. Operate the buttons to check its operation.
See a NISSAN dealer if you need any assistance
for replacement.
FCC Notice:
For USA:
This device complies with Part 15 of the
FCC Rules. Operation is subject to the
following two conditions: (1) This device
may not cause harmful interference, and
(2) this device must accept any interfer-
ence received, including interference that
Maintenance and do-it-yourself8-25
Page 323 of 331
10 Index
A
A/C (Air Conditioner) operation.............................. 4-15
ABS (Anti-lock Braking System) ............................ 5-26
Advanced air bag system ......................................... 1-46
Air bag system Advanced air bag system .................................. 1-46
Front passenger air bag and status light....... 1-47
Front-seat mounted side-impact
supplemental air bag system ............................ 1-50
Roof-mounted curtain side-impact
supplemental air bag system ............................ 1-50
Air bag warning labels............................................... 1-53
Air bag warning light...................................... 1-53, 2-15
Air cleaner housing filter ........................................... 8-17
Air conditioner Air conditioner operation.................................... 4-13
Air conditioner service ........................................ 4-19
Air conditioner specification label.................... 9-10
Air conditioning system refrigerant and
lubricant recommendations....................... 4-19, 9-6
In-cabin microfilter ............................................... 4-19
Alarm, How to stop alarm (see vehicle
security system)........................................................... 2-20
Alcohol, drugs and driving.......................................... 5-7
Antenna.......................................................................... 4-50
Anti-lock Braking System (ABS) ............................ 5-26
Anti-lock braking system (ABS) warning light..... 2-12
Appearance care Exterior appearance care ...................................... 7-2
Interior appearance care ....................................... 7-4
Armrest ............................................................................ 1-9
Audible reminders....................................................... 2-18
Audio operation precautions.................................... 4-20
Audio setup .................................................................... 4-5
Audio system................................................................ 4-20 Steering wheel audio controls.......................... 4-49
Autolight system.......................................................... 2-25
Automatic Air conditioner....................................................... 4-17
Door locks................................................................. 3-6
AUX (Auxiliary) button........................ 4-34, 4-41, 4-45
AUX (Auxiliary) input........................... 4-34, 4-41, 4-45
Average fuel consumption ........................................ 2-10
Average speed............................................................. 2-10
Avoiding collision and rollover ................................... 5-6
B
Back door...................................................................... 3-20
Battery............................................................................ 8-13 Battery replacement, Intelligent Key................ 8-25
Battery replacement, Keyfob............................. 8-24
Battery saver system........................................... 2-26
Variable voltage control system........................ 8-15
Before starting the engine........................................ 5-12
Bluetooth
®Hands-Free Phone System ................ 4-52
Booster seats............................................................... 1-37
Brake Anti-lock Braking System (ABS) ..................... 5-26
Brake and clutch fluid......................................... 8-12
Brake system......................................................... 5-26
Parking brake operation ..................................... 5-20
Warning light......................................................... 2-12
Break-in schedule ....................................................... 5-23
Brightness control Display ON/OFF button ........................................ 4-5
Instrument panel................................................... 2-27
Bulb check/instrument panel ................................... 2-12
Bulb replacement........................................................ 8-26
C
Cabin air filter............................................................... 4-19
Capacities and recommended fuel/lubricants ....... 9-2
Car phone or CB radio ............................................. 4-51
Cargo light.................................................................... 2-40
Catalytic converter, Three way catalyst................... 5-3
CD/USB memory care and cleaning ..................... 4-49
Ceiling light................................................................... 2-39
Check tire pressure warning...................................... 2-6
Child restraints............................................................. 1-21 Booster seats........................................................ 1-37
Precautions on child restraints......................... 1-21
Child safety................................................................... 1-19
Child safety rear door lock ......................................... 3-6
Chimes, Audible reminders ...................................... 2-18
Circuit breaker, Fusible link...................................... 8-21
Cleaning exterior and interior............................ 7-2, 7-4
Clock (models with navigation system)................... 4-7
Clutch fluid.................................................................... 8-12
Cockpit ............................................................................ 2-2
Cold weather driving.................................................. 5-29
Compact Disc (CD) player
(See audio system) ............................ 4-33, 4-38, 4-43
Continuously Variable Transmission
(CVT) fluid..................................................................... 8-11
Control panel buttons — color screen with
navigation system.......................................................... 4-2
Controls, Steering wheel audio controls............... 4-49
Coolant Capacities and
recommended fuel/lubricants............................... 9-2
Changing engine coolant...................................... 8-8
Checking engine coolant level............................. 8-8
Corrosion protection .................................................... 7-6
Cruise control............................................................... 5-21