2012 NISSAN CUBE turn signal
[x] Cancel search: turn signalPage 99 of 331
SIC4128
SIC4129
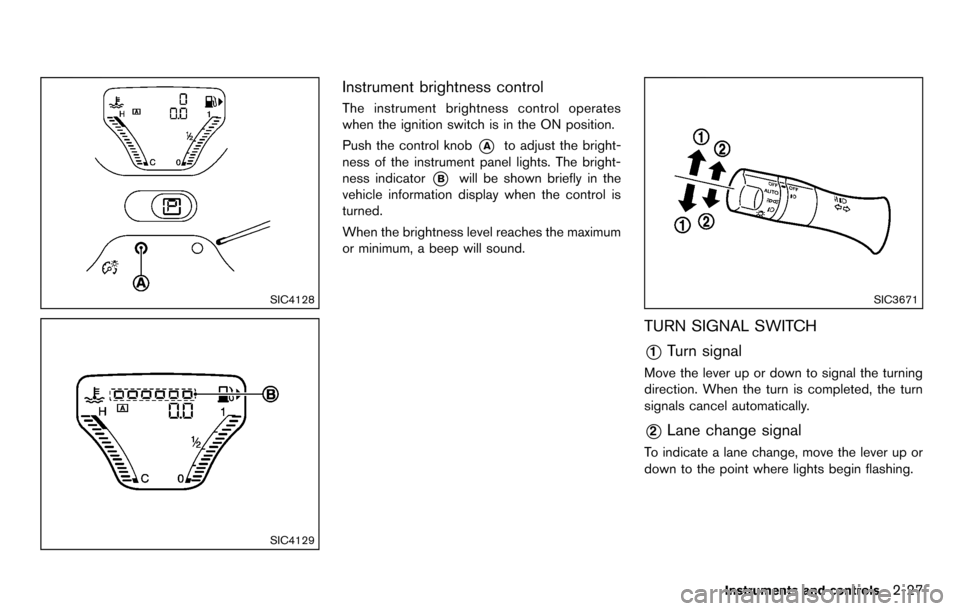
Instrument brightness control
The instrument brightness control operates
when the ignition switch is in the ON position.
Push the control knob
*Ato adjust the bright-
ness of the instrument panel lights. The bright-
ness indicator
*Bwill be shown briefly in the
vehicle information display when the control is
turned.
When the brightness level reaches the maximum
or minimum, a beep will sound.
SIC3671
TURN SIGNAL SWITCH
*1Turn signal
Move the lever up or down to signal the turning
direction. When the turn is completed, the turn
signals cancel automatically.
*2Lane change signal
To indicate a lane change, move the lever up or
down to the point where lights begin flashing.
Instruments and controls2-27
Page 100 of 331
2-28Instruments and controls
SIC3672
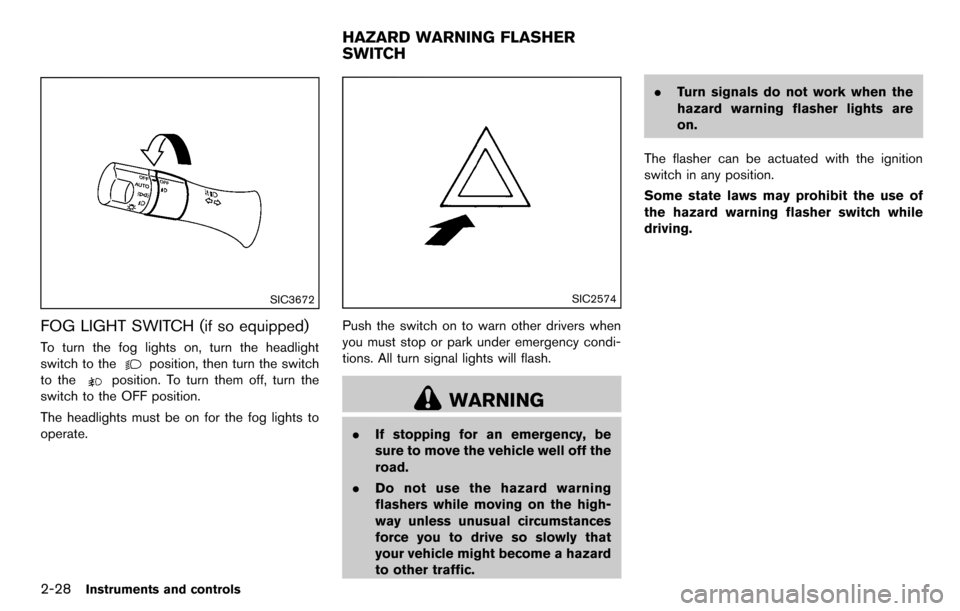
FOG LIGHT SWITCH (if so equipped)
To turn the fog lights on, turn the headlight
switch to the
position, then turn the switch
to the
position. To turn them off, turn the
switch to the OFF position.
The headlights must be on for the fog lights to
operate.
SIC2574
Push the switch on to warn other drivers when
you must stop or park under emergency condi-
tions. All turn signal lights will flash.
WARNING
. If stopping for an emergency, be
sure to move the vehicle well off the
road.
. Do not use the hazard warning
flashers while moving on the high-
way unless unusual circumstances
force you to drive so slowly that
your vehicle might become a hazard
to other traffic. .
Turn signals do not work when the
hazard warning flasher lights are
on.
The flasher can be actuated with the ignition
switch in any position.
Some state laws may prohibit the use of
the hazard warning flasher switch while
driving.
HAZARD WARNING FLASHER
SWITCH
Page 160 of 331
4-20Center display, heater, air conditioner, audio and phone systems
AUDIO OPERATION PRECAUTIONS
Radio
Place the ignition switch in the ACC or ON
position and push the PWR (power/VOL (vo-
lume) control to turn on the radio. If you listen to
the radio with the engine not running, the ignition
switch should be placed in the ACC position.
Radio reception is affected by station signal
strength, distance from radio transmitter, build-
ings, bridges, mountains and other external
influences. Intermittent changes in reception
quality normally are caused by these external
influences.
Using a cellular phone in or near the
vehicle may influence radio reception
quality.
Radio reception:
Your NISSAN radio system is equipped with
state-of-the-art electronic circuits to enhance
radio reception. These circuits are designed to
extend reception range, and to enhance the
quality of that reception.
However there are some general characteristics
of both FM and AM radio signals that can affect
radio reception quality in a moving vehicle, even
when the finest equipment is used. These
characteristics are completely normal in a given
reception area, and do not indicate any mal-function in your NISSAN radio system.
Reception conditions will constantly change
because of vehicle movement. Buildings, terrain,
signal distance and interference from other
vehicles can work against ideal reception.
Described below are some of the factors that
can affect your radio reception.
Some cellular phones or other devices may
cause interference or a buzzing noise to come
from the audio system speakers. Storing the
device in a different location may reduce or
eliminate the noise.
SAA0306
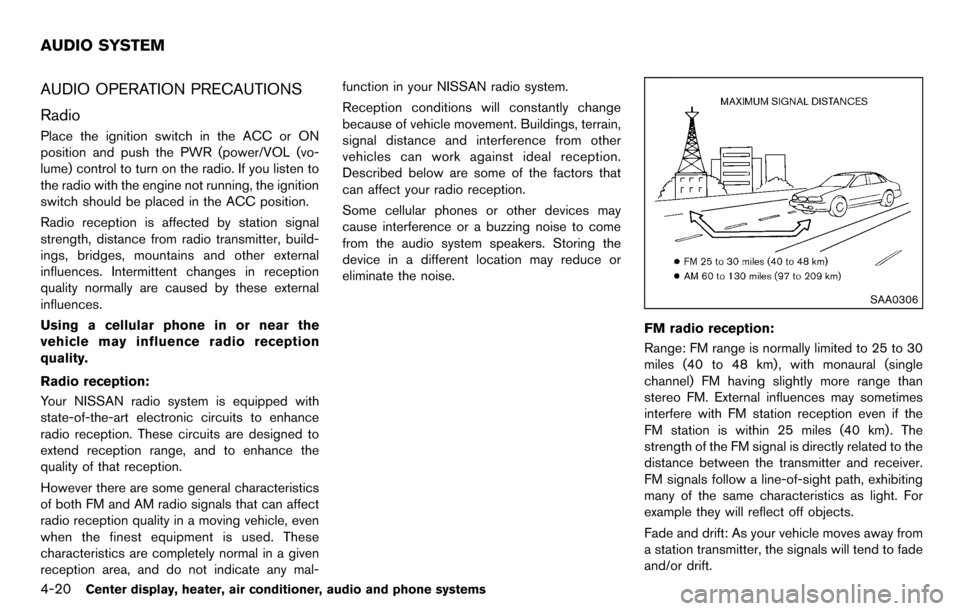
FM radio reception:
Range: FM range is normally limited to 25 to 30
miles (40 to 48 km) , with monaural (single
channel) FM having slightly more range than
stereo FM. External influences may sometimes
interfere with FM station reception even if the
FM station is within 25 miles (40 km). The
strength of the FM signal is directly related to the
distance between the transmitter and receiver.
FM signals follow a line-of-sight path, exhibiting
many of the same characteristics as light. For
example they will reflect off objects.
Fade and drift: As your vehicle moves away from
a station transmitter, the signals will tend to fade
and/or drift.
AUDIO SYSTEM
Page 172 of 331
4-32Center display, heater, air conditioner, audio and phone systems
Balance to the desired level. Fade adjusts the
sound level between the front and rear speakers
and Balance adjusts the sound between the
right and left speakers.
Once you have adjusted the sound quality to the
desired level, push the MENU button repeatedly
until the radio or CD display reappears (normal
mode) . Otherwise, the radio or CD display will
automatically reappear after approximately 10
seconds.
SIC4146
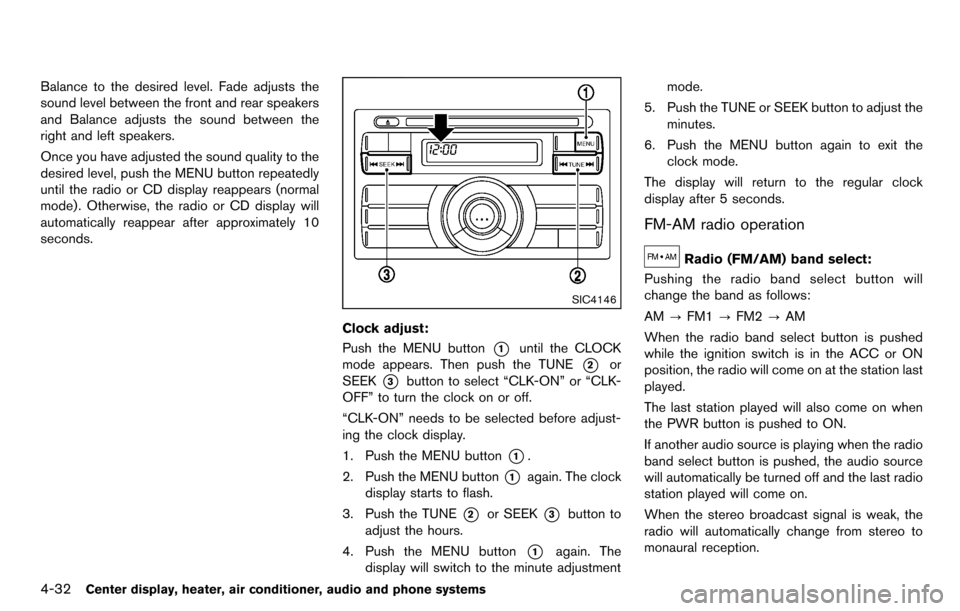
Clock adjust:
Push the MENU button
*1until the CLOCK
mode appears. Then push the TUNE
*2or
SEEK
*3button to select “CLK-ON” or “CLK-
OFF” to turn the clock on or off.
“CLK-ON” needs to be selected before adjust-
ing the clock display.
1. Push the MENU button
*1.
2. Push the MENU button
*1again. The clock
display starts to flash.
3. Push the TUNE
*2or SEEK*3button to
adjust the hours.
4. Push the MENU button
*1again. The
display will switch to the minute adjustment mode.
5. Push the TUNE or SEEK button to adjust the minutes.
6. Push the MENU button again to exit the clock mode.
The display will return to the regular clock
display after 5 seconds.
FM-AM radio operation
Radio (FM/AM) band select:
Pushing the radio band select button will
change the band as follows:
AM ?FM1 ?FM2 ?AM
When the radio band select button is pushed
while the ignition switch is in the ACC or ON
position, the radio will come on at the station last
played.
The last station played will also come on when
the PWR button is pushed to ON.
If another audio source is playing when the radio
band select button is pushed, the audio source
will automatically be turned off and the last radio
station played will come on.
When the stereo broadcast signal is weak, the
radio will automatically change from stereo to
monaural reception.
Page 182 of 331
4-42Center display, heater, air conditioner, audio and phone systems
FM-AM-SAT RADIO WITH COMPACT
DISC (CD) PLAYER (Type C)
For all operation precautions, see “Audio opera-
tion precautions” (P.4-20) .
The satellite radio mode requires an active XM
Satellite Radio subscription. The satellite radio is
not available in Alaska, Hawaii and Guam.
It may take some time to receive the activation
signal after subscribing the XM Satellite Radio.
After receiving the activation signal, an available
channel list will be automatically updated in the
radio. For XM, place the ignition switch in LOCK
to ACC to update the channel list.
Audio main operation
Head unit:
The auto loudness circuit enhances the low and
high frequency ranges automatically in both
radio reception and CD playback.
ON·OFF/Volume control:
Place the ignition switch in the ACC or ON
position, and then push the ON·OFF button
while the system is off to turn on the last audio
source, which was playing immediately before
the system was turned off. While the system is
on, pushing the ON·OFF button turns the system
off.
Turn the VOL control knob to adjust the volume.Adjusting tone quality and speaker bal-
ance:
To adjust Bass, Treble, Balance and Fade, push
the Audio control knob. When the display shows
the setting you want to change (Bass, Treble,
Balance and Fade) , rotate the Audio control
knob to set the desired setting. For the other
setting methods, see “How to use the setup
button” (P.4-5).
This audio system is equipped with Speed
Volume for audio. When this feature is active,
the audio volume increases/decreases in re-
sponse to an increase/decrease in the speed
that the vehicle is being driven. For more details,
see “How to use the setup button” (P.4-5) .
Adjusting AUX level:
The volume level of incoming sound can be
selected from “Quiet”, “Medium” and “Loud”
when an auxiliary device is connected to the
system. For more details, see “How to use the
setup button” (P.4-5) .
Switching the display:
Pushing the AUX button will switch the displays
between USB/iPod
®and AUX.
Adjusting clock:
For information about adjusting the clock dis-
play, see “How to use the setup button” (P.4-5) .
FM-AM-SAT radio operation
When the radio band select button is pushed
while the ignition switch is in the ACC or ON
position, the radio will come on at the channel
last played.
The last channel played will also come on when
the ON·OFF button is pushed to ON.
If another audio source is playing when the radio
band select button is turned to ON, the audio
source will automatically be turned off and the
last radio channel played will come on.
When the stereo broadcast signal is weak, the
radio will automatically change from stereo to
monaural reception.
FM·AM radio band select:
Pushing the FM·AM radio band select button will
change the band as follows:
AM ?FM1 ?FM2 ?AM
XM radio band select:
Pushing the XM radio band select button will
change the band as follows:
XM1 ?XM2 ?XM3 ?XM1
The satellite radio is not available in Alaska,
Hawaii and Guam.
Page 208 of 331
5-4Starting and driving
pressure telltale.
Your vehicle has also been equipped with a
TPMS malfunction indicator to indicate when the
system is not operating properly. The TPMS
malfunction indicator is combined with the low
tire pressure telltale. When the system detects a
malfunction, the telltale will flash for approxi-
mately one minute and then remain continuously
illuminated. This sequence will continue upon
subsequent vehicle start-ups as long as the
malfunction exists. When the malfunction indi-
cator is illuminated, the system may not be able
to detect or signal low tire pressure as intended.
TPMS malfunctions may occur for a variety of
reasons, including the installation of replace-
ment or alternate tires or wheels on the vehicle
that prevent the TPMS from functioning properly.
Always check the TPMS malfunction telltale
after replacing one or more tires or wheels on
your vehicle to ensure that the replacement or
alternate tires and wheels allow the TPMS to
continue to function properly.
Additional information
.The TPMS does not monitor the tire
pressure of the spare tire.
. The TPMS will activate only when the
vehicle is driven at speeds above 16 MPH
(25 km/h) . Also, this system may not detect
a sudden drop in tire pressure (for example a flat tire while driving) .
. The low tire pressure warning light does not
automatically turn off when the tire pressure
is adjusted. After the tire is inflated to the
recommended pressure, the vehicle must be
driven at speeds above 16 MPH (25 km/h)
to activate the TPMS and turn off the low tire
pressure warning light. Use a tire pressure
gauge to check the tire pressure.
. The CHECK TIRE PRES (pressure) warning
message is displayed in the vehicle informa-
tion display when the low tire pressure
warning light is illuminated and low tire
pressure is detected. The CHECK TIRE
PRES warning message turns off when the
low tire pressure warning light turns off. The
low tire pressure warning light remains
illuminated until the tires are inflated to the
recommended COLD tire pressure. The
CHECK TIRE PRES warning message is
displayed each time the ignition switch is
placed in the ON position as long as the low
tire pressure warning light remains illumi-
nated. (See “Check tire pressure warning
message” (P.2-6).)
. The CHECK TIRE PRES warning message
is not displayed if the low tire pressure
warning light illuminates to indicate a TPMS
malfunction. .
Tire pressure rises and falls depending on
the heat caused by the vehicle’s operation
and the outside temperature. Low outside
temperature can lower the temperature of
the air inside the tire which can cause a
lower tire inflation pressure. This may cause
the low tire pressure warning light to
illuminate. If the warning light illuminates in
low ambient temperature, check the tire
pressure for all four tires.
For additional information, see “Low tire pres-
sure warning light” (P.2-14) and “Tire Pressure
Monitoring System (TPMS)” (P.6-2) .
WARNING
. If the low tire pressure warning light
illuminates while driving, avoid sud-
den steering maneuvers or abrupt
braking, reduce vehicle speed, pull
off the road to a safe location and
stop the vehicle as soon as possi-
ble. Driving with under-inflated tires
may permanently damage the tires
and increase the likelihood of tire
failure. Serious vehicle damage
could occur and may lead to an
accident and could result in serious
personal injury. Check the tire pres-
Page 209 of 331
sure for all four tires. Adjust the tire
pressure to the recommended COLD
tire pressure shown on the Tire and
Loading Information label to turn
the low tire pressure warning light
OFF. If you have a flat tire, replace it
with a spare tire as soon as possi-
ble. (See “Flat tire” (P.6-2) for chan-
ging a flat tire.)
. When a spare tire is mounted or a
wheel is replaced, the TPMS will not
function and the low tire pressure
warning light will flash for approxi-
mately 1 minute. The light will
remain on after 1 minute. Contact
your NISSAN dealer as soon as
possible for tire replacement and/
or system resetting.
. Replacing tires with those not ori-
ginally specified by NISSAN could
affect the proper operation of the
TPMS.
. Do not inject any tire liquid or
aerosol tire sealant into the tires,
as this may cause a malfunction of
the tire pressure sensors.CAUTION
.The TPMS may not function properly
when the wheels are equipped with
tire chains or the wheels are buried
in snow.
. Do not place metalized film or any
metal parts (antenna, etc.) on the
windows. This may cause poor re-
ception of the signals from the tire
pressure sensors, and the TPMS will
not function properly.
Some devices and transmitters may temporarily
interfere with the operation of the TPMS and
cause the low tire pressure warning light to
illuminate. Some examples are:
. Facilities or electric devices using similar
radio frequencies are near the vehicle.
. If a transmitter set to similar frequencies is
being used in or near the vehicle.
. If a computer (or similar equipment) or a DC/
AC converter is being used in or near the
vehicle. FCC Notice:
For USA:
This device complies with Part 15 of the
FCC Rules. Operation is subject to the
following two conditions:
(1) This device may not cause harmful
interference, and (2) this device must
accept any interference received, including
interference that may cause undesired
operation.
Note: Changes or modifications not ex-
pressly approved by the party responsible
for compliance could void the user’s
authority to operate the equipment.
For Canada:
This device complies with RSS-210 of
Industry Canada. Operation is subject to
the following two conditions:
(1) this device may not cause interference,
and (2) this device must accept any inter-
ference, including interference that may
cause undesired operation of the device.
Starting and driving5-5
Page 239 of 331
the tire pressure sensors.
CHANGING A FLAT TIRE
If you have a flat tire, follow the instructions
below.
Stopping the vehicle
1. Safely move the vehicle off the road andaway from traffic.
2. Turn on the hazard warning flashers.
3. Park on a level surface and apply the parking brake.
4. Continuously Variable Transmission
(CVT) models:
Move the selector lever to the P (Park)
position.
Manual Transmission (MT) models:
Move the shift lever to the R (Reverse)
position.
5. Turn off the engine.
6. Raise the hood to warn other traffic, and to signal professional road assistance person-
nel that you need assistance.
7. Have all passengers get out of the vehicle and stand in a safe place, away from traffic
and clear of the vehicle.
WARNING
.Make sure the parking brake is
securely applied and the Manual
Transmission is shifted into R (Re-
verse) , or the Continuously Variable
Transmission into P (Park) .
. Never change tires when the vehicle
is on a slope, ice or slippery areas.
This is hazardous.
. Never change tires if oncoming
traffic is close to your vehicle. Wait
for professional road assistance.
MCE0001A
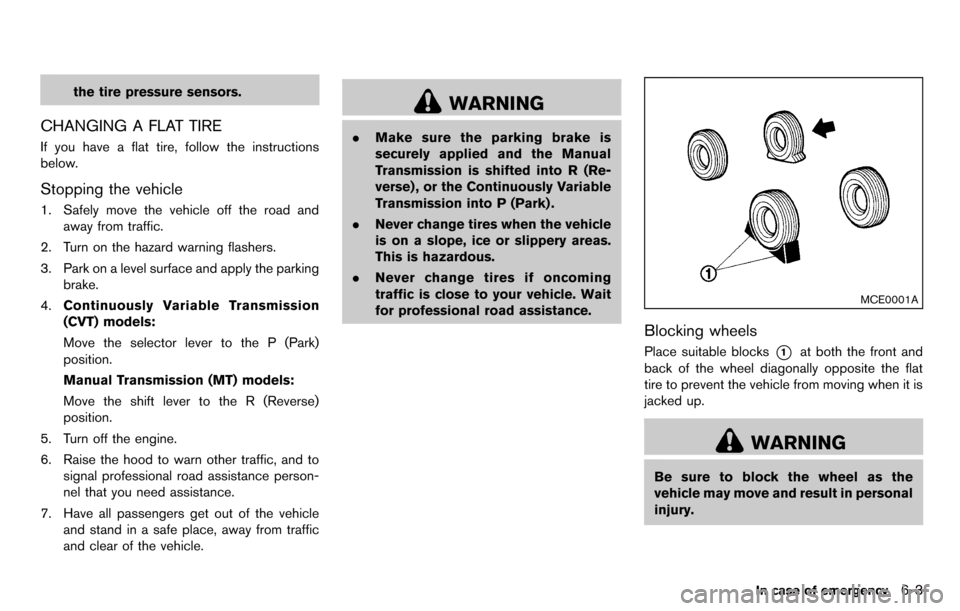
Blocking wheels
Place suitable blocks*1at both the front and
back of the wheel diagonally opposite the flat
tire to prevent the vehicle from moving when it is
jacked up.
WARNING
Be sure to block the wheel as the
vehicle may move and result in personal
injury.
In case of emergency6-3