Page 7 of 331
Illustrated table of contents0
Safety — Seats, seat belts and supplemental
restraint system1
Instruments and controls
Pre-driving checks and adjustments
Center display, heater, air conditioner, audio and
phone systems
Starting and driving
In case of emergency
Appearance and care
Maintenance and do-it-yourself
Technical and consumer information
Index
2
3
4
5
6
7
8
9
10
Table of
Contents
Page 20 of 331
1-2Safety — Seats, seat belts and supplemental restraint system
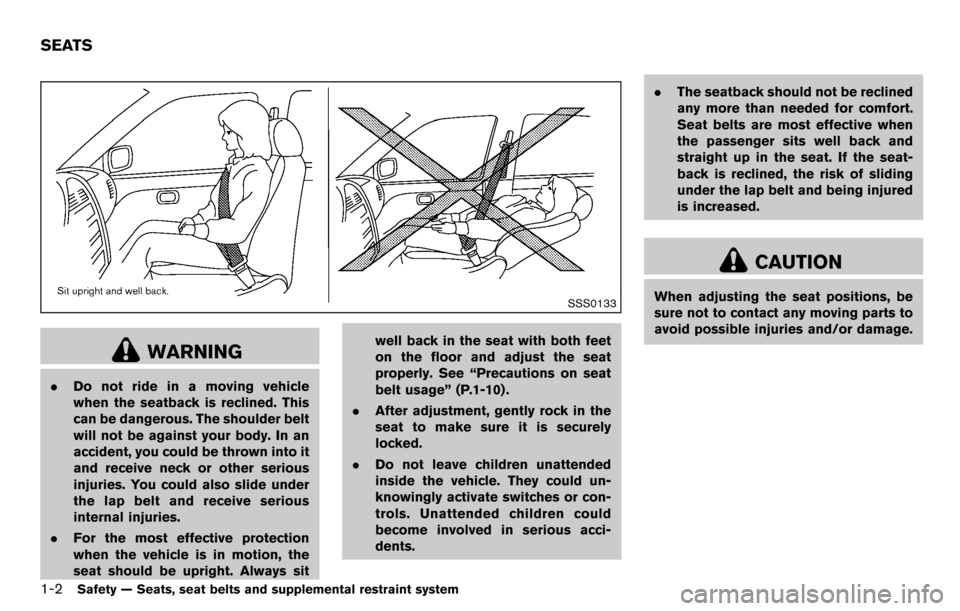
SSS0133
WARNING
.Do not ride in a moving vehicle
when the seatback is reclined. This
can be dangerous. The shoulder belt
will not be against your body. In an
accident, you could be thrown into it
and receive neck or other serious
injuries. You could also slide under
the lap belt and receive serious
internal injuries.
. For the most effective protection
when the vehicle is in motion, the
seat should be upright. Always sit well back in the seat with both feet
on the floor and adjust the seat
properly. See “Precautions on seat
belt usage” (P.1-10) .
. After adjustment, gently rock in the
seat to make sure it is securely
locked.
. Do not leave children unattended
inside the vehicle. They could un-
knowingly activate switches or con-
trols. Unattended children could
become involved in serious acci-
dents. .
The seatback should not be reclined
any more than needed for comfort.
Seat belts are most effective when
the passenger sits well back and
straight up in the seat. If the seat-
back is reclined, the risk of sliding
under the lap belt and being injured
is increased.
CAUTION
When adjusting the seat positions, be
sure not to contact any moving parts to
avoid possible injuries and/or damage.
SEATS
Page 21 of 331
SSS0792
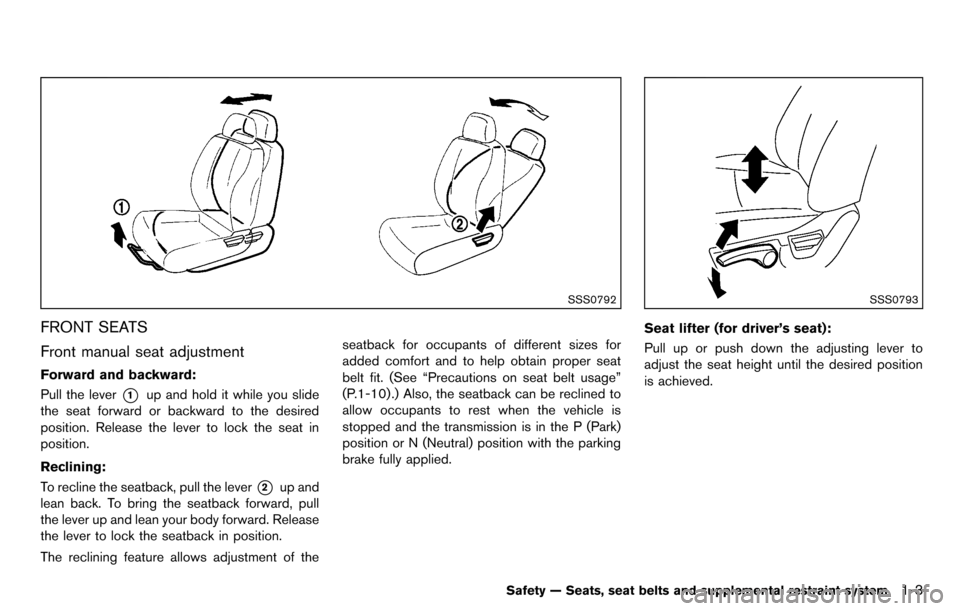
FRONT SEATS
Front manual seat adjustment
Forward and backward:
Pull the lever
*1up and hold it while you slide
the seat forward or backward to the desired
position. Release the lever to lock the seat in
position.
Reclining:
To recline the seatback, pull the lever
*2up and
lean back. To bring the seatback forward, pull
the lever up and lean your body forward. Release
the lever to lock the seatback in position.
The reclining feature allows adjustment of the seatback for occupants of different sizes for
added comfort and to help obtain proper seat
belt fit. (See “Precautions on seat belt usage”
(P.1-10) .) Also, the seatback can be reclined to
allow occupants to rest when the vehicle is
stopped and the transmission is in the P (Park)
position or N (Neutral) position with the parking
brake fully applied.
SSS0793
Seat lifter (for driver’s seat):
Pull up or push down the adjusting lever to
adjust the seat height until the desired position
is achieved.
Safety — Seats, seat belts and supplemental restraint system1-3
Page 22 of 331
1-4Safety — Seats, seat belts and supplemental restraint system
SSS0961
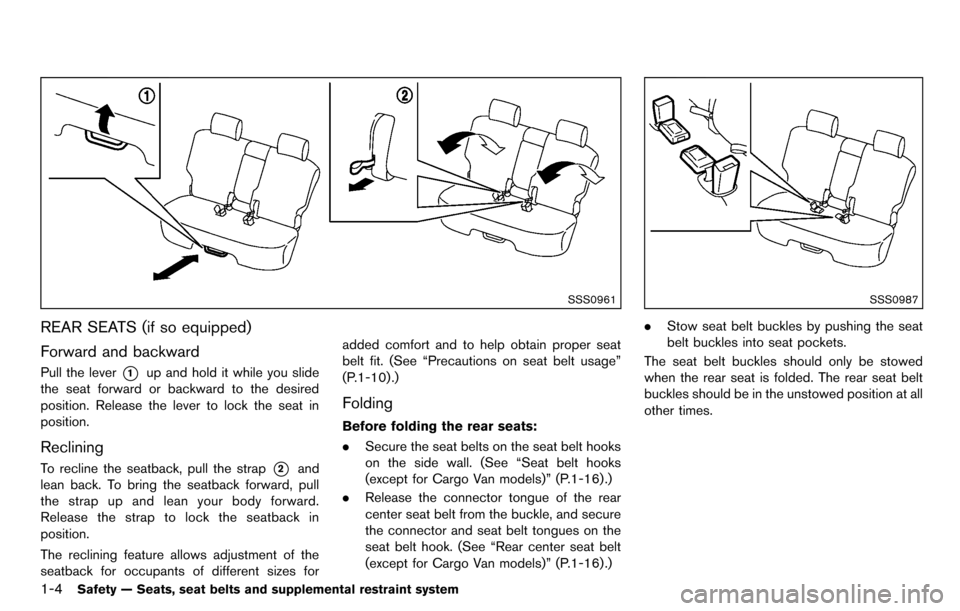
REAR SEATS (if so equipped)
Forward and backward
Pull the lever*1up and hold it while you slide
the seat forward or backward to the desired
position. Release the lever to lock the seat in
position.
Reclining
To recline the seatback, pull the strap*2and
lean back. To bring the seatback forward, pull
the strap up and lean your body forward.
Release the strap to lock the seatback in
position.
The reclining feature allows adjustment of the
seatback for occupants of different sizes for added comfort and to help obtain proper seat
belt fit. (See “Precautions on seat belt usage”
(P.1-10) .)
Folding
Before folding the rear seats:
.
Secure the seat belts on the seat belt hooks
on the side wall. (See “Seat belt hooks
(except for Cargo Van models)” (P.1-16) .)
. Release the connector tongue of the rear
center seat belt from the buckle, and secure
the connector and seat belt tongues on the
seat belt hook. (See “Rear center seat belt
(except for Cargo Van models)” (P.1-16) .)
SSS0987
.Stow seat belt buckles by pushing the seat
belt buckles into seat pockets.
The seat belt buckles should only be stowed
when the rear seat is folded. The rear seat belt
buckles should be in the unstowed position at all
other times.
Page 24 of 331
1-6Safety — Seats, seat belts and supplemental restraint system
HEAD RESTRAINTS
WARNING
Head restraints supplement the other
vehicle safety systems. They may pro-
vide additional protection against injury
in certain rear end collisions. Adjust the
head restraints properly, as specified in
this section. Check the adjustment after
someone else uses the seat. Do not
attach anything to the head restraint
stalks or remove the head restraint. Do
not use the seat if the head restraint
has been removed. If the head restraint
was removed, reinstall and properly
adjust the head restraint before an
occupant uses the seating position.
Failure to follow these instructions
can reduce the effectiveness of the
head restraints. This may increase the
risk of serious injury or death in a
collision.
JVR0060X
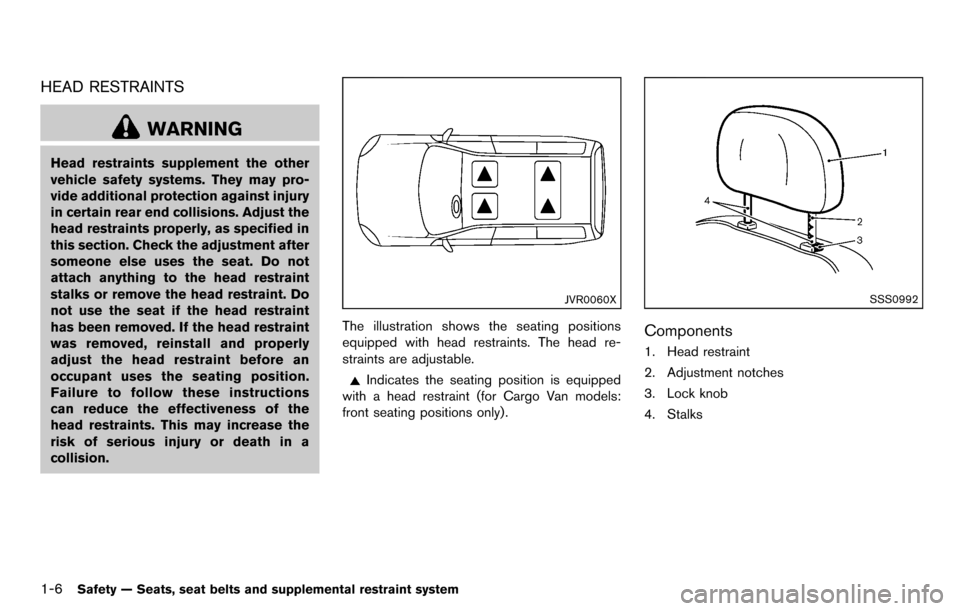
The illustration shows the seating positions
equipped with head restraints. The head re-
straints are adjustable.
Indicates the seating position is equipped
with a head restraint (for Cargo Van models:
front seating positions only).
SSS0992
Components
1. Head restraint
2. Adjustment notches
3. Lock knob
4. Stalks
Page 25 of 331
SSS0997
Adjustment
Adjust the head restraint so the center is level
with the center of your ears.
SSS0993
To raise the head restraint, pull it up.
SSS0994
To lower, push and hold the lock knob and push
the head restraint down.
Safety — Seats, seat belts and supplemental restraint system1-7
Page 26 of 331
1-8Safety — Seats, seat belts and supplemental restraint system
SSS0995
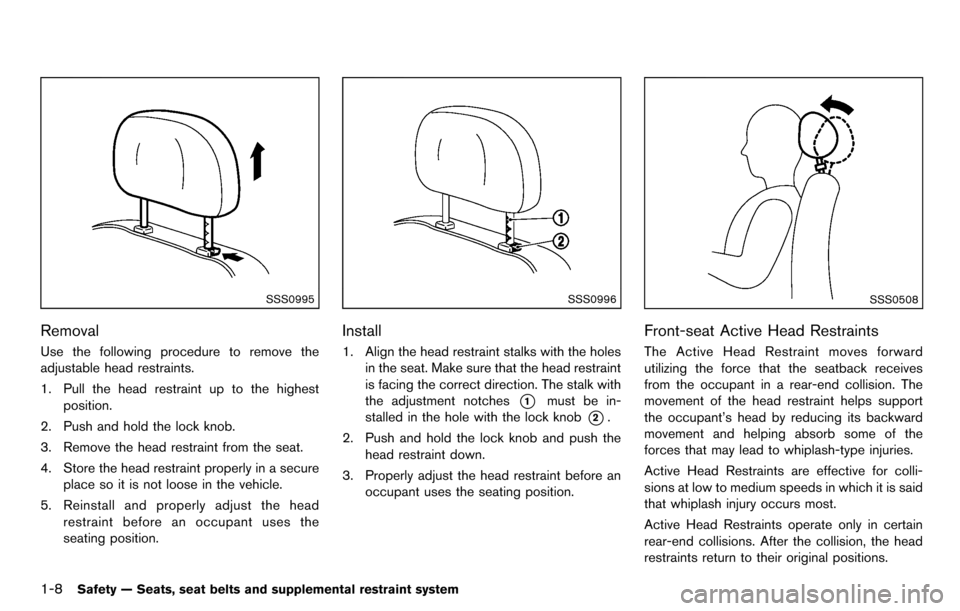
Removal
Use the following procedure to remove the
adjustable head restraints.
1. Pull the head restraint up to the highestposition.
2. Push and hold the lock knob.
3. Remove the head restraint from the seat.
4. Store the head restraint properly in a secure place so it is not loose in the vehicle.
5. Reinstall and properly adjust the head restraint before an occupant uses the
seating position.
SSS0996
Install
1. Align the head restraint stalks with the holesin the seat. Make sure that the head restraint
is facing the correct direction. The stalk with
the adjustment notches
*1must be in-
stalled in the hole with the lock knob
*2.
2. Push and hold the lock knob and push the head restraint down.
3. Properly adjust the head restraint before an occupant uses the seating position.
SSS0508
Front-seat Active Head Restraints
The Active Head Restraint moves forward
utilizing the force that the seatback receives
from the occupant in a rear-end collision. The
movement of the head restraint helps support
the occupant’s head by reducing its backward
movement and helping absorb some of the
forces that may lead to whiplash-type injuries.
Active Head Restraints are effective for colli-
sions at low to medium speeds in which it is said
that whiplash injury occurs most.
Active Head Restraints operate only in certain
rear-end collisions. After the collision, the head
restraints return to their original positions.
Page 33 of 331
Failure to do so may reduce the effec-
tiveness of the entire restraint system
and increase the chance or severity of
injury in an accident.
Checking seat belt operation
Seat belt retractors are designed to lock seat
belt movement by two separate methods:
.When the belt is pulled quickly from the
retractor.
. When the vehicle slows down rapidly.
To increase your confidence in the seat belts,
check the operation as follows:
. Grasp the shoulder belt and pull forward
quickly. The retractor should lock and
restrict further belt movement.
If the retractor does not lock during this check or
if you have any question about seat belt
operation, see a NISSAN dealer.
SSS0351A
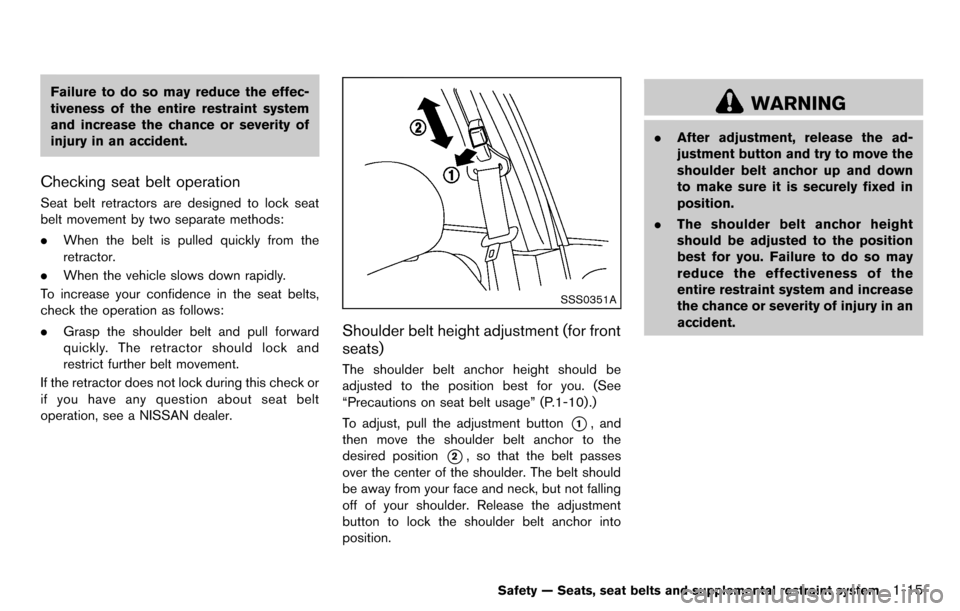
Shoulder belt height adjustment (for front
seats)
The shoulder belt anchor height should be
adjusted to the position best for you. (See
“Precautions on seat belt usage” (P.1-10) .)
To adjust, pull the adjustment button
*1, and
then move the shoulder belt anchor to the
desired position
*2, so that the belt passes
over the center of the shoulder. The belt should
be away from your face and neck, but not falling
off of your shoulder. Release the adjustment
button to lock the shoulder belt anchor into
position.
WARNING
. After adjustment, release the ad-
justment button and try to move the
shoulder belt anchor up and down
to make sure it is securely fixed in
position.
. The shoulder belt anchor height
should be adjusted to the position
best for you. Failure to do so may
reduce the effectiveness of the
entire restraint system and increase
the chance or severity of injury in an
accident.
Safety — Seats, seat belts and supplemental restraint system1-15