Page 122 of 235

INFO:
The location is stored in the first available
position number in the Address Book list.
Voice command
1. Push located on the steering
switch.
2. After the tone sounds, speak a command.
To store a current location:
“Store Location” (Alternate command mode)
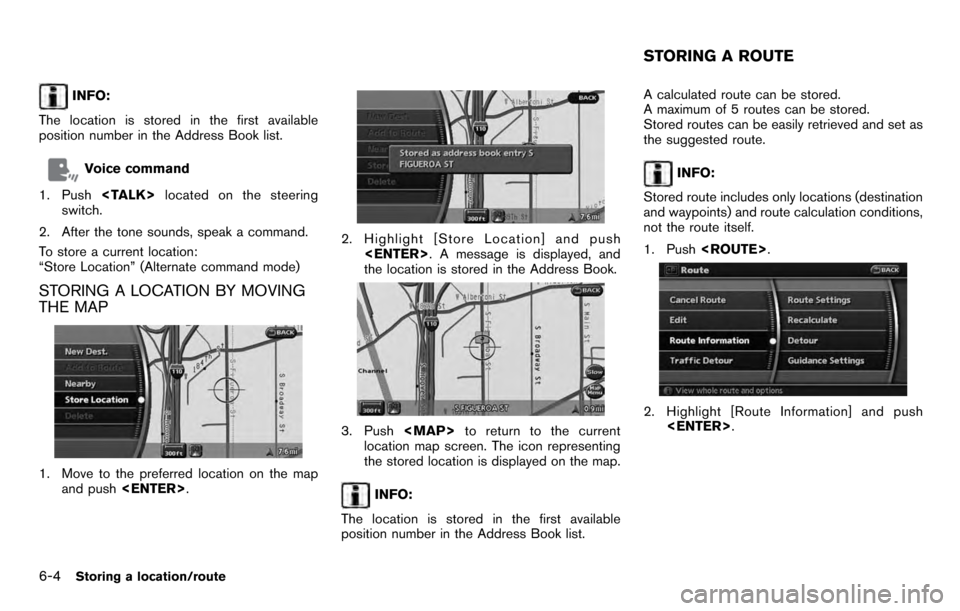
STORING A LOCATION BY MOVING
THE MAP
1. Move to the preferred location on the map and push .
2. Highlight [Store Location] and push
. A message is displayed, and
the location is stored in the Address Book.
3. Push
Page 123 of 235
3. Highlight [Store Route] and push .
4. A confirmation message is displayed. Con-
firm the contents of the message, highlight
[Yes] and push .
The current route is stored.
OTHER SETTINGS
You can also store a route using the following
procedure.
1) Push .
2) Highlight [Navigation] and push .
3) Highlight [Address Book] and push .
4) Highlight [Stored Routes] and push .
5) Highlight [None (Add New)] and push .
6) A confirmation message is displayed. Con- firm the contents of the message, highlight
[Yes] and push .
The current route is stored.
INFO:
. The route is stored in the first available
position number in the store current route
list.
. A maximum of 5 routes can be stored. When
5 routes are stored in the Address Book, a
new route cannot be stored until a route is
deleted.
“DELETING A STORED ITEM” (page
6-20)
. If you have not set any waypoints on the
route, the route cannot be stored.
Storing a location/route6-5
Page 124 of 235

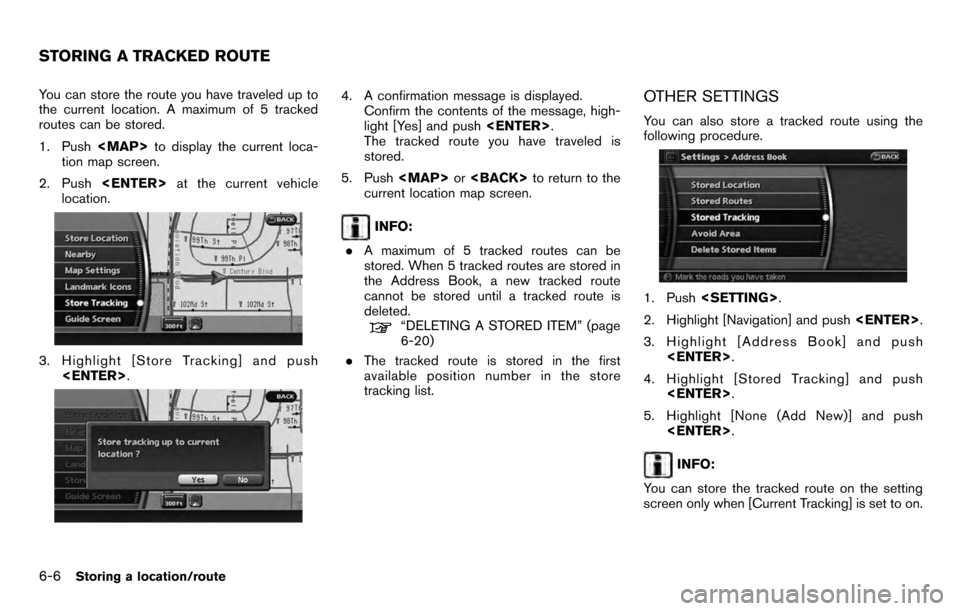
You can store the route you have traveled up to
the current location. A maximum of 5 tracked
routes can be stored.
1. Push
Page 127 of 235

Available items
.Stored Location:
Edits the information of a stored home and
location.
“EDITING THE STORED HOME AND
LOCATION” (page 6-9)
. Stored Routes:
Edits the information of a stored route.
“EDITING THE STORED ROUTE”
(page 6-16)
. Stored Tracking:
Edits the information of a stored tracked
route.
“EDITING THE STORED TRACKING”
(page 6-16)
. Avoid Area:
Edits the information of a stored Avoid Area.
“EDITING THE AVOID AREA” (page
6-18)
. Delete Stored Items:
Deletes a stored location or route.
“DELETING ALL STORED ITEMS”
(page 6-21)
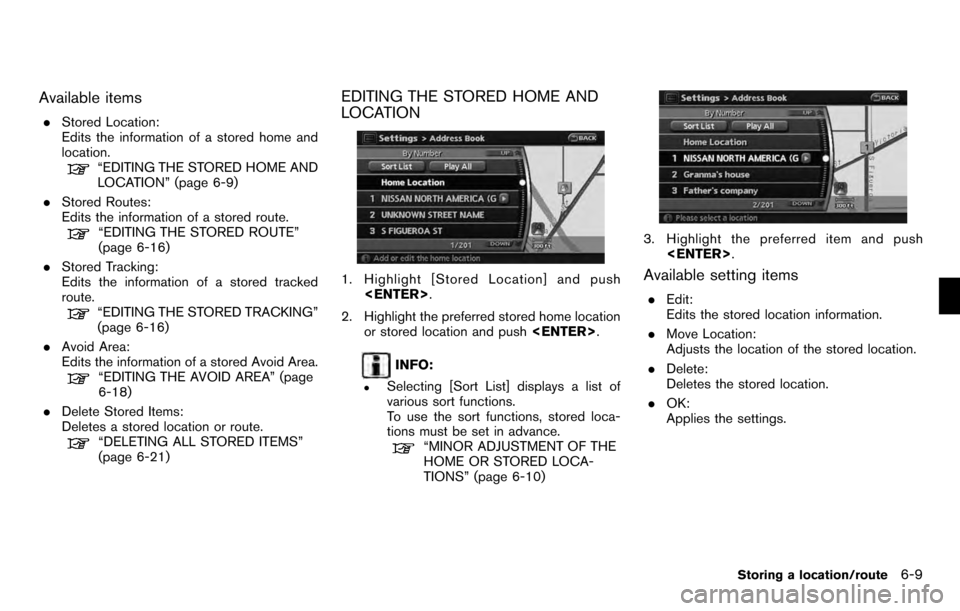
EDITING THE STORED HOME AND
LOCATION
1. Highlight [Stored Location] and push
.
2. Highlight the preferred stored home location or stored location and push .
INFO:
.Selecting [Sort List] displays a list of
various sort functions.
To use the sort functions, stored loca-
tions must be set in advance.
“MINOR ADJUSTMENT OF THE
HOME OR STORED LOCA-
TIONS” (page 6-10)
3. Highlight the preferred item and push
.
Available setting items
.Edit:
Edits the stored location information.
. Move Location:
Adjusts the location of the stored location.
. Delete:
Deletes the stored location.
. OK:
Applies the settings.
Storing a location/route6-9
Page 128 of 235
![NISSAN ARMADA 2012 1.G 06IT Navigation Manual MINOR ADJUSTMENT OF THE HOME
OR STORED LOCATIONS
When you select [Edit], you can edit the
following items of the home or stored location.. Show Icon on Map
. Name (only for stored locations)
. Icon
. NISSAN ARMADA 2012 1.G 06IT Navigation Manual MINOR ADJUSTMENT OF THE HOME
OR STORED LOCATIONS
When you select [Edit], you can edit the
following items of the home or stored location.. Show Icon on Map
. Name (only for stored locations)
. Icon
.](/manual-img/5/280/w960_280-127.png)
MINOR ADJUSTMENT OF THE HOME
OR STORED LOCATIONS
When you select [Edit], you can edit the
following items of the home or stored location.. Show Icon on Map
. Name (only for stored locations)
. Icon
. Sound
. Direction
. Distance
. Phone No.
. Group (only for stored locations)
. Entry Number (only for stored locations)
Show Icon on Map
Displays the home icon or the stored location
icon on the map.
1. Highlight [Edit] and push .2. Highlight [Show Icon on Map] and push
.
3. The indicator illuminates when the item is set. Then the system displays the icon on
the map.
Name (only for stored locations)
Changes the name of a stored location.
1. Highlight [Edit] and push .
2. Highlight [Name] and push .
A character input screen is displayed.
3. Enter the preferred name for the stored
location.
“CHARACTER (letter and number)
INPUT SCREEN” (page 2-21)
4. Highlight [OK] and push .
The name is stored.
Icon
Changes the icon of the home or stored location
to the preferred one. By changing the icons, you
can utilize the [By Icon] option of the sort
function more effectively.
1. Highlight [Edit] and push .
2. Highlight [Icon] and push .
A list of icons is displayed.
6-10Storing a location/route
Page 131 of 235
Sound
Sets the tone of the arrival alarm that sounds
when the vehicle approaches the home or a
stored location.
1. Highlight [Edit] and push.
2. Highlight [Sound] and push .
A sound list is displayed.
3. Highlight the preferred alarm tone by scrol- ling the list using the main directional
buttons or the center dial. Then push
. The indicator of the selected
alarm tone illuminates.
Sound list:
None
Chime
Melody
Sound
Dog
Cat
Wave
Church bell
Music box 1
Music box 2
Marimba
Trumpet
Horn
Scratch
Direction
Sets the alarm to sound when approaching from
a specific direction.
1. Highlight [Edit] and push .
2. Highlight [Direction] and push .
The home or stored location is displayed at
the center of the map.
3. Set the direction that sounds the alarm using the center dial or the left or right
button of the main directional buttons. Then
push . The selected direction is
set.
Storing a location/route6-13
Page 132 of 235
![NISSAN ARMADA 2012 1.G 06IT Navigation Manual INFO:
. While setting the direction, you can change
the map scale.
. After the direction is set, if you highlight
[Direction] and push <ENTER>once again,
a confirmation message is displayed. Con-
firm NISSAN ARMADA 2012 1.G 06IT Navigation Manual INFO:
. While setting the direction, you can change
the map scale.
. After the direction is set, if you highlight
[Direction] and push <ENTER>once again,
a confirmation message is displayed. Con-
firm](/manual-img/5/280/w960_280-131.png)
INFO:
. While setting the direction, you can change
the map scale.
. After the direction is set, if you highlight
[Direction] and push once again,
a confirmation message is displayed. Con-
firm the contents of the message, highlight
[Yes] and push . The set direction
is cancelled.
Distance
Sets the alarm to sound when reaching a
specific distance to the home or stored location.
1. Highlight [Edit] and push .
2. Highlight [Distance] and push .
3. Highlight the preferred distance option and
push . The indicator of the
selected distance illuminates.
Available distance options: . 150 feet (50 m)
. 300 feet (100 m)
. 1000 feet (300 m)
. 1500 feet (500 m)
INFO:
Once you set the direction and distance to
sound an alarm, the system will sound the alarm
when the vehicle icon passes a half circle outline
on the map, as shown in the figure.
Example: Set to 300 feet (100 m) distance,
upward direction
&1Stored location icon
&2Vehicle icon
&3Setting range
Phone No.
Stores the telephone number of the home or a
stored location.
1. Highlight [Edit] and push .
2. Highlight [Phone No.] and push .
The telephone number entry screen is
6-14Storing a location/route
Page 133 of 235
displayed.
3. Enter the telephone number of the home orstored location.
“PHONE NUMBER INPUT SCREEN”
(page 2-22)
4. Highlight [OK] and push .
The telephone number is stored.
Group (only for stored locations)
This allows you to group the stored locations. By
grouping the stored locations, you can utilize the
[By Group] option of the sort function more
effectively.
1. Highlight [Edit] and push .
2. Highlight [Group] and push .
3. Highlight the preferred group and push
. When the indicator of the
selected group illuminates, the stored loca-
tion is classified into the applicable group.
Entry Number (only for stored locations)
Swaps the position numbers of any two stored
locations in the list.
1. Highlight [Edit] and push .
2. Highlight [Entry Number] and push . A list of stored locations is
displayed.
3. Highlight the stored locations you want to swap and push . The position
numbers of the selected stored locations are
swapped.
Storing a location/route6-15