Page 251 of 453
●Individual tracks from a CD cannot be se-
lected to be recorded to the Music Box hard
drive.
● The fast forward and rewind features are
disabled while the CD is recording.
● The recording process can be stopped at
any time. All tracks that were played before
the CD was stopped are stored.
● Individual tracks can be deleted from the
hard drive after the CD is recorded.
● The system records faster than it plays. If the title information of the track being recorded
is stored either in the hard drive or in the CD, the
title is automatically displayed on the screen. For
title acquisition from the hard drive, music recog-
nition technology and related data are provided
by Gracenote�.
To view the details of the track, touch the “Text”
key on the screen. The track name and album title
are displayed on the screen.
If a track is not recorded successfully due to
skipping sounds, the
Page 253 of 453
Music Box menu
There are some options available during play-
back. Select the “Menu” key, then select one of
the following that are displayed on the screen, if
necessary. Refer to the following information for
each item:● Now Playing
Lists the tracks stored in the Music Box
system. Touch the name of the track to begin
playing that track.
● Music Library
Lists the songs in the Music Library. Tracks
can be searched by Album, Artist or Genre.
Page 254 of 453
●My Playlists
Displays the playlists stored in the system.
Touch the “Edit” key next to a playlist to
perform the following operations for that
playlist:
– Add Current Song - adds the song cur- rently playing to the playlist.
– Add Songs by Album - adds songs to the playlist by album.
– Add Songs by Artist - adds songs to the playlist by artist.
– Edit Song Order - edits the order of the songs in the playlist. – Edit Name - changes the name of the
playlist.
– Delete Songs - deletes songs from the playlist.
●Play Mode
Alters the play mode of the playlist. Touch
the key of the mode you wish to apply. The
modes change the play pattern as follows:
– Normal - no play pattern is applied.
– 1 Album Repeat - the songs in the current album are repeated.
– 1 Track Repeat - the current track is re- peated.
– 1 Album Random - the songs in the cur- rent album are played randomly.
– All Random - all songs are played ran- domly.
Page 255 of 453
●Edit Music Information
Edits the information of the songs in the
Music Library.
– Edit Information of Current Song
– Edit Information by Album
– Update Gracenote from USB Device
– Transfer Missing Titles to USB
– Update Gracenote from HDD The “Transfer Missing Titles to USB” and “Up-
date Gracenote from HDD” options can be used
to update the titles of songs in the Music Library.
Visit www.nissanusa.com/gracenote for detailed
instructions on how to update the Gracenote
database.Music Box settings
To set up the Music Box system to your preferred
settings, touch the “Menu” key during playback,
then touch the “Music Box Settings” key.
● Music Box Used/Free Space:
Displays the number of tracks and albums
stored on the hard drive. The percentage of
hard drive space taken up and the amount of
remaining recording time left are also shown.
● Automatic Recording:
When this item is turned to ON, the Music
Box system automatically starts recording
when a CD is inserted.
Page 258 of 453
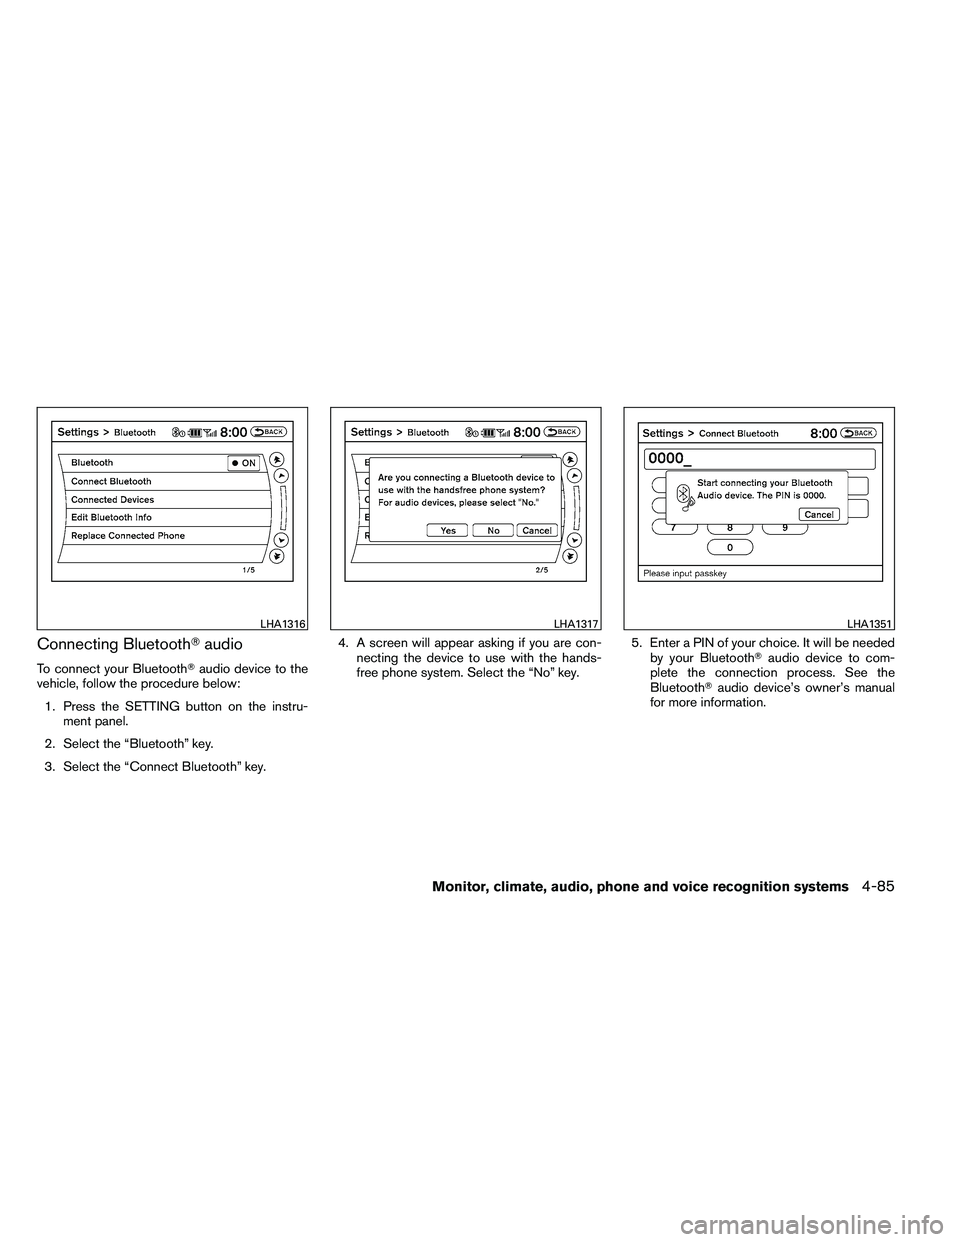
Connecting Bluetooth�audio
To connect your Bluetooth� audio device to the
vehicle, follow the procedure below:
1. Press the SETTING button on the instru- ment panel.
2. Select the “Bluetooth” key.
3. Select the “Connect Bluetooth” key. 4. A screen will appear asking if you are con-
necting the device to use with the hands-
free phone system. Select the “No” key. 5. Enter a PIN of your choice. It will be needed
by your Bluetooth� audio device to com-
plete the connection process. See the
Bluetooth� audio device’s owner’s manual
for more information.
Page 259 of 453
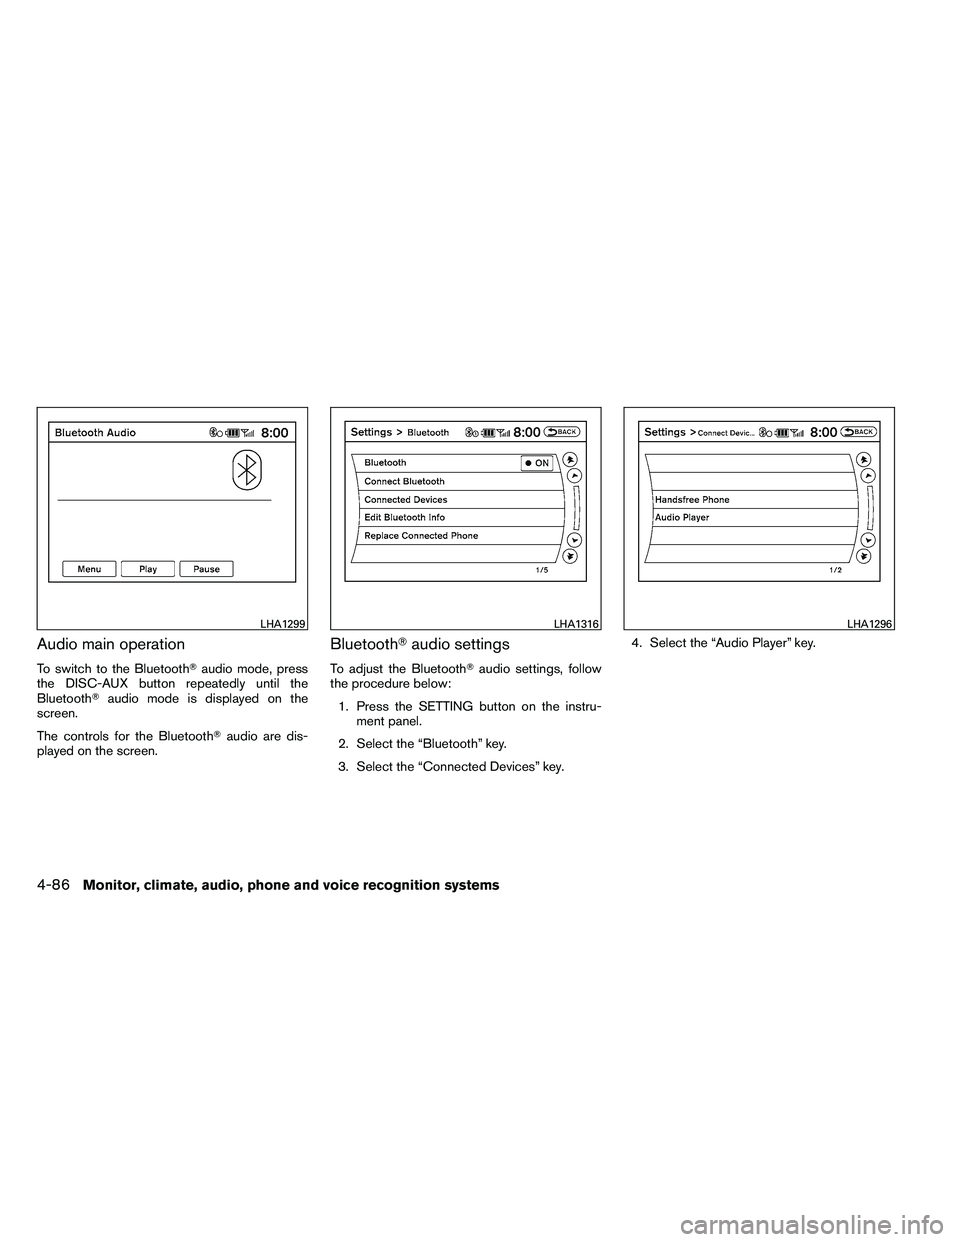
Audio main operation
To switch to the Bluetooth�audio mode, press
the DISC-AUX button repeatedly until the
Bluetooth� audio mode is displayed on the
screen.
The controls for the Bluetooth� audio are dis-
played on the screen.
Bluetooth� audio settings
To adjust the Bluetooth� audio settings, follow
the procedure below:
1. Press the SETTING button on the instru- ment panel.
2. Select the “Bluetooth” key.
3. Select the “Connected Devices” key. 4. Select the “Audio Player” key.
Page 260 of 453
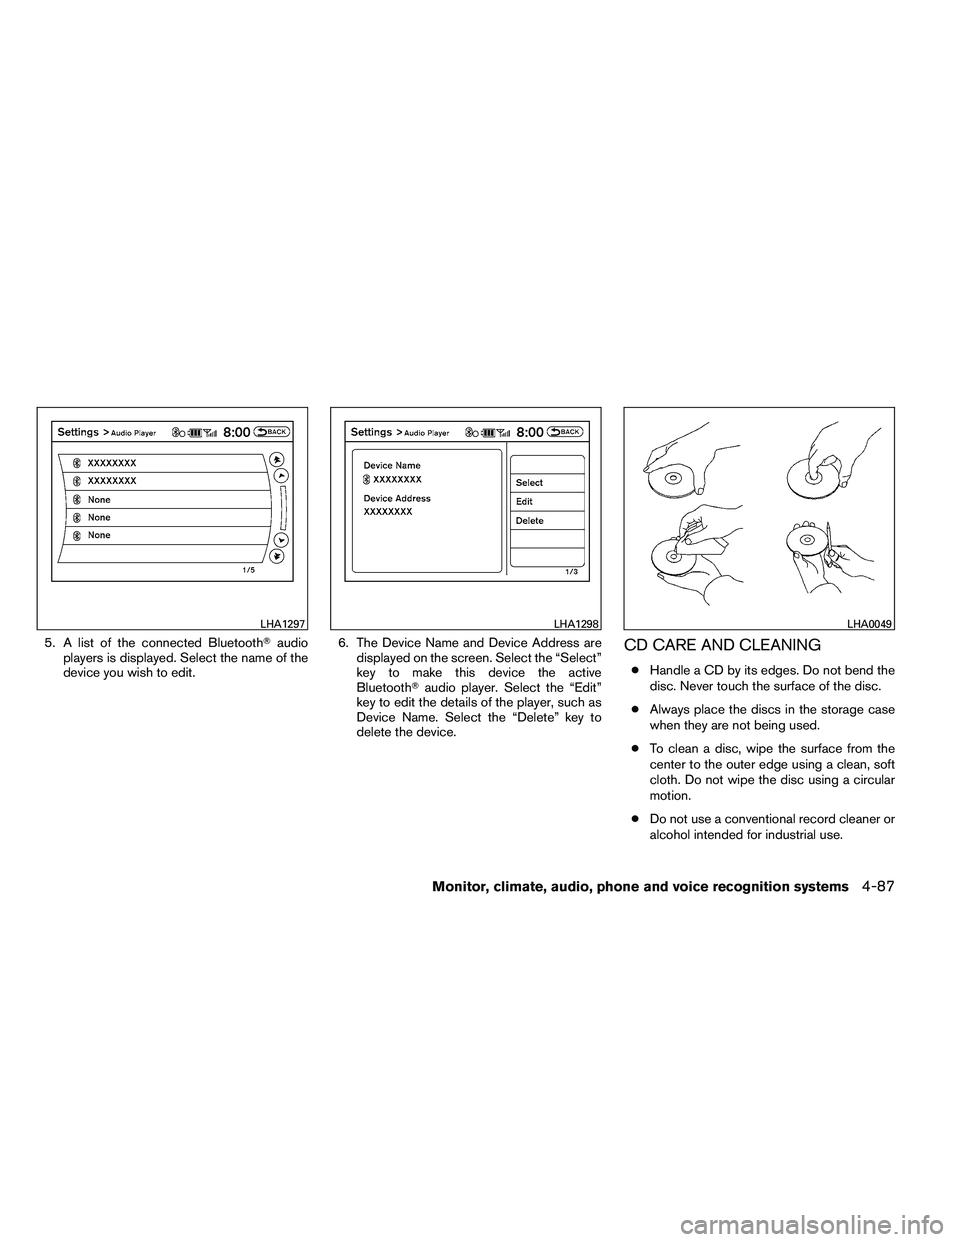
5. A list of the connected Bluetooth�audio
players is displayed. Select the name of the
device you wish to edit. 6. The Device Name and Device Address are
displayed on the screen. Select the “Select”
key to make this device the active
Bluetooth� audio player. Select the “Edit”
key to edit the details of the player, such as
Device Name. Select the “Delete” key to
delete the device.CD CARE AND CLEANING
● Handle a CD by its edges. Do not bend the
disc. Never touch the surface of the disc.
● Always place the discs in the storage case
when they are not being used.
● To clean a disc, wipe the surface from the
center to the outer edge using a clean, soft
cloth. Do not wipe the disc using a circular
motion.
● Do not use a conventional record cleaner or
alcohol intended for industrial use.
Page 282 of 453
2. Select the “Connect Bluetooth” key.3. A popup box will appear on the screen,
prompting you to confirm that the connec-
tion is for the phone system. Select the “Yes”
key. 4. When a PIN code appears on the screen,
operate the Bluetooth� cellular phone to
enter the PIN code.
The connecting procedure of the cellular
phone varies according to each cellular
phone. See the cellular phone Owner’s
Manual for details. You can also visit
www.nissanusa.com/bluetooth or call the
NISSAN Consumer Affairs Department for
instructions on connecting recommended
cellular phones.
When the connecting is complete, the
screen will return to the Bluetooth� settings
screen.