2012 NISSAN ALTIMA COUPE brake
[x] Cancel search: brakePage 7 of 20

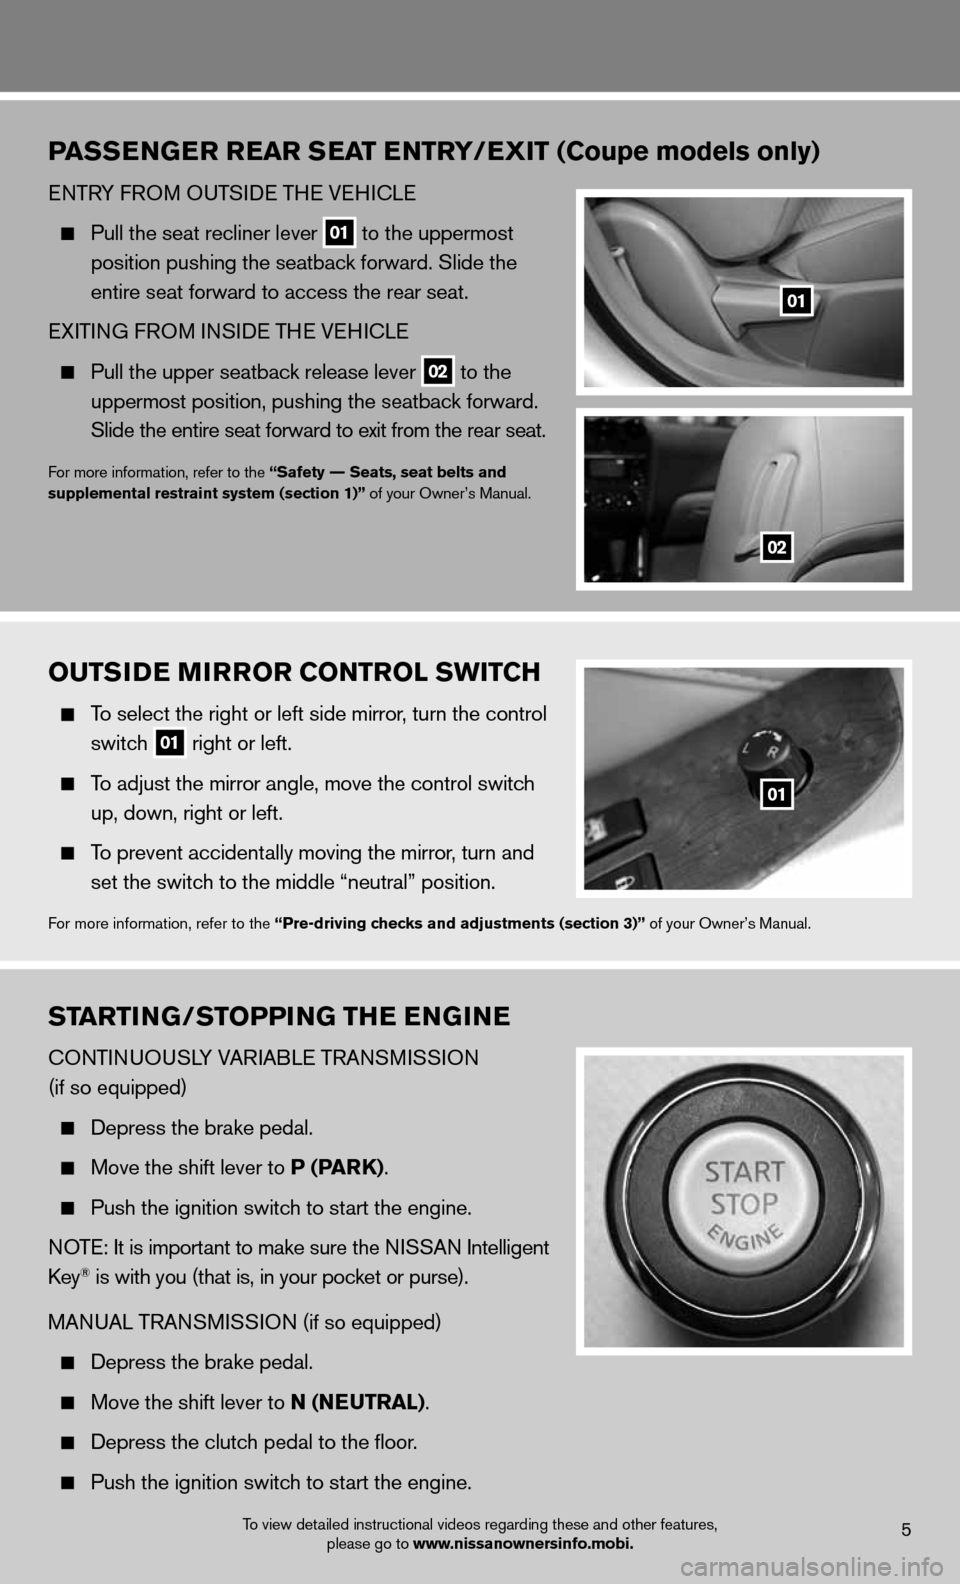
OUTSIDE MIRROR CONTROL SWITCh
To select the right or left side mirror , turn the control
switch
01 right or left.
To adjust the mirror angle, move the control switch
up, down, right or left.
To prevent accidentally moving the mirror, turn and
set the switch to the middle “neutral” position.
for more information, refer to the “Pre-driving checks and adjustments (section 3)” of your Owner’s Manual.
P ASSENGER REAR SEAT ENTRY/EXIT (Coupe models only)
enTRY f ROM O uTSide TH e VeHic Le
Pull the seat recliner lever 01 to the uppermost
position pushing the seatback forward. Slide the
entire seat forward to access the rear seat.
eXi TinG fROM inSide TH e VeH icL e
Pull the upper seatback release lever 02 to the
uppermost position, pushing the seatback forward.
Slide the entire seat forward to exit from the rear seat.
for more information, refer to the “Safety –– Seats, seat belts and
supplemental restraint system (section 1)” of your Owner’s Manual.
01
02
To view detailed instructional videos regarding these and other features, please go to www.nissanownersinfo.mobi.5
01
STARTING/STOPPING Th E ENGINE
cOnTinuOuSLY VAR iABL e TRA nSM iSSiOn
(if so equipped)
Depress the brake pedal.
Move the shift lever to P (PAR k).
Push the ignition switch to start the engine.
n OTe: it is important to make sure the ni SSAn intelligent
key
® is with you (that is, in your pocket or purse).
MAnu AL TRAn SMiSS iO n (if so equipped)
Depress the brake pedal.
Move the shift lever to N (N EUTRAL).
depress the clutch pedal to the floor.
Push the ignition switch to start the engine.
Page 8 of 20

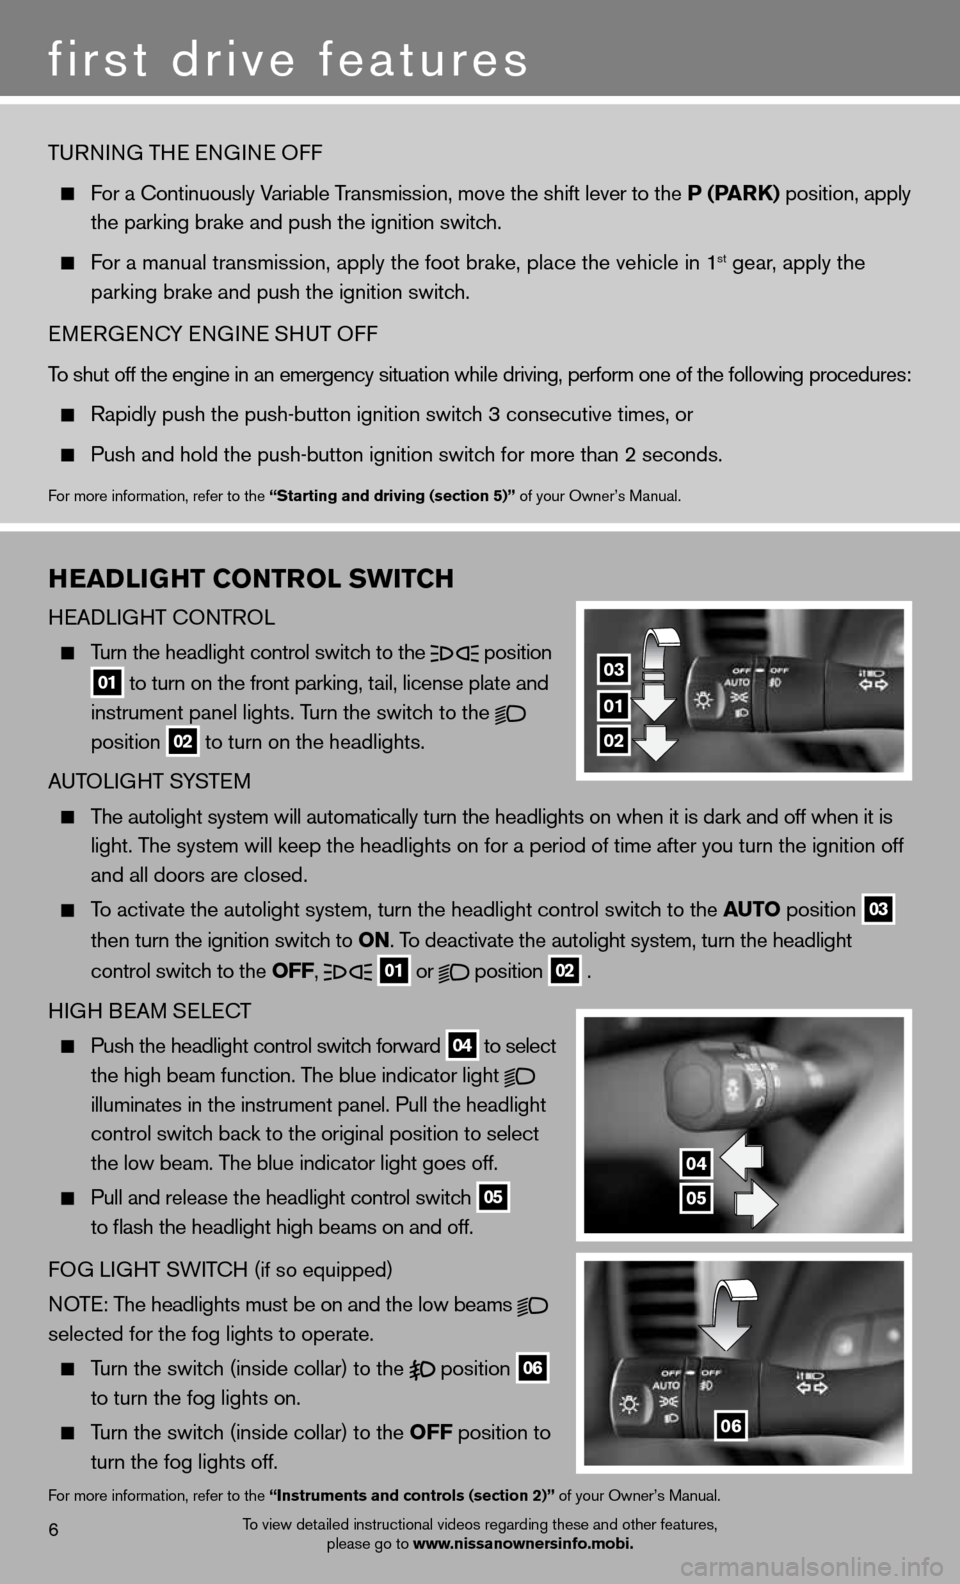
hEADLIG hT CONTROL SWITCh
H eAd LiGHT c OnTROL
Turn the headlight control switch to the
position
01 to turn on the front parking, tail, license plate and
instrument panel lights. Turn the switch to the
position
02 to turn on the headlights.
A uTOLi GHT SYSTe M
The autolight system will automatically turn the headlights on when it is\
dark and off when it is
light. The system will keep the headlights on for a period of time after you tur\
n the ignition off
and all doors are closed.
To activate the autolight system, turn the headlight control switch to the AUTO position
03
then turn the ignition switch to ON. To deactivate the autolight system, turn the headlight
control switch to the OFF,
01 or
position
02 .
H iGH B eAM S eLec T
Push the headlight control switch forward
04 to
select
the high beam function. The blue indicator light
illuminates in the instrument panel. Pull the headlight
control switch back to the original position to select
the low beam. The blue indicator light goes off.
Pull and release the headlight control switch
05
to flash the headlight high beams on and off.
fOG Li GHT SW iTc H (if so equipped)
NOTE: The headlights must be on and the low beams
selected for the fog lights to operate.
Turn the switch (inside collar) to the
position
06
to turn the fog lights on.
Turn the switch (inside collar)
to the OFF position to
turn the fog lights off.
for more information, refer to the “Instruments and controls (section 2)” of your Owner’s Manual.
To view detailed instructional videos regarding these and other features,
please go to www.nissanownersinfo.mobi.6
first drive features
TuRnin G THe enGine Off
For a Continuously Variable Transmission, move the shift lever to the P (PAR k) position, apply
the parking brake and push the ignition switch.
For a manual transmission, apply the foot brake, place the vehicle in 1st gear, apply the
parking brake and push the ignition switch.
eMeRGenc Y enGine SHuT Off
To shut off the engine in an emergency situation while driving, perform one of the following procedures:
Rapidly push the push-button ignition switch 3 consecutive times, or
Push and hold the push-button ignition switch for more than 2 seconds.
for more information, refer to the “Starting and driving (section 5)” of your Owner’s Manual.
01
03
02
04
05
06
Page 12 of 20

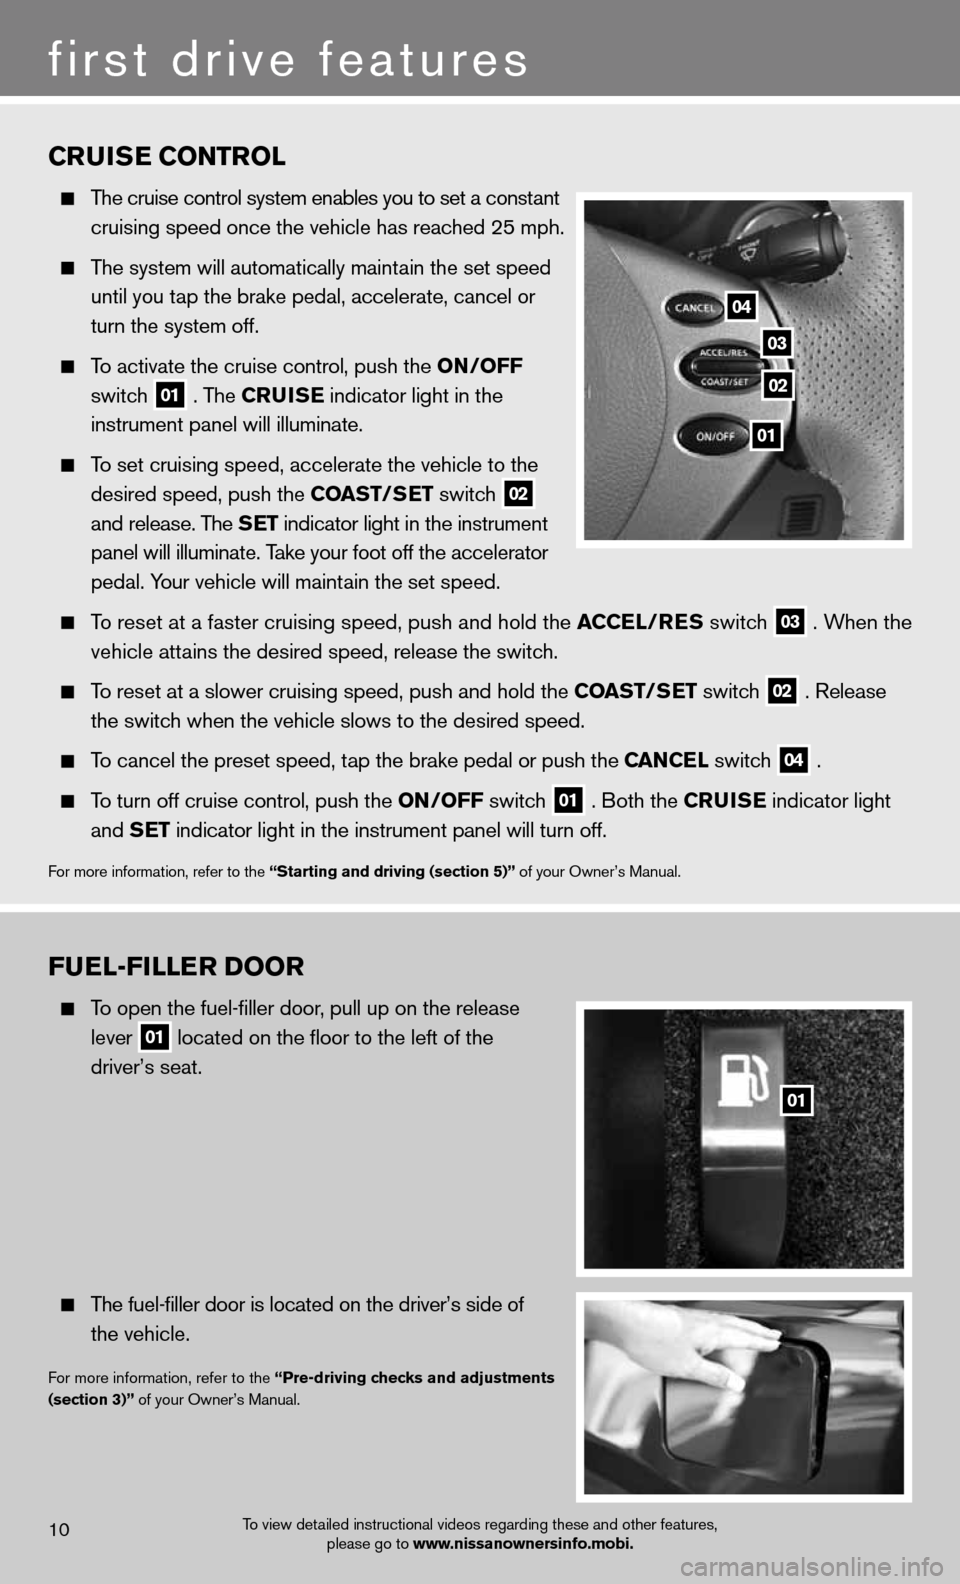
FUEL-FILLER DOOR
To open the fuel-filler door, pull up on the release
lever
01 located on the floor to the left of the
driver’s seat.
The fuel-filler door is located on the driver’s side of
the vehicle.
for more information, refer to the “Pre-driving checks and adjustments
(section 3)” of your Owner’s Manual.
CRUISE CONTROL
The cruise control system enables you to set a constant
cruising speed once the vehicle has reached 25 mph.
The system will automatically maintain the set speed
until you tap the brake pedal, accelerate, cancel or
turn the system off.
To activate the cruise control, push the ON/OFF
switch
01 . The CRUISE
indicator light in the
instrument panel will illuminate.
To set cruising speed, accelerate the vehicle to the
desired speed, push the COAST/SET switch
02
and release. The SET indicator light in the instrument
panel will illuminate. Take your foot off the accelerator
pedal. Your vehicle will maintain the set speed.
To reset at a faster cruising speed, push and hold the ACCEL/RES switch
03 . When the
vehicle attains the desired speed, release the switch.
To reset at a slower cruising speed, push and hold the COAST/SET switch
02 . Release
the switch when the vehicle slows to the desired speed.
To cancel the preset speed, tap the brake pedal or push the CANCEL switch
04 .
To turn off cruise control, push the ON/OFF switch
01 . Both the CRUISE
indicator light
and SET indicator light in the instrument panel will turn off.
for more information, refer to the “Starting and driving (section 5)” of your Owner’s Manual.
first drive features
To view detailed instructional videos regarding these and other features,
please go to www.nissanownersinfo.mobi.10
03
02
04
01
01
Page 18 of 20

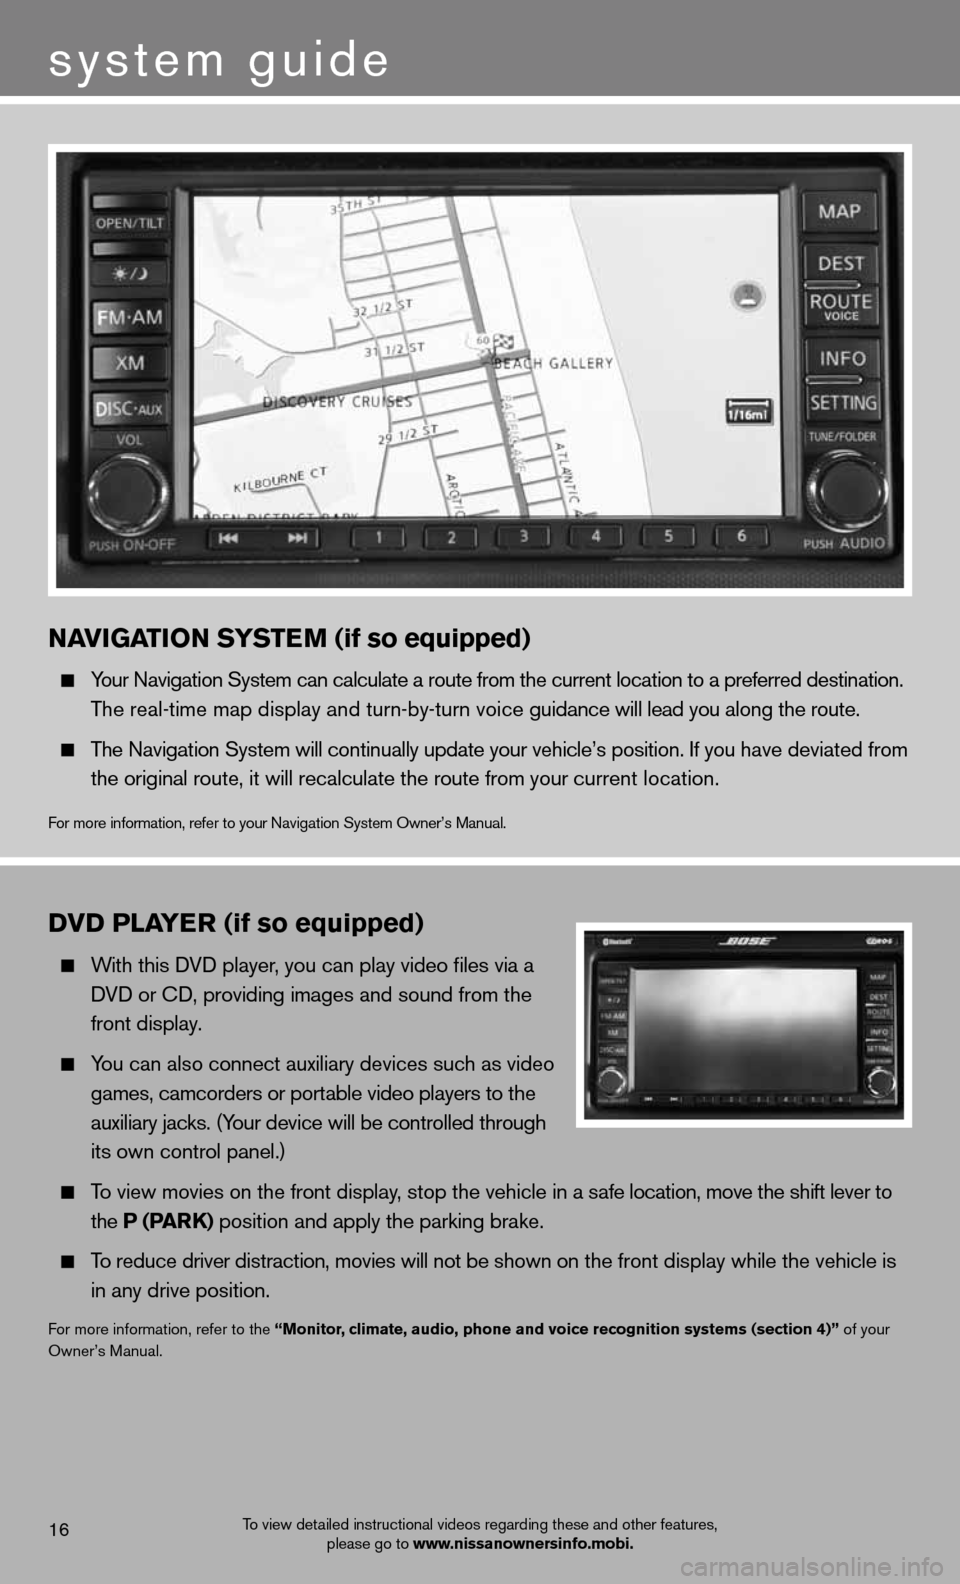
NAVIGATION SYSTEM (if so equipped)
Your navigation System can calculate a route from the current location to a preferred destination.
The real-time map display and turn-by-turn voice guidance will lead you along the route.
The navigation System will continually update your vehicle’s position. if you have deviated from
the original route, it will recalculate the route from your current location.
for more information, refer to your navigation System Owner’s Manual.
DVD PLAYER (if so equipped)
With this d Vd player, you can play video files via a
d Vd or cd, providing images and sound from the
front display.
You can also connect auxiliary devices such as video
games, camcorders or portable video players to the
auxiliary jacks. (Your device will be controlled through
its own control panel.)
To view movies on the front display, stop the vehicle in a safe location, move the shift lever to
the P (PAR k) position and apply the parking brake.
To reduce driver distraction, movies will not be shown on the front display while the vehicle is
in any drive position.
for more information, refer to the “Monitor, climate, audio, phone and voice recognition systems (section 4)” of your
Owner’s Manual.
system guide
To view detailed instructional videos regarding these and other features, please go to www.nissanownersinfo.mobi.16