2012 NISSAN ALTIMA COUPE transmission
[x] Cancel search: transmissionPage 19 of 454
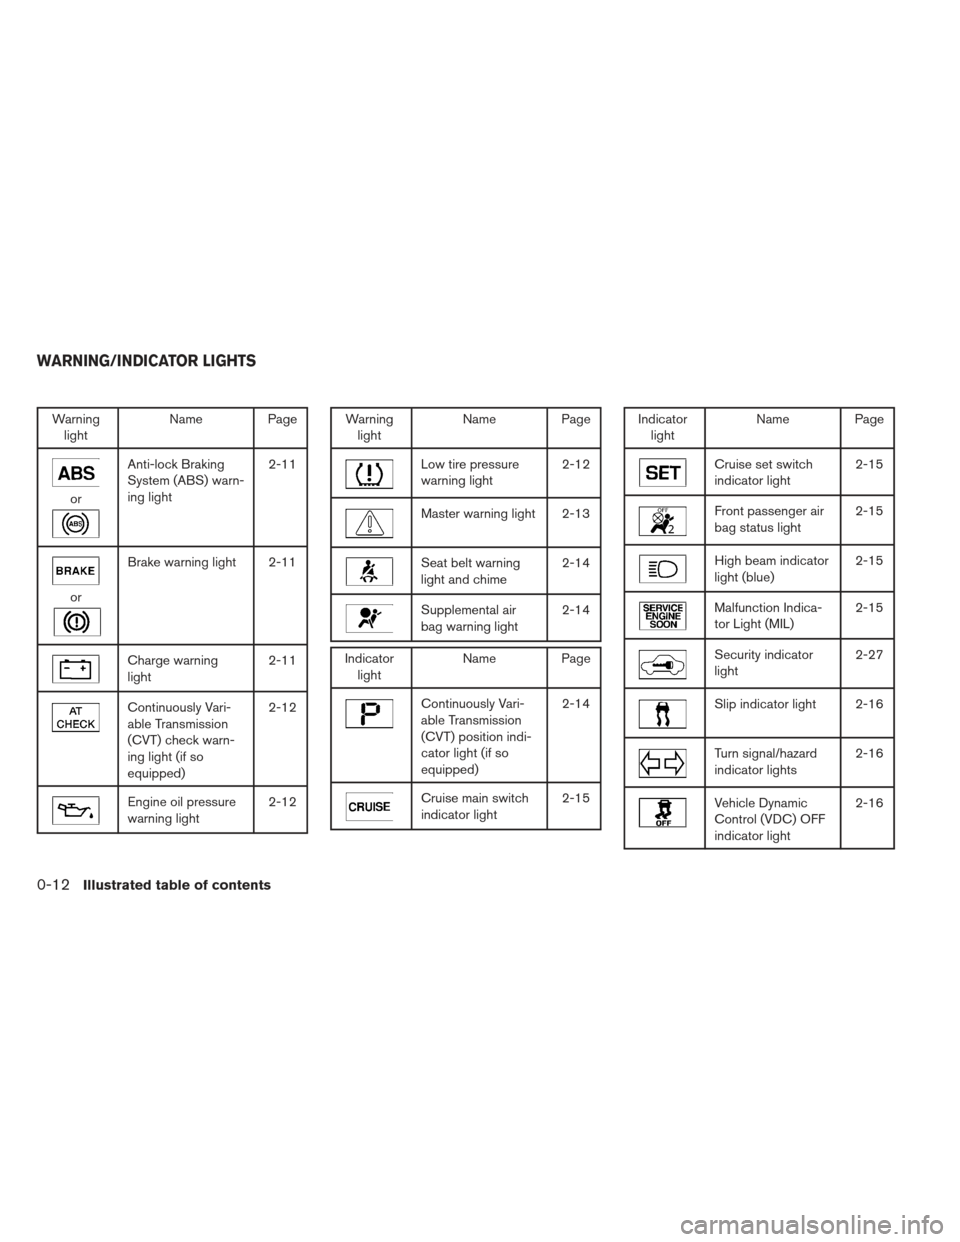
Warninglight Name Page
or
Anti-lock Braking
System (ABS) warn-
ing light 2-11
or
Brake warning light 2-11
Charge warning
light
2-11
Continuously Vari-
able Transmission
(CVT) check warn-
ing light (if so
equipped)2-12
Engine oil pressure
warning light
2-12
Warning
light Name Page
Low tire pressure
warning light 2-12
Master warning light 2-13
Seat belt warning
light and chime2-14
Supplemental air
bag warning light2-14
Indicator
light Name Page
Continuously Vari-
able Transmission
(CVT) position indi-
cator light (if so
equipped) 2-14
Cruise main switch
indicator light
2-15
Indicator
light Name Page
Cruise set switch
indicator light 2-15
Front passenger air
bag status light2-15
High beam indicator
light (blue)2-15
Malfunction Indica-
tor Light (MIL)2-15
Security indicator
light2-27
Slip indicator light 2-16
Turn signal/hazard
indicator lights2-16
Vehicle Dynamic
Control (VDC) OFF
indicator light2-16
WARNING/INDICATOR LIGHTS
0-12Illustrated table of contents
Page 22 of 454
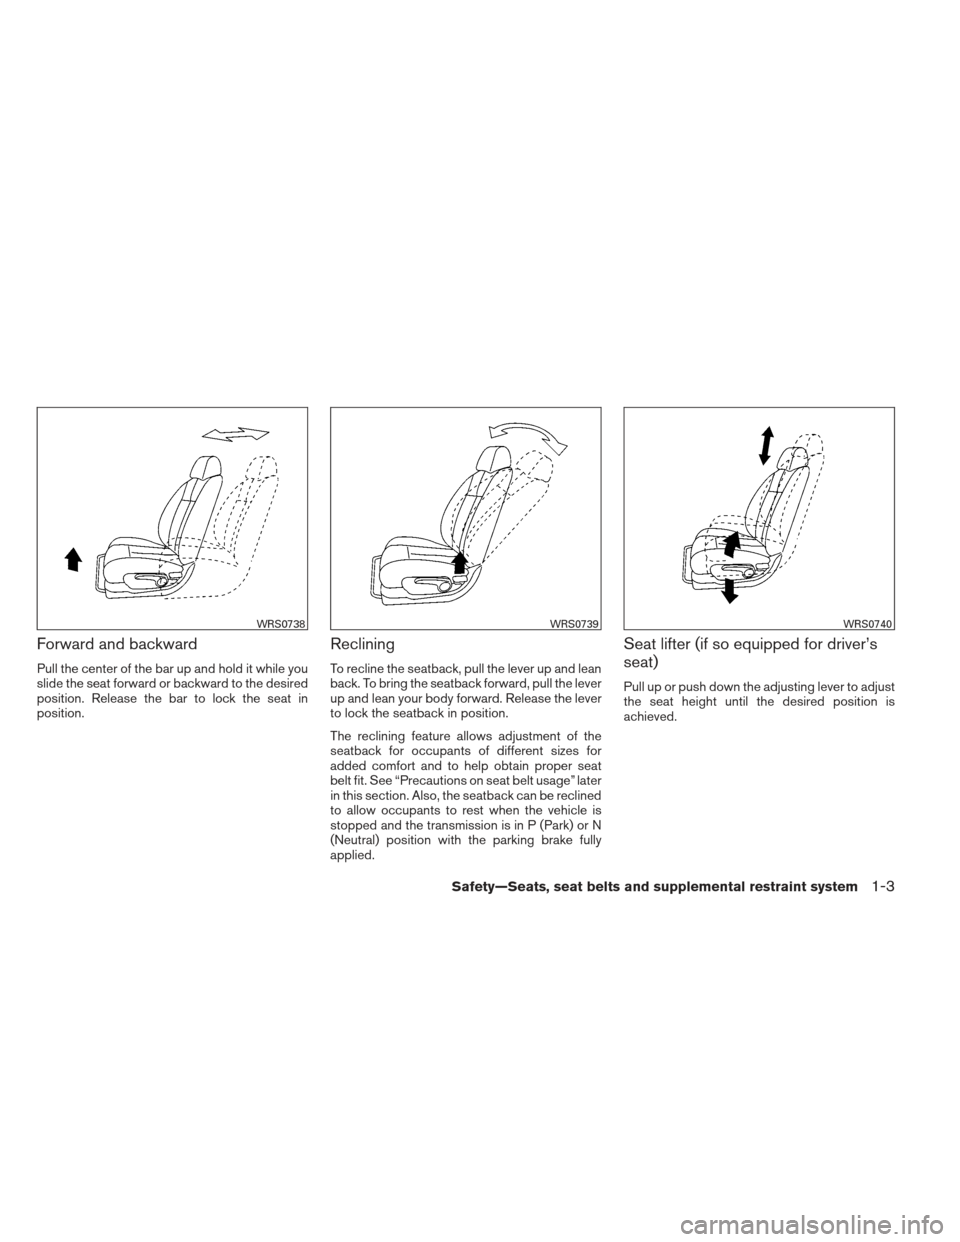
Forward and backward
Pull the center of the bar up and hold it while you
slide the seat forward or backward to the desired
position. Release the bar to lock the seat in
position.
Reclining
To recline the seatback, pull the lever up and lean
back. To bring the seatback forward, pull the lever
up and lean your body forward. Release the lever
to lock the seatback in position.
The reclining feature allows adjustment of the
seatback for occupants of different sizes for
added comfort and to help obtain proper seat
belt fit. See “Precautions on seat belt usage” later
in this section. Also, the seatback can be reclined
to allow occupants to rest when the vehicle is
stopped and the transmission is in P (Park) or N
(Neutral) position with the parking brake fully
applied.
Seat lifter (if so equipped for driver’s
seat)
Pull up or push down the adjusting lever to adjust
the seat height until the desired position is
achieved.
WRS0738WRS0739WRS0740
Safety—Seats, seat belts and supplemental restraint system1-3
Page 24 of 454
Forward and backward
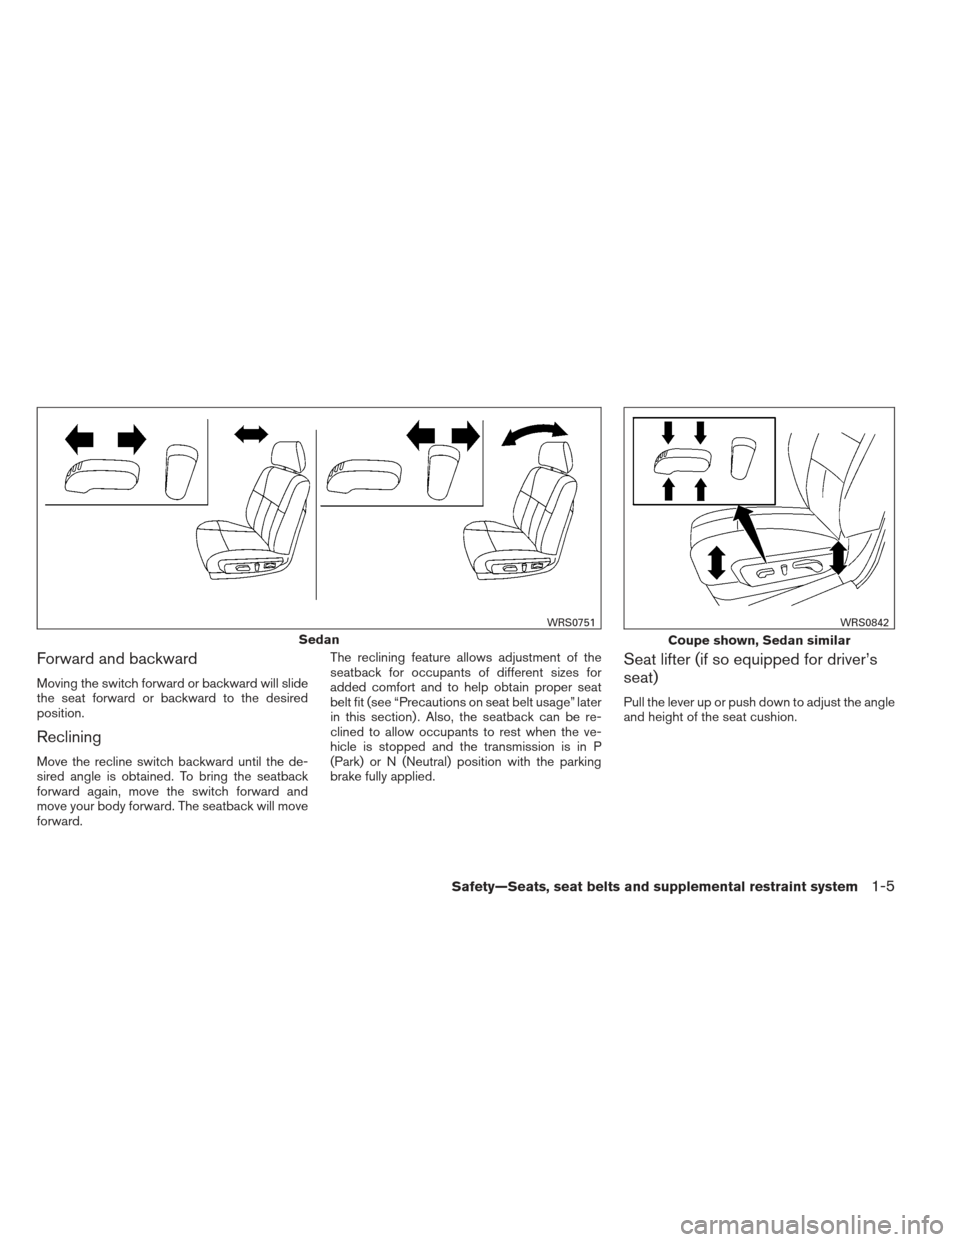
Moving the switch forward or backward will slide
the seat forward or backward to the desired
position.
Reclining
Move the recline switch backward until the de-
sired angle is obtained. To bring the seatback
forward again, move the switch forward and
move your body forward. The seatback will move
forward.The reclining feature allows adjustment of the
seatback for occupants of different sizes for
added comfort and to help obtain proper seat
belt fit (see “Precautions on seat belt usage” later
in this section) . Also, the seatback can be re-
clined to allow occupants to rest when the ve-
hicle is stopped and the transmission is in P
(Park) or N (Neutral) position with the parking
brake fully applied.
Seat lifter (if so equipped for driver’s
seat)
Pull the lever up or push down to adjust the angle
and height of the seat cushion.
Sedan
WRS0751
Coupe shown, Sedan similar
WRS0842
Safety—Seats, seat belts and supplemental restraint system1-5
Page 87 of 454
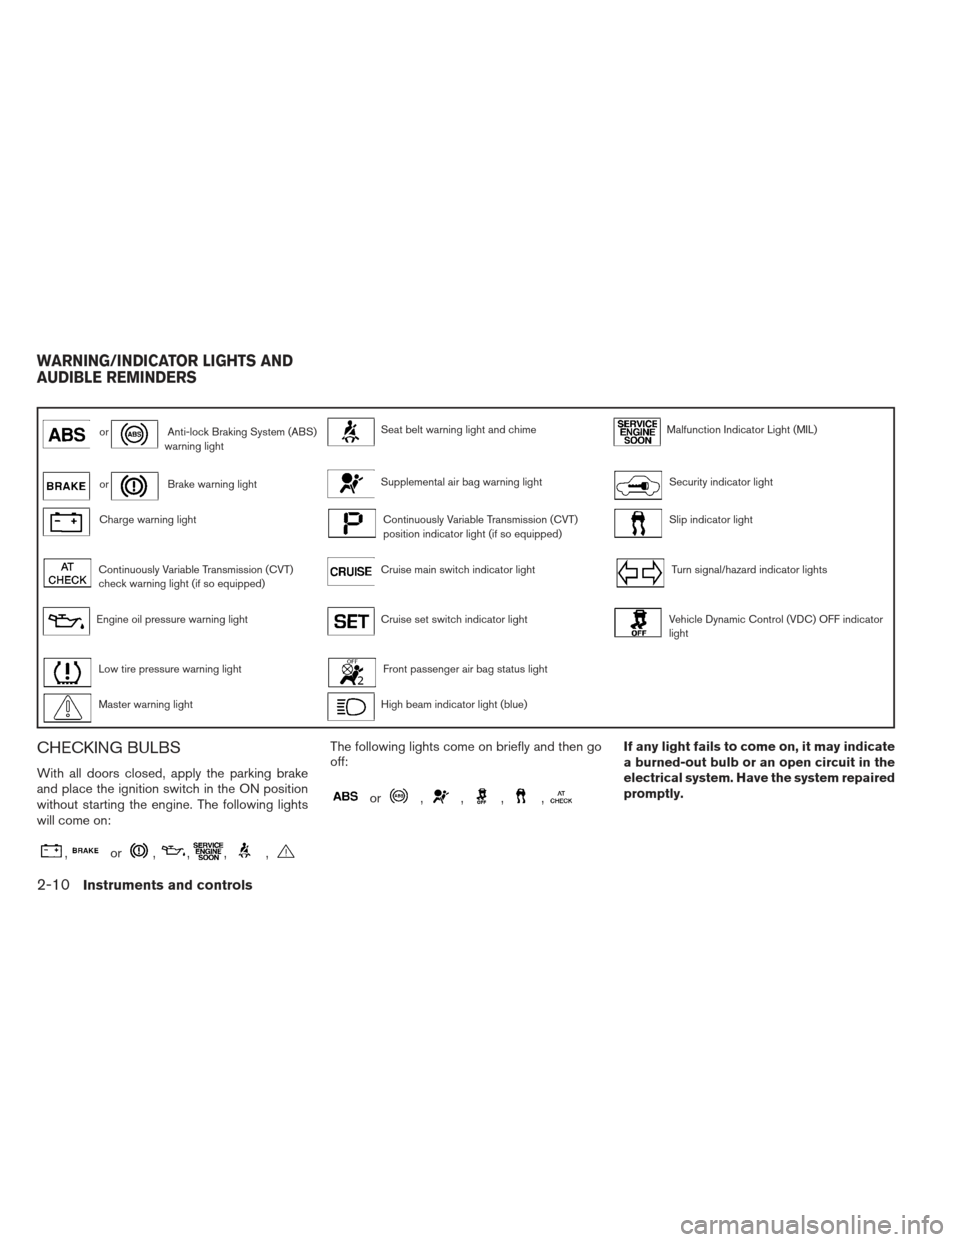
orAnti-lock Braking System (ABS)
warning lightSeat belt warning light and chimeMalfunction Indicator Light (MIL)
orBrake warning lightSupplemental air bag warning lightSecurity indicator light
Charge warning lightContinuously Variable Transmission (CVT)
position indicator light (if so equipped)Slip indicator light
Continuously Variable Transmission (CVT)
check warning light (if so equipped)Cruise main switch indicator lightTurn signal/hazard indicator lights
Engine oil pressure warning lightCruise set switch indicator lightVehicle Dynamic Control (VDC) OFF indicator
light
Low tire pressure warning lightFront passenger air bag status light
Master warning lightHigh beam indicator light (blue)
CHECKING BULBS
With all doors closed, apply the parking brake
and place the ignition switch in the ON position
without starting the engine. The following lights
will come on:
,or,,,,
The following lights come on briefly and then go
off:
or,,,,
If any light fails to come on, it may indicate
a burned-out bulb or an open circuit in the
electrical system. Have the system repaired
promptly.
WARNING/INDICATOR LIGHTS AND
AUDIBLE REMINDERS
2-10Instruments and controls
Page 89 of 454
CAUTION
●Do not ground electrical accessories
directly to the battery terminal. Doing
so will bypass the variable control sys-
tem and the vehicle battery may not
charge completely. Refer to “Variable
voltage control system” in the “Mainte-
nance and do-it-yourself” section later
in this manual.
● Do not continue driving if the generator
belt is loose, broken or missing.
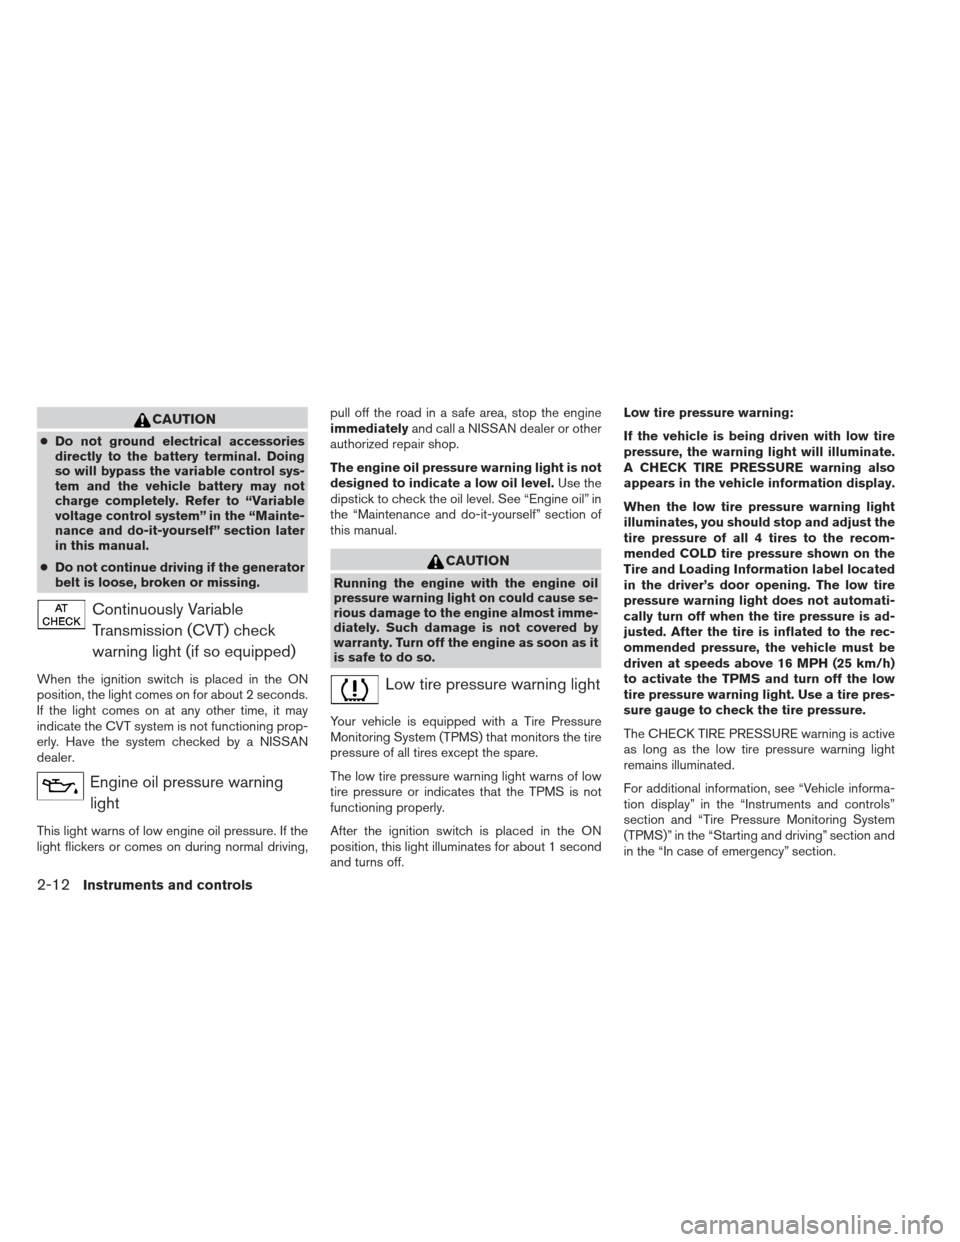
Continuously Variable
Transmission (CVT) check
warning light (if so equipped)
When the ignition switch is placed in the ON
position, the light comes on for about 2 seconds.
If the light comes on at any other time, it may
indicate the CVT system is not functioning prop-
erly. Have the system checked by a NISSAN
dealer.
Engine oil pressure warninglight
This light warns of low engine oil pressure. If the
light flickers or comes on during normal driving, pull off the road in a safe area, stop the engine
immediately
and call a NISSAN dealer or other
authorized repair shop.
The engine oil pressure warning light is not
designed to indicate a low oil level. Use the
dipstick to check the oil level. See “Engine oil” in
the “Maintenance and do-it-yourself” section of
this manual.
CAUTION
Running the engine with the engine oil
pressure warning light on could cause se-
rious damage to the engine almost imme-
diately. Such damage is not covered by
warranty. Turn off the engine as soon as it
is safe to do so.
Low tire pressure warning light
Your vehicle is equipped with a Tire Pressure
Monitoring System (TPMS) that monitors the tire
pressure of all tires except the spare.
The low tire pressure warning light warns of low
tire pressure or indicates that the TPMS is not
functioning properly.
After the ignition switch is placed in the ON
position, this light illuminates for about 1 second
and turns off. Low tire pressure warning:
If the vehicle is being driven with low tire
pressure, the warning light will illuminate.
A CHECK TIRE PRESSURE warning also
appears in the vehicle information display.
When the low tire pressure warning light
illuminates, you should stop and adjust the
tire pressure of all 4 tires to the recom-
mended COLD tire pressure shown on the
Tire and Loading Information label located
in the driver’s door opening. The low tire
pressure warning light does not automati-
cally turn off when the tire pressure is ad-
justed. After the tire is inflated to the rec-
ommended pressure, the vehicle must be
driven at speeds above 16 MPH (25 km/h)
to activate the TPMS and turn off the low
tire pressure warning light. Use a tire pres-
sure gauge to check the tire pressure.
The CHECK TIRE PRESSURE warning is active
as long as the low tire pressure warning light
remains illuminated.
For additional information, see “Vehicle informa-
tion display” in the “Instruments and controls”
section and “Tire Pressure Monitoring System
(TPMS)” in the “Starting and driving” section and
in the “In case of emergency” section.
2-12Instruments and controls
Page 91 of 454
●No key warning
● Low fuel warning
● Low windshield-washer fluid warning
● Parking brake release warning
● Door/trunk open warning
● Loose fuel cap
● Check tire pressure warning
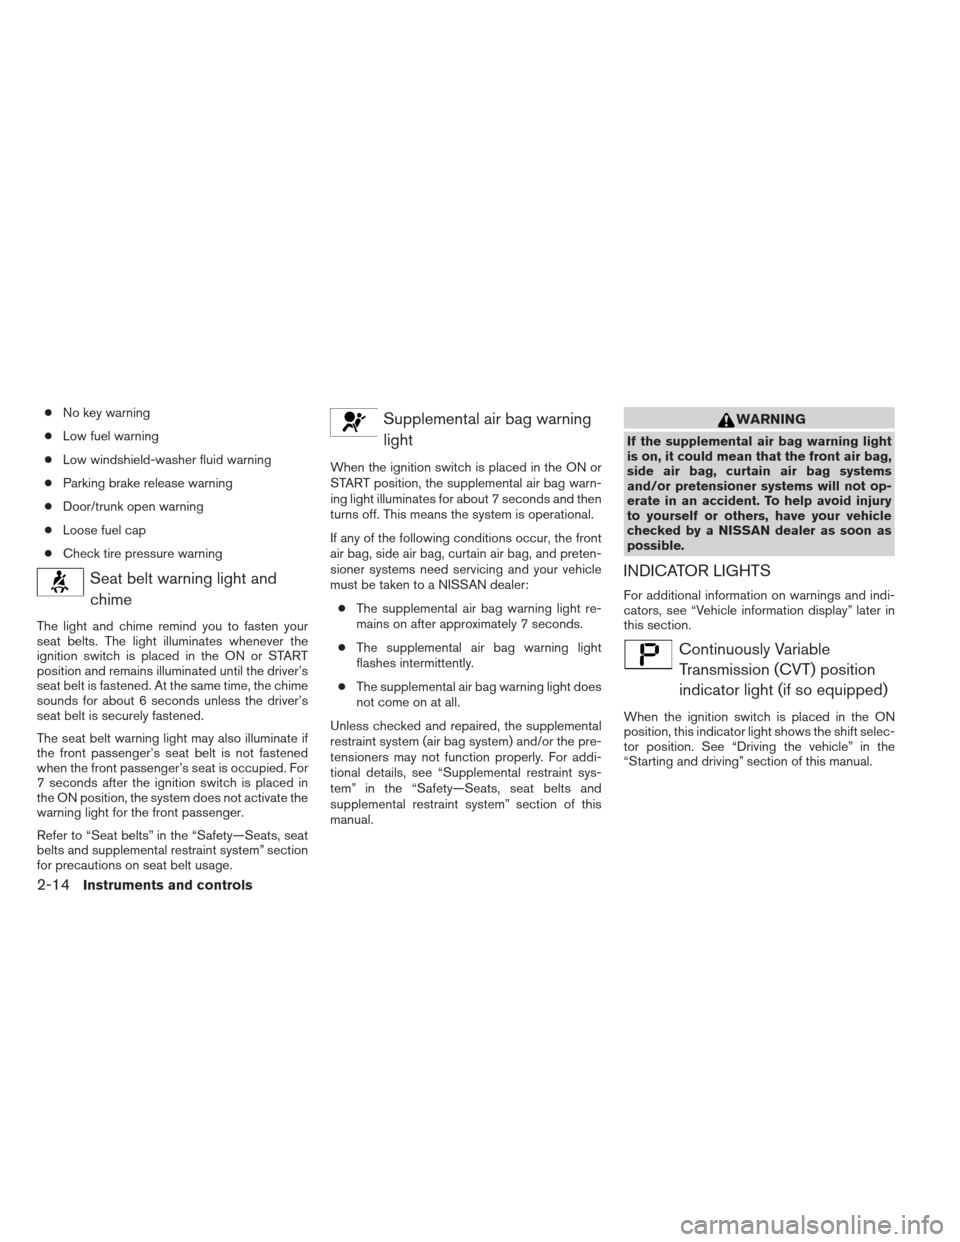
Seat belt warning light and
chime
The light and chime remind you to fasten your
seat belts. The light illuminates whenever the
ignition switch is placed in the ON or START
position and remains illuminated until the driver’s
seat belt is fastened. At the same time, the chime
sounds for about 6 seconds unless the driver’s
seat belt is securely fastened.
The seat belt warning light may also illuminate if
the front passenger’s seat belt is not fastened
when the front passenger’s seat is occupied. For
7 seconds after the ignition switch is placed in
the ON position, the system does not activate the
warning light for the front passenger.
Refer to “Seat belts” in the “Safety—Seats, seat
belts and supplemental restraint system” section
for precautions on seat belt usage.
Supplemental air bag warninglight
When the ignition switch is placed in the ON or
START position, the supplemental air bag warn-
ing light illuminates for about 7 seconds and then
turns off. This means the system is operational.
If any of the following conditions occur, the front
air bag, side air bag, curtain air bag, and preten-
sioner systems need servicing and your vehicle
must be taken to a NISSAN dealer:
● The supplemental air bag warning light re-
mains on after approximately 7 seconds.
● The supplemental air bag warning light
flashes intermittently.
● The supplemental air bag warning light does
not come on at all.
Unless checked and repaired, the supplemental
restraint system (air bag system) and/or the pre-
tensioners may not function properly. For addi-
tional details, see “Supplemental restraint sys-
tem” in the “Safety—Seats, seat belts and
supplemental restraint system” section of this
manual.
WARNING
If the supplemental air bag warning light
is on, it could mean that the front air bag,
side air bag, curtain air bag systems
and/or pretensioner systems will not op-
erate in an accident. To help avoid injury
to yourself or others, have your vehicle
checked by a NISSAN dealer as soon as
possible.
INDICATOR LIGHTS
For additional information on warnings and indi-
cators, see “Vehicle information display” later in
this section.
Continuously Variable Transmission (CVT) position
indicator light (if so equipped)
When the ignition switch is placed in the ON
position, this indicator light shows the shift selec-
tor position. See “Driving the vehicle” in the
“Starting and driving” section of this manual.
2-14Instruments and controls
Page 316 of 454
5 Starting and driving
Precautions when starting and driving................5-2
Exhaust gas (carbon monoxide) ..................5-2
Three-way catalyst ..............................5-2
Tire Pressure Monitoring System (TPMS) ..........5-3
Avoiding collision and rollover ....................5-5
Off-road recovery ...............................5-6
Rapid air pressure loss ..........................5-6
Drinking alcohol/drugs and driving ................5-7
Push-Button Ignition Switch ........................5-7
Push-button ignition switch positions .............5-8
Emergency engine shut off ......................5-9
NISSAN Intelligent Key™ battery discharge ........5-9
NISSAN vehicle immobilizer system .............5-10
Before starting the engine ......................... 5-10
Starting the engine ............................... 5-11
Driving the vehicle ................................ 5-12
Continuously Variable Transmission (CVT)
(if so equipped) ............................... 5-12
Manual transmission (if so equipped) ............5-17
Parking brake .................................... 5-19Cruise control
.................................... 5-20
Precautions on cruise control ...................5-20
Cruise control operations .......................5-20
Break-in schedule ................................ 5-22
Increasing fuel economy ........................... 5-22
Parking/parking on hills ............................ 5-23
Power steering ................................... 5-24
Brake system .................................... 5-24
Brake precautions ............................. 5-24
Anti-lock Braking System (ABS) .................5-25
Vehicle Dynamic Control (VDC) system .............5-26
Cold weather driving .............................. 5-28
Freeing a frozen door lock ......................5-28
Anti-freeze .................................... 5-28
Battery ....................................... 5-28
Draining of coolant water .......................5-28
Tire equipment ................................ 5-28
Special winter equipment .......................5-28
Driving on snow or ice ......................... 5-28
Engine
block heater (if so equipped) .............5-29
Page 326 of 454
1. Apply the parking brake.
2.Continuously Variable Transmission
(CVT) model:
Move the shift selector to P (Park) or N
(Neutral) . P (Park) is recommended.
The starter is designed not to operate if
the shift selector is in any of the driving
positions.
Manual transmission (M/T) model:
Move the shift selector to N (Neutral) . De-
press the clutch pedal to the floor.
The starter is designed not to operate
unless the clutch pedal is fully de-
pressed.
3. Push the ignition switch to the ON position. Depress the brake pedal and the clutch
pedal (if so equipped) and push the ignition
switch to start the engine.
To start the engine immediately, push and
release the ignition switch while depressing
the brake pedal with the ignition switch in
any position. ●
If the engine is very hard to start in ex-
tremely cold weather or when restarting,
depress the accelerator pedal a little (ap-
proximately 1/3 to the floor) and while
holding, crank the engine. Release the
accelerator pedal when the engine starts.
● If the engine is very hard to start because
it is flooded, depress the accelerator
pedal all the way to the floor and hold it.
Push the ignition switch to the ON posi-
tion to start cranking the engine. After 5 or
6 seconds, stop cranking by pushing the
ignition switch to LOCK. After cranking
the engine, release the accelerator pedal.
Crank the engine with your foot off the
accelerator pedal by depressing the
brake pedal and pushing the push-button
ignition switch to start the engine. If the
engine starts, but fails to run, repeat the
above procedure.CAUTION
Do not operate the starter for more than
15 seconds at a time. If the engine does
not start, push the ignition switch to the
OFF position and wait 10 seconds before
cranking again, otherwise the starter
could be damaged.
4. Warm-up
Allow the engine to idle for at least 30 sec-
onds after starting. Do not race the engine
while warming it up. Drive at moderate
speed for a short distance first, especially in
cold weather. In cold weather, keep the en-
gine running for a minimum of2-3minutes
before shutting it off. Starting and stopping
the engine over a short period of time may
make the vehicle more difficult to start.
5. To stop the engine, shift the shift selector to the P (Park) position (CVT) or to N (Neutral)
and apply the parking brake (M/T) and push
the ignition switch to the OFF position.
STARTING THE ENGINE
Starting and driving5-11