Page 23 of 454
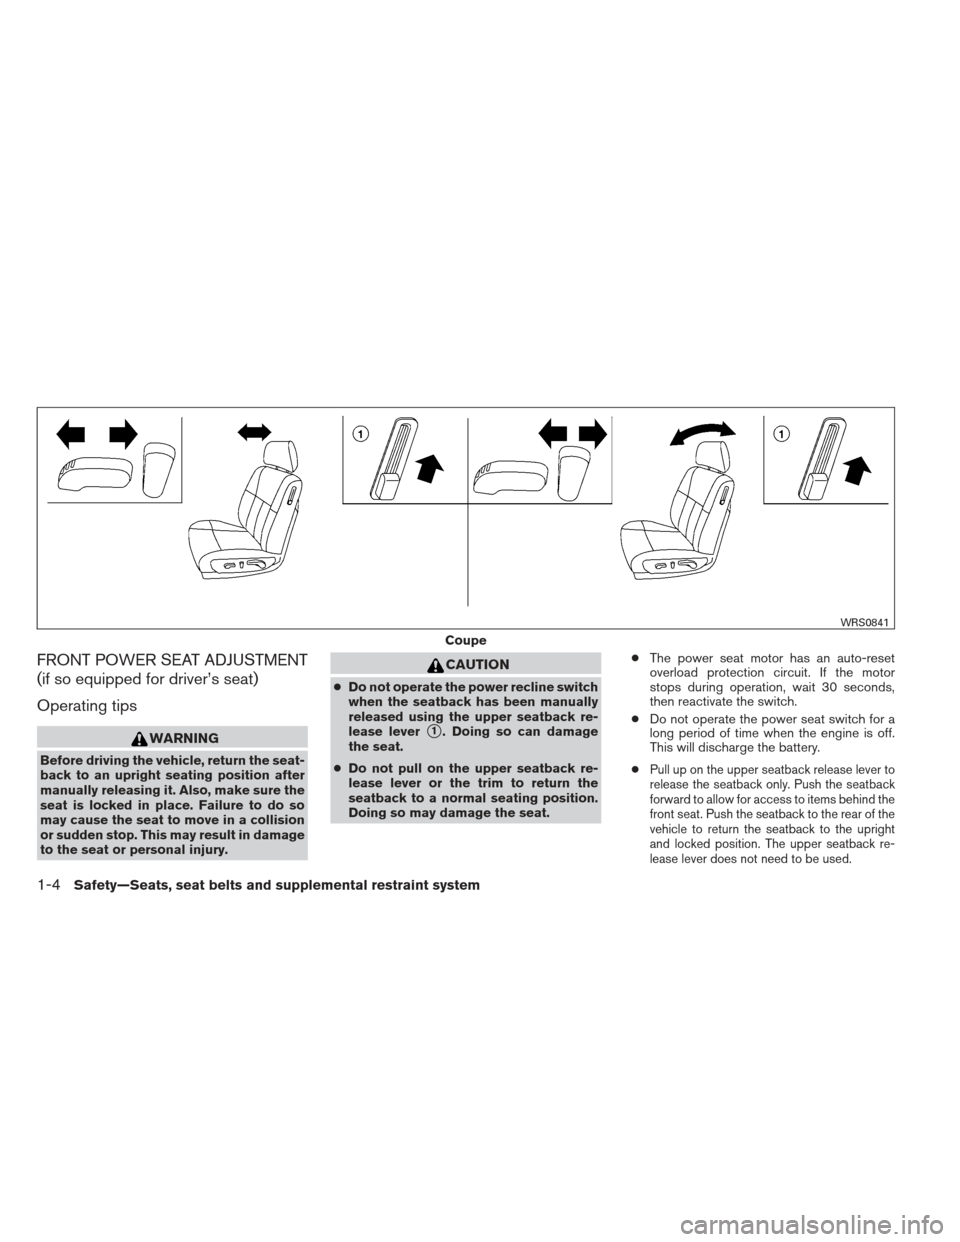
FRONT POWER SEAT ADJUSTMENT
(if so equipped for driver’s seat)
Operating tips
WARNING
Before driving the vehicle, return the seat-
back to an upright seating position after
manually releasing it. Also, make sure the
seat is locked in place. Failure to do so
may cause the seat to move in a collision
or sudden stop. This may result in damage
to the seat or personal injury.
CAUTION
●Do not operate the power recline switch
when the seatback has been manually
released using the upper seatback re-
lease lever
�1. Doing so can damage
the seat.
● Do not pull on the upper seatback re-
lease lever or the trim to return the
seatback to a normal seating position.
Doing so may damage the seat. ●
The power seat motor has an auto-reset
overload protection circuit. If the motor
stops during operation, wait 30 seconds,
then reactivate the switch.
● Do not operate the power seat switch for a
long period of time when the engine is off.
This will discharge the battery.
●
Pull up on the upper seatback release lever to
release the seatback only. Push the seatback
forward to allow for access to items behind the
front seat. Push the seatback to the rear of the
vehicle to return the seatback to the upright
and locked position. The upper seatback re-
lease lever does not need to be used.
Coupe
WRS0841
1-4Safety—Seats, seat belts and supplemental restraint system
Page 24 of 454
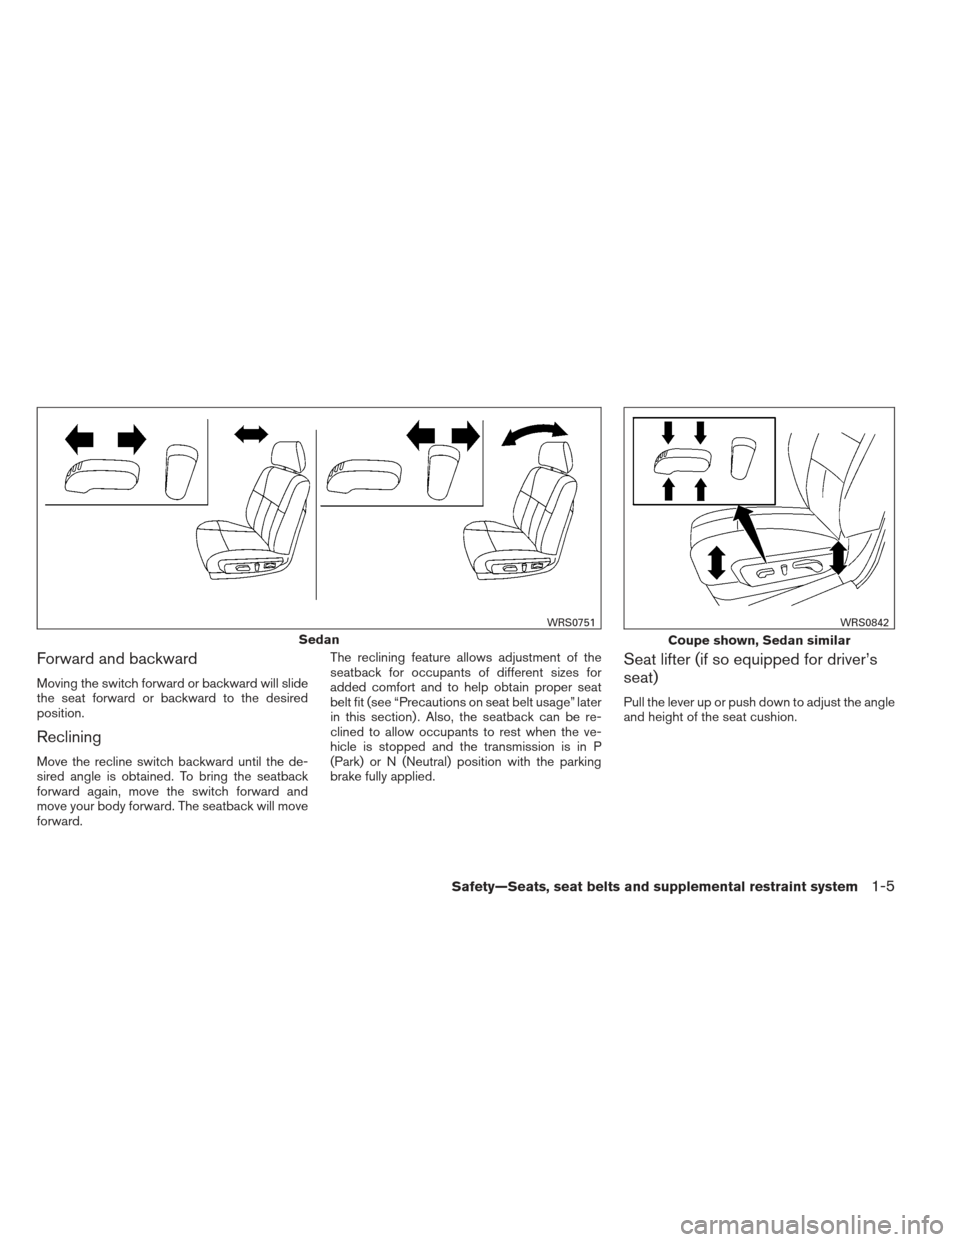
Forward and backward
Moving the switch forward or backward will slide
the seat forward or backward to the desired
position.
Reclining
Move the recline switch backward until the de-
sired angle is obtained. To bring the seatback
forward again, move the switch forward and
move your body forward. The seatback will move
forward.The reclining feature allows adjustment of the
seatback for occupants of different sizes for
added comfort and to help obtain proper seat
belt fit (see “Precautions on seat belt usage” later
in this section) . Also, the seatback can be re-
clined to allow occupants to rest when the ve-
hicle is stopped and the transmission is in P
(Park) or N (Neutral) position with the parking
brake fully applied.
Seat lifter (if so equipped for driver’s
seat)
Pull the lever up or push down to adjust the angle
and height of the seat cushion.
Sedan
WRS0751
Coupe shown, Sedan similar
WRS0842
Safety—Seats, seat belts and supplemental restraint system1-5
Page 25 of 454
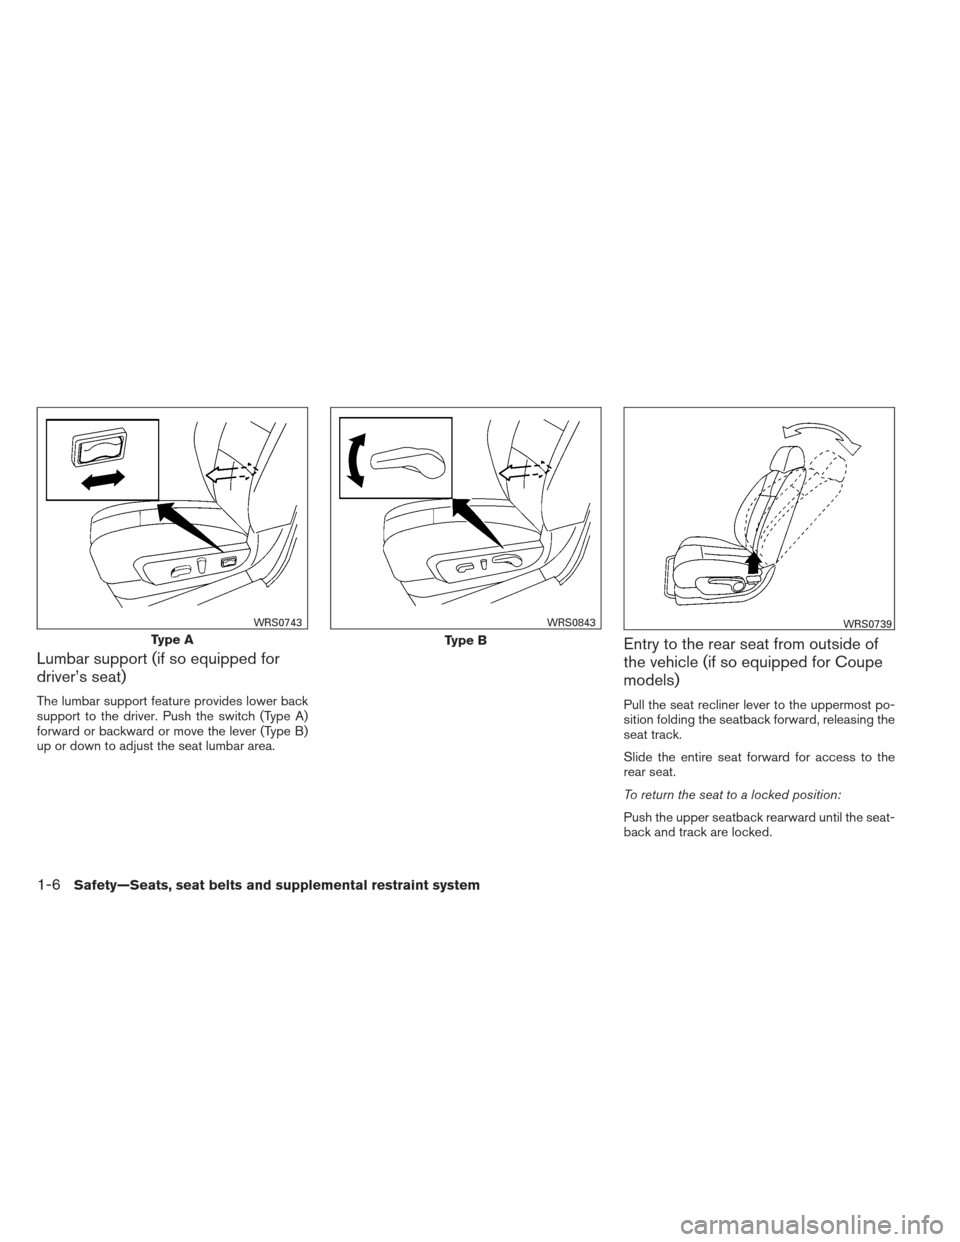
Lumbar support (if so equipped for
driver’s seat)
The lumbar support feature provides lower back
support to the driver. Push the switch (Type A)
forward or backward or move the lever (Type B)
up or down to adjust the seat lumbar area.
Entry to the rear seat from outside of
the vehicle (if so equipped for Coupe
models)
Pull the seat recliner lever to the uppermost po-
sition folding the seatback forward, releasing the
seat track.
Slide the entire seat forward for access to the
rear seat.
To return the seat to a locked position:
Push the upper seatback rearward until the seat-
back and track are locked.
Type A
WRS0743
Type B
WRS0843WRS0739
1-6Safety—Seats, seat belts and supplemental restraint system
Page 27 of 454
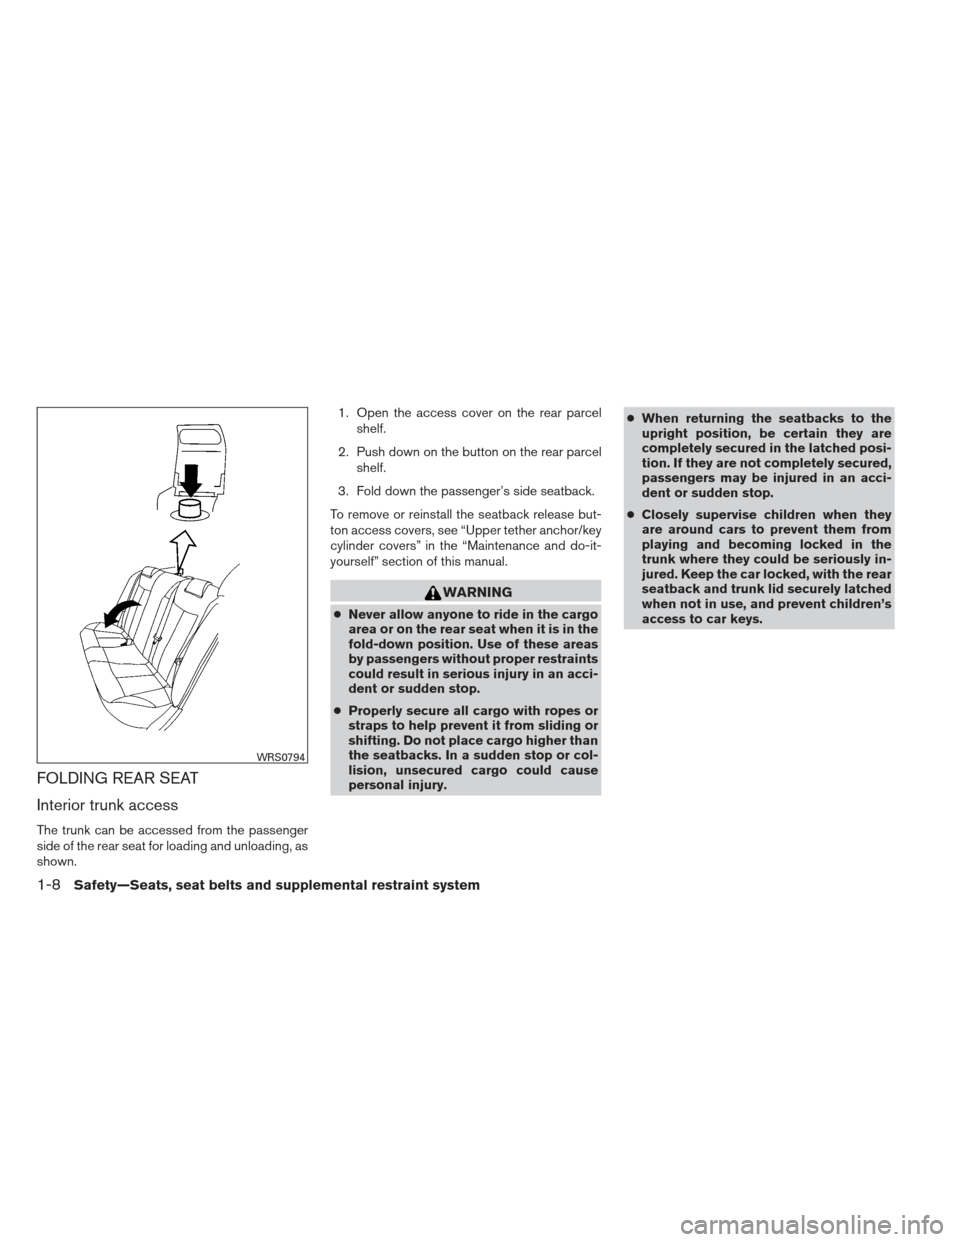
FOLDING REAR SEAT
Interior trunk access
The trunk can be accessed from the passenger
side of the rear seat for loading and unloading, as
shown.1. Open the access cover on the rear parcel
shelf.
2. Push down on the button on the rear parcel shelf.
3. Fold down the passenger’s side seatback.
To remove or reinstall the seatback release but-
ton access covers, see “Upper tether anchor/key
cylinder covers” in the “Maintenance and do-it-
yourself” section of this manual.
WARNING
● Never allow anyone to ride in the cargo
area or on the rear seat when it is in the
fold-down position. Use of these areas
by passengers without proper restraints
could result in serious injury in an acci-
dent or sudden stop.
● Properly secure all cargo with ropes or
straps to help prevent it from sliding or
shifting. Do not place cargo higher than
the seatbacks. In a sudden stop or col-
lision, unsecured cargo could cause
personal injury. ●
When returning the seatbacks to the
upright position, be certain they are
completely secured in the latched posi-
tion. If they are not completely secured,
passengers may be injured in an acci-
dent or sudden stop.
● Closely supervise children when they
are around cars to prevent them from
playing and becoming locked in the
trunk where they could be seriously in-
jured. Keep the car locked, with the rear
seatback and trunk lid securely latched
when not in use, and prevent children’s
access to car keys.
WRS0794
1-8Safety—Seats, seat belts and supplemental restraint system
Page 28 of 454
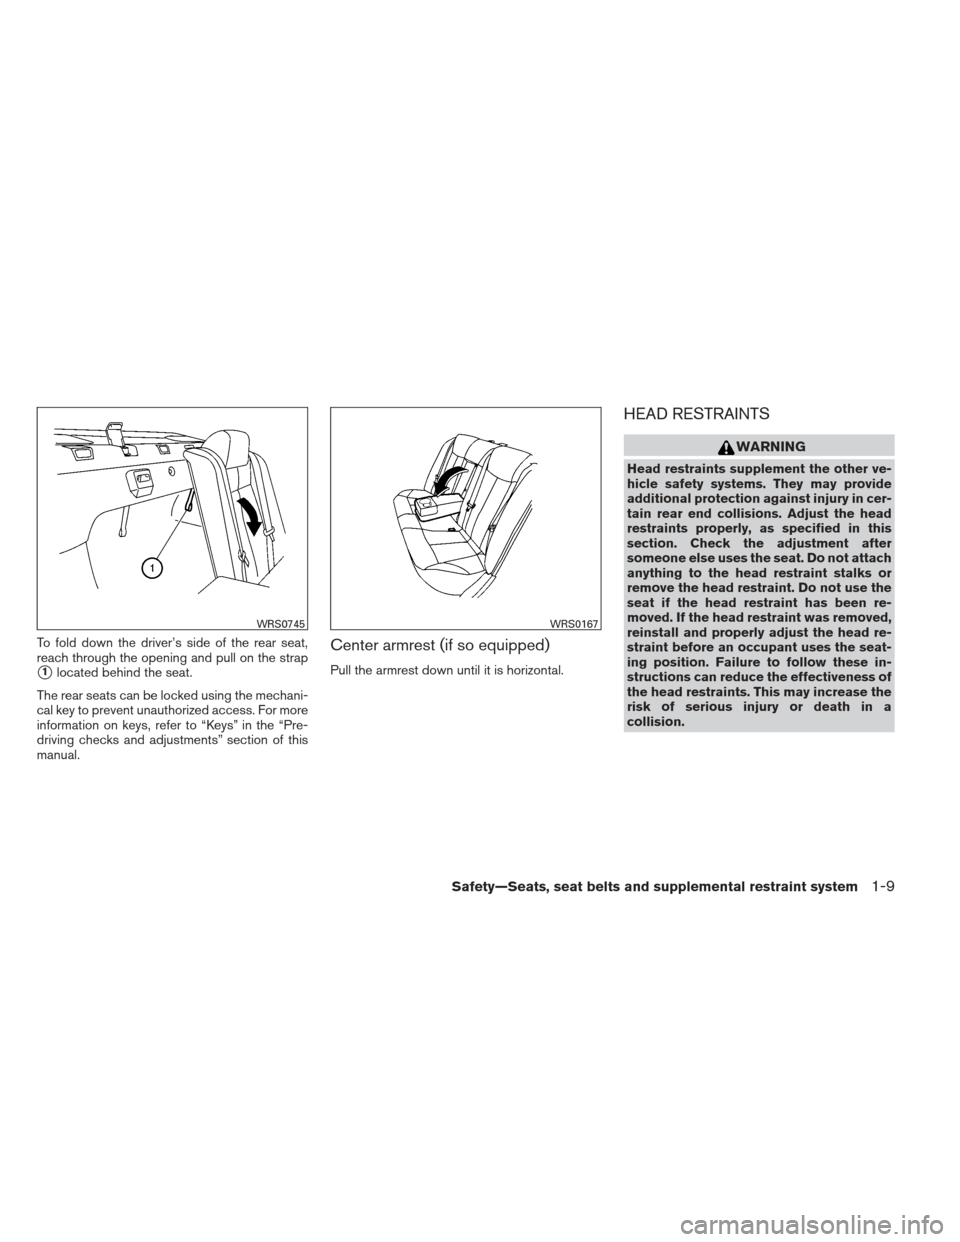
To fold down the driver’s side of the rear seat,
reach through the opening and pull on the strap
�1located behind the seat.
The rear seats can be locked using the mechani-
cal key to prevent unauthorized access. For more
information on keys, refer to “Keys” in the “Pre-
driving checks and adjustments” section of this
manual.
Center armrest (if so equipped)
Pull the armrest down until it is horizontal.
HEAD RESTRAINTS
WARNING
Head restraints supplement the other ve-
hicle safety systems. They may provide
additional protection against injury in cer-
tain rear end collisions. Adjust the head
restraints properly, as specified in this
section. Check the adjustment after
someone else uses the seat. Do not attach
anything to the head restraint stalks or
remove the head restraint. Do not use the
seat if the head restraint has been re-
moved. If the head restraint was removed,
reinstall and properly adjust the head re-
straint before an occupant uses the seat-
ing position. Failure to follow these in-
structions can reduce the effectiveness of
the head restraints. This may increase the
risk of serious injury or death in a
collision.
WRS0745WRS0167
Safety—Seats, seat belts and supplemental restraint system1-9
Page 30 of 454
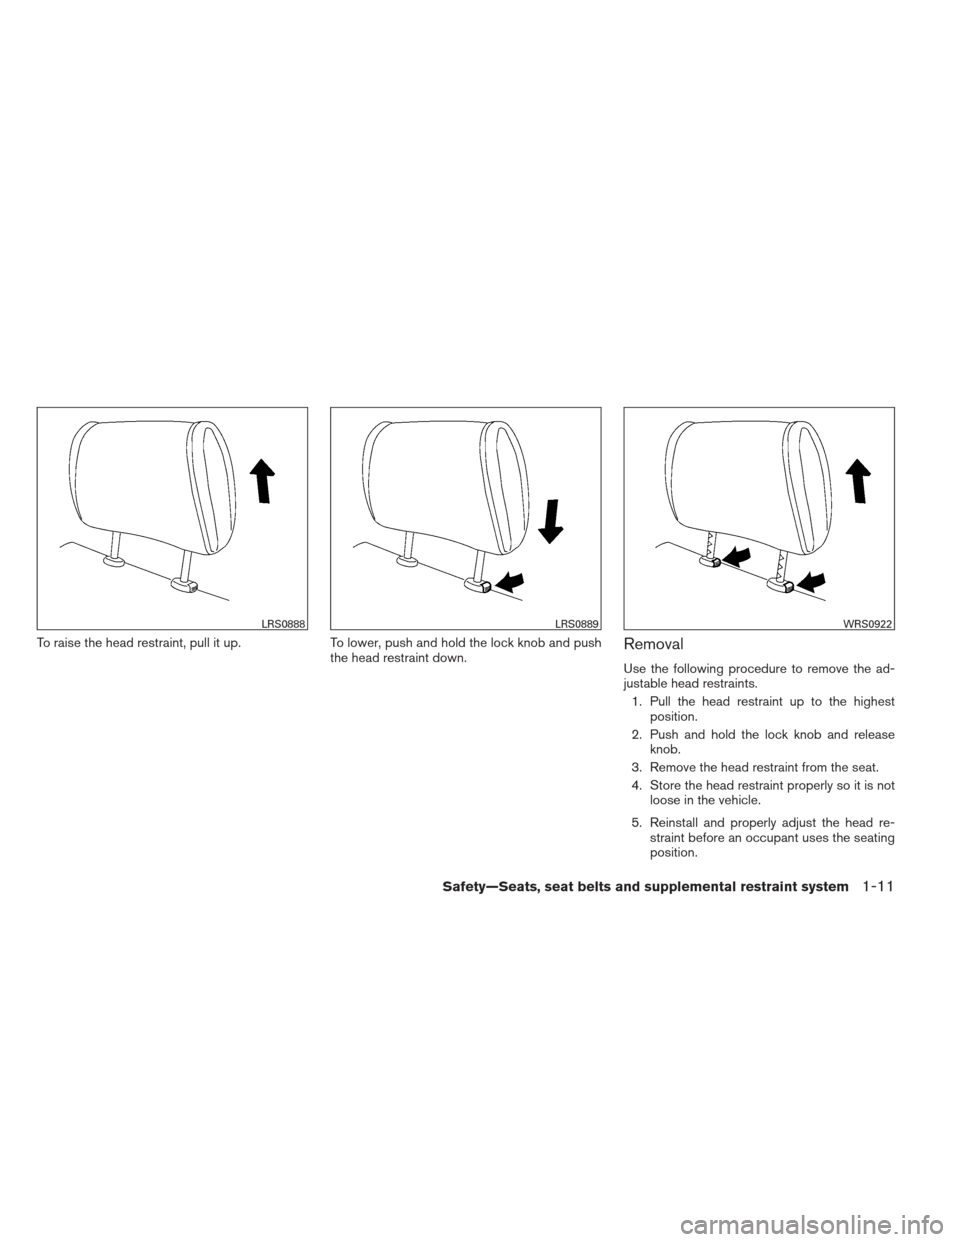
To raise the head restraint, pull it up.To lower, push and hold the lock knob and push
the head restraint down.Removal
Use the following procedure to remove the ad-
justable head restraints.
1. Pull the head restraint up to the highest position.
2. Push and hold the lock knob and release knob.
3. Remove the head restraint from the seat.
4. Store the head restraint properly so it is not loose in the vehicle.
5. Reinstall and properly adjust the head re- straint before an occupant uses the seating
position.
LRS0888LRS0889WRS0922
Safety—Seats, seat belts and supplemental restraint system1-11
Page 31 of 454
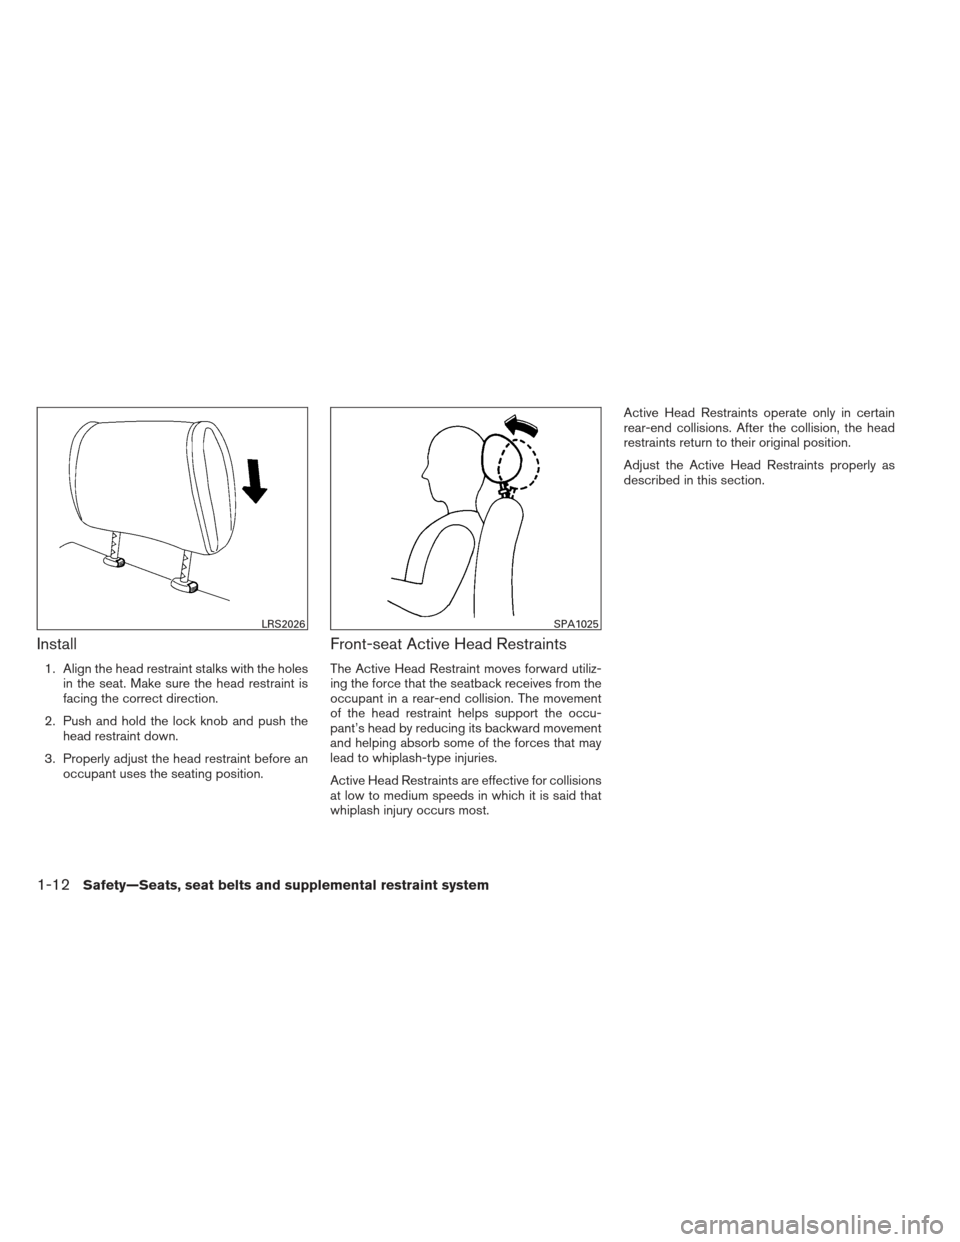
Install
1. Align the head restraint stalks with the holesin the seat. Make sure the head restraint is
facing the correct direction.
2. Push and hold the lock knob and push the head restraint down.
3. Properly adjust the head restraint before an occupant uses the seating position.
Front-seat Active Head Restraints
The Active Head Restraint moves forward utiliz-
ing the force that the seatback receives from the
occupant in a rear-end collision. The movement
of the head restraint helps support the occu-
pant’s head by reducing its backward movement
and helping absorb some of the forces that may
lead to whiplash-type injuries.
Active Head Restraints are effective for collisions
at low to medium speeds in which it is said that
whiplash injury occurs most. Active Head Restraints operate only in certain
rear-end collisions. After the collision, the head
restraints return to their original position.
Adjust the Active Head Restraints properly as
described in this section.
LRS2026SPA1025
1-12Safety—Seats, seat belts and supplemental restraint system
Page 34 of 454
WARNING
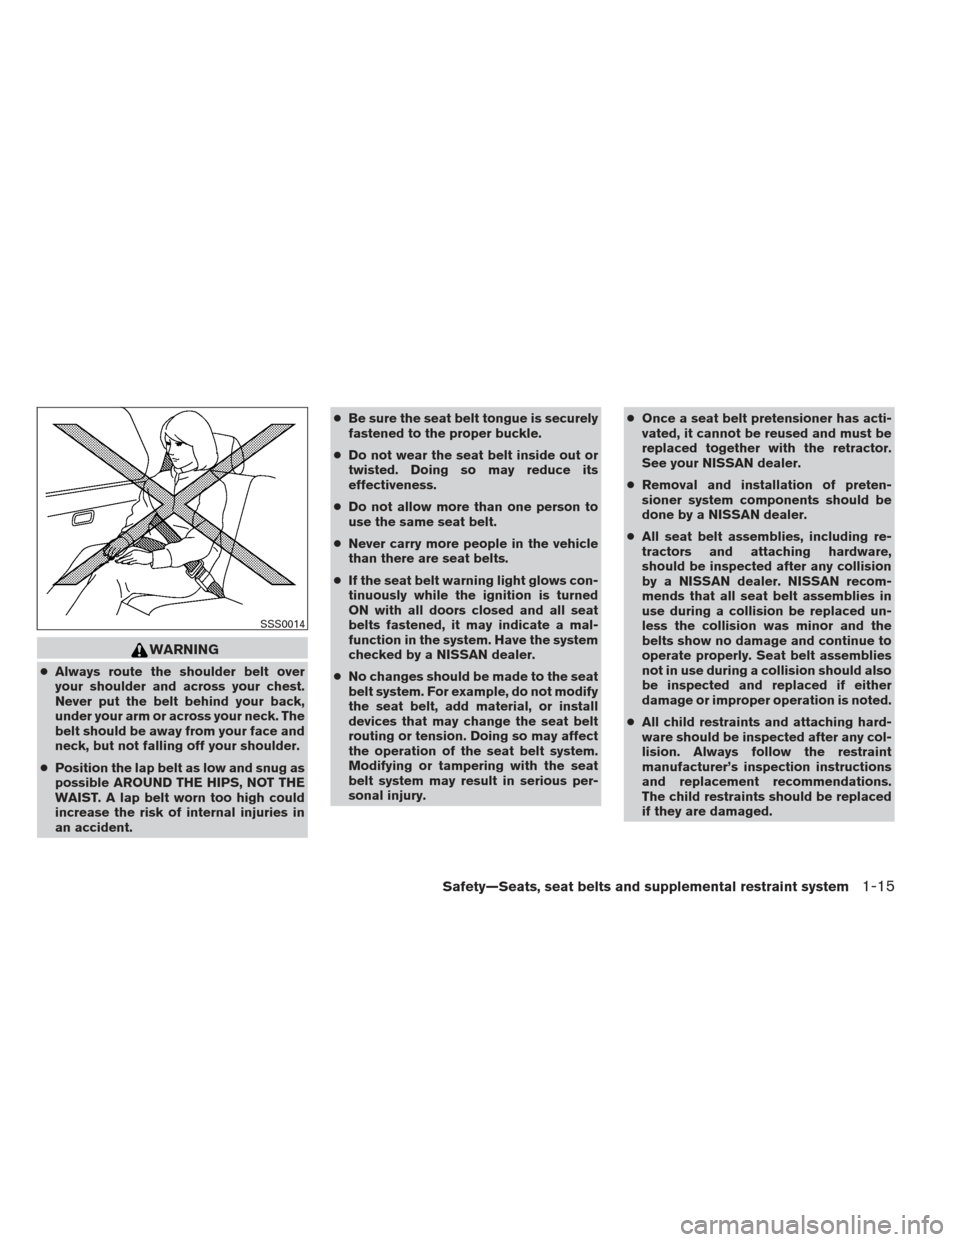
●Always route the shoulder belt over
your shoulder and across your chest.
Never put the belt behind your back,
under your arm or across your neck. The
belt should be away from your face and
neck, but not falling off your shoulder.
● Position the lap belt as low and snug as
possible AROUND THE HIPS, NOT THE
WAIST. A lap belt worn too high could
increase the risk of internal injuries in
an accident. ●
Be sure the seat belt tongue is securely
fastened to the proper buckle.
● Do not wear the seat belt inside out or
twisted. Doing so may reduce its
effectiveness.
● Do not allow more than one person to
use the same seat belt.
● Never carry more people in the vehicle
than there are seat belts.
● If the seat belt warning light glows con-
tinuously while the ignition is turned
ON with all doors closed and all seat
belts fastened, it may indicate a mal-
function in the system. Have the system
checked by a NISSAN dealer.
● No changes should be made to the seat
belt system. For example, do not modify
the seat belt, add material, or install
devices that may change the seat belt
routing or tension. Doing so may affect
the operation of the seat belt system.
Modifying or tampering with the seat
belt system may result in serious per-
sonal injury. ●
Once a seat belt pretensioner has acti-
vated, it cannot be reused and must be
replaced together with the retractor.
See your NISSAN dealer.
● Removal and installation of preten-
sioner system components should be
done by a NISSAN dealer.
● All seat belt assemblies, including re-
tractors and attaching hardware,
should be inspected after any collision
by a NISSAN dealer. NISSAN recom-
mends that all seat belt assemblies in
use during a collision be replaced un-
less the collision was minor and the
belts show no damage and continue to
operate properly. Seat belt assemblies
not in use during a collision should also
be inspected and replaced if either
damage or improper operation is noted.
● All child restraints and attaching hard-
ware should be inspected after any col-
lision. Always follow the restraint
manufacturer’s inspection instructions
and replacement recommendations.
The child restraints should be replaced
if they are damaged.
SSS0014
Safety—Seats, seat belts and supplemental restraint system1-15