2012 NISSAN 370Z COUPE brake
[x] Cancel search: brakePage 159 of 427
WARNING
.Do not disassemble or modify this
system. If you do, it may result in
accidents, fire, or electric shock.
. Do not use this system if you notice
any abnormality, such as a frozen
screen or lack of sound. Continued
use of the system may result in
accident, fire or electric shock.
. In case you notice any foreign
object in the system hardware, spill
liquid on it, or notice smoke or smell
coming from it, stop using the
system immediately and contact
your nearest NISSAN dealer. Ignor-
ing such conditions may lead to
accidents, fire, or electric shock.
. Park the vehicle in a safe location
and apply the parking brake to view
the images on the front center dis-
play screen.
Do not attempt to operate the system in
extreme temperature conditions [below
− 48F( −208 C) and above 1588 F (708C)].
Operating this system under these condi-
tions may result in system malfunctions.
SAA2273
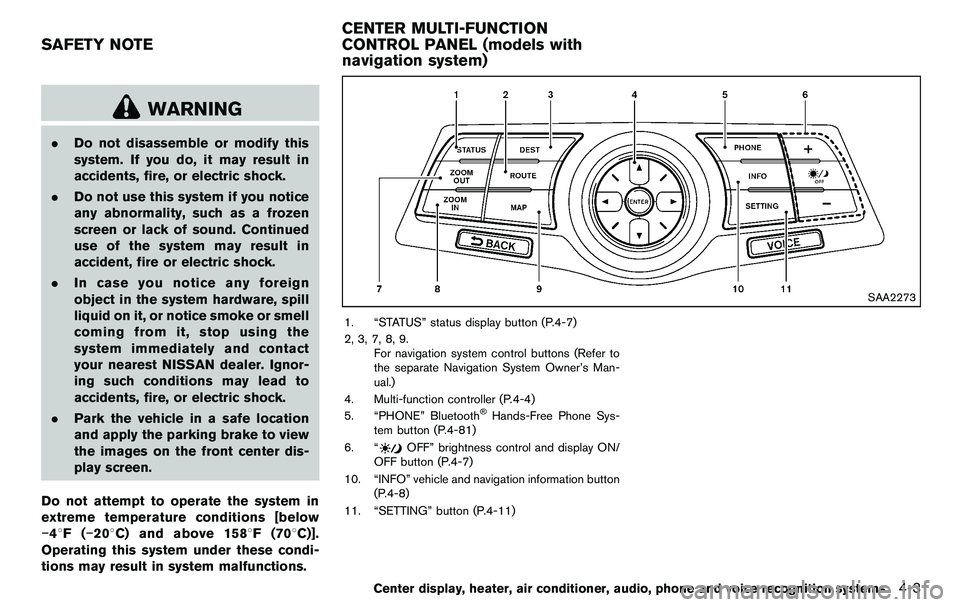
1. “STATUS” status display button (P.4-7)
2, 3, 7, 8, 9. For navigation system control buttons (Refer to
the separate Navigation System Owner’s Man-
ual.)
4. Multi-function controller (P.4-4)
5. “PHONE” Bluetooth
®Hands-Free Phone Sys-
tem button (P.4-81)
6. “
OFF” brightness control and display ON/
OFF button (P.4-7)
10. “INFO” vehicle and navigation information button (P.4-8)
11. “SETTING” button (P.4-11)
Center display, heater, air conditioner, audio, phone and voice recognition systems4-3
SAFETY NOTE CENTER MULTI-FUNCTION
CONTROL PANEL (models with
navigation system)
Page 169 of 427
SAA2486
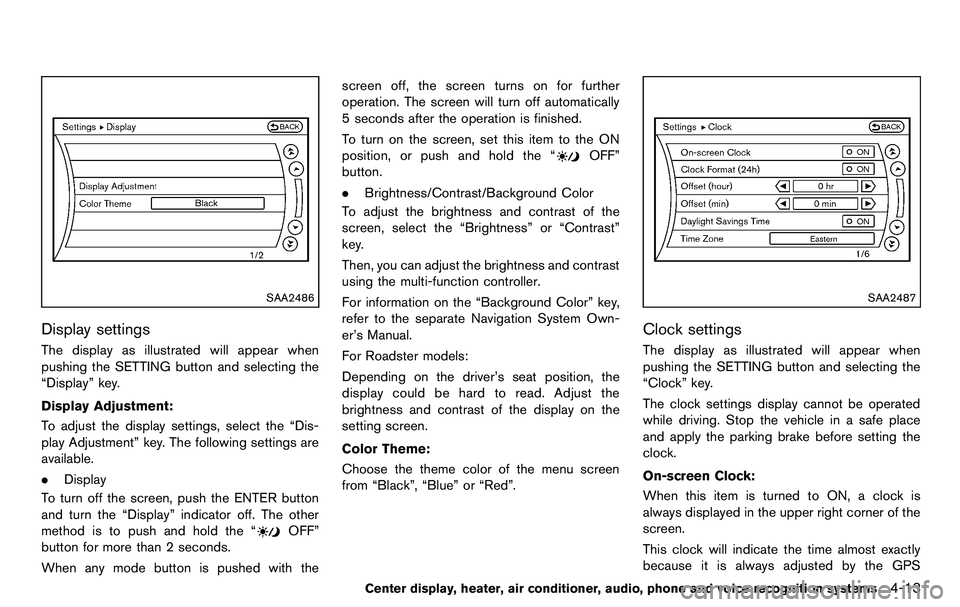
Display settings
The display as illustrated will appear when
pushing the SETTING button and selecting the
“Display” key.
Display Adjustment:
To adjust the display settings, select the “Dis-
play Adjustment” key. The following settings are
available.
.Display
To turn off the screen, push the ENTER button
and turn the “Display” indicator off. The other
method is to push and hold the “
OFF”
button for more than 2 seconds.
When any mode button is pushed with the screen off, the screen turns on for further
operation. The screen will turn off automatically
5 seconds after the operation is finished.
To turn on the screen, set this item to the ON
position, or push and hold the “
OFF”
button.
. Brightness/Contrast/Background Color
To adjust the brightness and contrast of the
screen, select the “Brightness” or “Contrast”
key.
Then, you can adjust the brightness and contrast
using the multi-function controller.
For information on the “Background Color” key,
refer to the separate Navigation System Own-
er’s Manual.
For Roadster models:
Depending on the driver’s seat position, the
display could be hard to read. Adjust the
brightness and contrast of the display on the
setting screen.
Color Theme:
Choose the theme color of the menu screen
from “Black”, “Blue” or “Red”.
SAA2487
Clock settings
The display as illustrated will appear when
pushing the SETTING button and selecting the
“Clock” key.
The clock settings display cannot be operated
while driving. Stop the vehicle in a safe place
and apply the parking brake before setting the
clock.
On-screen Clock:
When this item is turned to ON, a clock is
always displayed in the upper right corner of the
screen.
This clock will indicate the time almost exactly
because it is always adjusted by the GPS
Center display, heater, air conditioner, audio, phone and voice recognition systems4-13
Page 172 of 427
4-16Center display, heater, air conditioner, audio, phone and voice recognition systems
SAA2404
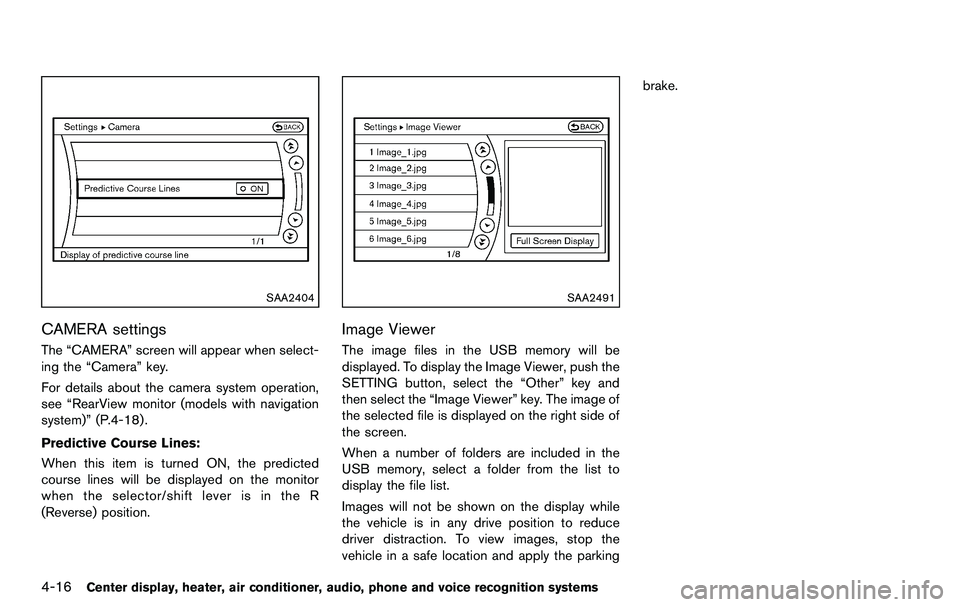
CAMERA settings
The “CAMERA” screen will appear when select-
ing the “Camera” key.
For details about the camera system operation,
see “RearView monitor (models with navigation
system)” (P.4-18) .
Predictive Course Lines:
When this item is turned ON, the predicted
course lines will be displayed on the monitor
when the selector/shift lever is in the R
(Reverse) position.
SAA2491
Image Viewer
The image files in the USB memory will be
displayed. To display the Image Viewer, push the
SETTING button, select the “Other” key and
then select the “Image Viewer” key. The image of
the selected file is displayed on the right side of
the screen.
When a number of folders are included in the
USB memory, select a folder from the list to
display the file list.
Images will not be shown on the display while
the vehicle is in any drive position to reduce
driver distraction. To view images, stop the
vehicle in a safe location and apply the parkingbrake.
Page 176 of 427

4-20Center display, heater, air conditioner, audio, phone and voice recognition systems
SAA1897
1. Visually check that the parking space is safebefore parking your vehicle.
2. The rearview of the vehicle is displayed on the screen
*Aas illustrated when the
selector/shift lever is moved to the R
(Reverse) position.
SAA1898
3. Slowly back up the vehicle adjusting the steering wheel so that the predicted course
lines
*Benter the parking space*C.
4. Maneuver the steering wheel to make the vehicle width guide lines
*Dparallel to the
parking space
*Cwhile referring to the
predicted course lines. 5. When the vehicle is parked in the space
completely, move the selector/shift lever to
the P (Park) position and apply the parking
brake.
DIFFERENCE BETWEEN PREDICTED
AND ACTUAL DISTANCES
The distance guide line and the vehicle width
guide line should be used as a reference only
when the vehicle is on a level, paved surface.
The distance viewed on the monitor is for
reference only and may be different from the
actual distance between the vehicle and dis-
played objects.
Page 179 of 427
course.
HOW TO ADJUST SCREEN
To adjust the Display ON/OFF, Brightness, Tint,
Color, Contrast and Black Level of the RearView
monitor, push the SETTING button with the
RearView monitor on, select the “Display” key on
the screen and select the item key and adjust
the level using the multi-function controller.
Do not adjust the Brightness, Tint, Color,
Contrast and Black Level of the RearView
monitor while the vehicle is moving. Make sure
the parking brake is firmly applied and the
engine is not running.
The display of the predicted course lines can be
set to ON or OFF. For details, see “CAMERA
settings” (P.4-16) .
OPERATING TIPS
.When the selector/shift lever is shifted to
the R (Reverse) position, the monitor screen
automatically changes to the RearView
monitor mode.
. It may take some time until the RearView
monitor is displayed after the selector/shift
lever has been shifted to R from another
position or to another position from “R”.
Objects may be distorted momentarily until
the RearView monitor screen is displayed
completely. .
When the temperature is extremely high or
low, the screen may not clearly display
objects. This is not a malfunction.
. When strong light directly enters the cam-
era, objects may not be displayed clearly.
This is not a malfunction.
. Vertical lines may be seen in objects on the
screen. This is due to strong reflected light
from the bumper. This is not a malfunction.
. The screen may flicker under fluorescent
light. This is not a malfunction.
. The colors of objects on the RearView
monitor may differ somewhat from those of
the actual object.
. Objects on the monitor may not be clear in a
dark place or at night. This is not a
malfunction.
. If dirt, rain or snow attaches to the camera,
the RearView monitor may not clearly display
objects. Clean the camera.
. Do not use alcohol, benzine or thinner to
clean the camera. This will cause discolora-
tion. To clean the camera, wipe with a cloth
dampened with diluted mild cleaning agent
and then wipe with a dry cloth.
. Do not damage the camera as the monitor
screen may be adversely affected.
. Do not use wax on the camera window.
Wipe off any wax with a clean cloth dampened with mild detergent diluted with
water.
Center display, heater, air conditioner, audio, phone and voice recognition systems4-23
Page 212 of 427

4-56Center display, heater, air conditioner, audio, phone and voice recognition systems
When this button is pushed while the CD is
being played, the CD will be ejected.
If the CD comes out and is not removed, it
will be pulled back into the slot to protect
it.
DVD (Digital Versatile Disc) PLAYER
OPERATION (models with navigation
system)
Precautions
Start the engine when using the DVD entertain-
ment system.
Movies will not be shown on the front display
while the vehicle is in any drive position to
reduce driver distraction. Audio is available
when a movie is played. To view movies in the
front display, stop the vehicle in a safe location,
move the selector lever to the P (Park) position
and apply the parking brake.
WARNING
.The driver must not attempt to
operate the DVD system or wear
the headphones while the vehicle is
in motion so that full attention may
be given to vehicle operation. .
Do not attempt to modify the system
to display a movie on the front
screen while the vehicle is being
driven. Doing so may distract the
driver and may cause a collision and
serious personal injury or death.
CAUTION
.Only operate the DVD while the
vehicle engine is running. Operating
the DVD for extended periods of
time with the engine OFF can dis-
charge the vehicle battery.
. Do not allow the system to get wet.
Excessive moisture such as spilled
liquids may cause the system to
malfunction.
. While playing VIDEO-CD media, this
DVD player does not guarantee
complete functionality of all VI-
DEO-CD formats.
Display settings
To adjust the front display mode, push the
SETTING button while the DVD is being played,
select the “Others” key and then select the
“Display” key.
To adjust the display ON/OFF, brightness, tint,
color and contrast, select the “Display Adjust-
ment” key and then select each key.
Then you can adjust each item using the multi-
function controller. After changes have been
made push the BACK button to save the setting.
Page 256 of 427
4-100Center display, heater, air conditioner, audio, phone and voice recognition systems
calls made from the vehicle.
“Incoming”
*B
Use the Incoming command to list the incoming
calls made from the vehicle.
“Missed”
*C
Use the Missed command to list the missed
calls made to the vehicle that were not
answered.
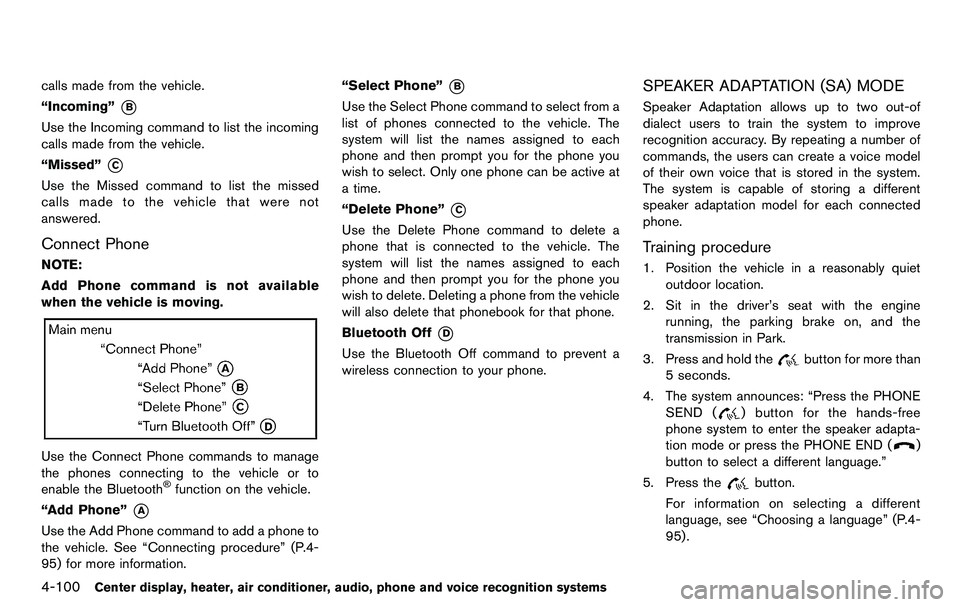
Connect Phone
NOTE:
Add Phone command is not available
when the vehicle is moving.
Use the Connect Phone commands to manage
the phones connecting to the vehicle or to
enable the Bluetooth
®function on the vehicle.
“Add Phone”
*A
Use the Add Phone command to add a phone to
the vehicle. See “Connecting procedure” (P.4-
95) for more information. “Select Phone”
*B
Use the Select Phone command to select from a
list of phones connected to the vehicle. The
system will list the names assigned to each
phone and then prompt you for the phone you
wish to select. Only one phone can be active at
a time.
“Delete Phone”
*C
Use the Delete Phone command to delete a
phone that is connected to the vehicle. The
system will list the names assigned to each
phone and then prompt you for the phone you
wish to delete. Deleting a phone from the vehicle
will also delete that phonebook for that phone.
Bluetooth Off
*D
Use the Bluetooth Off command to prevent a
wireless connection to your phone.
SPEAKER ADAPTATION (SA) MODE
Speaker Adaptation allows up to two out-of
dialect users to train the system to improve
recognition accuracy. By repeating a number of
commands, the users can create a voice model
of their own voice that is stored in the system.
The system is capable of storing a different
speaker adaptation model for each connected
phone.
Training procedure
1. Position the vehicle in a reasonably quiet
outdoor location.
2. Sit in the driver’s seat with the engine running, the parking brake on, and the
transmission in Park.
3. Press and hold the
button for more than
5 seconds.
4. The system announces: “Press the PHONE SEND (
) button for the hands-free
phone system to enter the speaker adapta-
tion mode or press the PHONE END (
)
button to select a different language.”
5. Press the
button.
For information on selecting a different
language, see “Choosing a language” (P.4-
95).
Page 285 of 427
5 Starting and driving
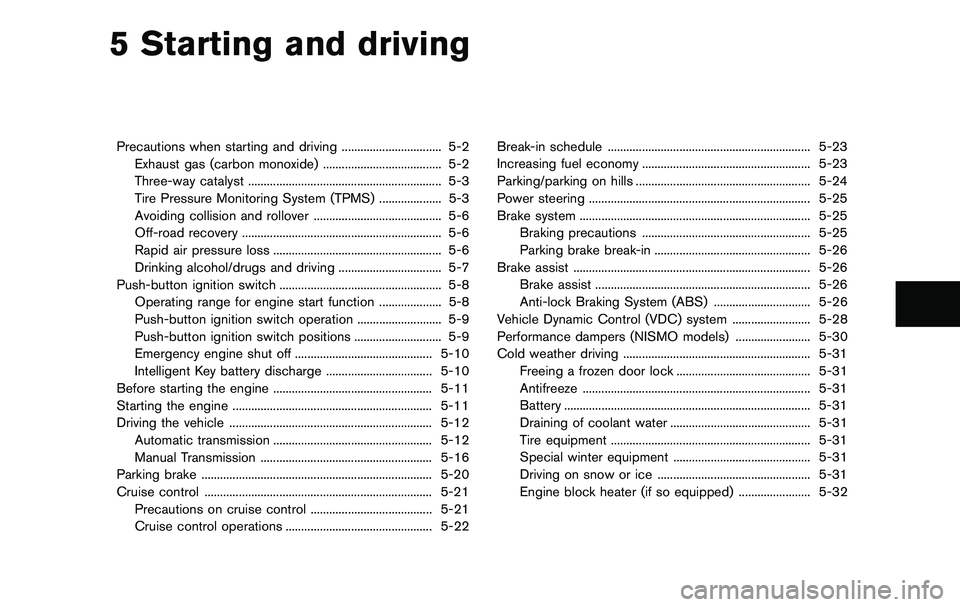
Precautions when starting and driving ................................ 5-2Exhaust gas (carbon monoxide) ...................................... 5-2
Three-way catalyst .............................................................. 5-3
Tire Pressure Monitoring System (TPMS) .................... 5-3
Avoiding collision and rollover ......................................... 5-6
Off-road recovery ................................................................ 5-6
Rapid air pressure loss ...................................................... 5-6
Drinking alcohol/drugs and driving ................................. 5-7
Push-button ignition switch .................................................... 5-8 Operating range for engine start function .................... 5-8
Push-button ignition switch operation ........................... 5-9
Push-button ignition switch positions ............................ 5-9
Emergency engine shut off ............................................ 5-10
Intelligent Key battery discharge .................................. 5-10
Before starting the engine ................................................... 5-11
Starting the engine ................................................................ 5-11
Driving the vehicle ................................................................. 5-12 Automatic transmission ................................................... 5-12
Manual Transmission ....................................................... 5-16
Parking brake ........................................................................\
.. 5-20
Cruise control ........................................................................\
. 5-21 Precautions on cruise control ....................................... 5-21
Cruise control operations ............................................... 5-22 Break-in schedule ................................................................. 5-23
Increasing fuel economy ...................................................... 5-23
Parking/parking on hills ........................................................ 5-24
Power steering ....................................................................... 5-25
Brake system ........................................................................\
.. 5-25 Braking precautions ...................................................... 5-25
Parking brake break-in .................................................. 5-26
Brake assist ........................................................................\
.... 5-26 Brake assist ..................................................................... 5-26
Anti-lock Braking System (ABS) ............................... 5-26
Vehicle Dynamic Control (VDC) system ......................... 5-28
Performance dampers (NISMO models) ........................ 5-30
Cold weather driving ............................................................ 5-31
Freeing a frozen door lock ........................................... 5-31
Antifreeze ........................................................................\
. 5-31
Battery ........................................................................\
....... 5-31
Draining of coolant water ............................................. 5-31
Tire equipment ................................................................ 5-31
Special winter equipment ............................................ 5-31
Driving on snow or ice ................................................. 5-31
Engine block heater (if so equipped) ....................... 5-32