2012 MINI COUPE ROADSTER CONVERTIBLE open hood
[x] Cancel search: open hoodPage 12 of 283

CockpitAT A GLANCE
11
1Adjusting the exterior mirrors, folding them
in and out 54
3 MINI Roadster, MINI Convertible: Always
Open Timer 72
7 Ignition lock 60 8
Buttons on steering wheel,
Right side
Left side
9 Horn: the entire surface
10 Adjusting the steering wheel 55
11 Releasing the hood 222
2
Parking lamps 96
Low beams 96
Automatic headlamp control 96
Adaptive Light Control 97
Turn signals 65
High beams 98
Headlamp flasher 65
Roadside parking lamps 98
Computer 71
4 Tachometer 12
Instrument lighting 99
Resetting the trip odometer 71
5 Wiper system 66
6 Switching the ignition on/off and
starting/stopping the engine
60
Resuming cruise control68
Storing speed and accelerating or
decelerating
or Activating/deactivating cruise
control
68
Increasing or reducing volume
Telephone:
Press: accepting and ending a call,
starting dialing of selected phone
number and redialing if no phone
number is selected
Microphone on steering column
Activating/deactivating voice
activation system 23
Microphone on steering column
Changing the radio station
Selecting a music track
Scrolling through the redial list
00320051004F004C00510048000300280047004C0057004C005200510003
Page 36 of 283

Opening and closingCONTROLS
35
>The car’s inclination changes, for example if
an attempt is made to jack it up and steal the
wheels or to raise it prior to towing it away
> There is an interruption in the power supply
from the battery
The alarm system briefly indicates unauthorized
entry or tampering by means of:
> An acoustic alarm
> Switching on the hazard warning flashers
Arming and disarming
General information
Whenever the car is locked or unlocked, the
alarm system is armed or disarmed.
Door lock with armed alarm system
Because of the design, unlocking the door lock
may trigger the alarm in some countries.
To turn off the alarm, unlock the vehicle using
the remote control or switch on the ignition.
Tailgate with armed alarm system
Even when the alarm syst em is armed, you can
open the tailgate by means of the button
on the remote control.
When you subsequently close the tailgate it is
again locked and monitored.
Panic mode
You can activate the alarm system if you find
yourself in a dangerous situation.
Press the button for at least two seconds.
Switching off the alarm:
Press any button.
Switching off an alarm
> Unlock the car with the remote control.
> Insert the key fully into the ignition lock.
> In cars with Comfort Access, press the button
on the door lock.
Display on the revolution counter
When the system is armed, all LEDs pulse. After
approx. 16 minutes one LED flashes.
>LEDs pulse or LED flashes: system is armed.
> One LED flashes at short intervals:
Doors, the hood or the tailgate are not prop-
erly closed. Even if these are not closed fully,
the remaining items are deadlocked and the
LEDs pulse after approx. 10 seconds for
approx. 16 minutes. Afterwards, one LED
flashes.
The interior movement detector is not
activated.
> LEDs go out after the vehicle is unlocked:
No attempt was made to tamper with the
car.
> LEDs flash after unlocking until the key is
inserted in the ignition, but for no longer
than approx. 5 minutes: an attempt was
made to tamper with the vehicle.
Tilt alarm sensor
The vehicle's inclination is monitored. The alarm
is triggered, for instance, if an attempt is made
to steal the vehicle's wheels or tow it away.
Interior movement detector
Before the interior mo vement detector can
operate correctly, the windows and glass roof
must be closed.
00320051004F004C00510048000300280047004C0057004C005200510003
Page 68 of 283

DrivingCONTROLS
67
5.Press and hold the butt on until the display
changes.
6. Press the button to select the desired
sensitivity.
7. Wait, or press and hold the button until the
display changes.
The settings are stored.
Deactivating intermittent wipe or
rain sensor
Press the button again, arrow 3.
Brief wipe
Press the lever downward once, arrow 2.
Cleaning windshield and headlamps
Pull the lever, arrow 4.
Washer fluid is sprayed onto the windshield and
the wipers are operated briefly.
When the vehicle lighting system is switched on,
the headlamps are cleaned at regular and
appropriate intervals.
In cars equipped with an alarm system, the
headlamps cannot be cleaned when the hood is
open. Do not use the washers when the washer
fluid reservoir is empt y; otherwise, you will
damage the washer pump.
Only use the washers if the hood has been com-
pletely closed; otherwise, the headlamp washer
system may be damaged. Do not use the wash-
ers if there is any danger that the fluid will freeze
on the windshield. If you do, your vision could be
obscured. For this reason, use antifreeze. <
Window washer nozzles
The window washer nozzles are heated auto-
matically while the engine is running or the
ignition is switched on.
Washer fluid
Washer fluid is flammable. Keep it away
from ignition sources, only store it in the
closed, original container, and keep out of reach
of children; otherwise, there is a danger of
injury. Comply with th e instructions on the
container. <
Washer fluid reservoir
Only refill washer fluid that contains
antifreeze when the engine is cool, to
avoid contact with hot engine parts. Otherwise,
fluid spills constitute a fi re hazard and a risk to
personal safety. <
Fill with water and, if required, with a washer
antifreeze, according to manufacturer's
recommendations. Mix the water and antifreeze before filling
the washer fluid reservoir to make sure
the correct concentration is maintained. <
Capacity
Approx. 2.6 US quarts/2.5 liters.
With headlamp washer system:
Approx. 4.8 US quarts/4.5 liters.
00320051004F004C00510048000300280047004C0057004C005200510003
Page 223 of 283

MOBILITYEngine compartment
222
Hood
Releasing
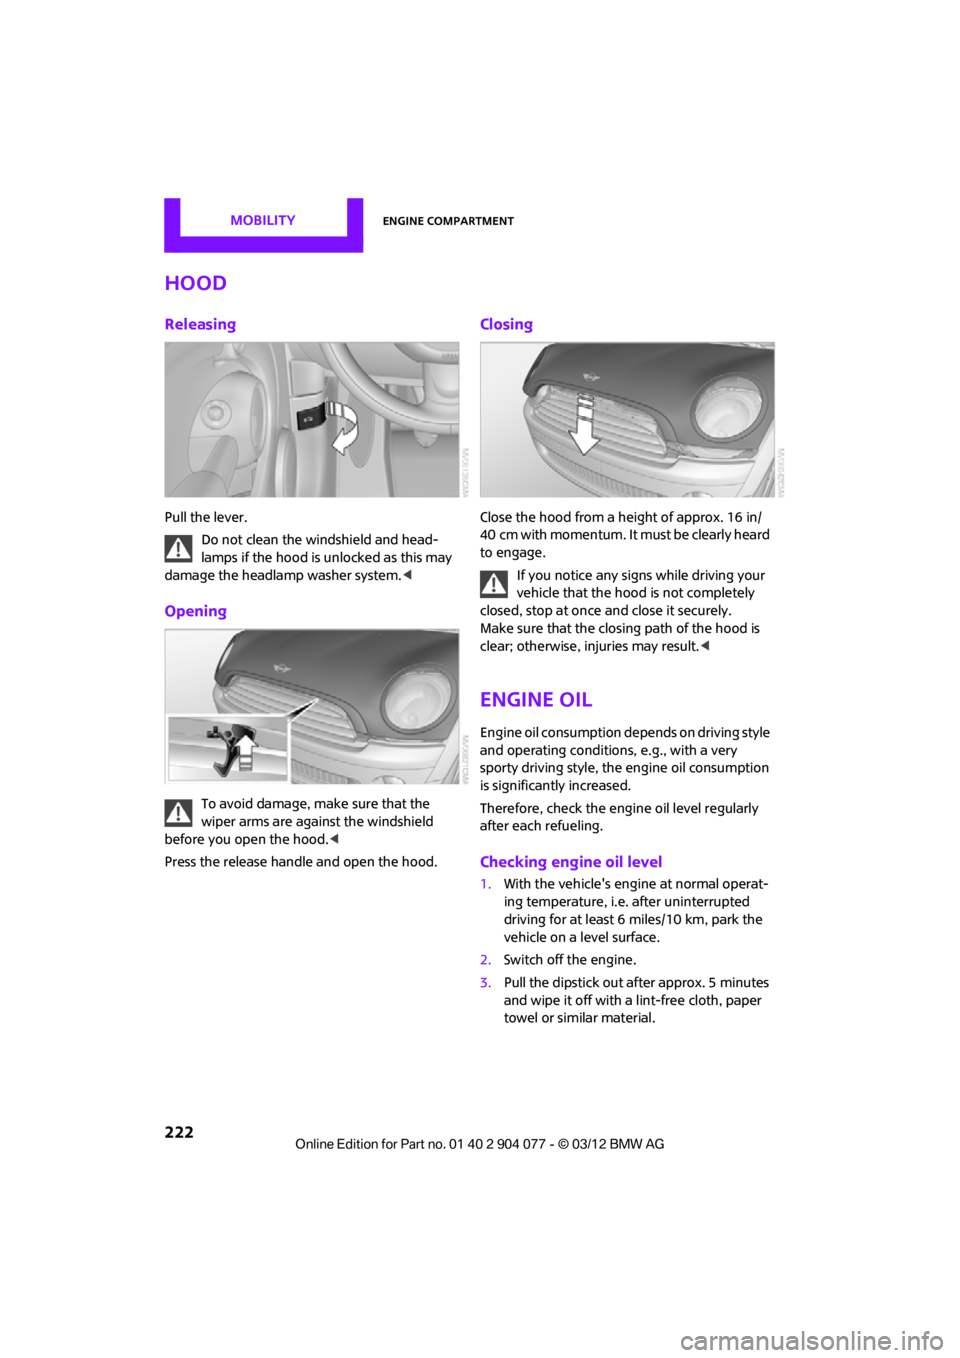
Pull the lever.Do not clean the windshield and head-
lamps if the hood is unlocked as this may
damage the headlamp washer system. <
Opening
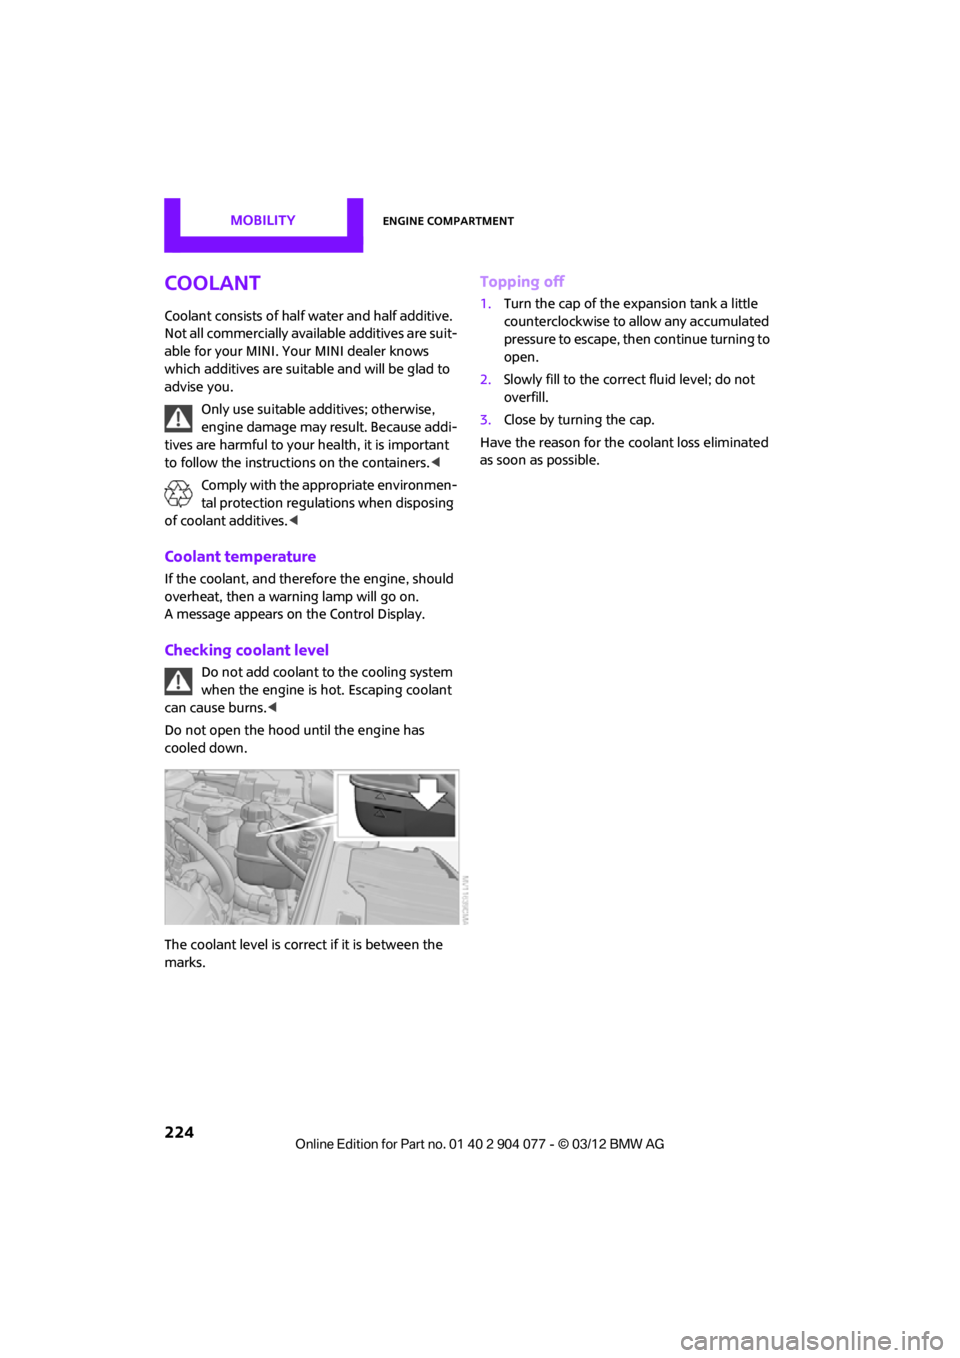
To avoid damage, make sure that the
wiper arms are against the windshield
before you open the hood. <
Press the release handle and open the hood.
Closing
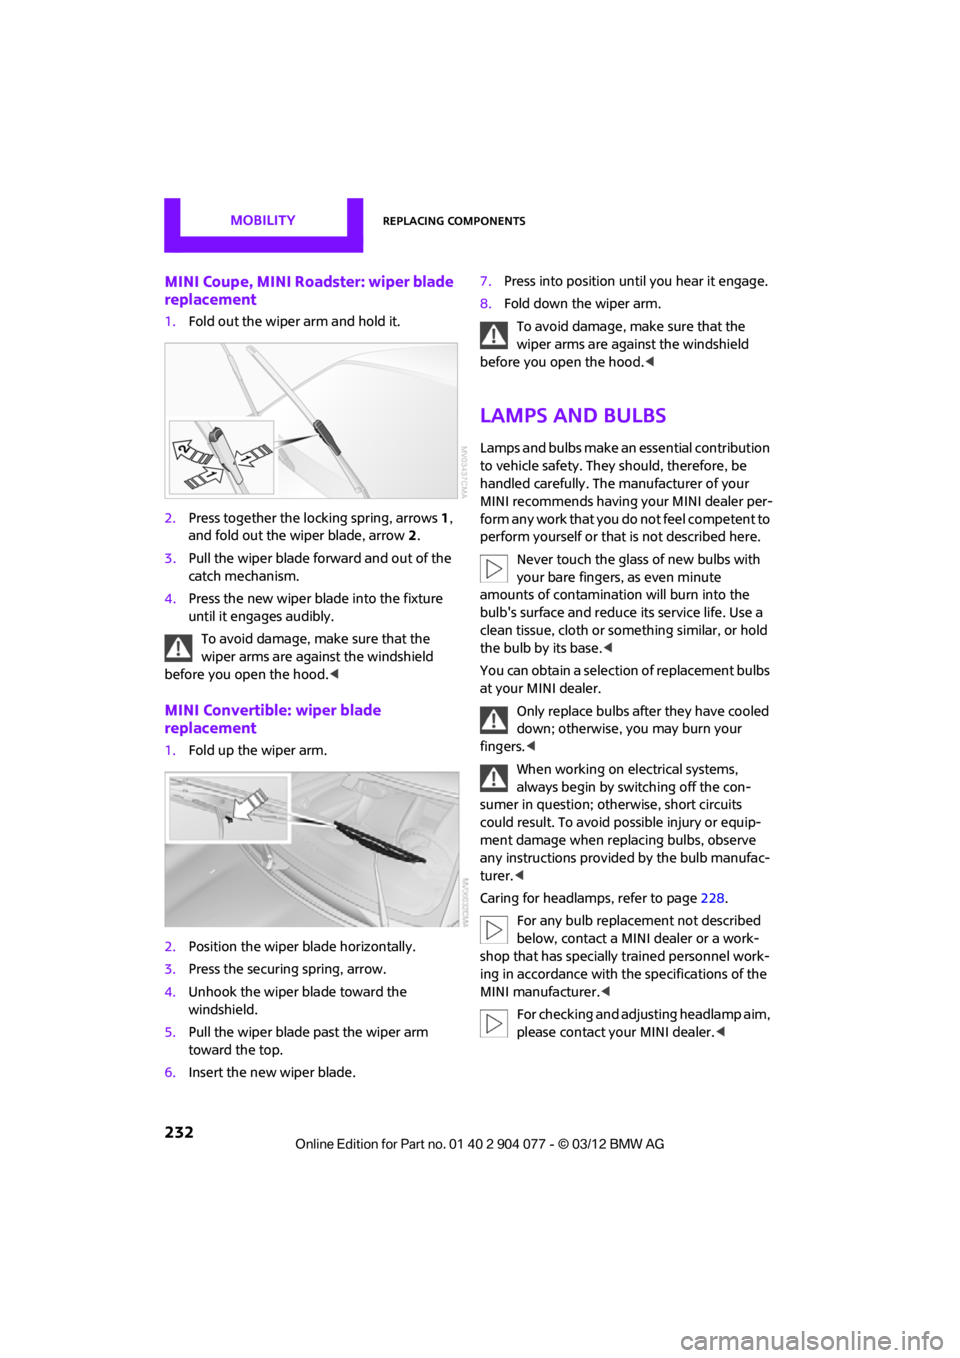
Close the hood from a height of approx. 16 in/
40 cm with momentum. It must be clearly heard
to engage.
If you notice any signs while driving your
vehicle that the hood is not completely
closed, stop at once and close it securely.
Make sure that the closing path of the hood is
clear; otherwise, injuries may result. <
Engine oil
Engine oil consumption depends on driving style
and operating conditions, e.g., with a very
sporty driving style, the engine oil consumption
is significantly increased.
Therefore, check the engine oil level regularly
after each refueling.
Checking engine oil level
1. With the vehicle's engine at normal operat-
ing temperature, i.e. after uninterrupted
driving for at least 6 miles/10 km, park the
vehicle on a level surface.
2. Switch off the engine.
3. Pull the dipstick out after approx. 5 minutes
and wipe it off with a lint-free cloth, paper
towel or similar material.
00320051004F004C00510048000300280047004C0057004C005200510003
Page 225 of 283

MOBILITYEngine compartment
224
Coolant
Coolant consists of half water and half additive.
Not all commercially available additives are suit-
able for your MINI. Your MINI dealer knows
which additives are suitab le and will be glad to
advise you.
Only use suitable additives; otherwise,
engine damage may result. Because addi-
tives are harmful to your health, it is important
to follow the instructions on the containers. <
Comply with the appropriate environmen-
tal protection regulations when disposing
of coolant additives. <
Coolant temperature
If the coolant, and therefore the engine, should
overheat, then a warning lamp will go on.
A message appears on the Control Display.
Checking coolant level
Do not add coolant to the cooling system
when the engine is hot. Escaping coolant
can cause burns. <
Do not open the hood until the engine has
cooled down.
The coolant level is correct if it is between the
marks.
Topping off
1. Turn the cap of the expansion tank a little
counterclockwise to allow any accumulated
pressure to escape, then continue turning to
open.
2. Slowly fill to the correct fluid level; do not
overfill.
3. Close by turning the cap.
Have the reason for the coolant loss eliminated
as soon as possible.
00320051004F004C00510048000300280047004C0057004C005200510003
Page 233 of 283

MOBILITYReplacing components
232
MINI Coupe, MINI Roadster: wiper blade
replacement
1.Fold out the wiper arm and hold it.
2. Press together the lo cking spring, arrows1,
and fold out the wiper blade, arrow 2.
3. Pull the wiper blade forward and out of the
catch mechanism.
4. Press the new wiper blade into the fixture
until it engages audibly.
To avoid damage, make sure that the
wiper arms are against the windshield
before you open the hood. <
MINI Convertible: wiper blade
replacement
1.Fold up the wiper arm.
2. Position the wiper blade horizontally.
3. Press the securing spring, arrow.
4. Unhook the wiper blade toward the
windshield.
5. Pull the wiper blade past the wiper arm
toward the top.
6. Insert the new wiper blade. 7.
Press into position until you hear it engage.
8. Fold down the wiper arm.
To avoid damage, make sure that the
wiper arms are against the windshield
before you open the hood. <
Lamps and bulbs
Lamps and bulbs make an essential contribution
to vehicle safety. They should, therefore, be
handled carefully. The manufacturer of your
MINI recommends having your MINI dealer per-
form any work that you do not feel competent to
perform yourself or that is not described here.
Never touch the glass of new bulbs with
your bare fingers, as even minute
amounts of contaminatio n will burn into the
bulb's surface and reduce its service life. Use a
clean tissue, cloth or some thing similar, or hold
the bulb by its base. <
You can obtain a selectio n of replacement bulbs
at your MINI dealer.
Only replace bulbs after they have cooled
down; otherwise, you may burn your
fingers. <
When working on electrical systems,
always begin by switching off the con-
sumer in question; otherwise, short circuits
could result. To avoid possible injury or equip-
ment damage when replacing bulbs, observe
any instructions provided by the bulb manufac-
turer.<
Caring for headlamp s, refer to page228.
For any bulb replacement not described
below, contact a MINI dealer or a work-
shop that has specially trained personnel work-
ing in accordance with th e specifications of the
MINI manufacturer.<
For checking and adjusting headlamp aim,
please contact your MINI dealer. <
00320051004F004C00510048000300280047004C0057004C005200510003
Page 277 of 283

REFERENCEEverything from A to Z
276
Oil types223
Old batteries, refer to
Disposal 242
Onboard computer 17
– adjusting brightness 80
– changing language 80
– menu guidance 18
– operating principles 17
– overview 17
Opening and closing
– Comfort Access 36
– from inside 32
– from outside 29
– using the door lock 31
– using the remote control 30
Opening and unlocking
– from inside 32
Options, selecting for navigation 135
Orientation menu, refer to Main menu 18
Outlets
– refer to Ventilation 106
Outlets, refer to Air vents 101
Output, refer to Engine
data 250
Outside-air mode
– automatic climate
control 104
Overheated engine, refer to
Coolant temperature 224
P
Paintwork, care229
Park Distance Control PDC 82
Parking
– vehicle 61
Parking aid, refer to Park
Distance Control PDC 82
Parking brake 62
– indicator lamp 13
Parking lamps, replacing bulb 234
Parking lamps/low beams 96
Parts and accessories, see Vehicle equipment 4Pathway lighting
97
Personal Profile 28
Phone numbers
– dialing 174,186
Plastic parts, care 230
Pollen
– refer to Microfilter/activated-
charcoal filter for automatic
climate control 105
– refer to Microfilter for air
conditioner 103
Power convertible top 40
Power failure 242
Power windows 38
Power windows, refer to Windows 38
Pressure, tires 209
Pressure monitoring, tires 87
– Flat Tire Monitor 87
Pressure monitoring of tires, refer to Tire Pressure Monitor
TPM 89
Puncture
– Flat Tire Monitor 87
R
Radio
– controls146
– HD Radio 150
– satellite radio 151
– select waveband 149
– storing stations 150
– switching on/off 146
– tone control 147
– volume 147
Radio key, refer to Integrated key/remote control 28
Radio position, refer to Radio
readiness 60
Radio readiness 60
– switched off 61
– switched on 60
Rain sensor 66
Random play sequence
– external devices 162Range, refer to Cruising
range 71
Reading aloud 199
Reading lamps 99
Rear fog lamp 99
– indicator lamp 13
– replacing bulb 236
Rear lamps
– bulb replacement 235
Rear lamps, refer to Tail
lamps 235
Rear-mounted luggage rack 120
Rear spoiler, see Automatic rear spoiler 85
Rearview mirror, refer to
Mirrors 54
Rear window defroster 103,105
Reception
– quality 150
– radio station 150
Recirculated-air mode 102,104
Recirculation of air, refer to
Recirculated-air
mode 102,104
Reclining seat , refer to
Backrest 51
Refueling 206
Rejecting a call 173,186
Releasing
– hood 222
Reminders 198
Remote control 28
– battery renewal 38
– Comfort
Acces
s 36
– malfunctions 31,37
– service data 225
– tailgate 31
Replacement remote control 28
Replacing bulbs, refer to Lamps and bulbs 232
Replacing tires, refer to New
wheels and tires 219
Reporting safety defects 6
00320051004F004C00510048000300280047004C0057004C005200510003