2012 MERCEDES-BENZ SLS AMG COUPE heating
[x] Cancel search: heatingPage 11 of 288
Fuel tankCapacity ........................................ 280
Problem (malfunction) ...................129
Fuse box
Front-passenger footwell ...............247
Rear compartment .........................248
Fuses
Allocation chart ............................. 247
Before changing ............................. 247
Important safety notes ..................247
G
Garage door opener Clearing the memory .....................215
Notes ............................................. 212
Opening/closing the garage door ..215
Programming (button in the rear-
view mirror) ................................... 213
Gasoline ............................................. 127
Gear indicator .................................... 121
Genuine Mercedes-Benz parts ......... 276
Glove box ........................................... 200
H
Handbrake see Parking brake
Hazard warning lamps ........................ 96
Head bags ............................................ 41
Headlamp cleaning system Notes ............................................. 284
Headlamps
Adding fluid to cleaning system .....221
Cleaning system (function) ..............97
Fogging up ....................................... 97
see Automatic headlamp mode
Head level heating (AIRSCARF) .......... 87
Heating see Climate control
High-beam headlamps
Display message ............................ 175
Switching on/off .............................. 96
Hill start assist .................................. 117
Hood Closing ........................................... 219
Display message ............................ 183
Opening ......................................... 218
Hydroplaning ..................................... 135
I
Ignition lock ....................................... 115
Immobilizer .......................................... 59
Indicator lamps see Warning and indicator lamps
Indicators
see Turn signals
Instrument cluster
Overview .......................................... 27
Settings ......................................... 157
Warning and indicator lamps ...........28
Instrument cluster lighting .............. 158
Instrument lighting see Instrument cluster lighting
Interior lighting
Automatic control ............................ 97
Delayed switch-off (on-board
computer) ...................................... 159
Emergency lighting ..........................98
Manual control ................................. 98
Overview .......................................... 97
Reading lamp ................................... 97
J
Jack Storage location ............................ 232
Using ............................................. 237
Jump start (engine)
see Jump starting (engine)
Jump starting (engine) ...................... 243
K
Key see SmartKey
KEYLESS-GO start function
Display message ............................ 185
Start/Stop button .......................... 115
Starting the engine ........................116
Key positions
SmartKey ....................................... 115
Kickdown ........................................... 122
Driving tips .................................... 122
Knee bag .............................................. 40
Index9
Page 14 of 288
Product information ............................ 18
Program selector ............................... 122
Pulling away ...................................... 117
Q
Qualified specialist workshop ........... 21
R
RACE START ....................................... 123
RACETIMER (on-board computer) .... 161
Radio Selecting a station .........................154
see separate operating instructions
Reading lamp ....................................... 97
Rear spoiler Display message ............................ 189
Extending/retracting .....................210
Problem ......................................... 212
Rear view camera
Cleaning instructions .....................228
Function/notes ............................. 142
Rear-view mirror
Anti-glare (manual) ..........................89
Dipping (automatic) .........................90
Rear window defroster
Problem (malfunction) ...................109
Switching on/off ........................... 109
Refueling
Fuel gauge ....................................... 27
Important safety notes ..................127
Refueling process ..........................127
see Fuel
Remote control
Garage door opener .......................212
Reporting safety defects .................... 22
Reserve (fuel tank) see Fuel
Reserve fuel
Display message ............................ 179
Warning lamp ................................. 195
see Fuel
Restraint system
see SRS (Supplemental Restraint
System)
Roadside Assistance (breakdown) .... 19
Roof
see Soft top
Route
see Route guidance (navigation)
Route guidance (navigation) ............ 153
S
Safety Children in the vehicle .....................51
Child restraint systems ....................51
Occupant Classification System
(OCS) ............................................... 42
Overview of occupant safety
systems ........................................... 36
Safety systems
see Driving safety systems
Seat belts
Belt force limiters ............................ 50
Cleaning ......................................... 229
Correct usage .................................. 48
Emergency Tensioning Devices ........ 50
Fastening ......................................... 49
Important safety guidelines .............47
Releasing ......................................... 49
Safety guidelines ............................. 37
Special seat belt retractor ...............53
Warning lamp ................................. 191
Warning lamp (function) ................... 49
Seats
Adjusting (electrically) .....................86
Adjusting lumbar support ................86
Cleaning the cover .........................229
Correct driver's seat position ........... 84
Important safety notes ....................85
Seat heating problem ......................87
Storing settings (memory
function) .......................................... 91
Switching AIRSCARF on/off ............87
Switching seat heating on/off .........86
Selector lever
Positions ........................................ 119
Sensors (cleaning instructions) ....... 228
Service Center see Qualified specialist workshop
Service interval display
Displaying service messages .........222
Hiding service messages ...............222
12Index
Page 32 of 288
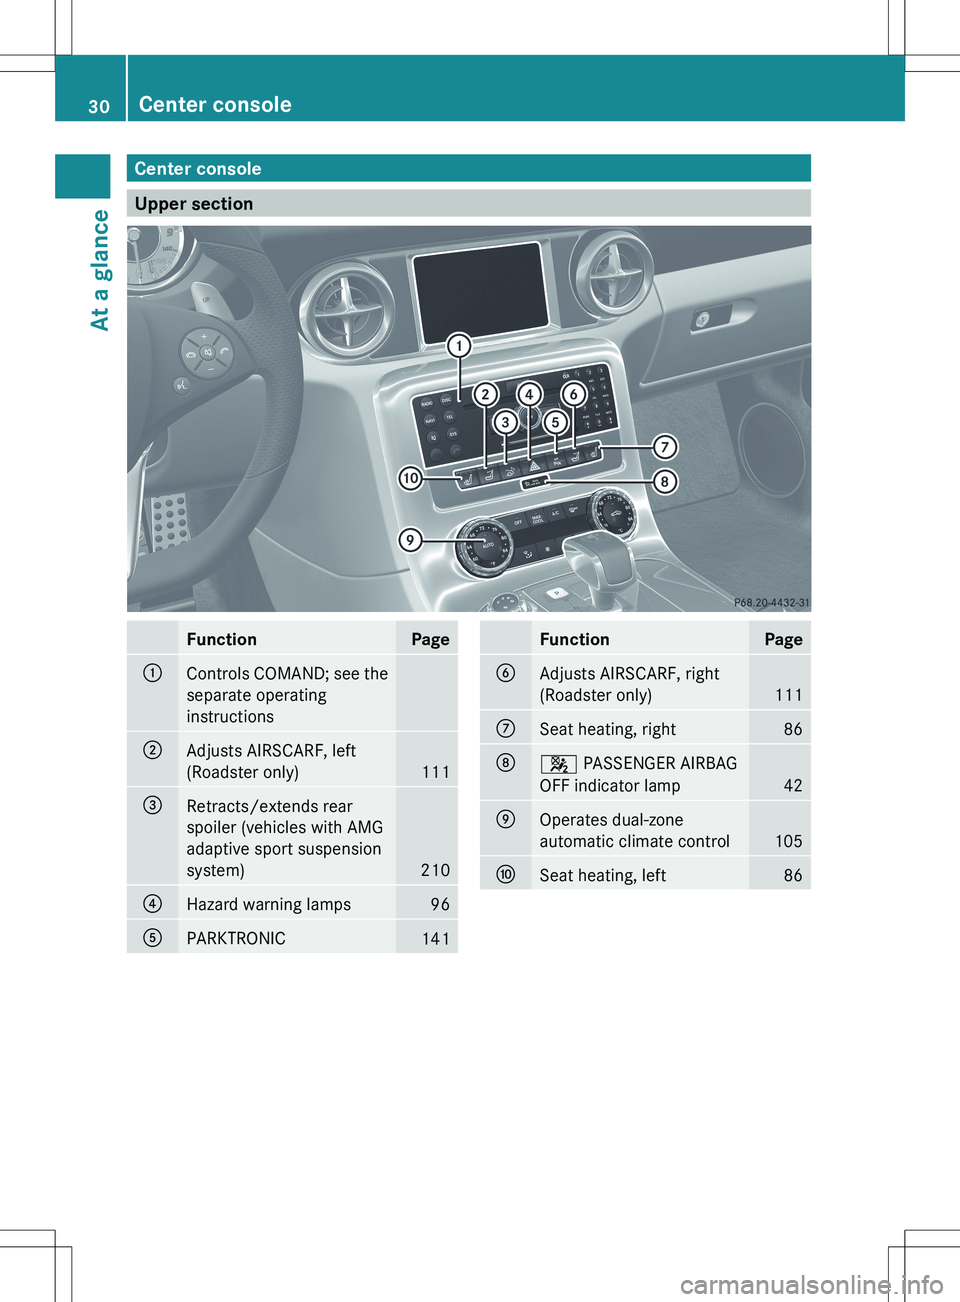
Center console
Upper section
FunctionPage:Controls COMAND; see the
separate operating
instructions;Adjusts AIRSCARF, left
(Roadster only)
111
=Retracts/extends rear
spoiler (vehicles with AMG
adaptive sport suspension
system)
210
?Hazard warning lamps96APARKTRONIC141FunctionPageBAdjusts AIRSCARF, right
(Roadster only)
111
CSeat heating, right86D4 PASSENGER AIRBAG
OFF indicator lamp
42
EOperates dual-zone
automatic climate control
105
FSeat heating, left8630Center consoleAt a glance
Page 70 of 288
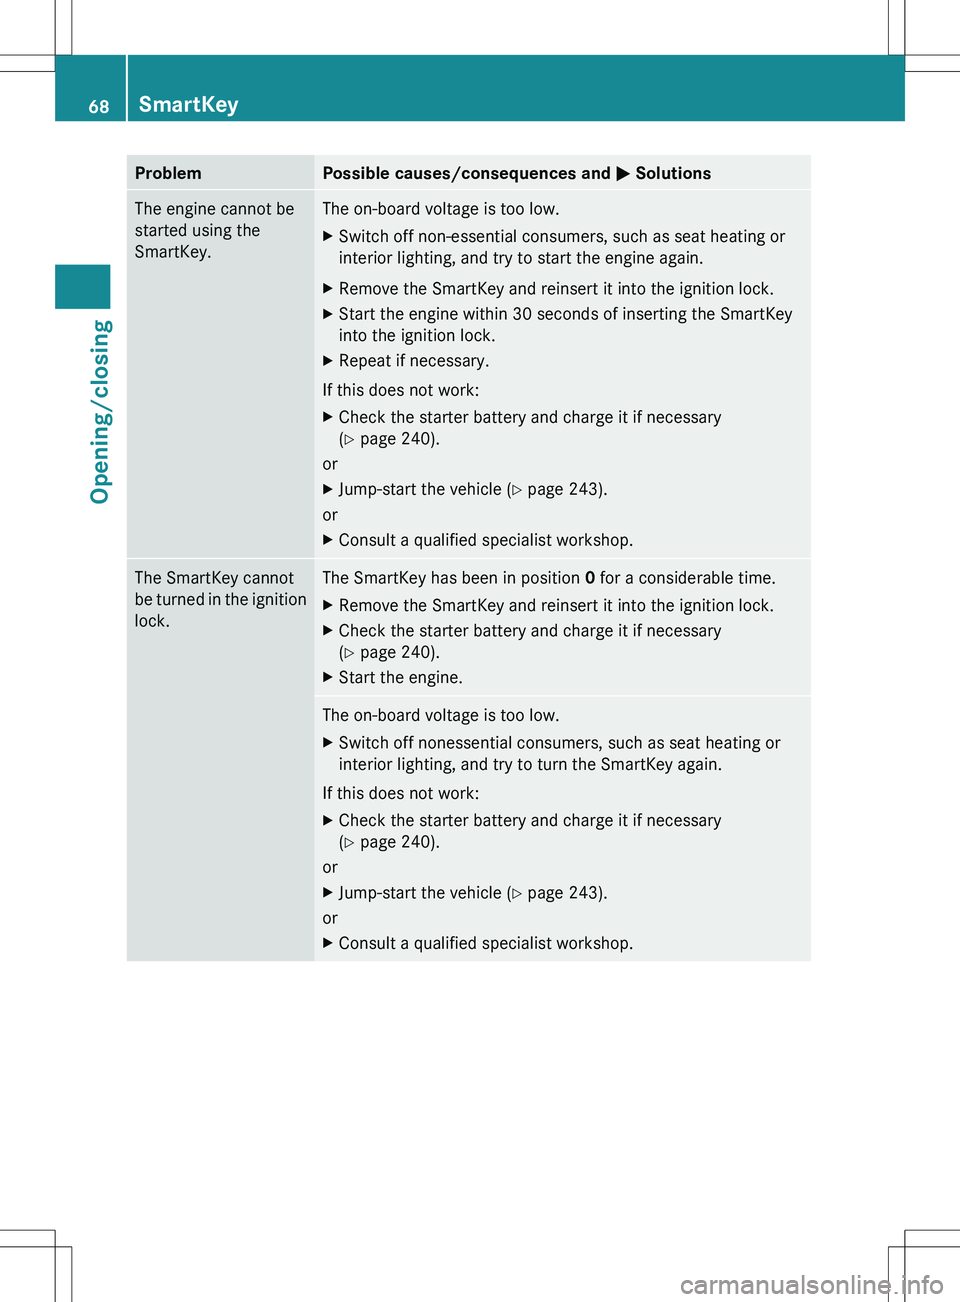
ProblemPossible causes/consequences and M SolutionsThe engine cannot be
started using the
SmartKey.The on-board voltage is too low.XSwitch off non-essential consumers, such as seat heating or
interior lighting, and try to start the engine again.XRemove the SmartKey and reinsert it into the ignition lock.XStart the engine within 30 seconds of inserting the SmartKey
into the ignition lock.XRepeat if necessary.
If this does not work:
XCheck the starter battery and charge it if necessary
( Y page 240).
or
XJump-start the vehicle ( Y page 243).
or
XConsult a qualified specialist workshop.The SmartKey cannot
be turned in the ignition
lock.The SmartKey has been in position 0 for a considerable time.XRemove the SmartKey and reinsert it into the ignition lock.XCheck the starter battery and charge it if necessary
( Y page 240).XStart the engine.The on-board voltage is too low.XSwitch off nonessential consumers, such as seat heating or
interior lighting, and try to turn the SmartKey again.
If this does not work:
XCheck the starter battery and charge it if necessary
( Y page 240).
or
XJump-start the vehicle ( Y page 243).
or
XConsult a qualified specialist workshop.68SmartKeyOpening/closing
Page 87 of 288
Seats
Important safety notes
GWARNING
In order to avoid possible loss of vehicle
control, the following must be done before the
vehicle is put into motion:
R seat adjustment
R steering wheel adjustment
R rear-view mirror adjustment
R fastening of seat belts
GWARNING
In order to avoid possible loss of vehicle
control, all seat, head restraint, steering
wheel and rear view mirror adjustments, as
well as fastening of seat belts, must be done
before setting the vehicle in motion.
GWARNING
Do not adjust the driver's seat while driving.
Adjusting the seat while driving could cause
the driver to lose control of the vehicle.
Never travel in a moving vehicle with the seat
backrest in an excessively reclined position as
this can be dangerous. You could slide under
the seat belt in a collision. If you slide under
it, the seat belt would apply force at the
abdomen or neck. This could cause serious or
fatal injuries. The seat backrest and seat belts
provide the best restraint when the wearer is
in a position that is as upright as possible and
seat belts are properly positioned on the
body.
GWARNING
Your seat belt must be adjusted so that you
can correctly fasten your seat belt.
Observe the following points:
R adjust the seat backrest until your arms are
slightly angled when holding the steering
wheel.
R adjust the seat to a comfortable seating
position that still allows you to reach the
accelerator/brake pedal safely. The
position should be as far back as possible
with the driver still able to operate the
controls properly.
R adjust the head restraint so that it is as
close to the head as possible and the center
of the head restraint supports the back of
the head at eye level.
R never place hands under the seat or near
any moving parts while a seat is being
adjusted.
Failure to do so could result in an accident
and/or serious personal injury.GWARNING
The electrically adjustable seats can be
operated at any time. Therefore, do not leave
children unattended in the vehicle, or with
access to an unlocked vehicle. A child's
unsupervised access to a vehicle could result
in an accident and/or serious personal injury.
GWARNING
Children 12 years old and under must be
seated and properly secured in an
appropriately sized infant restraint, toddler
restraint or booster seat recommended for
the size and weight of the child. For additional
information, see section "Children in the
vehicle".
A child's risk of serious or fatal injuries is
significantly increased if the child restraints
are not properly secured in the vehicle and/
or the child is not properly secured in the child
restraint.
! To avoid damage to the seats and the seat
heating, observe the following information:
R do not spill any liquids on the seats. If
liquid is spilled on the seats, dry them as
soon as possible.
R if the seat covers are damp or wet, do not
switch on the seat heating. The seat
heating should also not to be used to dry
the seats.
Seats85Seats, steering wheel and mirrorsZ
Page 88 of 288
Rclean the seat covers as recommended;
see the "Interior care" section.
R do not transport heavy loads on the
seats. Do not place sharp objects on the
seat cushions, e.g. knives, nails or tools.
The seats should only be occupied by
passengers, if possible.
R when the seat heating is in operation, do
not cover the seats with insulating
materials, e.g. blankets, coats, bags,
seat covers, child seats or booster seats.
! When you move the seats, make sure that
there are no objects in the footwell or
behind the seats. Otherwise, you could
damage the seats and the objects.
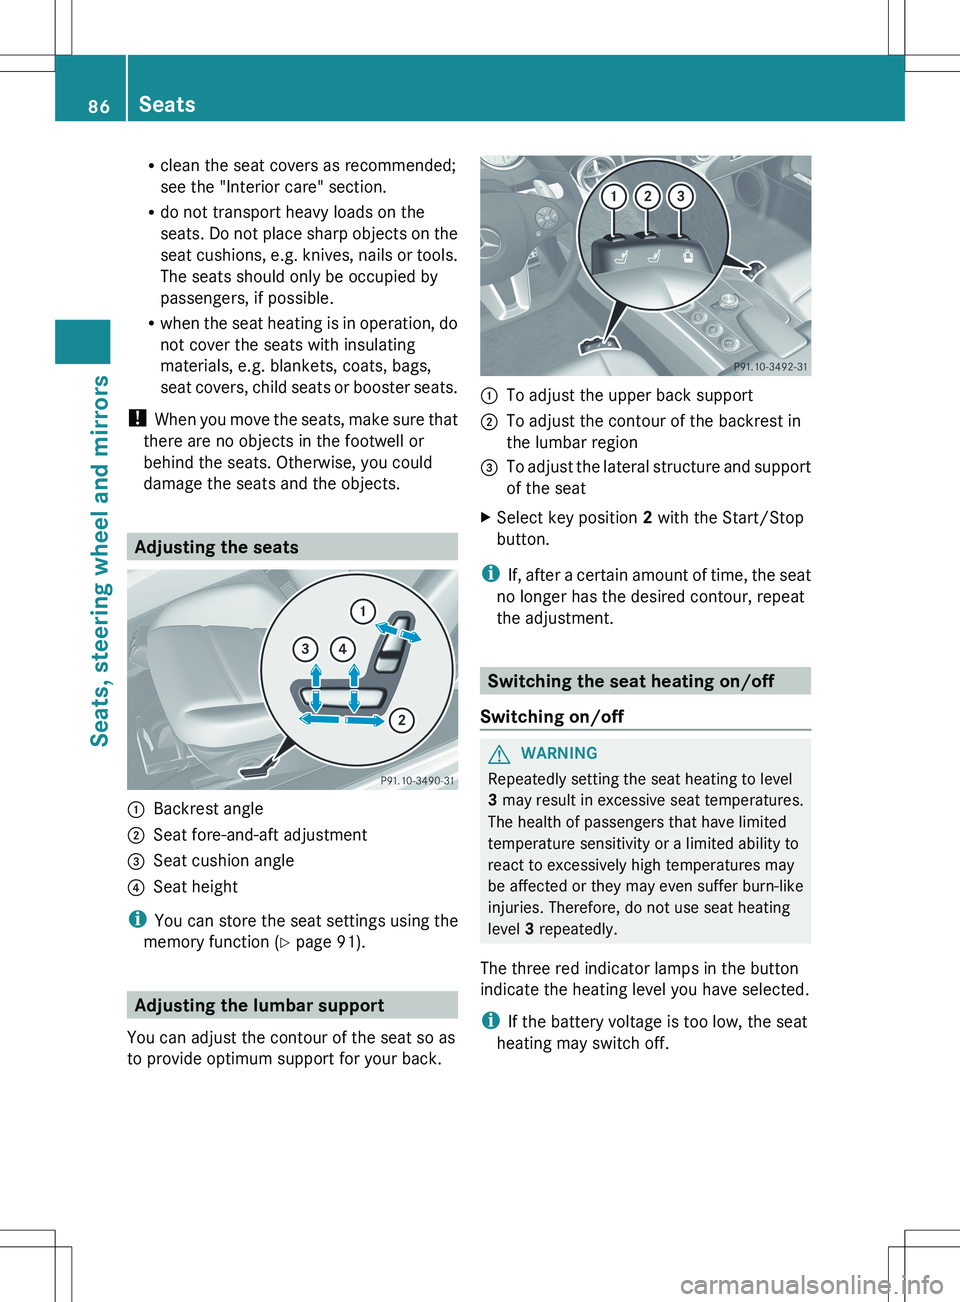
Adjusting the seats
:Backrest angle;Seat fore-and-aft adjustment=Seat cushion angle?Seat height
i You can store the seat settings using the
memory function ( Y page 91).
Adjusting the lumbar support
You can adjust the contour of the seat so as
to provide optimum support for your back.
:To adjust the upper back support;To adjust the contour of the backrest in
the lumbar region=To adjust the lateral structure and support
of the seatXSelect key position 2 with the Start/Stop
button.
i If, after a certain amount of time, the seat
no longer has the desired contour, repeat
the adjustment.
Switching the seat heating on/off
Switching on/off
GWARNING
Repeatedly setting the seat heating to level
3 may result in excessive seat temperatures.
The health of passengers that have limited
temperature sensitivity or a limited ability to
react to excessively high temperatures may
be affected or they may even suffer burn-like
injuries. Therefore, do not use seat heating
level 3 repeatedly.
The three red indicator lamps in the button
indicate the heating level you have selected.
i If the battery voltage is too low, the seat
heating may switch off.
86SeatsSeats, steering wheel and mirrors
Page 89 of 288
The system automatically switches down
from level 3 to level 2 after approximately five
minutes.
The system automatically switches down
from level 2 to level 1 after approximately ten
minutes.
The system automatically switches off
approximately 20 minutes after it is set to
level 1.
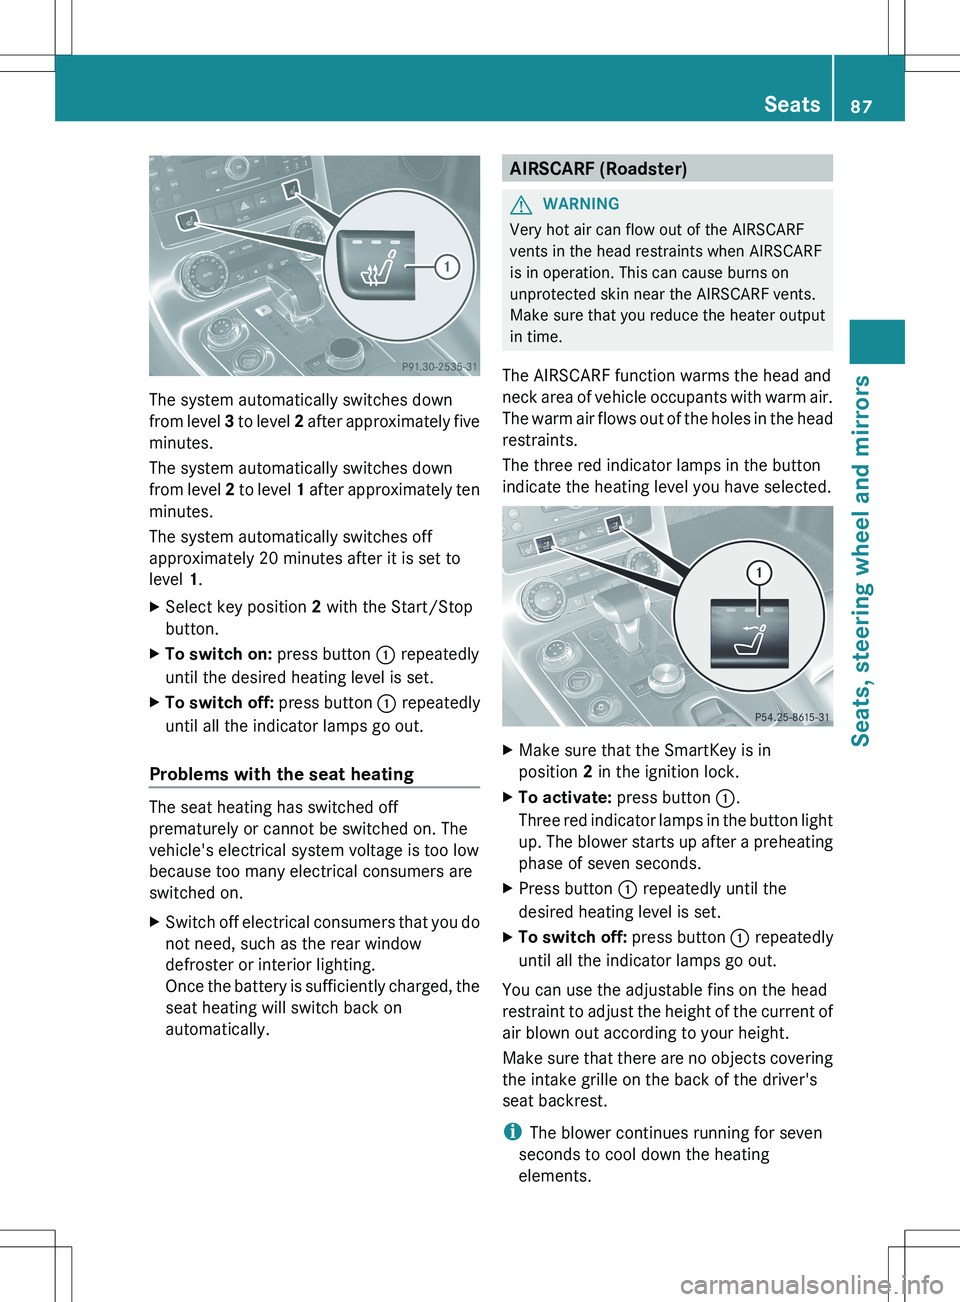
XSelect key position 2 with the Start/Stop
button.XTo switch on: press button : repeatedly
until the desired heating level is set.XTo switch off: press button : repeatedly
until all the indicator lamps go out.
Problems with the seat heating
The seat heating has switched off
prematurely or cannot be switched on. The
vehicle's electrical system voltage is too low
because too many electrical consumers are
switched on.
XSwitch off electrical consumers that you do
not need, such as the rear window
defroster or interior lighting.
Once the battery is sufficiently charged, the
seat heating will switch back on
automatically.AIRSCARF (Roadster)GWARNING
Very hot air can flow out of the AIRSCARF
vents in the head restraints when AIRSCARF
is in operation. This can cause burns on
unprotected skin near the AIRSCARF vents.
Make sure that you reduce the heater output
in time.
The AIRSCARF function warms the head and
neck area of vehicle occupants with warm air.
The warm air flows out of the holes in the head
restraints.
The three red indicator lamps in the button
indicate the heating level you have selected.
XMake sure that the SmartKey is in
position 2 in the ignition lock.XTo activate: press button :.
Three red indicator lamps in the button light
up. The blower starts up after a preheating
phase of seven seconds.XPress button : repeatedly until the
desired heating level is set.XTo switch off: press button : repeatedly
until all the indicator lamps go out.
You can use the adjustable fins on the head
restraint to adjust the height of the current of
air blown out according to your height.
Make sure that there are no objects covering
the intake grille on the back of the driver's
seat backrest.
i The blower continues running for seven
seconds to cool down the heating
elements.
Seats87Seats, steering wheel and mirrorsZ
Page 106 of 288
Useful information
i This Operator's Manual describes all
models and all standard and optional
equipment of your vehicle available at the
time of publication of the Operator's
Manual. Country-specific differences are
possible. Please note that your vehicle may
not be equipped with all features
described. This also applies to safety-
related systems and functions.
i Please read the information on qualified
specialist workshops ( Y page 21).
Overview of climate control systems
Important safety notes
GWARNING
Severe conditions (e.g. strong air pollution)
may require replacement of the filter before
its scheduled replacement interval. A clogged
filter will reduce the air volume to the interior
and the windows could fog up, impairing
visibility and endangering you and others.
Have a blocked filter replaced at a Mercedes-
Benz Center as soon as possible.
GWARNING
Follow the recommended settings for heating
and cooling given on the following pages.
Otherwise, the windows could fog up,
impairing visibility and endangering you and
others.
The automatic climate control regulates the
temperature and the humidity in the vehicle
interior and filters undesirable substances
out of the air.
Coupe: the automatic climate control is only
operational if the engine is running. Optimum
operation is achieved only when you drive
with the side windows closed.
Roadster: the automatic climate control is
only operational if the engine is running. The
system only works optimally when the side
windows and the roof are closed.
i Coupe: ventilate the vehicle for a brief
period during warm weather, e.g. using the
convenience opening feature ( Y page 77).
This will speed up the cooling process and
the desired vehicle interior temperature
will be reached more quickly.
Roadster: ventilate the vehicle for a brief
period during warm weather. This will
speed up the cooling process and the
desired vehicle interior temperature will be
reached more quickly.
i The integrated filter can filter out most
particles of dust, and completely filters out
pollen. A clogged filter reduces the amount
of air supplied to the vehicle interior. For
this reason, you should always observe the
interval for replacing the filter, which is
specified in the Maintenance Booklet. As it
depends on environmental conditions, e.g.
heavy air pollution, the interval may be
shorter than stated in the Maintenance
Booklet.104Overview of climate control systemsClimate control