2012 MERCEDES-BENZ SLS AMG COUPE start stop button
[x] Cancel search: start stop buttonPage 147 of 288
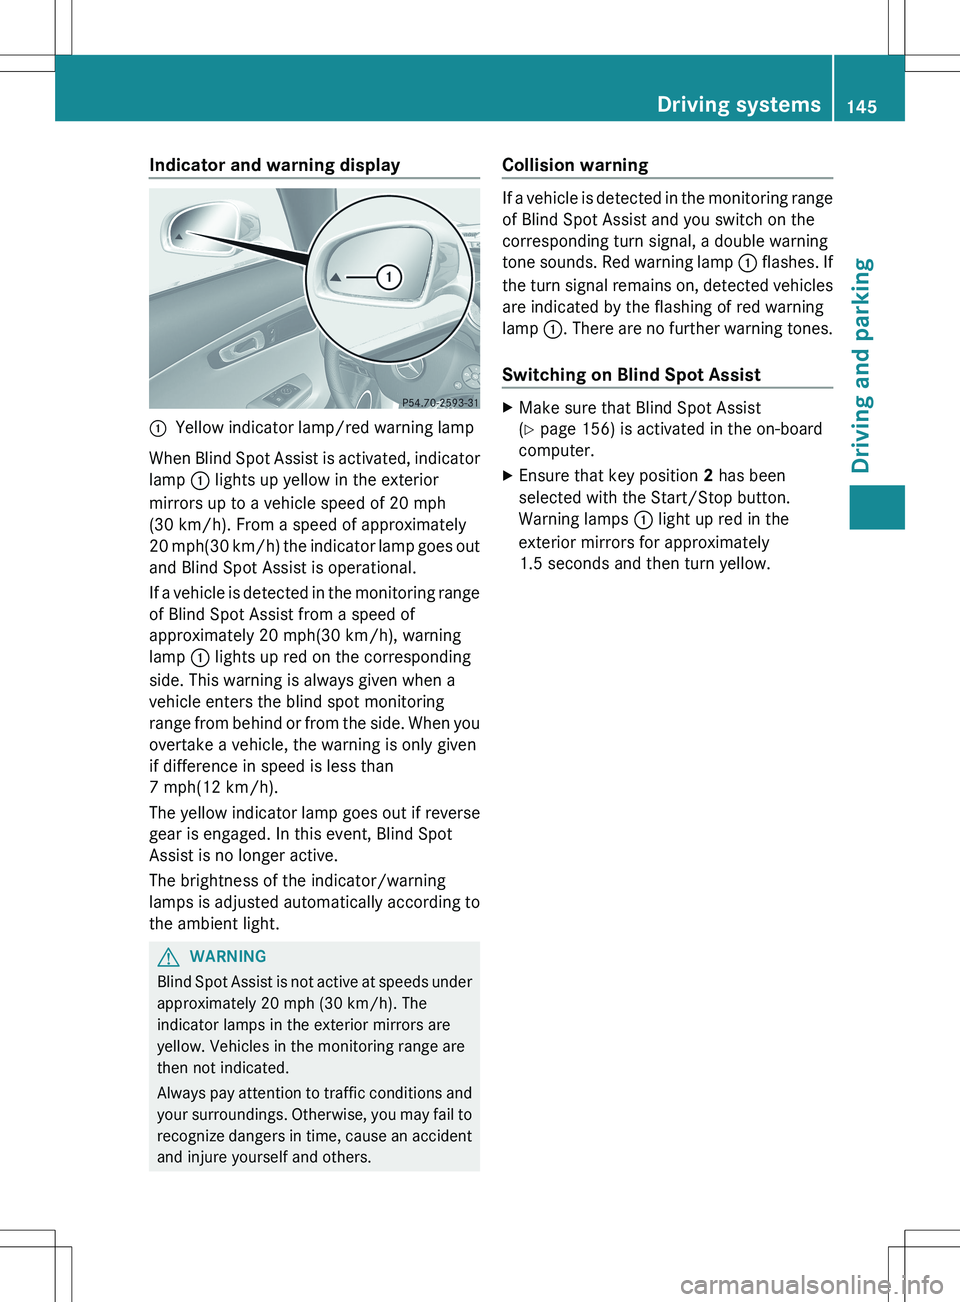
Indicator and warning display:Yellow indicator lamp/red warning lamp
When Blind Spot Assist is activated, indicator
lamp : lights up yellow in the exterior
mirrors up to a vehicle speed of 20 mph
(30 km/h). From a speed of approximately
20 mph (30 km/h) the indicator lamp goes out
and Blind Spot Assist is operational.
If a vehicle is detected in the monitoring range
of Blind Spot Assist from a speed of
approximately 20 mph(30 km/h), warning
lamp : lights up red on the corresponding
side. This warning is always given when a
vehicle enters the blind spot monitoring
range from behind or from the side. When you
overtake a vehicle, the warning is only given
if difference in speed is less than
7 mph(12 km/h).
The yellow indicator lamp goes out if reverse
gear is engaged. In this event, Blind Spot
Assist is no longer active.
The brightness of the indicator/warning
lamps is adjusted automatically according to
the ambient light.
GWARNING
Blind Spot Assist is not active at speeds under
approximately 20 mph (30 km/h). The
indicator lamps in the exterior mirrors are
yellow. Vehicles in the monitoring range are
then not indicated.
Always pay attention to traffic conditions and
your surroundings. Otherwise, you may fail to
recognize dangers in time, cause an accident
and injure yourself and others.
Collision warning
If a vehicle is detected in the monitoring range
of Blind Spot Assist and you switch on the
corresponding turn signal, a double warning
tone sounds. Red warning lamp : flashes. If
the turn signal remains on, detected vehicles
are indicated by the flashing of red warning
lamp :. There are no further warning tones.
Switching on Blind Spot Assist
XMake sure that Blind Spot Assist
( Y page 156) is activated in the on-board
computer.XEnsure that key position 2 has been
selected with the Start/Stop button.
Warning lamps : light up red in the
exterior mirrors for approximately
1.5 seconds and then turn yellow.Driving systems145Driving and parkingZ
Page 158 of 288
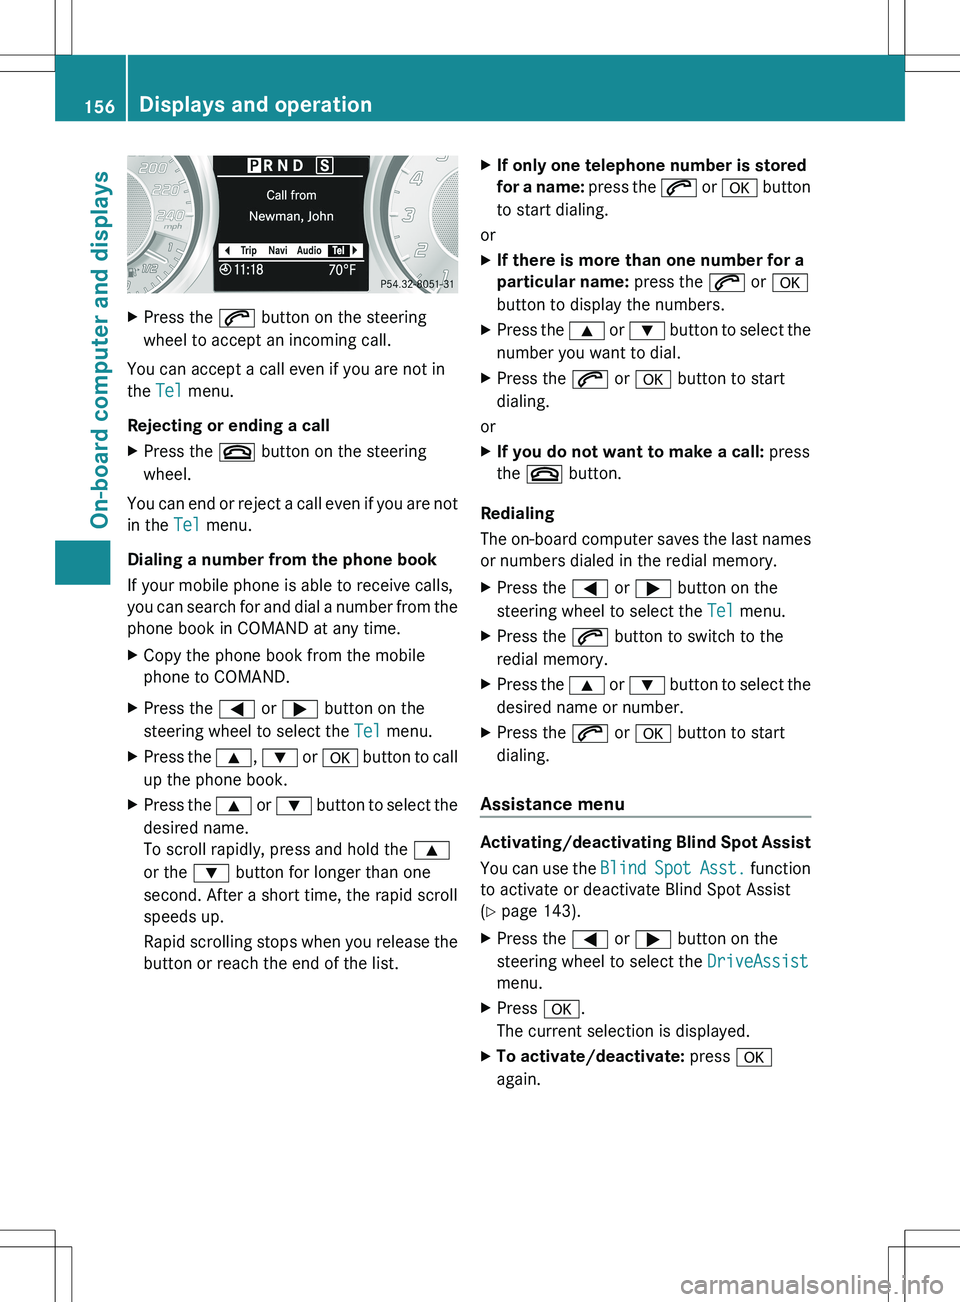
XPress the 6 button on the steering
wheel to accept an incoming call.
You can accept a call even if you are not in
the Tel menu.
Rejecting or ending a call
XPress the ~ button on the steering
wheel.
You can end or reject a call even if you are not
in the Tel menu.
Dialing a number from the phone book
If your mobile phone is able to receive calls,
you can search for and dial a number from the
phone book in COMAND at any time.
XCopy the phone book from the mobile
phone to COMAND.XPress the = or ; button on the
steering wheel to select the Tel menu.XPress the 9, : or a button to call
up the phone book.XPress the 9 or : button to select the
desired name.
To scroll rapidly, press and hold the 9
or the : button for longer than one
second. After a short time, the rapid scroll
speeds up.
Rapid scrolling stops when you release the
button or reach the end of the list.XIf only one telephone number is stored
for a name: press the 6 or a button
to start dialing.
or
XIf there is more than one number for a
particular name: press the 6 or a
button to display the numbers.XPress the 9 or : button to select the
number you want to dial.XPress the 6 or a button to start
dialing.
or
XIf you do not want to make a call: press
the ~ button.
Redialing
The on-board computer saves the last names
or numbers dialed in the redial memory.
XPress the = or ; button on the
steering wheel to select the Tel menu.XPress the 6 button to switch to the
redial memory.XPress the 9 or : button to select the
desired name or number.XPress the 6 or a button to start
dialing.
Assistance menu
Activating/deactivating Blind Spot Assist
You can use the Blind Spot Asst. function
to activate or deactivate Blind Spot Assist
( Y page 143).
XPress the = or ; button on the
steering wheel to select the DriveAssist
menu.XPress a.
The current selection is displayed.XTo activate/deactivate: press a
again.156Displays and operationOn-board computer and displays
Page 161 of 288
Deactivating the delayed switch-off
temporarily:XSelect key position 0 with the Start/Stop
button before leaving the vehicle.XSelect key position 2 and then key position
0 again with the Start/Stop button
The delayed switch-off is deactivated.
Delayed switch-off is reactivated the next
time you start the engine.
Activating/deactivating the interior
lighting delayed switch-off
If you select key position 0 with the Start/
Stop button when the Light. Delay
function is activated, the interior lighting
lights up for approximately 20 seconds if it is
dark.
XPress the = or ; button on the
steering wheel to select the Settings
menu.XPress the : or 9 button to select the
Light submenu.XPress the a button to confirm.XPress the : or 9 button to select the
Interior lighting delay sw. off
function.
You will see the selected setting: Enabled
or Disabled .XPress the a button to save the setting.
Vehicle
Activating/deactivating the automatic
door locking mechanism
If you select the Automatic Door Lock:
function, the vehicle is centrally locked above
a speed of around 9 mph(15 km/h).
i For further information on the automatic
locking feature, see ( Y page 71).
XPress the = or ; button on the
steering wheel to select the Settings
menu.XPress the : or 9 button to select the
Vehicle submenu.XPress the a button to confirm.XPress the : or 9 button to select the
Automatic door locks function.
You will see the selected setting: Enabled
or Disabled .XPress the a button to save the setting.
Activating/deactivating the acoustic
locking verification signal
You can use the Acoustic Lock function to
determine whether there is an acoustic
confirmation when locking and unlocking the
vehicle.
XPress the = or ; button on the
steering wheel to select the Settings
menu.XPress the : or 9 button to select the
VEHICLE submenu.XPress the a button to confirm.XPress the : or 9 button to select the
Acoustic Lock function.
You will see the selected setting:
Activated or Deactivated .XPress the a button to save the setting.
Convenience
Activating/deactivating the EASY-
ENTRY/EXIT feature
GWARNING
You must make sure no one can become
trapped or injured by the moving steering
wheel when the easy-entry/exit feature is
activated.
To stop steering wheel movement, move
steering wheel adjustment lever or press one
of the memory position buttons.
Do not leave children unattended in the
vehicle, or with access to an unlocked vehicle.
Children could open the driver's door and
unintentionally activate the easy-entry/exit
feature, which could result in an accident
and/or serious personal injury.
You can use the Easy Entry/Exit: function
to activate or deactivate the EASY-ENTRY/
EXIT feature ( Y page 88).
Displays and operation159On-board computer and displaysZ
Page 163 of 288
XPress the = or ; button on the
steering wheel to select the AMG menu.XPress the 9 button repeatedly until
SETUP is displayed.
or
XPress the AMG button on the center
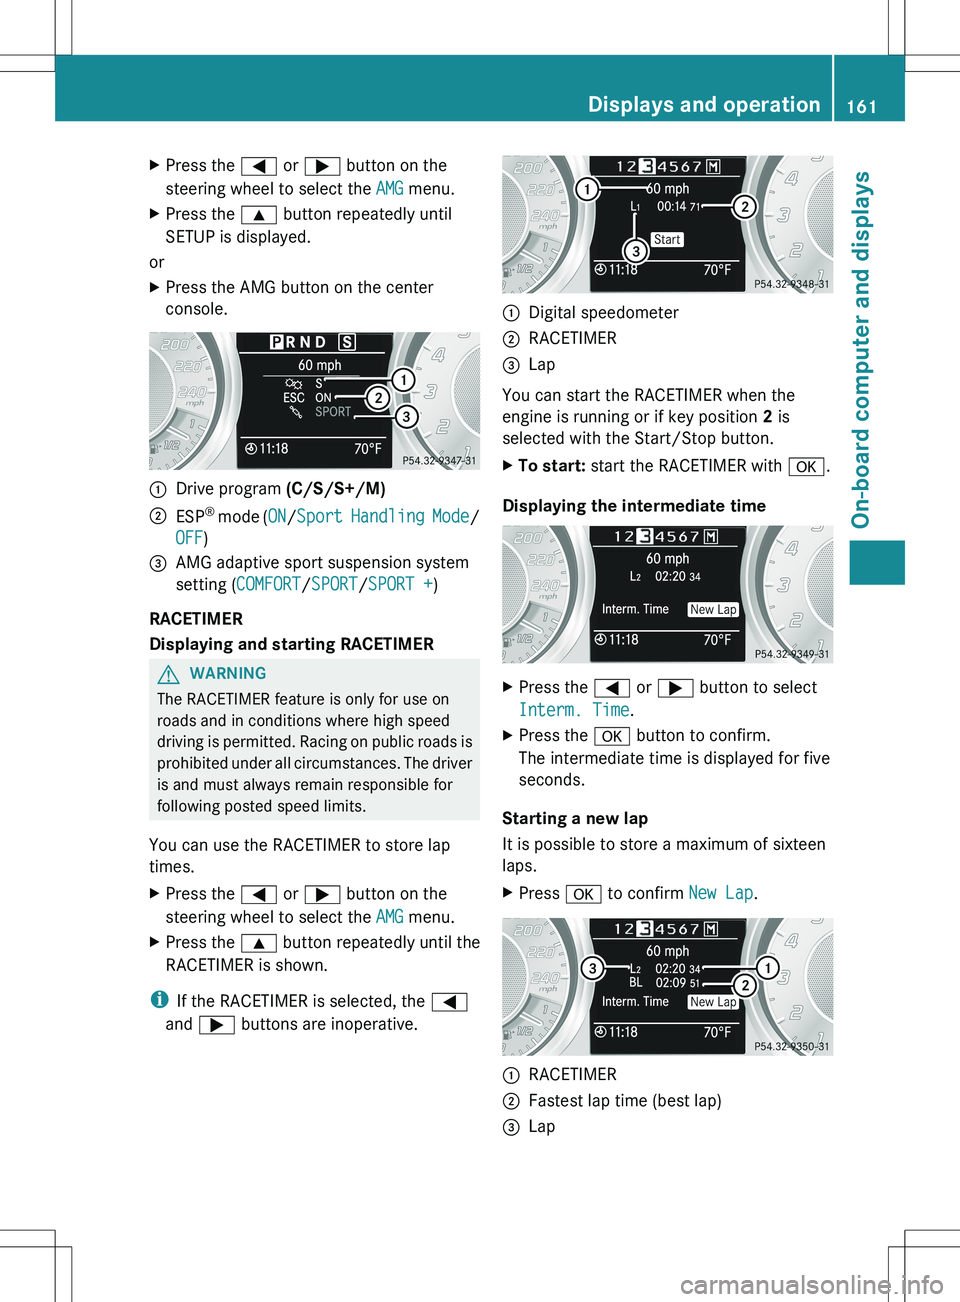
console.:Drive program (C/S/S+/M);ESP®
mode ( ON/Sport Handling Mode /
OFF )=AMG adaptive sport suspension system
setting ( COMFORT /SPORT /SPORT + )
RACETIMER
Displaying and starting RACETIMER
GWARNING
The RACETIMER feature is only for use on
roads and in conditions where high speed
driving is permitted. Racing on public roads is
prohibited under all circumstances. The driver
is and must always remain responsible for
following posted speed limits.
You can use the RACETIMER to store lap
times.
XPress the = or ; button on the
steering wheel to select the AMG menu.XPress the 9 button repeatedly until the
RACETIMER is shown.
i If the RACETIMER is selected, the =
and ; buttons are inoperative.
:Digital speedometer;RACETIMER=Lap
You can start the RACETIMER when the
engine is running or if key position 2 is
selected with the Start/Stop button.
XTo start: start the RACETIMER with a.
Displaying the intermediate time
XPress the = or ; button to select
Interm. Time .XPress the a button to confirm.
The intermediate time is displayed for five
seconds.
Starting a new lap
It is possible to store a maximum of sixteen
laps.
XPress a to confirm New Lap.:RACETIMER;Fastest lap time (best lap)=LapDisplays and operation161On-board computer and displaysZ
Page 164 of 288
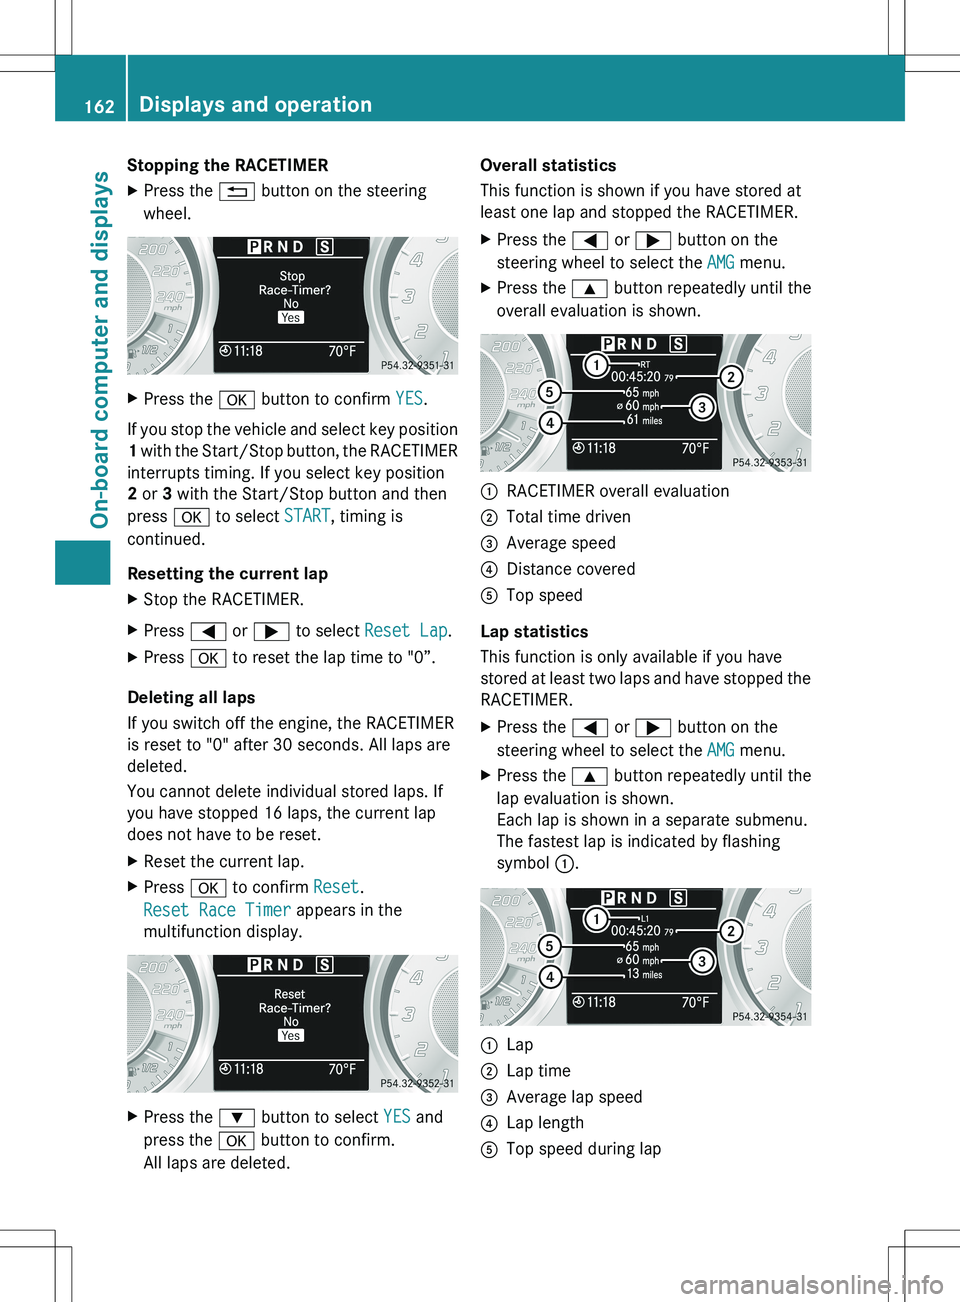
Stopping the RACETIMERXPress the % button on the steering
wheel.XPress the a button to confirm YES.
If you stop the vehicle and select key position
1 with the Start/Stop button, the RACETIMER
interrupts timing. If you select key position
2 or 3 with the Start/Stop button and then
press a to select START, timing is
continued.
Resetting the current lap
XStop the RACETIMER.XPress = or ; to select Reset Lap .XPress a to reset the lap time to "0”.
Deleting all laps
If you switch off the engine, the RACETIMER
is reset to "0" after 30 seconds. All laps are
deleted.
You cannot delete individual stored laps. If
you have stopped 16 laps, the current lap
does not have to be reset.
XReset the current lap.XPress a to confirm Reset.
Reset Race Timer appears in the
multifunction display.XPress the : button to select YES and
press the a button to confirm.
All laps are deleted.Overall statistics
This function is shown if you have stored at
least one lap and stopped the RACETIMER.XPress the = or ; button on the
steering wheel to select the AMG menu.XPress the 9 button repeatedly until the
overall evaluation is shown.:RACETIMER overall evaluation;Total time driven=Average speed?Distance coveredATop speed
Lap statistics
This function is only available if you have
stored at least two laps and have stopped the
RACETIMER.
XPress the = or ; button on the
steering wheel to select the AMG menu.XPress the 9 button repeatedly until the
lap evaluation is shown.
Each lap is shown in a separate submenu.
The fastest lap is indicated by flashing
symbol :.:Lap;Lap time=Average lap speed?Lap lengthATop speed during lap162Displays and operationOn-board computer and displays
Page 206 of 288
such as seat adjustment, steering wheel
adjustment, or the memory function
If children open a door, they could injure other
persons or get out of the vehicle and injure
themselves or be injured by following traffic.
Do not expose the child restraint system to
direct sunlight. The child restraint system's
metal parts, for example, could become very
hot, and the child could be burned on these
parts.GWARNING
Never touch the heating element or sides of
the lighter; they are extremely hot. Hold the
knob only.
Make sure any children traveling with you do
not injure themselves or start a fire with the
hot cigarette lighter.
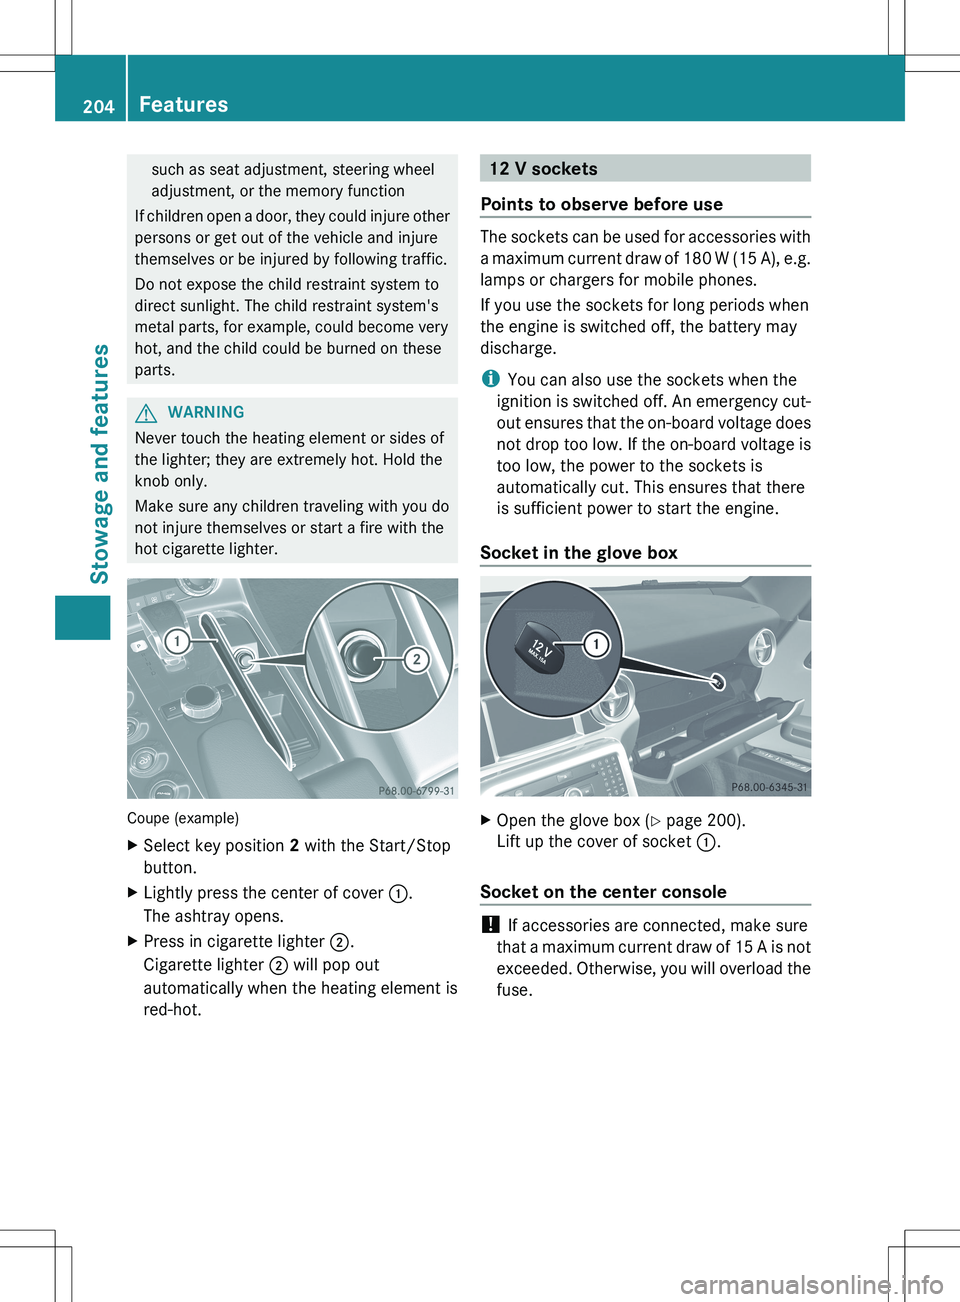
Coupe (example)
XSelect key position 2 with the Start/Stop
button.XLightly press the center of cover :.
The ashtray opens.XPress in cigarette lighter ;.
Cigarette lighter ; will pop out
automatically when the heating element is
red-hot.12 V sockets
Points to observe before use
The sockets can be used for accessories with
a maximum current draw of 180 W (15 A), e.g.
lamps or chargers for mobile phones.
If you use the sockets for long periods when
the engine is switched off, the battery may
discharge.
i You can also use the sockets when the
ignition is switched off. An emergency cut-
out ensures that the on-board voltage does
not drop too low. If the on-board voltage is
too low, the power to the sockets is
automatically cut. This ensures that there
is sufficient power to start the engine.
Socket in the glove box
XOpen the glove box ( Y page 200).
Lift up the cover of socket :.
Socket on the center console
!
If accessories are connected, make sure
that a maximum current draw of 15 A is not
exceeded. Otherwise, you will overload the
fuse.
204FeaturesStowage and features
Page 213 of 288
Extending and retracting the rear
spoiler manually
You can extend and retract the rear spoiler
manually for cleaning.
GWARNING
During manual retraction of the rear spoiler,
make sure that nobody becomes trapped. If
there is a danger of someone becoming
trapped, release the rear spoiler button to
pause retraction. The rear spoiler is then
extended again.
Never leave children unsupervised in the
vehicle. They could unintentionally retract the
extended rear spoiler. Someone could then
become trapped and seriously injured.
! Do not enter an automatic car wash with
the rear spoiler extended. Otherwise, the
rear spoiler may be damaged.
Only extend the rear spoiler in order to
clean it by hand. Retract it again when you
have finished cleaning it.
XClose the trunk lid.XSelect key position 2 with the Start/Stop
button.X To extend: press button :.
The rear spoiler is extended.
Button : flashes until the rear spoiler has
extended and then lights up in red.XTo retract: press and hold button : until
the rear spoiler is completely retracted.
Button : flashes until the rear spoiler has
retracted and then goes out.
Rear Spoiler retracts manually
appears in the display.
i If you release button : while retracting
the rear spoiler, it extends again
automatically.
Features211Stowage and featuresZ
Page 222 of 288
Adding engine oilHEnvironmental note
When adding oil, take care not to spill any. If
oil enters the soil or waterways, it is harmful
to the environment.
! Use only engine oils and oil filters that
have been approved for vehicles equipped
with a service system. A list of the engine
oils and oil filters tested and approved in
accordance with the Mercedes-Benz
Specifications for Service Products can be
called up by visiting http://
www.mbusa.com (USA only). More
information about tested and approved
engine oils and oil filters is available from
any authorized Mercedes-Benz Center.
Damage to the engine or exhaust system is
caused by the following:
R using engine oils and oil filters which
have not been specifically approved for
the service system.
R replacing the engine oil or oil filter after
the replacement interval required by the
service system has elapsed
R using engine oil additives.
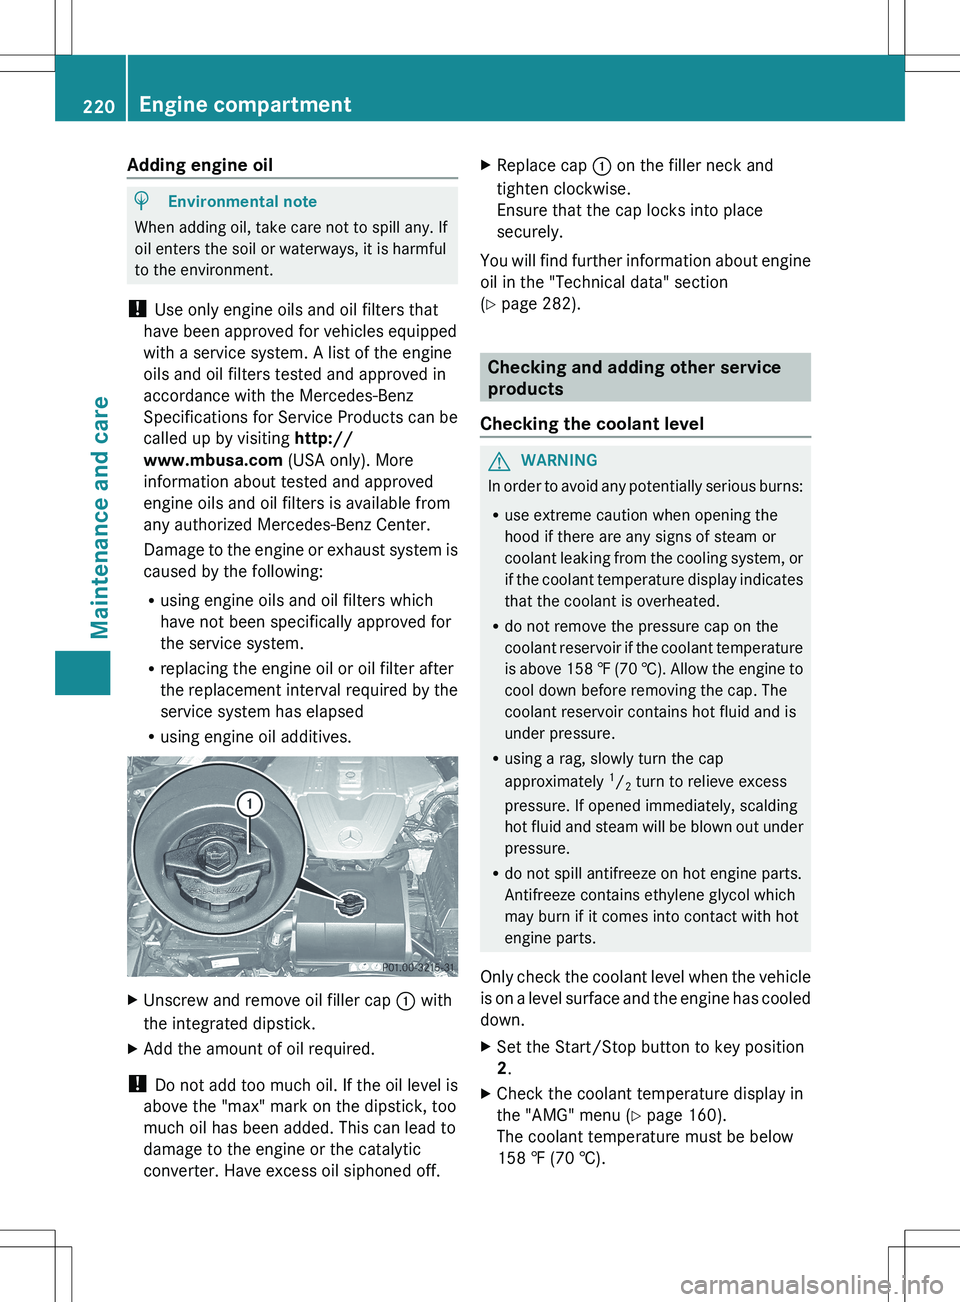
XUnscrew and remove oil filler cap : with
the integrated dipstick.XAdd the amount of oil required.
! Do not add too much oil. If the oil level is
above the "max" mark on the dipstick, too
much oil has been added. This can lead to
damage to the engine or the catalytic
converter. Have excess oil siphoned off.
XReplace cap : on the filler neck and
tighten clockwise.
Ensure that the cap locks into place
securely.
You will find further information about engine
oil in the "Technical data" section
( Y page 282).
Checking and adding other service
products
Checking the coolant level
GWARNING
In order to avoid any potentially serious burns:
R use extreme caution when opening the
hood if there are any signs of steam or
coolant leaking from the cooling system, or
if the coolant temperature display indicates
that the coolant is overheated.
R do not remove the pressure cap on the
coolant reservoir if the coolant temperature
is above 158 ‡ (70 †). Allow the engine to
cool down before removing the cap. The
coolant reservoir contains hot fluid and is
under pressure.
R using a rag, slowly turn the cap
approximately 1
/ 2 turn to relieve excess
pressure. If opened immediately, scalding
hot fluid and steam will be blown out under
pressure.
R do not spill antifreeze on hot engine parts.
Antifreeze contains ethylene glycol which
may burn if it comes into contact with hot
engine parts.
Only check the coolant level when the vehicle
is on a level surface and the engine has cooled
down.
XSet the Start/Stop button to key position
2 .XCheck the coolant temperature display in
the "AMG" menu ( Y page 160).
The coolant temperature must be below
158 ‡ (70 †).220Engine compartmentMaintenance and care