2012 MERCEDES-BENZ SLK55AMG spare tire location
[x] Cancel search: spare tire locationPage 11 of 334

Switching off
.................................. 150
Tow-starting (vehicle) ..................... 289
Engine electronics
Problem (malfunction) ...................138
Engine oil
Adding ........................................... 262
Additives ........................................ 327
Checking the oil level ..................... 261
Checking the oil level using the
dipstick .......................................... 261
Display message ............................ 218
Filling capacity ............................... 327
Notes about oil grades ................... 326
Notes on oil level/consumption ....261
Temperature (on-board computer) .195
Viscosity ........................................ 327
ESP ®
(Electronic Stability
Program) AMG menu (on-board computer) ...196
Deactivating/activating (AMG
vehicles) .......................................... 60
Deactivating/activating (notes;
except AMG vehicles) ......................59
Display message ............................ 200
ETS .................................................. 59
Function/notes ................................ 58
Important safety information ...........58
Warning lamp ................................. 231
ETS (Electronic Traction System) ....... 59
Exhaus tcheck ................................... 153
Exhaus ttail pipe (cleaning
instructions) ...................................... 269
Exterior lighting see Lights
Exterior mirrors
Adjusting ......................................... 98
Dipping (automatic) .........................99
Folding in/ou t(automatically) .........99
Folding in/ou t(electrically) .............99
Folding in whe nlocking (on-board
computer) ...................................... 195
Out of position (troubleshooting) .....99
Storing settings (memory
function) ........................................ 100
Storing the parking position ..........100
Eyeglasses compartment .................243 F
Fille rcap
see Fuel filler flap
First-aid kit ......................................... 274
Flat tire Changing a wheel/mounting the
spare wheel ................................... 276
MOExtended run-fla tsystem ......... 281
Preparing the vehicle .....................275
Raising the vehicle .........................277
see Emergency spare wheel
Floormat ............................................ .257
Front fog lamps ................................. 106
Display message ............................ 214
Switching on/off ........................... 106
Fron twindshield
see Windshield
Fuel
Additives ........................................ 326
Consumption statistic s.................. 185
Displaying the current
consumption .................................. 185
Displaying the range ......................185
Driving tips .................................... 152
Fuel gauge ....................................... 27
Grade (gasoline) ............................ 325
Important safety notes ..................325
Premium-grade unleaded gasoline .325
Problem (malfunction) ...................149
Refueling ........................................ 146
Tank content/reserve fuel .............325
Fuel filler flap, opening/closing ....... 147
Fuel level Calling up the range (on-board
computer) ...................................... 185
Fuel tank
Capacity ........................................ 325
Problem (malfunction) ...................149
Fuse allocation chart (vehicle tool
kit) ...................................................... 274
Fuses Allocation chart ............................. 290
Before changing ............................. 290
Fuse box in the engine
compartment ................................. 290
Fuse box in the trunk .....................290
Important safety notes ..................289 Index
9
Page 176 of 334

G
WARNING
Objects located above the height range of
Parking Guidance will not be detected when
the parking space is measured. These objects
are not taken into account when the parking
procedure is calculated, e.g. overhanging
loads, tail sections or loading ramps of goods
vehicles. Under some circumstances, Parking
Guidance might therefore issu esteering
instructions too soon. Thi smay lead to a
collision .For this reason, you should avoid
using Parking Guidance in such situations. G
WARNING
Make sure that no persons or animals are in
the maneuvering range. Otherwise, they
could be injured.
! Pay particular attention to low objects or
objects with flat surfaces, such as trailer
drawbars, posts, cross beams and curbs.
These types of objects cannot be detected
by Parking Guidance and may damage the
vehicle.
When PARKTRONIC is deactivated, Parking
Guidance is also unavailable.
Use Parking Guidance for parking spaces:
R that are parallel to the direction of travel
R that are on straight roads, not bends
R that are on the same level as the road, i.e.
not on the pavement, for example. Parking
Guidance may not detect flat curbs
Parking tips:
R on narrow roads, drive past the parking
space as close as possible.
R parking spaces that are littered, overgrown
or partially occupied by trailer drawbars
might be identified incorrectly or not at all.
R snowfall or heavy rain may lead to a parking
space being measured inaccurately.
R pay attention to the PARKTRONIC
(Y page 171) warning messages during the
parking procedure. R
when transporting a load which protrudes
from your vehicle, you must not use Parking
Guidance.
R never use Parking Guidance with snow
chains or an emergency spare wheel
mounted.
R make sure that the tire pressures are
always correct. This has adirec teffect on
the steering instructions.
R the way you rvehicle is positioned in the
parking space after parkin gis dependent
on various factors. These include the
position and shape of the vehicles parked
in front and behind it and the conditions of
the location. In some cases, Parking
Guidance may guide you too far or not far
enough into a parking space. In some
cases, it may also lead you across or onto
the curb. If necessary, cancel the parking
procedure with Parking Guidance.
! If unavoidable, you should drive over
obstacles such as curbs slowly and not at
a sharp angle. Otherwise, you may damage
the wheels or tires.
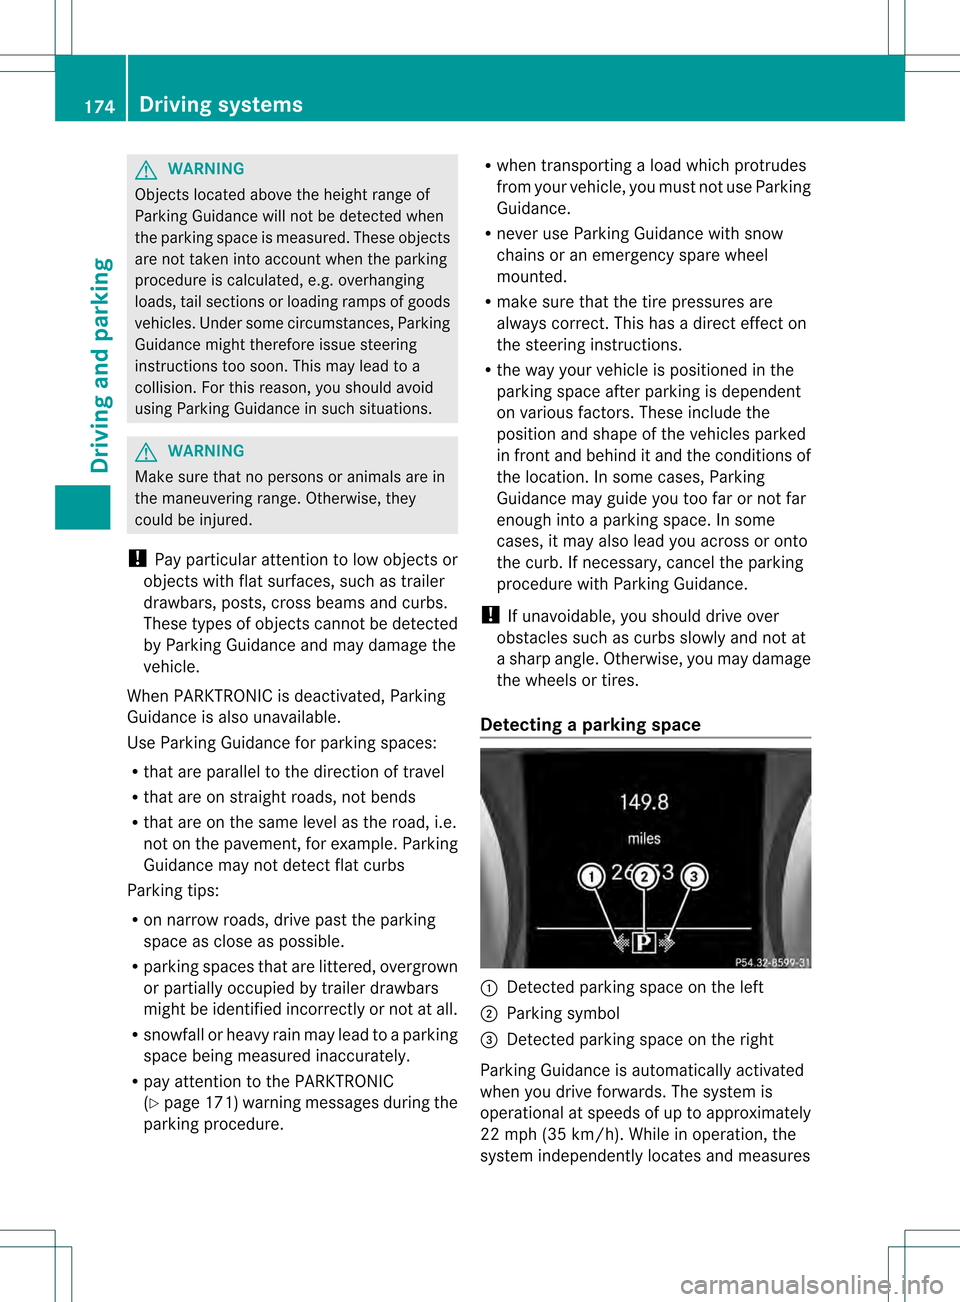
Detecting aparking space 0002
Detected parking space on the left
0003 Parking symbol
0023 Detected parking space on the right
Parking Guidance is automatically activated
whe nyou drive forwards. The system is
operational at speeds of up to approximately
22 mph (35 km/h). While in operation, the
system independently locates and measures 174
Driving systemsDriving and parking
Page 276 of 334

Useful information
i This Operator's Manual describes all
models and all standard and optional
equipment of your vehicle available at the
time of publication of the Operator's
Manual. Country-specific differences are
possible. Please note that your vehicle may
not be equipped with all features
described. This also applies to safety-
related systems and functions.
i Please read the information on qualified
specialist workshops (Y page 23).Where will I find...?
First-aid kit
X Open the trun klid. X
Lift the trunk floor up.
X Remove first-aid kit 0002.
i Check the expiration date on the first-aid
kit at least once a year. Replace the
contents if necessary, and replace missing
items. Vehicle tool kit
The vehicle tool kit can be found in the
stowage well under the trunk floor.
X Vehicles with a TIREFIT kit: lift the trunk
floor up. X
Lift the trunk floor up.
X Remove the collapsible spare wheel
(Y page 274).
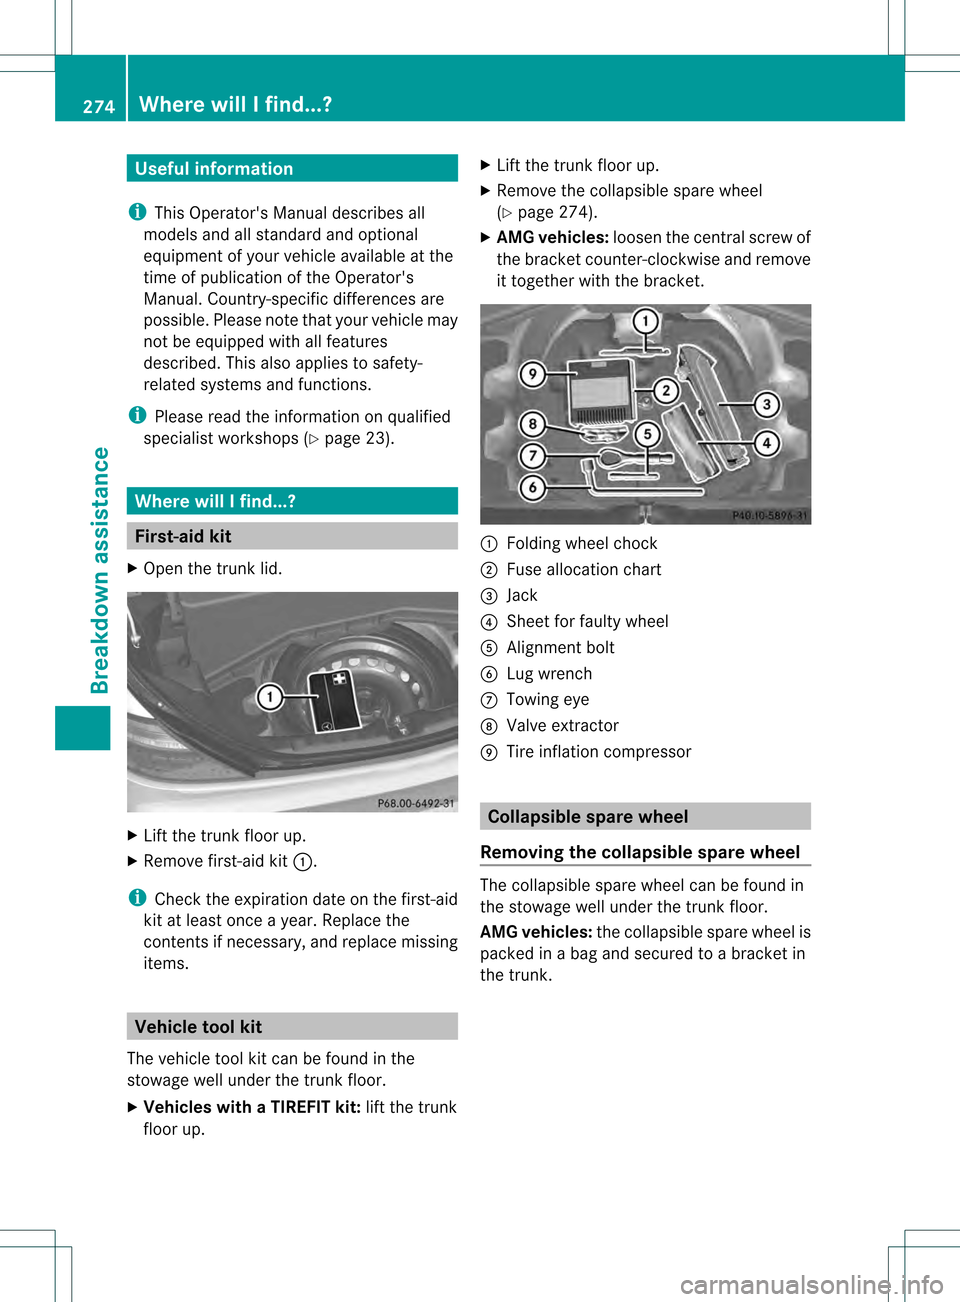
X AMG vehicles: loosen the central screw of
the bracket counter-clockwise and remove
it together with the bracket. 0002
Folding wheel chock
0003 Fuse allocation chart
0023 Jack
0022 Shee tfor faulty wheel
0020 Alignmen tbolt
0021 Lug wrench
0014 Towing eye
0015 Valve extractor
0016 Tire inflation compressor Collapsible spare wheel
Removing the collapsible sparew heel The collapsible spare wheel can be found in
the stowage well unde
rthe trunk floor.
AMG vehicles: the collapsible spare wheel is
packed in a bag and secured to a bracket in
the trunk. 274
Where will I find...?Breakdown assistance
Page 297 of 334

Notes on regularly inspecting wheels
and tires G
WARNING
Damaged tires can cause tire inflation
pressure loss. As a result, you could lose
control of your vehicle. There is a risk of
accident.
Check the tires regularly for signs of damage
and replace any damaged tires immediately.
R Regularly check the wheels and tires of
your vehicle for damage (e.g. cuts,
punctures, tears, bulges on tires and
deformation or cracks or severe corrosion
on wheels) at leas tonce amonth, as well
as after driving off-road or on rough roads.
Damaged wheels can cause a loss of tire
pressure.
R Regularly check the tire tread depth and
the condition of the tread across the whole
width of the tire (Y page 295). If necessary,
turn the front wheels to full lock in order to
inspect the inner side of the tire surface.
R All wheels must have a valve cap to protect
the valve against dirt and moisture. Do not
mount anything onto the valve (such as tire
pressure monitoring systems) other than
the standard valve cap or other valve caps
approved by Mercedes-Benz for your
vehicle.
R Regularly check the pressure of all the tires
including the emergency spare wheel or the
spare wheel, particularly prior to long trips,
and correc tthe pressure as necessary
(Y page 297). Tire tread
G
WARNING
Insufficient tire tread will reduce tire traction.
The tire is no longer able to dissipate water.
This means that on wet road surfaces, the risk
of hydroplaning increases, in particular where
speed is not adapted to suit the driving
conditions. There is a risk of accident. If the tire pressure is too high or too low, tires
may exhibit different levels of wear at
different locations on the tire tread. Thus, you
should regularly check the tread depth and
the condition of the tread across the entire
width of all tires.
Minimum tire tread depth for:
R
Summer tires: 0009in (3 mm)
R M+S tires: 000Ain (4 mm)
For safety reasons, replace the tires before
the legally prescribed limit for the minimum
tire tread depth is reached.
Tread wear indicators (TWI) are required by
law. Six indicators are positioned on the tire
tread. They are visible once the tread depth
is approximately 0008in (1.6 mm). If this is the
case, the tire is so worn that it must be
replaced. Bar marking
0002for tread wear is integrated
into the tire tread. Notes on selecting, mounting and
replacing tires
R Only mount tires and wheels of the same
type and make.
R Only mount tires of the correct size onto
the wheels.
R After mounting new tires, run them in at
moderate speeds for the first 60 miles
(100 km) as they only reach their full
performance after this distance. Operation
295Wheels and tires Z
Page 305 of 334

Checking tire pressure electronically
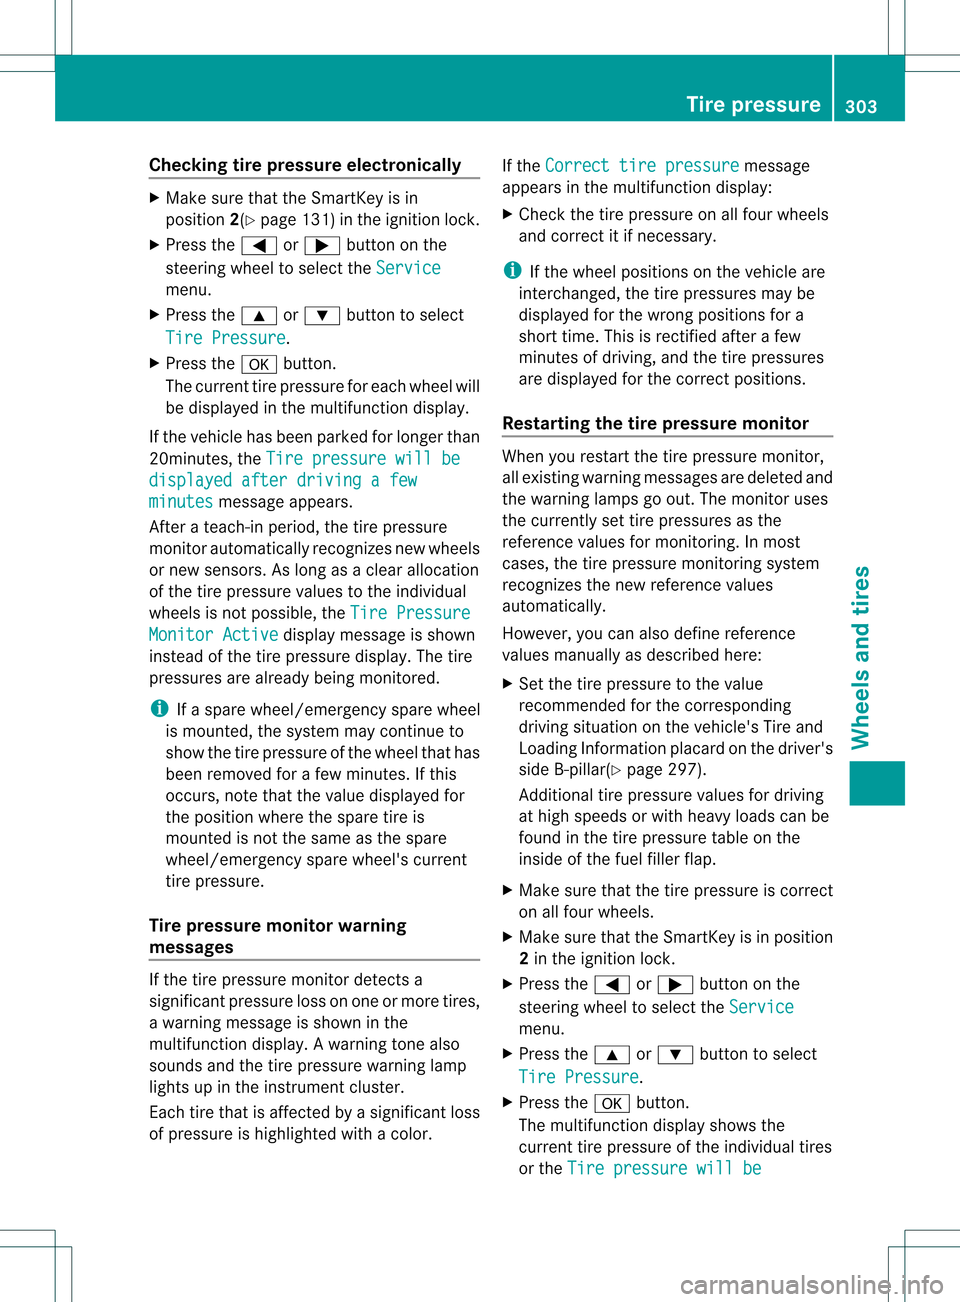
X
Make sure that the SmartKey is in
position 2(Ypage 131) in the ignition lock.
X Press the 0002or0005 button on the
steering wheel to selec tthe Service menu.
X Press the 0003or0004 button to select
Tire Pressure .
X Press the 000Cbutton.
The current tire pressure for each wheel will
be displayed in the multifunction display.
If the vehicle has been parked for longer than
20minutes, the Tire pressure will be displayed after driving a few
minutes message appears.
After a teach-in period, the tire pressure
monitor automatically recognizes new wheels
or new sensors. As long as a clear allocation
of the tire pressure values to the individual
wheels is not possible, the Tire PressureMonitor Active display message is shown
instead of the tire pressure display. The tire
pressures are already being monitored.
i If a spare wheel/emergency spare wheel
is mounted, the system may continue to
show the tire pressure of the wheel that has
been removed for a few minutes. If this
occurs, note that the value displayed for
the position where the spare tire is
mounted is not the same as the spare
wheel/emergency spare wheel's current
tire pressure.
Tire pressure monitor warning
messages If the tire pressure monitor detects a
significant pressure loss on one or more tires,
a warning message is shown in the
multifunction display. Awarning tone also
sounds and the tire pressure warning lamp
lights up in the instrumen tcluster.
Each tire that is affected by a significant loss
of pressure is highlighted with a color. If the
Correct tire pressure message
appears in the multifunction display:
X Check the tire pressure on all four wheels
and correct it if necessary.
i If the wheel positions on the vehicle are
interchanged, the tire pressures may be
displayed for the wrong positions for a
shor ttime. This is rectified after a few
minutes of driving, and the tire pressures
are displayed for the correc tpositions.
Restarting the tire pressure monitor When you restart the tire pressure monitor,
all existing warning messages are deleted and
the warning lamps go out. The monitor uses
the currently set tire pressures as the
reference values for monitoring. In most
cases, the tire pressure monitoring system
recognizes the new reference values
automatically.
However, you can also define reference
values manually as described here:
X
Set the tire pressure to the value
recommended for the corresponding
driving situation on the vehicle's Tire and
Loading Information placard on the driver's
side B-pillar(Y page 297).
Additional tire pressure values for driving
at high speeds or with heavy loads can be
found in the tire pressure table on the
inside of the fuel filler flap.
X Make sure that the tire pressure is correct
on all four wheels.
X Make sure that the SmartKey is in position
2 in the ignition lock.
X Press the 0002or0005 button on the
steering wheel to select the Service menu.
X Press the 0003or0004 button to select
Tire Pressure .
X Press the 000Cbutton.
The multifunction display shows the
current tire pressure of the individual tires
or the Tire pressure will be Tire pressure
303Wheels and tires Z