2012 MERCEDES-BENZ SLK55AMG fuel
[x] Cancel search: fuelPage 269 of 334
!
Do not park the vehicle for an extended
period straight after cleaning it, particularly
after having cleaned the wheels with wheel
cleaner. Wheel cleaners could cause
increased corrosion of the brake discs and
brake pads/linings. For this reason, you
should drive for a few minutes after
cleaning. Braking heats the brake discs and
the brake pads/linings, thus drying them.
The vehicle can then be parked.
Cleaning the paintwork Scratches, corrosive deposits, areas affected
by corrosion and damage caused by
inadequate care cannot always be completely
repaired.Ins uch cases, visit a qualified
specialist workshop.
X Remove dirt immediately, where possible,
while avoiding rubbing too hard.
X Soak insect remains with insect remover
and rinse off the treated areas afterwards.
X Soak bird droppings with wate rand rinse
off the treated areas afterwards.
X Remove coolant, brake fluid, tree resin,
oils, fuels and greases by rubbing gently
with a cloth soaked in petroleu metheror
lighter fluid.
X Use tar remover to remove tar stains.
X Use silicone remover to remove wax.
! Do not affix:
R stickers
R films
R magnetic plates or similar items
to painted surfaces. You could otherwise
damage the paintwork.
If water no longer forms "beads" on the paint
surface, use the paint care products
recommended and approved by Mercedes-
Benz. This is the case approximately every
three to five months, depending on the
climate conditions and the care produc tused.
If the dirt has penetrated the paint surface or
if the paintwork has become dull, then the
paintwork should be cleaned. For cleaning, please use the paint cleaner recommend and
approved by Mercedes Benz.
Do not use these care products in the sun or
on the hood while the hood is hot.
X
Use a suitable touch-up stick, e.g. MB
Touch-Up Stick, to repair slight damage to
the paintwork quickly and provisionally.
Matte finish care If your vehicle has a clear matte finish,
observe the following instructions in order to
avoid damage to the paintwork due to
incorrect care.
These notes also apply to light alloy wheels
with a clear matte finish.
!
Never polish the vehicle or the light alloy
wheels. Polishing causes the finish to
shine.
! The following may cause the paint to
become shiny and thus reduce the matte
effect:
R Vigorous rubbing with unsuitable
materials.
R Frequent use of car washes.
R Washing the vehicle in direct sunlight.
! Never use paint cleaner, buffing or
polishing products, or gloss preserver, e.g.
wax. These products are only suitable for
high-gloss surfaces. Their use on vehicles
with matte finish leads to considerable
surface damage (shiny, spotted areas).
Always have paintwork repairs carried out
at a qualified specialist workshop.
! Do not use wash programs with a hot wax
treatment under any circumstances.
i The vehicle should preferably be washed
by hand using a soft sponge, car shampoo
and plenty of water.
i Use only insect remover and car shampoo
from the range of recommended and
approved Mercedes-Benz care products. Care
267Maintenance and care Z
Page 287 of 334
Jump-starting
G
WARNING
Failure to follow these directions will cause damage to the electronic components, and can lead
to a battery explosion and severe injury or death.
Never lean over batteries while connecting or jump starting. You might get injured.
Battery fluid contains sulfuric acid. Do not allow this fluid to come in contact with eyes, skin or
clothing. In case it does, immediately flush affected area with water, and seek medical help if
necessary.
Ab attery will also produce hydrogen gas, which is flammable and explosive. Keep flames or
sparks away from battery, avoid improper connectio nofjumpe rcables, smoking, etc.
Attempting to jump start a frozen battery can result in it exploding, causing personal injury.
Read all instructions before proceeding. G
WARNING
Non-combusted fuel can collect in the exhaust system and ignite. There is a risk of fire. Avoid
repeated and lengthy starting attempts.
! Avoid repeated and lengthy starting attempts. Otherwise, the catalytic converte rcould be
damaged by the non-combusted fuel.
Do not use a rapid charging device to start the vehicle. If your vehicle's battery is discharged,
the engine can be jump-started from another vehicle or from a second battery using jumper
cables. Observe the following points:
R The battery is not accessible in all vehicles. If the other vehicle's battery is not accessible,
jump-start the vehicle using a second battery or ajump-starting device.
R You may only jump-start the vehicle when the engine and catalyti cconverter are cold.
R Do not start the engine if the battery is frozen. Let the battery thaw first.
R jump-starting may only be performed from batteries with a nominal voltage of 12 V.
R Only use jumper cables which have a sufficient cross-section and insulated terminal clamps.
R If the battery is fully discharged, leave the battery that is being used to jump-start connected
for a few minutes before attempting to start.T his charges the empty battery a little.
R Make sure that the two vehicles do not touch.
Make sure that:
R the jumper cables are not damaged.
R bare parts of the terminal clamp do not come into contact with other metal parts while the
jumper cables are connected to the battery.
R the jumper cables cannot come into contact with parts such as the V-belt pulley or the fan.
These parts move when the engine is started and while it is running.
X Secure the vehicle by applying the electric parking brake.
X Manual transmission: engage neutral.
X Automatic transmission: move the selector lever to position P. Jump-starting
285Breakdown assistance Z
Page 296 of 334

Useful information
i This Operator's Manual describes all
models and all standard and optional
equipment of your vehicle available at the
time of publication of the Operator's
Manual. Country-specific differences are
possible. Please note that your vehicle may
not be equipped with all features
described. This also applies to safety-
related systems and functions.
i Please read the information on qualified
specialist workshops (Y page 23).Important safety notes
G
WARNING
If wheels and tires of the wrong size are used,
the wheel brakes or suspension components
may be damaged. There is arisk of accident.
Always replace wheels and tires with those
that fulfill the specifications of the original
part (designation, manufacturer, model). G
WARNING
Af lat tire severely impairs the driving,
steering and braking characteristics of the
vehicle. There is a risk of accident.
Tires without run-flat characteristics:
R do not drive with aflat tire.
R immediately replace the flat tire with your
emergency spare wheel or spare wheel, or
consult a qualified specialist workshop.
Tires with run-flat characteristics:
R pay attention to the information and
warning notices on MOExtended tires (tires
with run-flat characteristics).
Accessories that are not approved for your
vehicle by Mercedes-Ben zorare not being
used correctly can impair the operating
safety. Before purchasing and using non-approved
accessories, visit a qualified specialist
workshop and inquire about:
R
suitability
R legal stipulations
R factory recommendations
Information on the dimensions and types of
wheels and tires for yourv ehicle can be found
in the "Wheel/tire combinations" section
(Y page 316).
Information on air pressure for the tires on
your vehicle can be found:
R on the vehicle's Tire and Loading
Information placard on the B-pillar
R on the tire pressure label on the fuel filler
flap
R in the "Tire pressure" section
Pay special attention to the country-specific
requirements for tire approval. These
requirements can stipulate a specific tire type
for your vehicle. Furthermore, the use of
certain tire types in certain regions and areas
of operation can be highly beneficial. You can
find further information regarding tires at
specialist tire retailers, at qualified specialist
workshops or at any authorized Mercedes-
Benz Center.
i Further information on wheels and tires
can be obtained at any qualified specialist
workshop. Operation
Notes on driving
R If the vehicle is heavily laden, chec kthe tire
pressures and correct them if necessary.
R When parking your vehicle, make sure that
the tires do not get deformed by the curb
or other obstacles. If it is necessary to drive
over curbs, speed humps or similar
elevations, try to do so slowly and at an
obtuse angle. Otherwise, the tires,
particularly the sidewalls, can get
damaged. 294
OperationWheels and tires
Page 300 of 334

Follow recommended tire inflation pressures
and check the pressure of all the tires
including the spare wheel:
R
monthly, at least
R if the load changes
R before beginning a long journey
R under different operating conditions, e.g.
off-road driving
If necessary, correct the tire pressure.
The recommended tire pressures for the tires
mounted at the factory can be found on the
labels described here.
Option 1) Tire and Loading Information
placard on the B-pilla ronthe driver's side of
the vehicle (Y page 304).
The Tire and Loading Information placard
contains the recommended tire pressures for
cold tires on a fully loaded vehicle and for the
maximum permissible vehicle speed.
i The specifications given on the following
Tire and Loading Information placard are
examples. Tire pressure specifications are
vehicle-specific and may deviate from the
data shown here. The tire pressures
applicable to your vehicle can be found on
the Tire and Loading Information placard on
your vehicle. 0002
Recommended tire pressures
Option 2) Tire pressure table on the inside
of the fuel filler flap.
The tire pressure table contains the
recommended pressures for cold tires for various operating conditions, i.e. differing
load and speed conditions.
i
Specifications shown in the examples of
tire pressure tables are for illustration
purposes only. Tire pressure specifications
are vehicle-specific and may deviate from
the data shown here. Tire pressure
specifications applicable to your vehicle
are located in your vehicle's tire pressure
table. Example: tire pressure table for all tires permitted
for this vehicle by the factory
If a tire size precedes a tire pressure, the tire
pressure information following is only valid
for that tire size. The load conditions "partially
laden" and "fully laden" are defined in the
table for different numbers of occupants and
amounts of luggage. The actual number of
seats may differ.
Example: tire pressure table with tire dimensions
Some tire pressure tables show only the rim
diameters instead of the full tire size, e.g.
R18. The rim diameter is part of the tire size298
Tire pressureWheels and tires
Page 302 of 334
changes by 18 ‡ (10 †), the tire pressure
changes by approximately 10 kPa (0.1 bar/
1.5 psi). Take this into account when
checking the pressure of warm tires and only
correct the tire pressure if it is too low for the
current operating conditions
.Ifyou check the
tire pressure when the tires are warm, the
resulting value will be higher than if the tires
were cold. This is normal. Do not reduce the
tire pressure to the value specified for cold
tires. The tire pressure would otherwise be
too low.
Observe the recommended tire pressures for
cold tires:
R on the Tire and Loading Information placard
on the B-pillar on the driver's side
R in the tire pressure table on the inside of
the fuel filler flap
R printed in yellow on the rim of the
emergency/collapsible spare wheel
(depending on vehicle equipment) Underinflated or overinflated tires
Underinflation G
WARNING
Tires with pressure that is too low can
overheat and burst as a consequence. In
addition, they also suffer from excessive and/
or irregular wear, which can severely impair
the braking properties and the driving
characteristics. There is a risk of an accident.
Avoid tire pressures that are too low in all the
tires, including the spare wheel.
Underinflated tires may:
R wear quickly and unevenly
R have an adverse effect on fuel consumption
R overheat, leading to tire defects
R have an adverse effect on handling
characteristics Overinflation G
WARNING
Tires with excessively high pressure can burst
because they are damaged more easily by
road debris, potholes etc. In addition, they
also suffer from irregular wear, which can
severely impair the braking properties and the
driving characteristics. There is a risk of an
accident.
Avoid tire pressures that are too high in all the
tires, including the spare wheel.
Overinflated tires may:
R have an adverse effect on handling
characteristics
R wear quickly and unevenly
R be more susceptible to damage
R have an adverse effect on ride comfort
R increase the braking distance
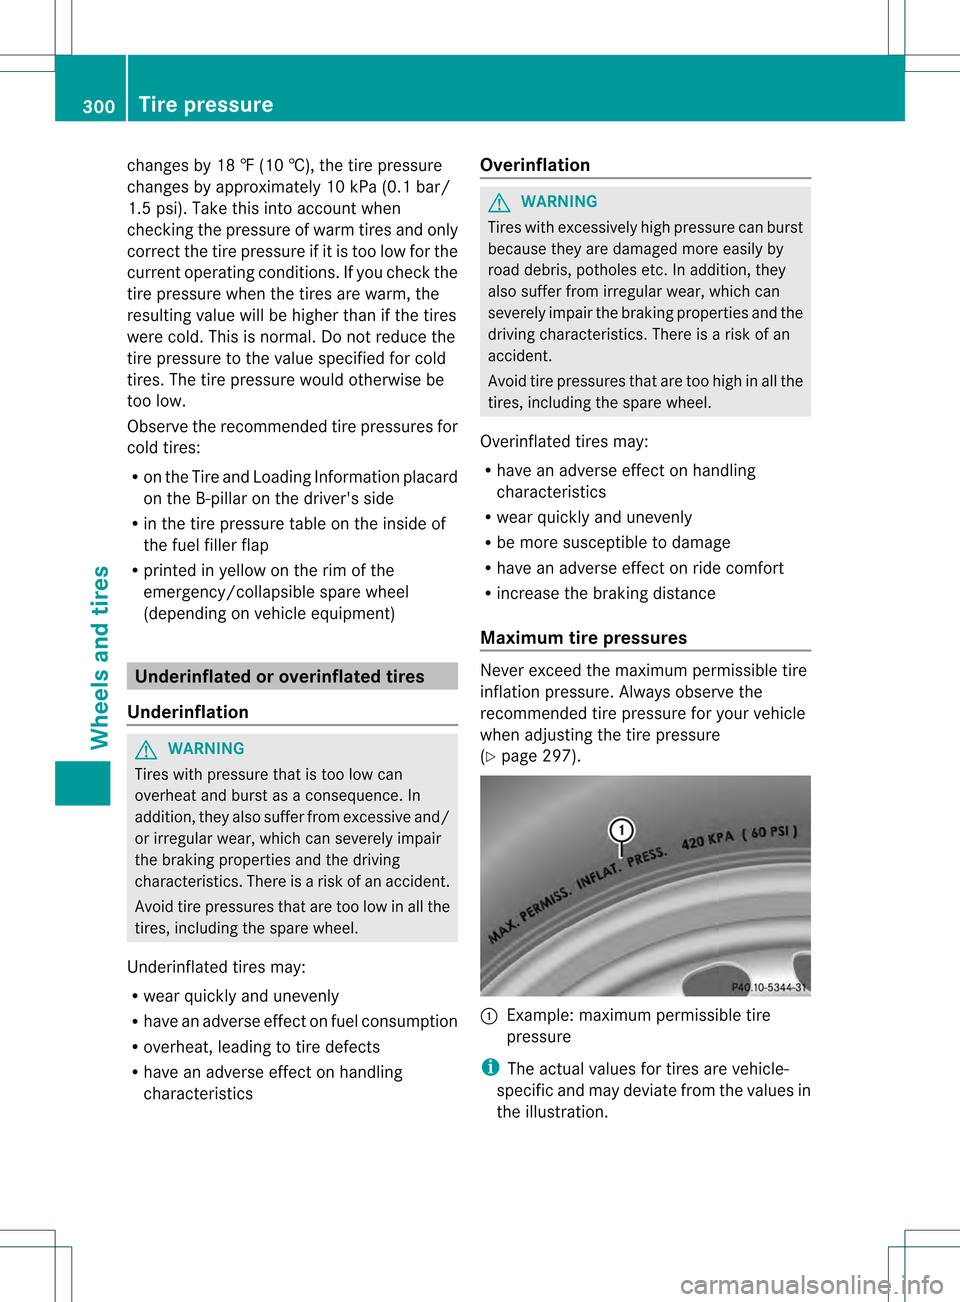
Maximum tire pressures Never exceed the maximum permissible tire
inflation pressure. Always observe the
recommended tire pressure for your vehicle
when adjusting the tire pressure
(Y
page 297). 0002
Example: maximum permissible tire
pressure
i The actual values for tires are vehicle-
specific and may deviate from the values in
the illustration. 300
Tire pressureWheels and tires
Page 303 of 334
Checking the tire pressures
Important safety notes Observe the "Tire pressure information"
sectio n(Ypage 297).
Information on air pressure for the tires on
your vehicle can be found:
R on the vehicle's Tire and Loading
Information placard on the B-pillar
R on the tire pressure label on the fuel filler
flap
R in the "Tire pressure information" section
Checking tire pressures manually To determine and set the correct tire
pressure, proceed as follows:
X Remove the valve cap of the tire that is to
be checked.
X Press the tire pressure gauge securely onto
the valve.
X Read the tire pressure and compare it with
the recommended value on the Tire and
Loading Information placard on the
B-pillar on the driver's side of your vehicle.
X If necessary, increase the tire pressure to
the recommended value (Y page 297).
X If the tire pressure is too high, release air
by pressing down the metal pin in the valve
using the tip of a pen, for example. Then
chec kthe tire pressure again using the tire
pressure gauge.
X Screw the valve cap onto the valve.
X Repeatt hese steps for the other tires. Tire pressure monitor (USA only)
Important safety notes It is the driver's responsibility to set the tire
pressure to that recommended for cold tires
which is suitable for the operating situation
(Y page 297). Note that the correct tire
pressure for the current operating situation
must first be taught-in to the tire pressure monitor. If there is a substantial loss of
pressure, the warning threshold for the
warning message is aligned to the reference
values taught-in. Restart the tire pressure
monitor after adjusting the pressure of the
cold tires (Y page 303). The current
pressures are saved as new reference values.
As a result, a warning message will appearif
the tire pressure drops significantly.
The tire pressure monitor does not warn you
of an incorrectly set tire pressure. Observe
the notes on the recommended tire pressure
(Y page 297).
The tire pressure monitor is not able to warn
you of a sudden loss of pressure, e.g .ifthe
tire is penetrated by a foreign object. In the
event of a sudden loss of pressure, bring the
vehicle to a halt by braking carefully. Avoid
abrupt steering maneuvers.
If a tire pressure monitor system is installed,
the vehicle's wheels have sensors that
monitor the tire pressures in all four tires. The
tire pressure monitor warns you if the
pressure drops in one or more of the tires. The
tire pressure monitor only functions if the
correct sensors are installed to all wheels.
The tire pressure monitor has a yellow
warning lamp in the instrument cluster for
indicating pressure loss or amalfunction.
Whether the warning lamp flashes or lights up
indicates whether a tire pressure is too low or
the tire pressure monitoring system is
malfunctioning:
R if the warning lamp is lit continuously, the
tire pressure on one or more tires is
significantly too low. The tire pressure
monitor is not malfunctioning.
R if the warning lamp flashes for around a
minute and then remains lit constantly, the
tire pressure monito ris malfunctioning. G
WARNING
Each tire, including the spare (if provided),
should be checked at least once a month
when cold and inflated to the pressure
recommended by the vehicle manufacturer
on the Tire and Loading Information placard Tire pressure
301Wheels and tires
Z
Page 304 of 334
on the driver's door B-pillar or the tire
pressure label on the inside of the fuel filler
flap. If your vehicle has tires of a different size
than the size indicated on the Tire and Loading
Information placard or the tire pressure label,
you should determine the proper tire pressure
for those tires.
As an added safety feature, your vehicle has
been equipped with a tire pressure monitoring
system (TPMS) that illuminates a low tire
pressure telltale when one or more of your
tires are significantly underinflated.
Accordingly, when the low tire pressure
telltale illuminates, you should stop and check
your tires as soon as possible, and inflate
them to the proper pressure. Driving on a
significantly underinflated tire causes the tire
to overheat and can lead to tire failure.
Underinflation also reduces fuel efficiency
and tire tread life, and may affect the vehicle's
handling and stopping ability.
Please note that the TPMS is not a substitute
for proper tire maintenance, and it is the
driver's responsibility to maintain correc ttire
pressure, even if underinflation has not
reached the level to trigger illumination of the
TPMS low tire pressure telltale.
Your vehicle has also been equipped with a
TPMS malfunction indicator to indicate if the
system is not operating properly. The TPMS
malfunction indicator is combined with the
low tire pressure telltale. When the system
detects a malfunction, the warning lamp will
flash for approximately a minute and then
remain continuously illuminated. This
sequence will be repeated every time the
vehicle is started as long as the malfunction
exists.
When the malfunction indicator is illuminated,
the system may not be able to detect or signal
low tire pressure as intended .TPMS
malfunctions may occur for a variety of
reasons, including the installation of
incompatible replacement or alternate tires
or wheels on the vehicle that prevent the
TPMS from functioning properly. Always
check the TPMS malfunction telltale after replacing one or more tires or wheels on your
vehicle to ensure that the replacement or
alternate tires and wheels allow the TPMS to
continue to function properly.
i If the tire pressure monitor is
malfunctioning, it may take more than ten
minutes for the tire pressure warning lamp
to inform you of the malfunction by flashing
for approximately one minute and then
remaining lit.
When the malfunction has been rectified,
the tire pressure warning lamp goes out
after a few minutes of driving.
Information on tire pressures is displayed in
the multifunction display .After a few minutes
of driving, the current tire pressure of each
tire is show ninthe multifunction display.
i The tire pressure values indicated by the
on-board computer may differ from those
measured at a gas station with a pressure
gauge. The tire pressures shown by the on-
board computer refer to those measured at
sea level. At high altitudes, the tire pressure
values indicated by a pressure gauge are
higher than those shown by the on-board
computer. In this case, do not reduce the
tire pressures.
i The operation of the tire pressure monitor
can be affected by interference from radio
transmitting equipment (e.g. radio
headphones, two-way radios) that may be
being operated in or near the vehicle.
i This device complies with part 15 of the
FCC Rules. Operation is subject to the
following two conditions:
1. This device may not cause harmful
interference, and
2. this device must accept any interference
received, including interference that may
cause undesired operation of the device.
Any unauthorized modification to this
device could void the user’s authority to
operate the equipment. 302
Tire pressureWheels and tires
Page 305 of 334
Checking tire pressure electronically
X
Make sure that the SmartKey is in
position 2(Ypage 131) in the ignition lock.
X Press the 0002or0005 button on the
steering wheel to selec tthe Service menu.
X Press the 0003or0004 button to select
Tire Pressure .
X Press the 000Cbutton.
The current tire pressure for each wheel will
be displayed in the multifunction display.
If the vehicle has been parked for longer than
20minutes, the Tire pressure will be displayed after driving a few
minutes message appears.
After a teach-in period, the tire pressure
monitor automatically recognizes new wheels
or new sensors. As long as a clear allocation
of the tire pressure values to the individual
wheels is not possible, the Tire PressureMonitor Active display message is shown
instead of the tire pressure display. The tire
pressures are already being monitored.
i If a spare wheel/emergency spare wheel
is mounted, the system may continue to
show the tire pressure of the wheel that has
been removed for a few minutes. If this
occurs, note that the value displayed for
the position where the spare tire is
mounted is not the same as the spare
wheel/emergency spare wheel's current
tire pressure.
Tire pressure monitor warning
messages If the tire pressure monitor detects a
significant pressure loss on one or more tires,
a warning message is shown in the
multifunction display. Awarning tone also
sounds and the tire pressure warning lamp
lights up in the instrumen tcluster.
Each tire that is affected by a significant loss
of pressure is highlighted with a color. If the
Correct tire pressure message
appears in the multifunction display:
X Check the tire pressure on all four wheels
and correct it if necessary.
i If the wheel positions on the vehicle are
interchanged, the tire pressures may be
displayed for the wrong positions for a
shor ttime. This is rectified after a few
minutes of driving, and the tire pressures
are displayed for the correc tpositions.
Restarting the tire pressure monitor When you restart the tire pressure monitor,
all existing warning messages are deleted and
the warning lamps go out. The monitor uses
the currently set tire pressures as the
reference values for monitoring. In most
cases, the tire pressure monitoring system
recognizes the new reference values
automatically.
However, you can also define reference
values manually as described here:
X
Set the tire pressure to the value
recommended for the corresponding
driving situation on the vehicle's Tire and
Loading Information placard on the driver's
side B-pillar(Y page 297).
Additional tire pressure values for driving
at high speeds or with heavy loads can be
found in the tire pressure table on the
inside of the fuel filler flap.
X Make sure that the tire pressure is correct
on all four wheels.
X Make sure that the SmartKey is in position
2 in the ignition lock.
X Press the 0002or0005 button on the
steering wheel to select the Service menu.
X Press the 0003or0004 button to select
Tire Pressure .
X Press the 000Cbutton.
The multifunction display shows the
current tire pressure of the individual tires
or the Tire pressure will be Tire pressure
303Wheels and tires Z