2012 MERCEDES-BENZ SLK55AMG belt
[x] Cancel search: beltPage 179 of 334
R
if you are predominantly driving slower
than 50 mph (80 km/h) or faster than
112 mph (180 km/h)
R if you are currently using COMAND or
making a telephone call with it
R if the time has been set incorrectly
R in active driving situations, such as when
you change lanes or change your speed
Warning and display messages in the
multifunction display X
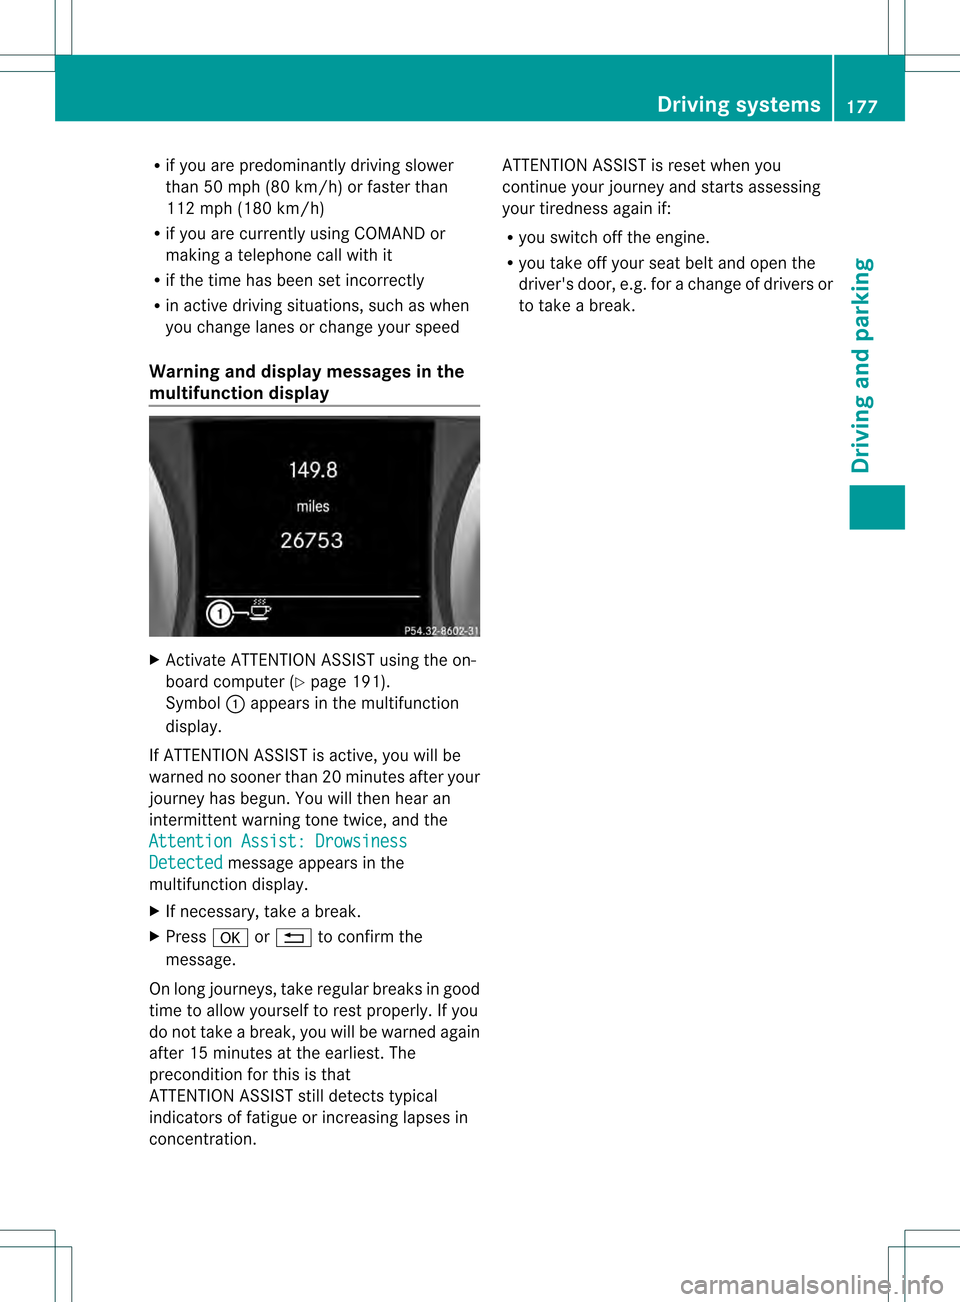
Activate ATTENTION ASSIST using the on-
board computer (Y page 191).
Symbol 0002appears in the multifunction
display.
If ATTENTION ASSIST is active, you will be
warned no sooner than 20 minutes after your
journey has begun. You will the nhear an
intermittent warning tonet wice, and the
Attention Assist: Drowsiness Detected message appears in the
multifunction display.
X If necessary, take a break.
X Press 000Cor0001 to confirm the
message.
On long journeys, take regular breaks in good
time to allow yourself to rest properly. If you
do not take a break, you will be warned again
after 15 minutes at the earliest. The
preconditio nfor this is that
ATTENTION ASSIST still detects typical
indicators of fatigue or increasing lapses in
concentration. ATTENTION ASSIST is reset when you
continue your journey and starts assessing
your tiredness again if:
R
you switch off the engine.
R you take off your seat belt and open the
driver's door, e.g. for a change of drivers or
to take a break. Driving systems
177Driving and parking Z
Page 196 of 334
X
Press the 0002or0005 button on the
steering wheel to select the Settingsmenu.
X Press the 0004or0003 button to select the
Vehicle submenu.
X Press the 000Cbutton to confirm.
X Press the 0004or0003 button to select the
Automatic door locks function.
You will see the selected setting: on or
off .
X Press the 000Cbutton to save the setting.
Activating/deactivating the acoustic
locking verification signal
If you switch on the Acoustic Lockfeedback function, an acoustic signal sounds
when you lock the vehicle.
X Press the 0002or0005 button on the
steering wheel to select the Settingsmenu.
X Press the 0004or0003 button to select the
Vehicle submenu.
X Press the 000Cbutton to confirm.
X Press the 0004or0003 button to select the
Acoustic Lock feedback: function.
You will see the selected setting:
Activated or
Deactivated .
X Press the 000Cbutton to save the setting.
Activating/deactivating the radar sensor
system
The following systems are switched off when
the radar sensor system is deactivated:
R DISTRONIC PLUS (Y page 158)
R BAS PLUS (Y page 57)
R PRE-SAFE ®
Brake (Y page 62)
X Press the 0002or0005 button on the
steering wheel to select the Sett. menu.
X Press the 0004or0003 button to select the
Vehicle submenu.
X Press 000Cto confirm. X
Press the 0003or0004 button to select
Radar Sensor (See Oper. Manual): .
You will see the selected setting: Enabled or
Disabled .
X Press the 000Cbutton to save the setting.
Convenience Activating/deactivating the EASY-
ENTRY/EXIT feature
You can use the
Easy Entry/Exit: function
to activate or deactivate the EASY ENTRY/
EXIT feature (Y page 97). G
WARNING
You must make sure no one can become
trapped or injured by the moving steering
wheel when the easy-entry/exit feature is
activated.
To stop steering wheel movement, move
steering wheel adjustmen tlever or press one
of the memory position buttons.
Do not leave children unattended in the
vehicle, or with access to an unlocked vehicle.
Children could open the driver's door and
unintentionally activate the easy-entry/exit
feature, which could result in an accident
and/or serious personal injury.
X Press the 0002or0005 button on the
steering wheel to select the Settings menu.
X Press the 0004or0003 button to select the
Convenience submenu.
X Press the 000Cbutton to confirm.
X Press the 0004or0003 button to select the
Easy Entry/Exit: function.
You will see the selected setting: on or
off .
X Press the 000Cbutton to save the setting.
Switching the belt adjustment on/off
For further information on belt adjustment,
see (Y page 51). 194
Menus and submenusOn-board computer and displays
Page 197 of 334
X
Press the 0002or0005 button on the
steering wheel to select the Sett. menu.
X Press the 0004or0003 button to select the
Convenience submenu.
X Press 000Cto confirm.
X Press the 0004or0003 button to select the
Belt Adjustment function.
You will see the selected setting: on or
off .
X Press the 000Cbutton to save the setting.
Switching the fold-in mirrors when
locking feature is on/off
If you switch on the Fold Mirrors in when
Locking function, the exterior mirrors fold in
when you lock the vehicle. If you unlock the
vehicle and then open a door, the exterior
mirrors fold out again.
If you have switched the function on and you
fold the exterior mirrors in using the button
on the door (Y page 99), they will not fold out
automatically. The exterior mirrors can then
only be folded out using the button on the
door.
X Press the 0002or0005 button on the
steering wheel to select the Settingsmenu.
X Press the 0004or0003 button to select the
Convenience submenu.
X Press the 000Cbutton to confirm.
X Press the 0004or0003 button to select the
Fold mirrors in when locking: function.
You will see the selected setting:
Enabledor
Disabled .
X Press the 000Cbutton to save the setting.
Restoring the factory settings For safety reasons, the
Daytime RunningLights: function in the
Lights submenu is
only reset when the vehicle is stationary. X
Press the 0002or0005 button on the
steering wheel to select the Sett. menu.
X Press the 0004or0003 button to select the
Factory Setting submenu.
X Press the 000Cbutton to confirm.
The Reset All Settings? message
appears.
X Press the 0004or0003 button to select
No or
Yes .
X Press the 000Cbutton to confirm the
selection.
If you select Yes , the multifunction display
shows a confirmation message. AMG menu in AMG vehicles
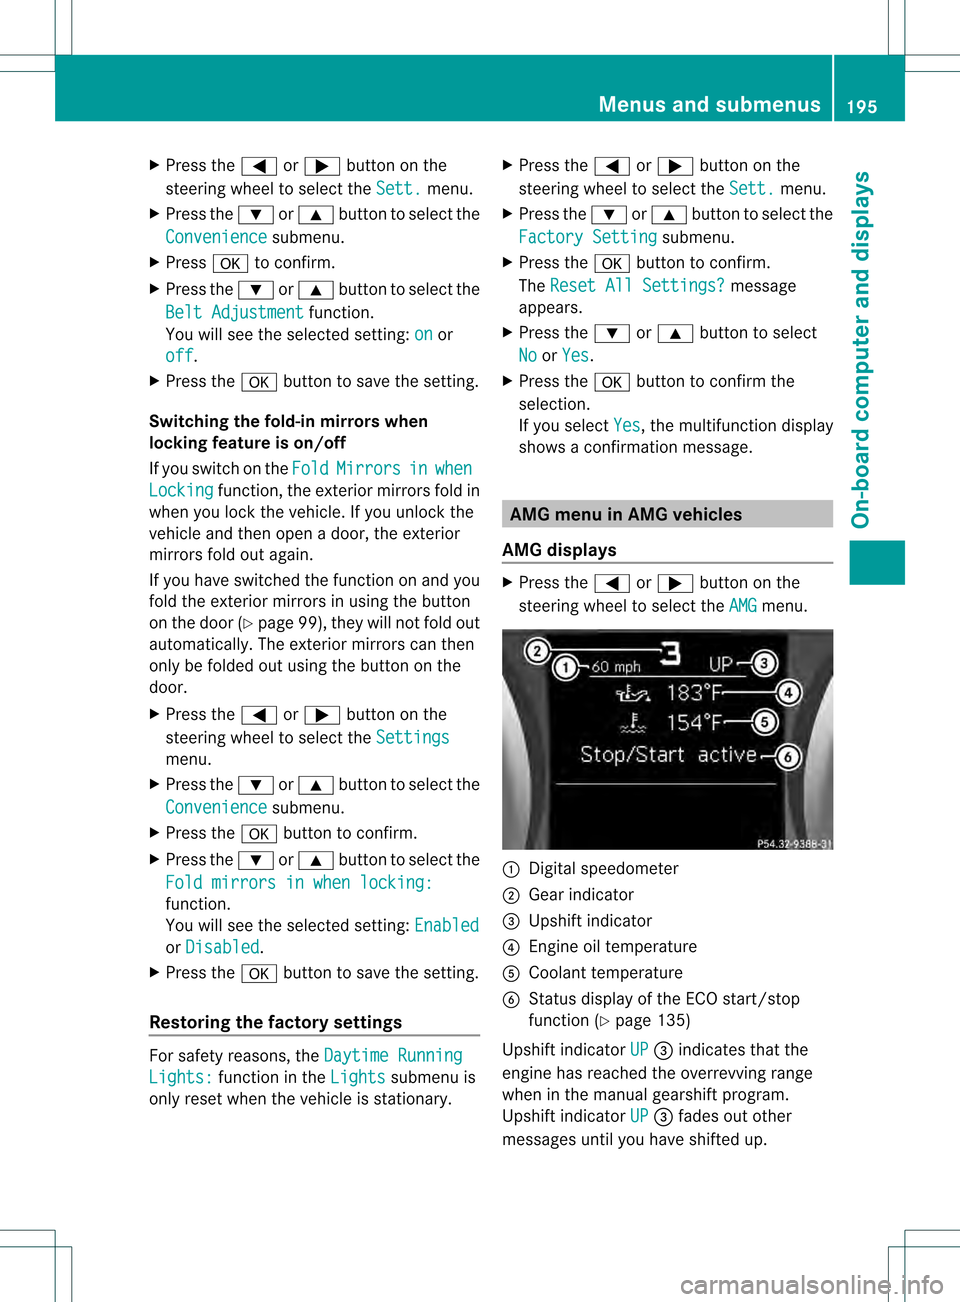
AMG displays X
Press the 0002or0005 button on the
steering wheel to select the AMG menu.
0002
Digital speedometer
0003 Gear indicator
0023 Upshift indicator
0022 Engine oil temperature
0020 Coolant temperature
0021 Status display of the ECO start/stop
function (Y page 135)
Upshift indicator UP 0023
indicates that the
engine has reached the overrevving range
when in the manual gearshift program.
Upshift indicator UP 0023
fades out other
messages until you have shifted up. Menus and submenus
195On-board computer and displays Z
Page 220 of 334
Display messages Possible causes/consequences and
0001 Solutions
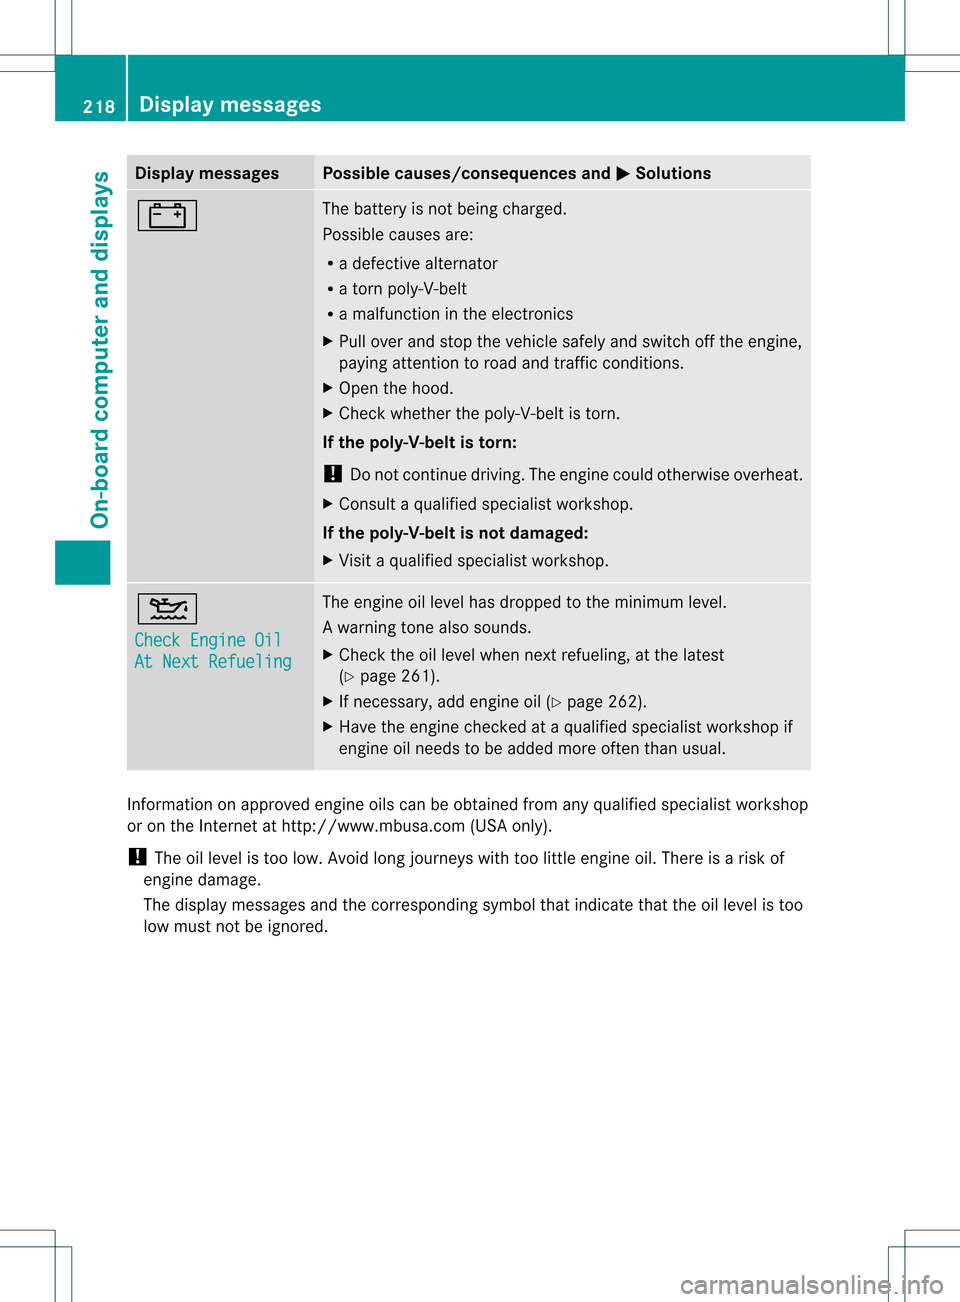
000A The battery is no
tbeing charged.
Possible causes are:
R a defective alternator
R a torn poly-V-belt
R a malfunction in the electronics
X Pull over and stop the vehicle safely and switch off the engine,
paying attention to road and traffic conditions.
X Open the hood.
X Check whether the poly-V-belt is torn.
If the poly-V-belt is torn:
! Do not continue driving. The engine could otherwise overheat.
X Consult a qualified specialist workshop.
If the poly-V-belt is not damaged:
X Visit a qualified specialist workshop. 0012
Check Engine Oil
At Next Refueling The engine oil level has dropped to the minimum level.
Aw
arning tone also sounds.
X Chec kthe oil level when next refueling, at the latest
(Y page 261).
X If necessary, add engine oil (Y page 262).
X Have the engine checked at a qualified specialist workshop if
engine oil needs to be added more often than usual. Information on approved engine oils can be obtained from any qualified specialist workshop
or on the Internet at http://www.mbusa.com (USA only).
! The oil level is too low. Avoid long journeys with too little engine oil. There is a risk of
engine damage.
The display messages and the corresponding symbol that indicate that the oil level is too
low must not be ignored. 218
Display messagesOn-board computer and displays
Page 230 of 334
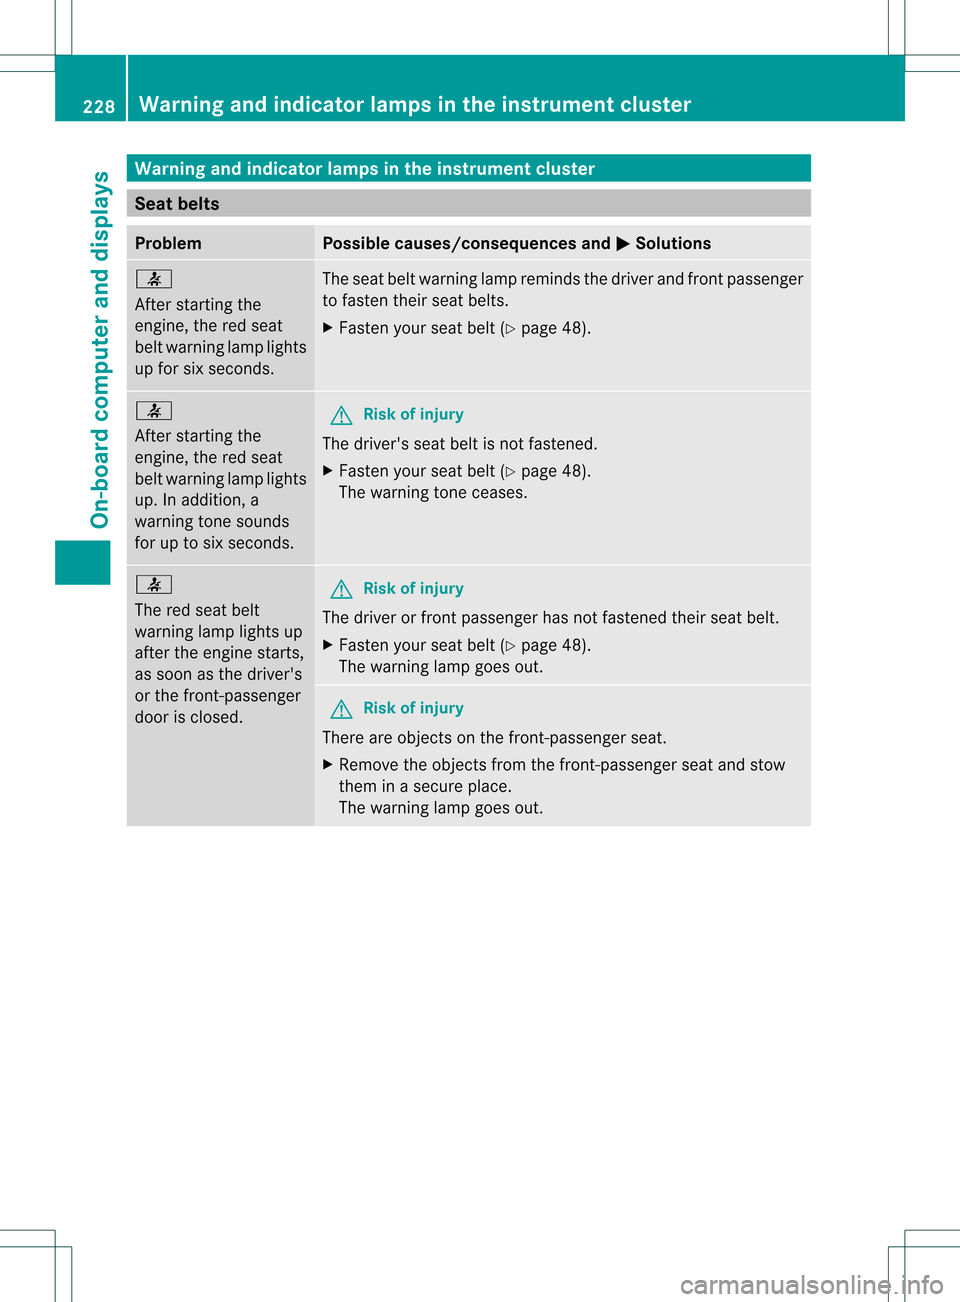
Warning and indicator lamps in the instrument cluster
Seat belts
Problem Possible causes/consequences and
0001 Solutions
001A
After starting the
engine, the red seat
bel twarning lamp lights
up for six seconds. The seat belt warning lamp reminds the driver and fron
tpassenger
to fasten their seat belts.
X Faste nyour seat belt (Y page 48). 001A
After starting the
engine, the red seat
belt warning lamp lights
up. In addition, a
warning tone sounds
for up to six seconds.
G
Risk of injury
The driver's seat belt is not fastened.
X Fasten your seat belt (Y page 48).
The warning tone ceases. 001A
The red seat belt
warning lamp lights up
after the engine starts,
as soon as the driver's
or the front-passenger
door is closed. G
Risk of injury
The driver or front passenger has not fastened their seat belt.
X Fasten your seat belt (Y page 48).
The warning lamp goes out. G
Risk of injury
There are objects on the front-passenger seat.
X Remove the objects from the front-passenger seat and stow
them in a secure place.
The warning lamp goes out. 228
Warning and indicator lamps in the instrument clusterOn-board computer and displays
Page 231 of 334
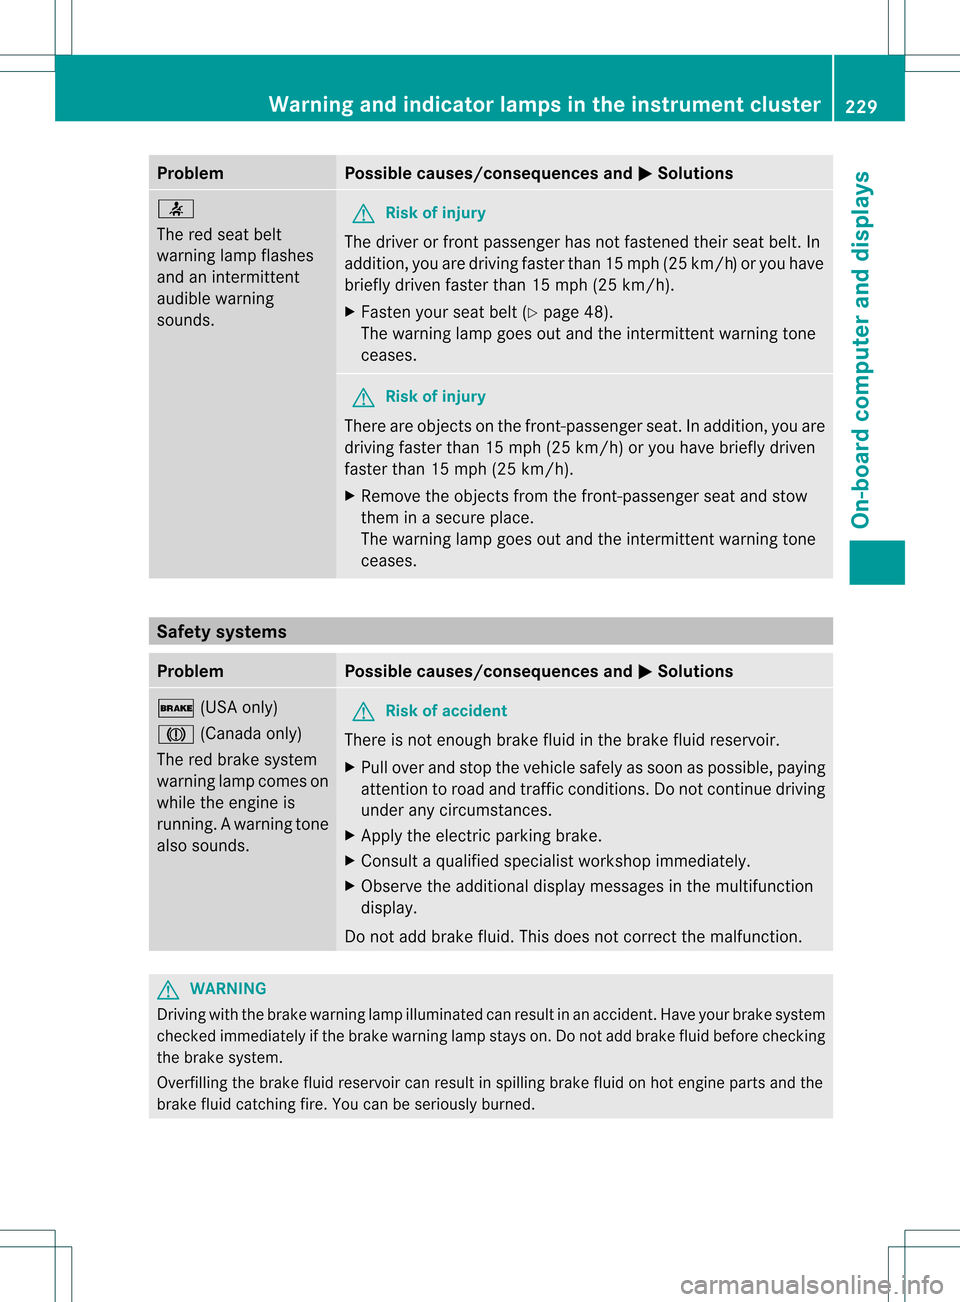
Problem Possible causes/consequences and
0001 Solutions
001A
The red seat belt
warning lamp flashes
and an intermittent
audible warning
sounds. G
Risk of injury
The driver or front passenger has not fastened their seat belt. In
addition, you are driving faster than 15 mph (25 km/h) or you have
briefly driven faster than 15 mph (25 km/h).
X Fasten your seat belt (Y page 48).
The warning lamp goes out and the intermittentw arning tone
ceases. G
Risk of injury
There are objects on th efront-passenge rseat. In addition, you are
driving faster than 15 mph (25 km/h) or you have briefly driven
faster than 15 mph (25 km/h).
X Remove the objects from the front-passenger seat and stow
them in a secure place.
The warning lamp goes out and the intermittentw arning tone
ceases. Safety systems
Problem Possible causes/consequences and
0001 Solutions
000D
(USA only)
0006 (Canada only)
The red brake system
warning lamp comes on
while the engine is
running. A warning tone
also sounds. G
Ris
kofa ccident
There is no tenough brake fluid in the brake fluid reservoir.
X Pull ove rand stop the vehicle safely as soo nas possible, paying
attention to road and traffic conditions. Do not continue driving
under any circumstances.
X Apply the electric parking brake.
X Consult a qualified specialist workshop immediately.
X Observe the additional display messages in the multifunction
display.
Do not add brake fluid. This does not correct the malfunction. G
WARNING
Driving with the brake warning lamp illuminated can result in an accident. Have your brake system
checked immediately if the brake warning lamp stays on. Do not add brake fluid before checking
the brake system.
Overfilling the brake fluid reservoir can result in spilling brake fluid on hot engine parts and the
brake fluid catching fire. You can be seriously burned. Warning and indicator lamps in the instrument cluster
229On-board computer and displays Z
Page 272 of 334
X
Wipe the plastic trim with a damp, lint-free
cloth, e.g. a microfiber cloth.
X Heavy soiling: use car care and cleaning
products recommended and approved by
Mercedes-Benz.
The surface may change color temporarily.
Wait until the surface is dry again.
Cleaning the steering wheel and gear or
selector lever X
Thoroughly wipe with a damp cloth or use
leather care agents that have been
recommended and approved by Mercedes-
Benz.
Cleaning genuine wood and trim
elements X
Wipe the wooden trim and trim pieces with
a damp, lint-free cloth ,e.g. a microfiber
cloth.
X Heavy soiling: use car care and cleaning
products recommended and approved by
Mercedes-Benz.
! Do not use solvent-based cleaning agents
such as tar remover, whee lcleaners,
polishes or waxes. There is otherwise a risk
of damaging the surface.
! Do not use chrome polish on trim pieces.
The trim pieces have a chrome look but are
mostly made of anodized aluminum and
can lose their shine if chrome polish is
used. Use a damp, lint-free cloth instead
when cleaning the trim pieces.
If the chrome-plated trim pieces are very
dirty, you can use a chrome polish. If you
are unsure as to whether the trim pieces
are chrome-plated or not, consult an
authorized Mercedes-Ben zCenter.
Cleaning the seat covers !
Do not use microfiber cloths to clean
genuine leather, artificial leather or
Alcantara® covers. If used often, these can
damage the cover. !
Observe the following when cleaning:
R clean genuine leather cover scarefully
with a damp cloth and then wipe the
covers down with a dry cloth .Make sure
that the leather does no tbecome
soaked. It may otherwise become rough
and cracked. Only use leather care
agents that have been tested and
approved by Mercedes-Benz. You can
obtain these from a qualified specialist
workshop.
R clean artificial leather covers with a cloth
moistened with a solution containing 1%
detergen t(e.g. dish washing liquid).
R clean cloth covers with a microfiber cloth
moistened with a solution containing 1%
detergen t(e.g. dish washing liquid). Rub
carefully and always wipe entire seat
sections to avoid leaving visible lines.
Leave the seat to dry afterwards.
Cleaning results depend on the type of
dirt and how long it has been there.
R clean Alcantara® covers with a damp
cloth. Make sure that you wipe entire
seat sections to avoid leaving visible
lines.
i Note that regular care is essential to
ensure that the appearance and comfort of
the covers is retained over time.
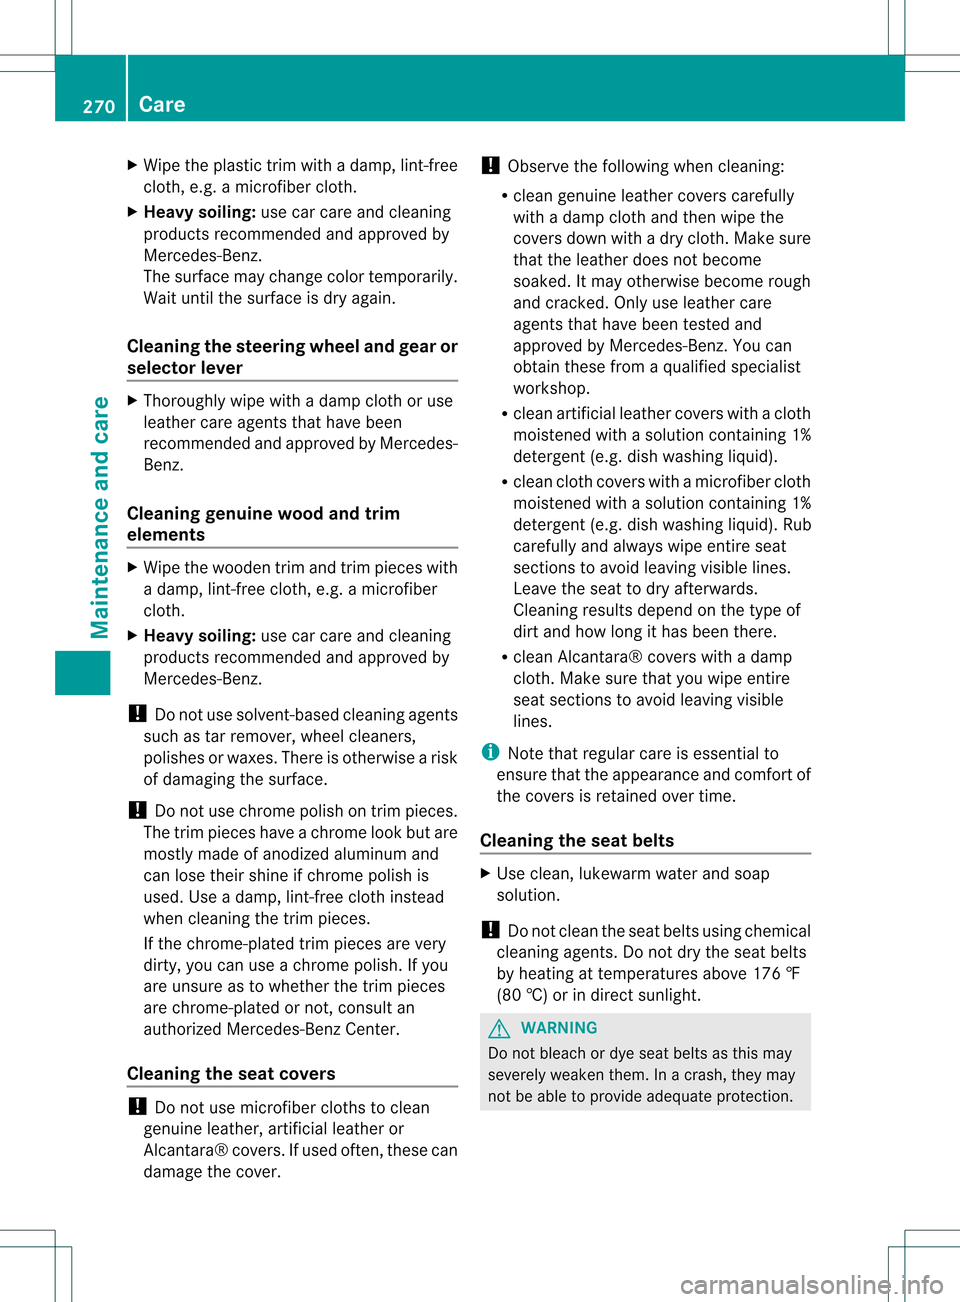
Cleaning the seat belts X
Use clean, lukewarm water and soap
solution.
! Do not clean the seat belts using chemical
cleaning agents .Do not dry the seat belts
by heating at temperatures above 176 ‡
(80 †) or in direct sunlight. G
WARNING
Do not bleach or dye seat belts as this may
severely weaken them. In a crash, they may
not be able to provide adequate protection. 270
CareMaintenance and care
Page 287 of 334
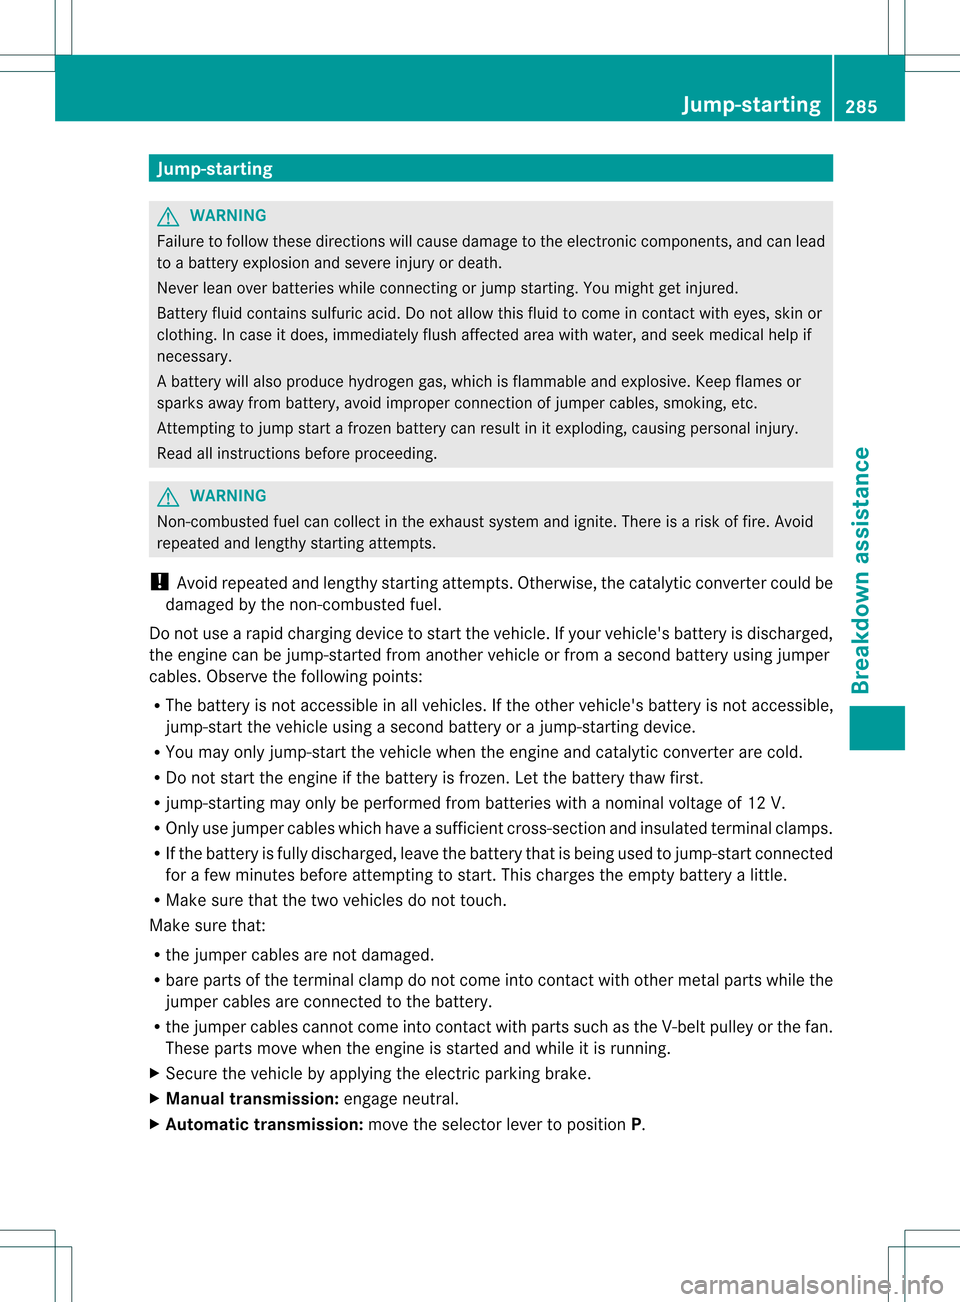
Jump-starting
G
WARNING
Failure to follow these directions will cause damage to the electronic components, and can lead
to a battery explosion and severe injury or death.
Never lean over batteries while connecting or jump starting. You might get injured.
Battery fluid contains sulfuric acid. Do not allow this fluid to come in contact with eyes, skin or
clothing. In case it does, immediately flush affected area with water, and seek medical help if
necessary.
Ab attery will also produce hydrogen gas, which is flammable and explosive. Keep flames or
sparks away from battery, avoid improper connectio nofjumpe rcables, smoking, etc.
Attempting to jump start a frozen battery can result in it exploding, causing personal injury.
Read all instructions before proceeding. G
WARNING
Non-combusted fuel can collect in the exhaust system and ignite. There is a risk of fire. Avoid
repeated and lengthy starting attempts.
! Avoid repeated and lengthy starting attempts. Otherwise, the catalytic converte rcould be
damaged by the non-combusted fuel.
Do not use a rapid charging device to start the vehicle. If your vehicle's battery is discharged,
the engine can be jump-started from another vehicle or from a second battery using jumper
cables. Observe the following points:
R The battery is not accessible in all vehicles. If the other vehicle's battery is not accessible,
jump-start the vehicle using a second battery or ajump-starting device.
R You may only jump-start the vehicle when the engine and catalyti cconverter are cold.
R Do not start the engine if the battery is frozen. Let the battery thaw first.
R jump-starting may only be performed from batteries with a nominal voltage of 12 V.
R Only use jumper cables which have a sufficient cross-section and insulated terminal clamps.
R If the battery is fully discharged, leave the battery that is being used to jump-start connected
for a few minutes before attempting to start.T his charges the empty battery a little.
R Make sure that the two vehicles do not touch.
Make sure that:
R the jumper cables are not damaged.
R bare parts of the terminal clamp do not come into contact with other metal parts while the
jumper cables are connected to the battery.
R the jumper cables cannot come into contact with parts such as the V-belt pulley or the fan.
These parts move when the engine is started and while it is running.
X Secure the vehicle by applying the electric parking brake.
X Manual transmission: engage neutral.
X Automatic transmission: move the selector lever to position P. Jump-starting
285Breakdown assistance Z