2012 MERCEDES-BENZ SLK55AMG window
[x] Cancel search: windowPage 43 of 334

doors must therefore only be performed by
qualified technicians. Contact an authorized
Mercedes-Benz Center. G
WARNING
Only use seat covers which have been tested
and approved by Mercedes-Benz for your
vehicle model. Using other seat covers may
interfere with or prevent the deployment of
the side impact air bags. Contact an
authorized Mercedes-Benz Center for
availability.
When deployed, the side impact air bags offer
additional protection for the thorax of the
vehicle occupants on the side of the vehicle
on which the impact occurs. However, they
do not protect the:
R head
R neck
R arms Side impact air bags
0002deploy nex tto the
outer seat cushions.
Side impact air bags 0002are deployed:
R on the side on which an impact occurs
R at the start of an accident with a high rate
of lateral vehicle deceleration or
acceleration, e.g. in aside impact
R depending on whether the seat belt is being
used
R independently of the front air bags
R independently of the ETDs
If the vehicle overturns, the side impac tair
bags are generally not deployed. Exception: if the system detects high vehicle deceleration
or acceleration in a lateral direction and
determines that deploymen
tcan offer
additional protection to that provided by the
seat belt.
Side impac tair bags will not deploy in side
impacts which do not exceed the system's
prese tdeployment thresholds for lateral
acceleration/deceleration .You will then be
protected by the fastened seat belt.
The side impact air bag on the front-
passenger side will not deploy under the
following conditions:
R the OCS detects that the front-passenger
seat is not occupied.
R the front-passenger seat belt is not
fastened.
The side impact air bag on the front-
passenger side will deploy if the front-
passenger seat belt is fastened, regardless of
whether the front-passenger seat is occupied
or not.
Head bags G
WARNING
Observe "Important safety notes"
(Y page 38).
Head bags enhance the level of protection for
the head, but not the chest or arms, of the
vehicle occupants in the front of the vehicle
on the side on which the impact occurs. Head bags
0002deploy in the area of the side
windows at the front.T hey are deployed: Occupant safety
41Safety Z
Page 49 of 334
PRE-SAFE
®
(preventative occupant
protection)
i AMG vehicles do not include the PRE-
SAFE ®
system. G
WARNING
The PRE-SAFE ®
system reduces the impact of
an accident on vehicle occupants, as long as
their seat belts have been fastened correctly.
Although your vehicle is equipped with a PRE-
SAFE ®
system, the possibility of injury in the
event of an accident cannot be ruled out. You
should therefore always drive carefully and
adapt your driving style to the prevailing road,
weather and traffic conditions.
PRE-SAFE ®
takes preemptive measures to
protect occupants in certain hazardous
situations.
PRE-SAFE ®
intervenes:
R if BAS intervenes, e.g. in emergency
braking situations
R if BAS PLUS intervenes powerfully on
vehicles with DISTRONIC PLUS
R if, on vehicles with DISTRONIC PLUS, the
radar sensor system detectsani mminent
dange rofcollision in certain situations
R in critical driving situations, e.g. when
physical limits are exceeded and the
vehicle understeers or oversteers severely
PRE-SAFE ®
takes the following measures
depending on the hazardous situation
detected:
R the seat belts are pre-tensioned.
R on vehicles with memory function for the
front-passenger seat: the front-passenger
seat is adjusted if it is in an unfavorable
position.
R if the vehicle skids, the side windows are
closed so that only a small gap remains.
If the hazardous situation passes without
resulting in an accident, PRE-SAFE ®
slackens
the belt pretensioning. All settings made by
PRE-SAFE ®
can then be reversed. If the seat belts are not released:
X
Move the backrest or seat back slightly, but
only when the vehicle is stationary.
The belt pretensioning is reduced and the
locking mechanism is released. G
WARNING
Make sure that nobody can become trapped
as you adjust the seat.
! Make sure that there are no objects in the
footwell or behind the seats when resetting
the seats. There is a risk that the seats
and/or the objects could be damaged.
More information about seat-belt
adjustment, a convenience function
integrated into PRE-SAFE ®
, can be found in
the "Seat-belt adjustment" section
(Y page 51). NECK-PRO head restraints
The NECK-PRO head restraints increase
protection to the driver's and front
passenger's head and neck.T o this end, the
NECK-PRO head restraints on the driver's and
front-passenger seats are moved forwards
and upwards in the event of a rear-end
collision of a certain severity. This provides
better head support. G
WARNING
Do not secure any objects (e.g. coat hangers)
on the NECK-PRO head restraints. Otherwise,
the NECK-PRO head restraints may not
function properly, or in the event of a rear-end
collision may not be able offer the level of
protection they are designed to provide. G
WARNING
Seat or head restraint covers can cause a
malfunction when the NECK-PRO head
restraints are activated or when the side
impact air bags are deployed, or they can
prevent this completely. The NECK-PRO head
restraints or side impact air bags can Occupant safety
47Safety
Z
Page 69 of 334
Useful information
..............................68
SmartKey ............................................. 68
Doors .................................................... 74
Trunk .................................................... 77
Side windows ...................................... 80
Roof ...................................................... 82 67Opening/closing
Page 77 of 334

Unlocking and opening doors from
the inside
You can open a door from inside the vehicle
even if it has been locked.
Only open the door when the traffic situation
permits.
If the vehicle was previously locked with the
SmartKey or with KEYLESS-GO, opening the
vehicle from the inside will activate the anti-
theft alarm system. Switch off the alarm
(Y page 65). X
Pull door handle 0003.
If the door is locked, locking knob 0002pops
up. The door is unlocked and can be
opened.
i When a door is opened, the side window
on that side opens slightly. When the door
is closed, the side window closes again.
! The side windows will not open/close if
the battery is discharged or if the side
windows have iced up. It will then not be
possible to close the door. Do not attempt
to force the door closed. You could
otherwise damage the door or the side
window. Centrally locking and unlocking the
vehicle from the inside
You can centrally lock or unlock the vehicle
from the inside.
The central locking/unlocking button does
not lock or unlock the fuel filler flap or the stowage compartments, such as the glove
box.
i
You cannot unlock the vehicle centrally
from the inside if the vehicle has been
locked with the SmartKey or KEYLESS-GO. X
To unlock: press button 0002.
X To lock: press button 0003.
If all the doors are closed, the vehicle locks.
You can open a door from inside the vehicle
even if it has been locked. Only open the door
when the traffic situation permits.
If the vehicle has been locked with the central
locking button:
R and the SmartKey is set to its factory
setting, the entire vehicle is unlocked if a
door is opened from the inside
R and the SmartKey is set to an individual
setting, only the door that is opened from
inside the vehicle is unlocked. Automatic locking feature
When the ignition is switched on and the
wheels of the vehicle are turning at a speed
of more than 9 mph (15 km/h), the vehicle
locks automatically.
You could therefore be locked out when:
R the vehicle is being pushed.
R the vehicle is being towed.
R the vehicle is being tested on a
dynamometer. Doors
75Opening/closing Z
Page 82 of 334
Side windows
Important safety notes
G
WARNING
When opening or closing the door windows,
make sure that there is no danger of anyone
being harmed by the opening/closing
procedure.
The front door windows are equipped with
automatic operation and the anti-entrapment
feature. If in automatic mode a front door
window encounters an obstruction that
blocks its path, the anti-entrapment feature
will stop the door window and open it slightly.
The door windows operate differently when
the switch is pulled.S ee the "Problems with
door windows" section for more details.
The closing of the door windows can be
immediately halted by releasing the switch or,
if the switch was pulled past the resistance
point and released, by pressing or pulling the
respective switch.
If a door window encounters an obstruction
that blocks its path in a circumstance where
you are closing the windows by pressing and
holding 000Fbutton on the SmartKey or by
pressing and holding the lock button (vehicles
with KEYLESS-GO) on an outside door handle,
the anti-entrapment feature will not operate. Opening and closing the side
windows in the front
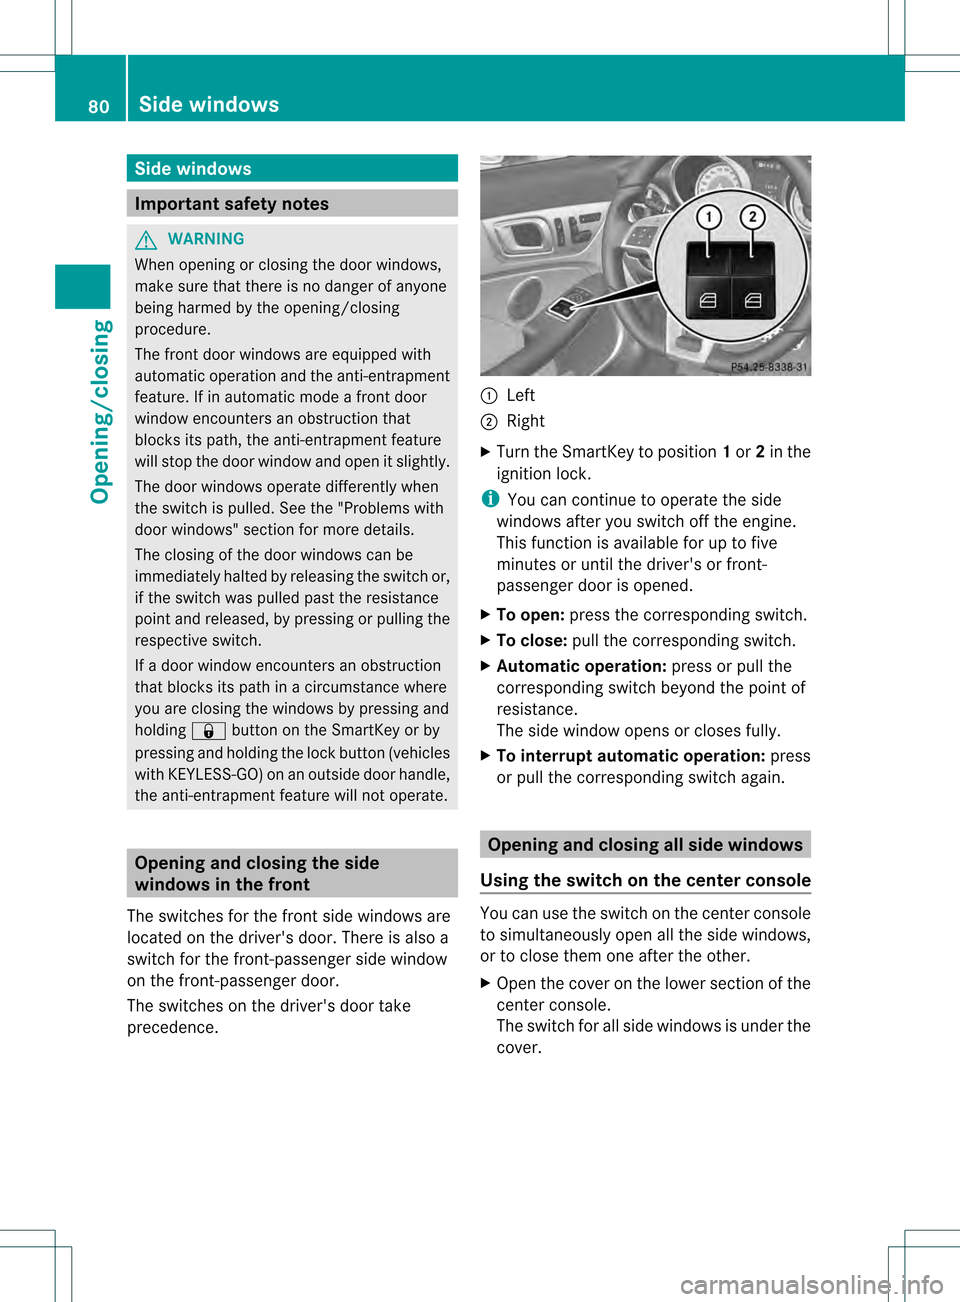
The switches for the fron tside windows are
located on the driver's door. There is also a
switch for the front-passenger side window
on the front-passenger door.
The switches on the driver's door take
precedence. 0002
Left
0003 Right
X Turn the SmartKey to position 1or 2in the
ignition lock.
i You can continue to operate the side
windows after you switch off the engine.
This function is available for up to five
minutes or until the driver's or front-
passenger door is opened.
X To open: press the corresponding switch.
X To close: pull the corresponding switch.
X Automatic operation: press or pull the
corresponding switch beyond the point of
resistance.
The side window opens or closes fully.
X To interrupt automatic operation: press
or pull the corresponding switch again. Opening and closing all side windows
Using the switch on the center console You can use the switch on the center console
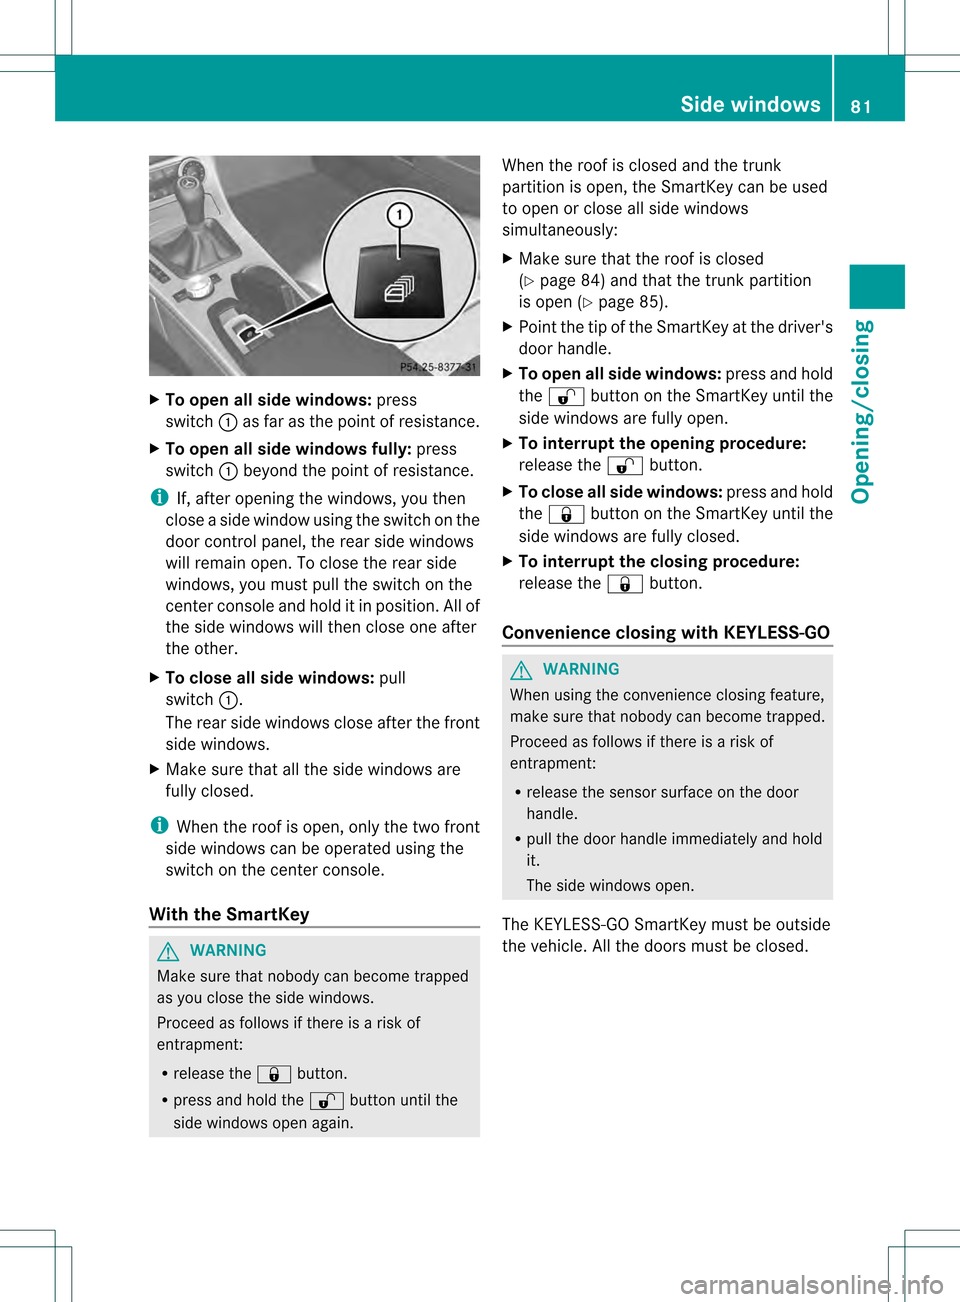
to simultaneously open all the side windows,
or to close them one after the other.
X Open the cover on the lower section of the
center console.
The switch for all side windows is under the
cover. 80
Side windowsOpening/closing
Page 83 of 334
X
To open all side windows: press
switch 0002as fa ras the point of resistance.
X To open all side windows fully: press
switch 0002beyond the point of resistance.
i If, after opening the windows, you then
close a side window using the switch on the
door control panel, the rear side windows
will remain open. To close the rear side
windows, you must pull the switch on the
center console and hold it in position. All of
the side windows will then close one after
the other.
X To close all side windows: pull
switch 0002.
The rear side windows close after the front
side windows.
X Make sure that all the side windows are
fully closed.
i When the roof is open, only the two front
side windows can be operated using the
switch on the center console.
With the SmartKey G
WARNING
Make sure that nobody can become trapped
as you close the side windows.
Proceed as follows if there is a risk of
entrapment:
R release the 000Fbutton.
R press and hold the 0010button until the
side windows open again. When the roof is closed and the trunk
partition is open, the SmartKey can be used
to open or close all side windows
simultaneously:
X
Make sure that the roof is closed
(Y page 84) and that the trunk partition
is open (Y page 85).
X Point the tip of the SmartKey at the driver's
door handle.
X To open all side windows: press and hold
the 0010 button on the SmartKey until the
side windows are fully open.
X To interrupt the opening procedure:
release the 0010button.
X To close all side windows: press and hold
the 000F button on the SmartKey until the
side windows are fully closed.
X To interrupt the closing procedure:
release the 000Fbutton.
Convenience closing with KEYLESS-GO G
WARNING
When using the convenience closing feature,
make sure that nobody can become trapped.
Proceed as follows if there is a risk of
entrapment:
R release the sensor surface on the door
handle.
R pull the door handle immediately and hold
it.
The side windows open.
The KEYLESS-GO SmartKey must be outside
the vehicle. All the doors must be closed. Side windows
81Opening/closing Z
Page 84 of 334
X
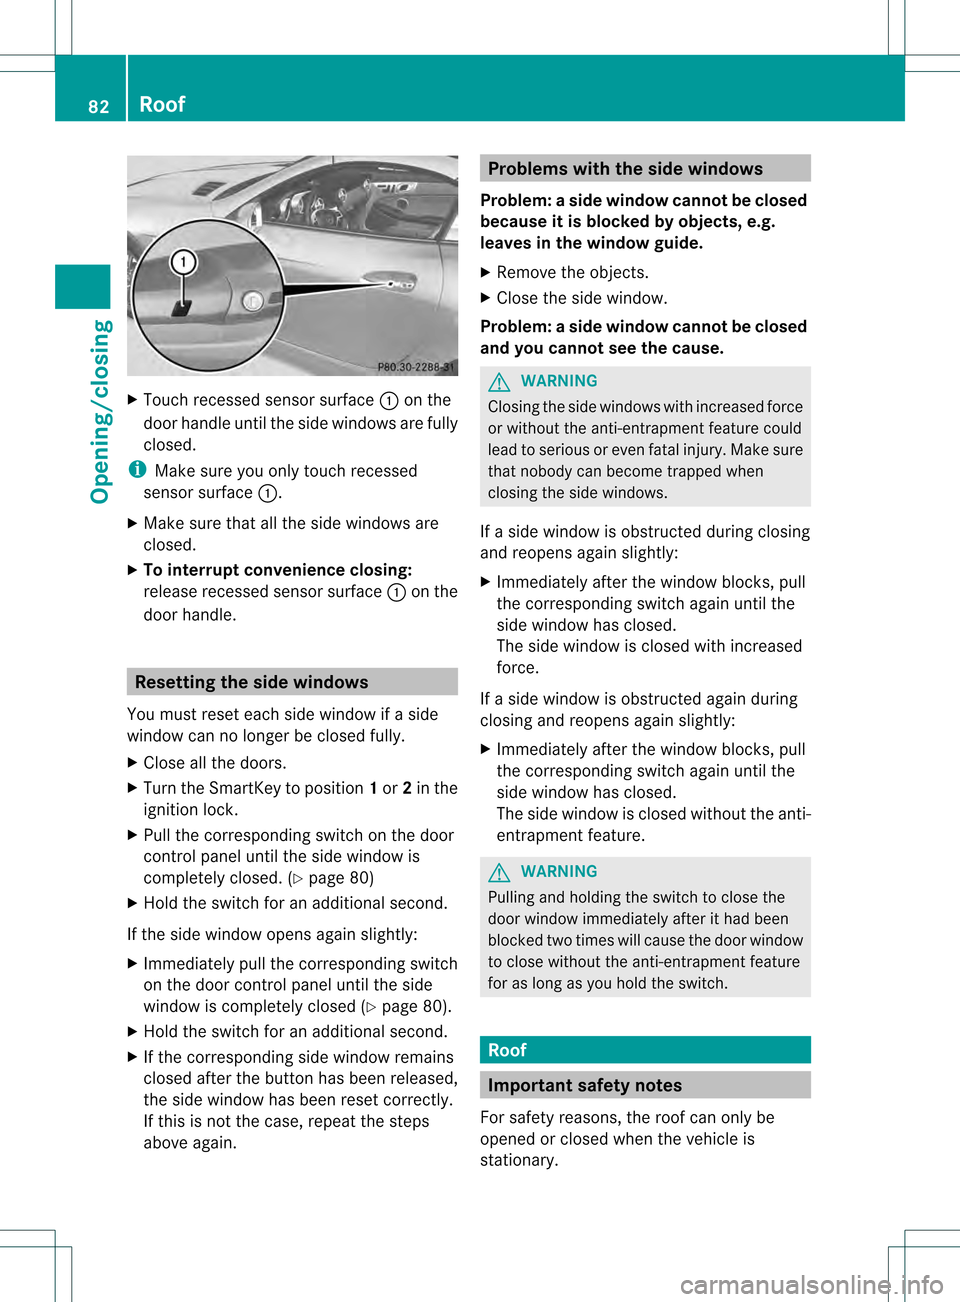
Touch recessed sensor surface 0002on the
door handle until the side windows are fully
closed.
i Make sure you only touch recessed
sensor surface 0002.
X Make sure that all the side windows are
closed.
X To interrupt convenience closing:
release recessed sensor surface 0002on the
door handle. Resetting the side windows
You must reset each side window if a side
window can no longer be closed fully.
X Close all the doors.
X Turn the SmartKey to position 1or 2in the
ignition lock.
X Pull the corresponding switch on the door
control panel until the side window is
completely closed. (Y page 80)
X Hold the switch for an additional second.
If the side window opens again slightly:
X Immediately pull the corresponding switch
on the door control panel until the side
window is completely closed (Y page 80).
X Hold the switch for an additional second.
X If the corresponding side window remains
closed after the button has been released,
the side window has been reset correctly.
If this is not the case, repeat the steps
above again. Problems with the side windows
Problem: aside window cannot be closed
because it is blocked by objects, e.g.
leaves in the window guide.
X Remove the objects.
X Close the side window.
Problem :aside window cannot be closed
and you cannot see the cause. G
WARNING
Closing the side windows with increased force
or without the anti-entrapment feature could
lead to serious or even fatal injury. Make sure
that nobody can become trapped when
closing the side windows.
If a side window is obstructed during closing
and reopens again slightly:
X Immediately afte rthe window blocks, pull
the corresponding switch again until the
side window has closed.
The side window is closed with increased
force.
If a side window is obstructed again during
closing and reopens again slightly:
X Immediately after the window blocks, pull
the corresponding switch again until the
side window has closed.
The side window is closed without the anti-
entrapment feature. G
WARNING
Pulling and holding the switch to close the
door window immediately after it had been
blocked two times will cause the door window
to close without the anti-entrapment feature
for as long as you hold the switch. Roof
Important safety notes
For safety reasons, the roof can only be
opened or closed when the vehicle is
stationary. 82
RoofOpening/closing
Page 85 of 334
G
WARNING
Only drive with the roof fully open or closed.
If the roof does not open or close fully, the
roof hydraulics are depressurized and the soft
top is lowered:
R after about seven minutes if the ignitio nis
switched on
R after about 15 seconds if the ignition is
switched off
Aw arning tone sounds shortly beforehand.
The 0008 symbol and the Retractable Roof Lowering message appears in the
multifunction display.
Lock the roof again before driving on.
Otherwise, the unlocked roo fcould open
during the journey and cause you to lose
control of your vehicle. You or other persons
could be injured as a result. G
WARNING
Closing the roof manually is a complex,
technically challenging procedure.
Attempting to manually close the roof may
cause damage to the roof and/or injury.
For this reason, the manual closing process
should only be carried out at a qualified
specialist workshop.
! Never sit on the rear shelf or store heavy
objects there. You will otherwise damage
the roof and the rear shelf of your vehicle.
! Do not forget that the weather can
change abruptly. Make certain that the roof
is closed when you leave the vehicle. The
vehicle electronics can be damaged if
water enters the vehicle interior.
! When opening and closing the roof, make
sure that:
R there is sufficient upward clearance, as
the roof swings upwards.
R there is sufficient clearance behind the
vehicle, as the trunk lid swings
backwards beyond the bumper.
R the trunk is only loaded to below the
trunk partition. R
the trunk partition is not pushed up by
the load.
R the trunk partition is closed.
R the trunk lid is closed.
R the outside temperature is above
+5 ‡ (−15 †).
You could otherwise damage the roof,
trunk and other parts of the vehicle.
i Make sure that the roof and rear window
are clean and dry before opening the roof.
Otherwise, water or dirt could enter the
vehicle interior or trunk. Opening and closing with the roof
switch
Important safety notes G
WARNING
Before operating the retractable hardtop
(vario-roof), make sure there is no danger of
anyone being injured by the moving parts
(retractable hardtop, roof frame, and trunk
lid).
Hands must never be placed near the roof
frame, upper windshield area, hardtop, shelf
behind roll bars, or trunk lid while the
retractable hardtop is being raised or
lowered. Serious personal injury may occur.
If potential danger exists, release the
retractable hardtop switch or the 0010or
000F button on the SmartKey. This
immediately interrupts the raising or lowering
procedure. You can then operate the
retractable hardtop switch or press the
0010 or000F button on the SmartKey to raise
or lower the retractable hardtop away from
the danger zone. Roof
83Opening/closing Z