2012 MERCEDES-BENZ SLK350 oil
[x] Cancel search: oilPage 271 of 334

shampoo. Cleaning cloths may be used as
well.
Cleaning the sensors X
Cleans ensors0002of the driving systems
with water, car shampoo and a soft cloth.
! If you clean the sensor swith a power
washer, make sure that you keep a
distance of at least 11. 8in(30 cm) between
the vehicle and the power washer nozzle.
Information about the correct distance is
available from the equipment
manufacturer.
Cleaning the exhaus tpipes Impurities combined with the effects of road
grit and corrosive environmental factors may
cause flash rust to form on the surface. You
can restore the original shine of the exhaust
tail pipe by cleaning it regularly, especially in
winter and after washing.
! Do not clean the exhaust tail pipes with
alkaline-based cleaning agents, such as
wheel cleaner.
X Clean the exhaust tail pipes with a chrome
care produc ttested and approved by
Mercedes-Benz. Interior care
Cleaning the display X
Before cleaning the display, make sure that
it is switched off and has cooled down.
X Clean the display surface using a
commercially-available microfiber cloth
and TFT/LCD display cleaner.
X Dry the display surface using a dry
microfiber cloth.
! For cleaning, do not use any of the
following:
R alcohol-based thinner or gasoline
R abrasive cleaning agents
R commercially-available household
cleaning agents
These may damage the display surface. Do
not put pressure on the display surface
when cleaning. This could lead to
irreparable damage to the display.
Cleaning the plastic trim G
WARNING
When cleaning the steering wheel boss and
dashboard, do not use cockpit sprays or
cleaning agents containing solvents. Cleaning
agents containing solvents cause the surface
to become porous, and as aresult, plastic
parts may break away and be thrown around
the interior when an air bag is deployed, which
may result in severe injuries.
! Do not affix the following to plastic
surfaces:
R stickers
R films
R scented oil bottles or similar items
You can otherwise damage the plastic.
! Do not allow cosmetics, insect repellent
or sunscreen to come into contact with the
plastic trim .This maintains the high-quality
look of the surfaces. Care
269Maintenance and care Z
Page 272 of 334
X
Wipe the plastic trim with a damp, lint-free
cloth, e.g. a microfiber cloth.
X Heavy soiling: use car care and cleaning
products recommended and approved by
Mercedes-Benz.
The surface may change color temporarily.
Wait until the surface is dry again.
Cleaning the steering wheel and gear or
selector lever X
Thoroughly wipe with a damp cloth or use
leather care agents that have been
recommended and approved by Mercedes-
Benz.
Cleaning genuine wood and trim
elements X
Wipe the wooden trim and trim pieces with
a damp, lint-free cloth ,e.g. a microfiber
cloth.
X Heavy soiling: use car care and cleaning
products recommended and approved by
Mercedes-Benz.
! Do not use solvent-based cleaning agents
such as tar remover, whee lcleaners,
polishes or waxes. There is otherwise a risk
of damaging the surface.
! Do not use chrome polish on trim pieces.
The trim pieces have a chrome look but are
mostly made of anodized aluminum and
can lose their shine if chrome polish is
used. Use a damp, lint-free cloth instead
when cleaning the trim pieces.
If the chrome-plated trim pieces are very
dirty, you can use a chrome polish. If you
are unsure as to whether the trim pieces
are chrome-plated or not, consult an
authorized Mercedes-Ben zCenter.
Cleaning the seat covers !
Do not use microfiber cloths to clean
genuine leather, artificial leather or
Alcantara® covers. If used often, these can
damage the cover. !
Observe the following when cleaning:
R clean genuine leather cover scarefully
with a damp cloth and then wipe the
covers down with a dry cloth .Make sure
that the leather does no tbecome
soaked. It may otherwise become rough
and cracked. Only use leather care
agents that have been tested and
approved by Mercedes-Benz. You can
obtain these from a qualified specialist
workshop.
R clean artificial leather covers with a cloth
moistened with a solution containing 1%
detergen t(e.g. dish washing liquid).
R clean cloth covers with a microfiber cloth
moistened with a solution containing 1%
detergen t(e.g. dish washing liquid). Rub
carefully and always wipe entire seat
sections to avoid leaving visible lines.
Leave the seat to dry afterwards.
Cleaning results depend on the type of
dirt and how long it has been there.
R clean Alcantara® covers with a damp
cloth. Make sure that you wipe entire
seat sections to avoid leaving visible
lines.
i Note that regular care is essential to
ensure that the appearance and comfort of
the covers is retained over time.
Cleaning the seat belts X
Use clean, lukewarm water and soap
solution.
! Do not clean the seat belts using chemical
cleaning agents .Do not dry the seat belts
by heating at temperatures above 176 ‡
(80 †) or in direct sunlight. G
WARNING
Do not bleach or dye seat belts as this may
severely weaken them. In a crash, they may
not be able to provide adequate protection. 270
CareMaintenance and care
Page 273 of 334
Cleaning the headliner and carpets
X
Headliner: use a softbrush or a cleaning
agent recommended and approved by
Mercedes-Benz to remove heavy soiling.
X Carpets: use the carpet and textile
cleaning agents recommended and
approved by Mercedes-Benz. Care
271Maintenance and care Z
Page 281 of 334

X
Make sure that the base of the jack is
positioned directly under the jacking point.
X Turn crank 0020clockwise until jack 0022sits
completely on jacking point 0023and the
base of the jack lies evenly on the ground.
X Turn handle 0020until the tire is 1.2 in
(3 cm) from the ground at most.
Removing awheel X
Unscrew the uppermost wheel bolt
completely.
X Screw alignment bolt 0002into the thread
instead of the wheel bolt.
X Unscrew the remaining wheel bolts fully.
! Do not place wheel bolts in sand or on a
dirty surface. The bol tand wheel hub
threads could otherwise be damaged when
you screw them in.
X Remove the wheel.
Mounting anew wheel G
WARNING
Oiled or greased wheel bolts or damaged
wheel bolts/hub threads can cause the wheel
bolts to come loose .As a result, you could
lose a wheel while driving. There is a risk of
accident.
Never oil or grease wheel bolts. In the event
of damage to the threads, contact a qualified
specialist workshop immediately.H ave the
damaged wheel bolts or hub threads
replaced/renewed. Do no tcontinue driving. G
WARNING
If you tighten the wheel bolts or wheel nuts
when the vehicle is raised, the jack could tip
over. There is a risk of injury.
Only tighten the wheel bolts or wheel nuts
when the vehicle is on the ground.
Always pay attention to the instructions and
safety notices in "Changing a wheel"
(Y page 315).
Only use wheel bolts that have been designed
for the wheel and the vehicle. For safety
reasons, Mercedes-Benz recommends that
you only use wheel bolts which have been
approved for Mercedes-Benz vehicles and the
respective wheel.
Be sure to use the original-length wheel bolts
when refitting the original wheel after it has
been repaired.
X Clean the wheel and wheel hub contact
surfaces.
! To prevent damage to the paintwork, hold
the wheel securely against the wheel hub
while screwing in the first wheel bolt. X
Slide the emergency spare wheel onto the
alignment bolt and push it on.
X Tighten the wheel bolts until they are
finger-tight.
X Unscrew the alignment bolt.
X Tighten the last wheel bolt until it is finger-
tight.
X Inflate the collapsible spare wheel
(Y page 280). Flat tire
279Breakdown assistance Z
Page 316 of 334
Kilopascal (kPa)
Metric unit for tire pressure. 6.9 kPa
corresponds to 1 psi. Another unit for tire
pressure is bar. There are 10 0kilopascals
(kPa) to 1bar. Load index
In addition to the load-bearing index, the load
index may also be imprinted on the sidewall
of the tire. This specifie sthe load-bearing
capacity more precisely. Curb weight
The weight of a vehicle with standard
equipment including the maximum capacity
of fuel, oil and coolant. It also includes the air-
conditioning system and optional equipment
if these are installed in the vehicle, but does
not include passengers or luggage. Maximum load rating
The maximum load rating in kilograms or
pounds is the maximum weight for which a
tire is approved. Maximum permissible tire pressure
Maximum permissible tire pressure for one
tire. Maximum load on one tire
Maximum load on one tire. This is calculated
by dividing the maximum axle load of one axle
by two. PSI (pounds per square inch)
As tandard uni tofmeasure for tire pressure. Aspect ratio
Relationship between tire height and tire
width in percent. Tire pressure
This is pressure inside the tire applying an
outward force to each square inch of the tire's
surface. The tire pressure is specified in
pounds per square inch (psi), in kilopascal
(kPa) or in bar. The tire pressure should only
be corrected when the tires are cold. Tire pressure of cold tires
The tires are cold:
R if the vehicle has been parked without
direct sunlight on the tires for at least three
hours and
R if the vehicle has not been driven more than
1 mile (1.6 km). Tread
The part of the tire that comes into contact
with the road. Bead
The tire bead ensures that the tire sits
securely on the wheel. There are several steel
wires in the bead to prevent the tire from
coming loose from the wheel rim. Sidewall
The part of the tire between the tread and the
bead. Weight of optional extras
The combined weight of those optional extras
that weigh more than the replaced standard
part and more than 2.3 kg (5 lb). These 314
Definition of terms for tires and loadingWheels and tires
Page 318 of 334
!
On vehicles equipped with a tire pressure
monitor, electronic components are
located in the wheel.
Tire-mounting tools should not be used
near the valve. This could damage the
electronic components.
Only have tires changed at a qualified
specialist workshop. Direction of rotation
Tires with a specified direction of rotation
have additional benefits, e.g. if there is a risk
of hydroplaning. You will only gain these
benefits if the correct direction of rotation is
maintained.
An arrow on the sidewall of the tire indicates
its correct direction of rotation.
You may mount a spare wheel/emergency
spare wheel against the direction of rotation.
Observe the time restriction on use as well as
the speed limit specified on the spare wheel/
emergency spare wheel. Storing wheels
Store wheels that are not being used in a cool,
dry and preferably dark place. Protect the
tires from oil, grease, gasoline and diesel. Cleaning the wheels
G
WARNING
Do not use power washers with circular-jet
nozzles (dirt grinders) to clean your vehicle, in
particular the tires. You could otherwise
damage the tires and cause an accident. Wheel and tire combinations
Please bear the following in mind
! For safety reasons, Mercedes-Benz
recommends that you only use tires and
wheels which have been approved by Mercedes-Benz specifically for your
vehicle.
These tires have been specially adapted for
use with the control systems, such as ABS
or ESP ®
, and are marked as follows:
R MO =Mercedes-BenzO riginal
R MOE =Mercedes-BenzO riginal Extended
(tires featuring run-flat characteristics)
R MO1 =Mercedes-BenzO riginal (only
certain AMG tires)
Mercedes-Benz Original Extended tires
may only be used on wheels that have been
specifically approved by Mercedes-Benz.
Only use tires, wheels or accessories
tested and approved by Mercedes-Benz.
Certain characteristics, e.g. handling,
vehicle noise emissions or fuel
consumption, may otherwise be adversely
affected. In addition, when driving with a
load, tire dimension variations could cause
the tires to come into contact with the
bodywork and axle components. This could
resul tind amage to the tires or the vehicle.
Mercedes-Ben zaccepts no liability for
damage resulting from the use of tires,
wheels or accessories othe rthan those
tested and approved.
Information on tires, wheels and approved
combinations can be obtained from any
qualified specialist workshop.
i The recommended pressures for various
operating conditions can be found:
R on the Tire and Loading Information
placard with the recommended tire
pressures on the B-pillar on the driver's
side
R in the tire pressure table on the inside of
the fuel filler flap
Observe the notes on recommended tire
pressures under various operating
conditions (Y page 297).
Check tire pressures regularly, and only
when the tires are cold. Comply with the
maintenance recommendations of the tire 316
Wheel and tire combinationsWheels and tires
Page 326 of 334

In addition to being stamped on the vehicle
identification plate, the vehicle identification
number (VIN) is also stamped onto the vehicle
body.
It is located in the transmission tunnel on the
front-passenger side.
X
Slide the front-passenger seat to its
frontmost position.
X Fold trim 0002upwards.
You will see vehicle identification number
(VIN) 0003. Engine number
0002
Emission control information plate,
including the certification of both federal
and Californian emissions standards
0003 Engine number (stamped into the
crankcase)
0023 VIN (on the lowere dge of the windshield) Service products and filling
capacities
Important safety notes
G
WARNING
Comply with all valid regulations with respect
to handling, storing and disposing of service
fluids. Otherwise, you could endanger
persons or the environment.
Keep service fluids out of the reach of
children.
For health reasons, you should prevent
service fluids from coming into direct contact
with your skin or clothing.
If a service fluid is swallowed, contact a
physician immediately.
Service products include the following:
R fuels
R lubricants (e.g. engine oil, transmission oil)
R coolant
R brake fluid
R windshield washer fluid
R climate control system refrigerant
Vehicle components and their service
products must match. Therefore only use
products tested and approved by Mercedes-
Benz.
Information about tested and approved
products can be obtained from an authorized
Mercedes-Benz Center or on the Internet at
http://bevo.mercedes-benz.com.
You can recognize servic eproducts approved
by Mercedes-Benz by the following
inscription on the containers:
R MB-Freigabe (e.g. MB-Freigabe 229.51)
R MB Approval (e.g. MB Approval 229.51)
Other designations or recommendations
indicate a level of quality or a specificatio nin
accordance with an MB Sheet number (e.g.
MB 229.5). They have no tnecessarily been
approved by Mercedes-Benz. 324
Service products and filling capacitiesTechnical data
Page 327 of 334
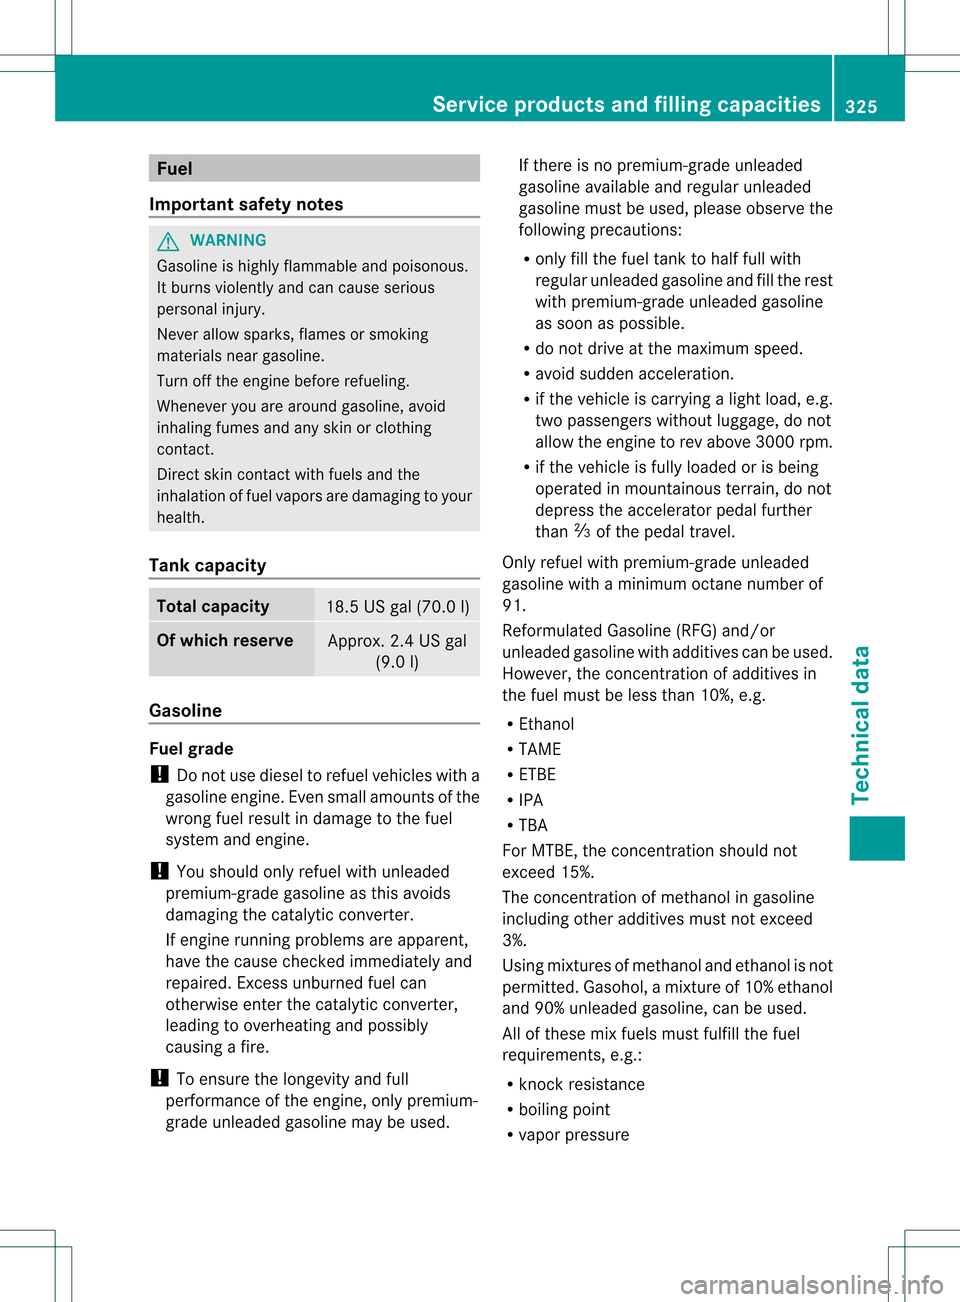
Fuel
Important safety notes G
WARNING
Gasoline is highly flammable and poisonous.
It burns violently and can cause serious
personal injury.
Never allow sparks, flames or smoking
materials near gasoline.
Turn off the engine before refueling.
Wheneve ryou are around gasoline, avoid
inhaling fumes and any skin or clothing
contact.
Direct skin contact with fuels and the
inhalation of fuel vapors are damaging to your
health.
Tank capacity Total capacity
18.5 US gal (70.0 l)
Of which reserve
Approx. 2.4 US gal
(9.0 l) Gasoline
Fuel grade
!
Do not use diesel to refuel vehicles with a
gasoline engine. Even small amounts of the
wrong fuel result in damage to the fuel
system and engine.
! You should only refuel with unleaded
premium-grade gasoline as this avoids
damaging the catalytic converter.
If engine running problems are apparent,
have the cause checked immediately and
repaired. Excess unburned fuel can
otherwise enter the catalytic converter,
leading to overheating and possibly
causing a fire.
! To ensure the longevity and full
performance of the engine, only premium-
grade unleaded gasoline may be used. If there is no premium-grade unleaded
gasoline available and regular unleaded
gasoline must be used, please observe the
following precautions:
R
only fill the fuel tank to half full with
regular unleaded gasoline and fill the rest
with premium-grade unleaded gasoline
as soon as possible.
R do not drive at the maximum speed.
R avoid sudden acceleration.
R if the vehicle is carrying a light load, e.g.
two passengers without luggage, do not
allow the engine to rev above 3000 rpm.
R if the vehicle is fully loaded or is being
operated in mountainous terrain, do not
depress the accelerator pedal further
than 0001of the pedal travel.
Only refuel with premium-grade unleaded
gasoline with a minimum octane number of
91.
Reformulated Gasoline (RFG) and/or
unleaded gasoline with additives can be used.
However, the concentration of additives in
the fuel must be less than 10%, e.g.
R Ethanol
R TAME
R ETBE
R IPA
R TBA
For MTBE, the concentration should not
exceed 15%.
The concentration of methanol in gasoline
including other additives must not exceed
3%.
Using mixtures of methanol and ethanol is not
permitted. Gasohol, a mixture of 10% ethanol
and 90% unleaded gasoline, can be used.
All of these mix fuels must fulfill the fuel
requirements, e.g.:
R knock resistance
R boiling point
R vapor pressure Service products and filling capacities
325Technical data Z