2012 MERCEDES-BENZ SLK250 buttons
[x] Cancel search: buttonsPage 125 of 334
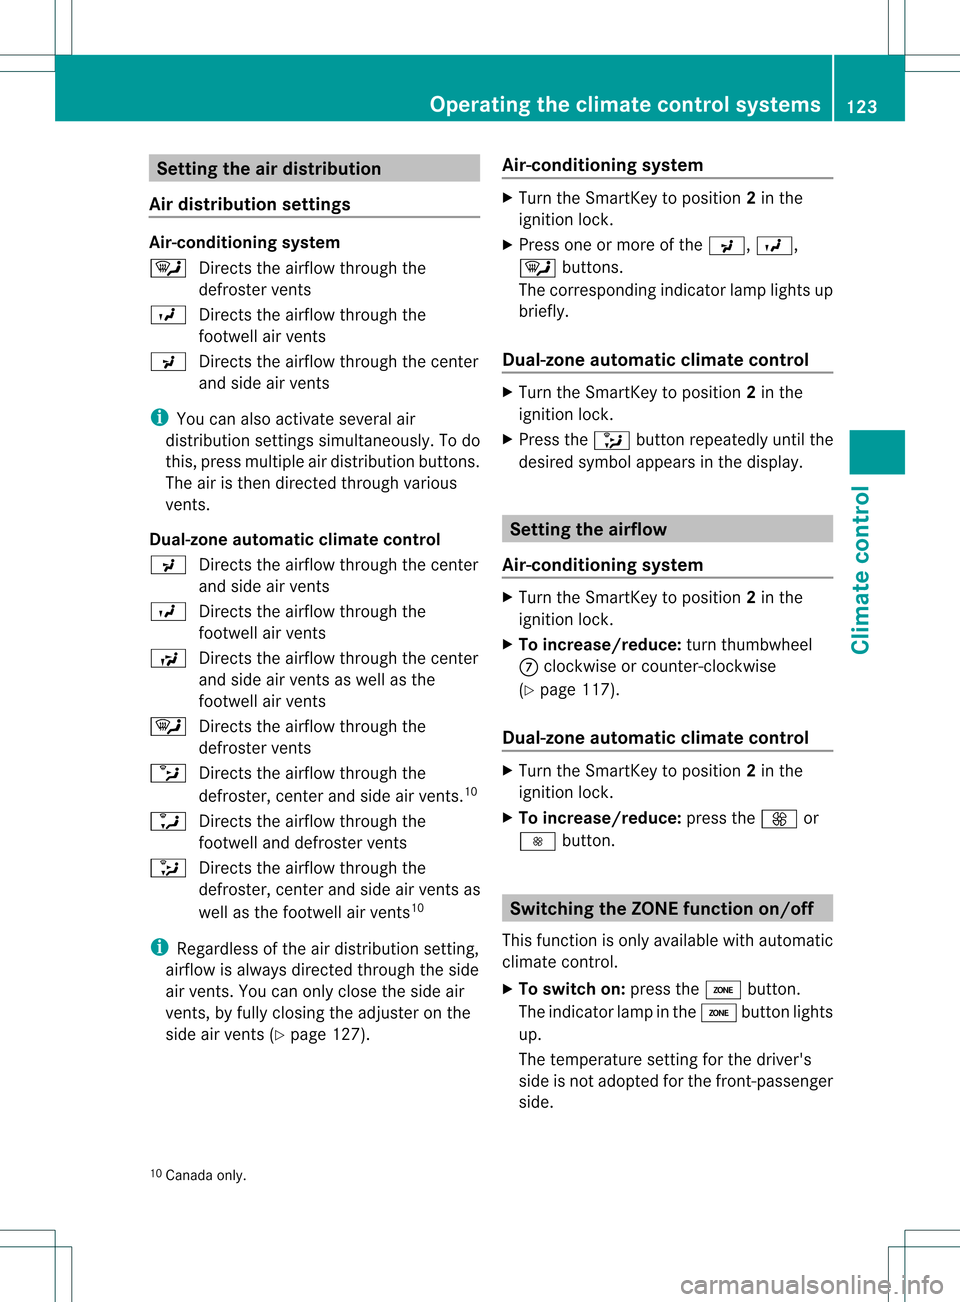
Setting the air distribution
Air distribution settings Air-conditioning system
0007
Directs the airflow through the
defroster vents
0018 Directs the airflow through the
footwell air vents
0019 Directs the airflow through the center
and side air vents
i You can also activate several air
distribution settings simultaneously .To do
this, press multiple air distribution buttons.
The air is then directed through various
vents.
Dual-zone automatic climate control
0019 Directs the airflow through the center
and side air vents
0018 Directs the airflow through the
footwell air vents
001A Directs the airflow through the center
and side air vents as well as the
footwell air vents
0007 Directs the airflow through the
defroster vents
0014 Directs the airflow through the
defroster, center and side air vents. 10
0013 Directs the airflow through the
footwell and defroster vents
0015 Directs the airflow through the
defroster, center and side air vents as
well as the footwell air vents 10
i Regardless of the air distribution setting,
airflow is always directed through the side
air vents. You can only close the side air
vents, by fully closing the adjuster on the
side air vents (Y page 127). Air-conditioning system X
Turn the SmartKey to position 2in the
ignition lock.
X Press one or more of the 0019,0018,
0007 buttons.
The corresponding indicator lamp lights up
briefly.
Dual-zone automatic climate control X
Turn the SmartKey to position 2in the
ignition lock.
X Press the 0015button repeatedly until the
desired symbol appears in the display. Setting the airflow
Air-conditioning system X
Turn the SmartKey to position 2in the
ignition lock.
X To increase/reduce: turn thumbwheel
0014 clockwise or counter-clockwise
(Y page 117).
Dual-zone automatic climate control X
Turn the SmartKey to position 2in the
ignition lock.
X To increase/reduce: press the0017or
0016 button. Switching the ZONE function on/off
This function is only available with automatic
climate control.
X To switch on: press the0003button.
The indicator lamp in the 0003button lights
up.
The temperature setting for the driver's
side is not adopted for the front-passenger
side.
10 Canada only. Operating the climate control systems
123Climate control Z
Page 126 of 334
When the buttons or controls for
temperature, airflow or air distribution are
activated, the temperature setting for the
driver's side is not adopted for the other
climate control zones.
X
To switch off: press the0003button.
The indicato rlamp in the 0003buttongoes
out.
The temperature setting for the driver's
side is adopted for the front-passenger
side. Defrosting the windshield
You can use this function to defrost the
windshield or to defrost the inside of the
windshield and the side windows.
i You should only select the defrosting
function until the windshield is clear again.
X Turn the SmartKey to position 2in the
ignition lock.
X To activate: press the0008button.
The indicator lamp in the 0008button lights
up.
The climate control system switches to the
following functions:
R cooling with air dehumidification on
R high airflow 11
R high temperature 11
R air distribution to the windshield and
front side windows
R air-recirculation mode off
X To switch off: press the0008button.
The indicator lamp in the 0008button goes
out. The previously selected settings come
into effect again. The cooling with air dehumidification function remains on. Air-
recirculation mode remains deactivated.
or
X Press the 0005button 12
.
The indicator lamp in the 0008button goes
out. Airflow and air distribution are set to
automatic mode. MAX COOL maximum cooling
The MAX COOL function is only available in
vehicles for the USA.
MAX COOL is only operational when the
engine is running.
When you activate MAX COOL, climate
control switches to the following functions:
R maximum cooling
R maximum airflow
R air-recirculation mode on
X To activate: press the0001button.
The indicator lamp in the button lights up.
X To deactivate: press the0001button
again.
The indicator lamp goes out. The previously
selected settings come into effect again. Rear window defroster
Activating/deactivating G
WARNING
Any accumulation of snow and ice should be
removed from the rear window before driving.
Visibility could otherwise be impaired,
endangering you and others.
The rear window defroster has a high current
draw. You should therefore switch it off as
soon as the window is clear. Otherwise, the
rear window defroster switches off
automatically after several minutes.
11 Depending on the outside temperature.
12 Automatic climate control. 124
Operating the climate control systemsClimate control
Page 148 of 334

Problems with the transmission
Problem Possible causes/consequences and
0001 Solutions
The transmission has
problems shifting gear. The transmission is losing oil.
X
Have the transmission checked at a qualified specialist
workshop immediately. The acceleration ability
is deteriorating.
The transmission no
longer changes gear. The transmission is in emergency mode.
It is only possible to shift into
secondgear and reverse gear.
X Stop the vehicle.
X Shift the transmission to position P.
X Switch off the engine.
X Wait at least 10seconds before restarting the engine.
X Shift the transmission to position Dor R.
If D is selected, the transmission shifts into secondgear; ifRis
selected, the transmission shifts into reverse gear.
X Have the transmission checked at a qualified specialist
workshop immediately. Releasing the parking lock manually
In the event of an electrical malfunction, it is
possible to release the selector lever lock
manually to move it out of position P, e.g. if
you wish to tow the vehicle away. !
Do not use any sharp-edged objects to
remove the selector lever gaiter from the
center console. This could damage the
selector lever gaiter. X
Apply the electric parking brake.
X Press the frame of selector level gaiter 0002
together somewhat on the side edge at the
back and hold with one hand 0003.
X With the other hand, pry off the frame of
selector level gaiter 0002with a flat, blunt
object (e.g. a screwdriver wrapped in cloth)
at rear edge 0023, pulling it up and out at the
same time.
X Press release buttons 0022down and
simultaneously move the selector lever out
of position P.
The selector lever can now be moved freely
until it is returned to position P. Refueling
Important safety notes
G
WARNING
Gasoline is highly flammable and poisonous.
It burns violently and can cause serious
personal injury. 146
RefuelingDriving and parking
Page 183 of 334

Coolant temperature display
G
WARNING
Driving when your engine is overheated can
cause some fluids which may have leaked into
the engine compartment to catch fire. You
could be seriously burned.
Steam from an overheated engine can cause
serious burns which can occur jus tby opening
the engine hood. Stay away from the engine
if you see or hear steam coming from it.
Stop the vehicle in a safe location away from
other traffic. Turn off the engine, get out of the
vehicle and do no tstand nea rthe vehicle until
the engine has cooled down.
The coolant temperature gauge is in the
instrumentc luster on the right-hand side.
Under normal operating conditions and with
the specified coolan tlevel, the coolant
temperature may rise to 248 ‡ (120 †).
! Adisplay message is shown if the coolant
temperature is too high.
If the coolant temperature is over
248 ‡(120 †), do not continue driving. The
engine will otherwise be damaged. Tachometer
The red band in the tachometer indicates the
engine's overrevving range.
! Do not drive in the overrevving range, as
this could damage the engine.
The fuel supply is interrupted to protect the
engine when the red band is reached. Outside temperature display
The outside temperature display is in the
multifunction display (Y page 183).G
WARNING
The outside temperature indicator is not
designed to serve as an ice-warning device
and is therefore unsuitable for that purpose. Indicated temperatures just above the
freezing point do not guarantee that the road
surface is free of ice. The road may still be icy,
especially in wooded areas or on bridges.
Changes in the outside temperature are
displayed after a shor tdelay. Speedometer with segments
The segments in the speedometer indicate
which speed range is available.
Cruise control (Y page 156) activated:
The segments light up from the stored speed
to the maximum speed.
DISTRONIC PLUS (Y page 158) activated:
One or two segments in the set speed range
light up.
DISTRONIC PLUS detects a vehicle in front:
The segments between the speed of the
vehicle in fron tand the stored speed light up. Operating the on-board computer
Overview The on-board compute
ris activated as soon
as you turn the SmartKey to position 1in the
ignition lock.
You can control the multifunction display and
the settings in the on-board computer using
the buttons on the multifunction steering
wheel. Displays and operation
181On-board computer and displays Z
Page 196 of 334
X
Press the 0002or0005 button on the
steering wheel to select the Settingsmenu.
X Press the 0004or0003 button to select the
Vehicle submenu.
X Press the 000Cbutton to confirm.
X Press the 0004or0003 button to select the
Automatic door locks function.
You will see the selected setting: on or
off .
X Press the 000Cbutton to save the setting.
Activating/deactivating the acoustic
locking verification signal
If you switch on the Acoustic Lockfeedback function, an acoustic signal sounds
when you lock the vehicle.
X Press the 0002or0005 button on the
steering wheel to select the Settingsmenu.
X Press the 0004or0003 button to select the
Vehicle submenu.
X Press the 000Cbutton to confirm.
X Press the 0004or0003 button to select the
Acoustic Lock feedback: function.
You will see the selected setting:
Activated or
Deactivated .
X Press the 000Cbutton to save the setting.
Activating/deactivating the radar sensor
system
The following systems are switched off when
the radar sensor system is deactivated:
R DISTRONIC PLUS (Y page 158)
R BAS PLUS (Y page 57)
R PRE-SAFE ®
Brake (Y page 62)
X Press the 0002or0005 button on the
steering wheel to select the Sett. menu.
X Press the 0004or0003 button to select the
Vehicle submenu.
X Press 000Cto confirm. X
Press the 0003or0004 button to select
Radar Sensor (See Oper. Manual): .
You will see the selected setting: Enabled or
Disabled .
X Press the 000Cbutton to save the setting.
Convenience Activating/deactivating the EASY-
ENTRY/EXIT feature
You can use the
Easy Entry/Exit: function
to activate or deactivate the EASY ENTRY/
EXIT feature (Y page 97). G
WARNING
You must make sure no one can become
trapped or injured by the moving steering
wheel when the easy-entry/exit feature is
activated.
To stop steering wheel movement, move
steering wheel adjustmen tlever or press one
of the memory position buttons.
Do not leave children unattended in the
vehicle, or with access to an unlocked vehicle.
Children could open the driver's door and
unintentionally activate the easy-entry/exit
feature, which could result in an accident
and/or serious personal injury.
X Press the 0002or0005 button on the
steering wheel to select the Settings menu.
X Press the 0004or0003 button to select the
Convenience submenu.
X Press the 000Cbutton to confirm.
X Press the 0004or0003 button to select the
Easy Entry/Exit: function.
You will see the selected setting: on or
off .
X Press the 000Cbutton to save the setting.
Switching the belt adjustment on/off
For further information on belt adjustment,
see (Y page 51). 194
Menus and submenusOn-board computer and displays
Page 198 of 334
When the engine temperature is below
80 †, the oil temperature gauge flashes.
Avoid driving at full engine output during this
time.
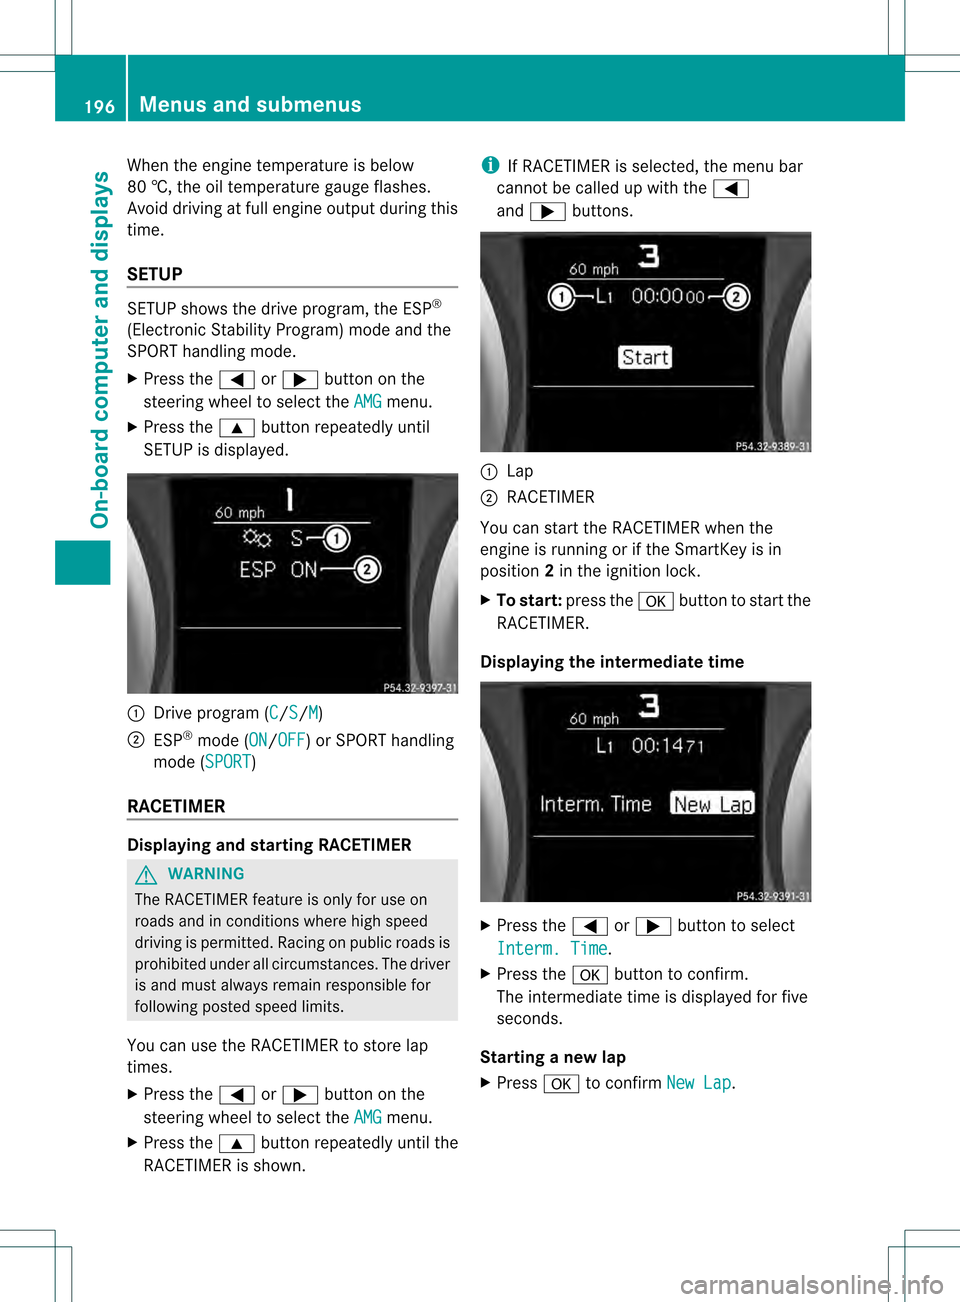
SETUP SETUP shows the drive program, the ESP
®
(Electronic Stability Program) mode and the
SPORT handling mode.
X Press the 0002or0005 button on the
steering wheel to select the AMG menu.
X Press the 0003button repeatedly until
SETUP is displayed. 0002
Drive program (C /S /M )
0003 ESP ®
mode (ON /OFF ) or SPORT handling
mode (SPORT )
RACETIMER Displaying and starting RACETIMER
G
WARNING
The RACETIMER feature is only for use on
roads and in conditions where high speed
driving is permitted. Racing on public roads is
prohibited under all circumstances. The driver
is and must always remain responsible for
following posted speed limits.
You can use the RACETIMER to store lap
times.
X Press the 0002or0005 button on the
steering wheel to select the AMG menu.
X Press the 0003button repeatedly until the
RACETIMER is shown. i
If RACETIMER is selected, the menu bar
cannot be called up with the 0002
and 0005 buttons. 0002
Lap
0003 RACETIMER
You can start the RACETIMER when the
engine is running or if the SmartKey is in
position 2in the ignition lock.
X To start: press the 000Cbutton to start the
RACETIMER.
Displaying the intermediate time X
Press the 0002or0005 button to select
Interm. Time .
X Press the 000Cbutton to confirm.
The intermediate time is displayed for five
seconds.
Starting a new lap
X Press 000Cto confirm New Lap .196
Menus and submenusOn-board computer and displays
Page 255 of 334
Destinatio
nDownload gives you access to a
database with over 15 million points of
interest (POIs)/important destinations that
can be downloaded onto the navigation
system of your vehicle. If you know the
destination, you can download the address or
obtain the location of points of interest
(POIs)/important destinations in the
surrounding area.
You are prompted to confirm route guidance
to the address entered.
X Select Yes with the
0002or0005 buttons
on COMAND.
X Press the 0003button on COMAND to
confirm.
The system calculates the route and
subsequently starts the route guidance with
the address entered.
i If you select No , the address can be stored
in the address book.
i The Destination Download function is
available if the corresponding mobile
phone network is available and data
transfer is possible.
Route Assistance
This service is part of the mbrace PLUS
Package and cannot be purchased
separately.
i You can also use the Route Assistance
function if your vehicle is not equipped with
a navigation system.
Within the framework of this service, you
receive a professional and reliable form of
navigation support without having to leave
your vehicle.
The customer service representative
determines a suitable driving route based on
your current vehicle position and the desired
destination and guides you live through the
current sections of the route. Search
&Send "Search & Send" is a destination entry
service. You can find further information on
"Search
&Send" in the separate COMAND
operating instructions.
Vehicle remote opening If you have unintentionally locked your
vehicle (e.g. the SmartKey is still in the
vehicle) and a replacemen
tSmartKey is not
available, the vehicle can be opened by a
Mercedes-Benz Customer Assistance Center.
The vehicle can be opened remotely up to four
days after the ignitio nwas last switched off.
X Contac tthe following service hotlines:
R USA: Mercedes-Ben zCustomer
Assistance Cente rat
1-800-FOR-MERCedes
(1-800-367-6372) or 1-888-990-9007
R Canada: Customer Service at
1-888-923-8367
You will be asked for you rpassword.
X Return to your vehicle at the time agreed
upon with the Mercedes-Ben zCustomer
Assistance Center.
X Pull on the trunk lid handle for at least
20 seconds until the indicator lamp in the
SOS button (Y page 249) flashes.
The Connecting Call message appears
on the multifunction display.
Alternatively, the vehicle can also be opened
via the Internet or an iPhone in the "Owners
Online" section using your ID number and
password 18
.
i Vehicle remote unlocking is only possible
if the corresponding mobile phone network
is accessible.
The SO Sbutton flashes and the
Connecting Call message appears in the
multifunction display to confirm that the
command for vehicle remote unlocking has
been received.
18 USA only. Features
253Stowage and featu res Z
Page 257 of 334
before April 1, 1982). A garage door that
cannot detect an object - signaling the door
to stop and revers e-does not meet current
U.S .federal safety standards.
When programming a garage door opener,
park vehicle outside the garage.
Do not run the engine while programming the
integrated remote control. Inhalation of
exhaust gas is hazardous to your health. All
exhaust gas contains carbon monoxide (CO),
and inhaling it can cause unconsciousness
and possible death. All exhaust gas contains
carbon monoxide (CO), and inhaling it can
cause unconsciousness and possible death.
i USA only:
This device complies with Part 15 of the
FCC Rules. Operation is subject to the
following two conditions:
1. This device may not cause harmful
interference, and
2. this device must accept any interference
received, including interference that may
cause undesired operation.
Any unauthorized modification to this
device could void the user's authority to
operate the equipment.
FCC ID: CB2HMIHL4
i Canada only:
This device complies with RSS-210 of
Industry Canada. Operation is subject to
the following two conditions:
1. This device may not cause interference,
and
2. this device must accept any interference
received, including interference that may
cause undesired operation of the device.
Any unauthorized modification to this
device could void the user's authority to
operate the equipment.
IC: 279B-HMIHL4 Programming the integrated garage
door opener on the rear-view mirror Programming
G
WARNING
Only press the button on the integrated
garage door opener if there are no persons or
objects present within the sweep of the
garage door. Persons could otherwise be
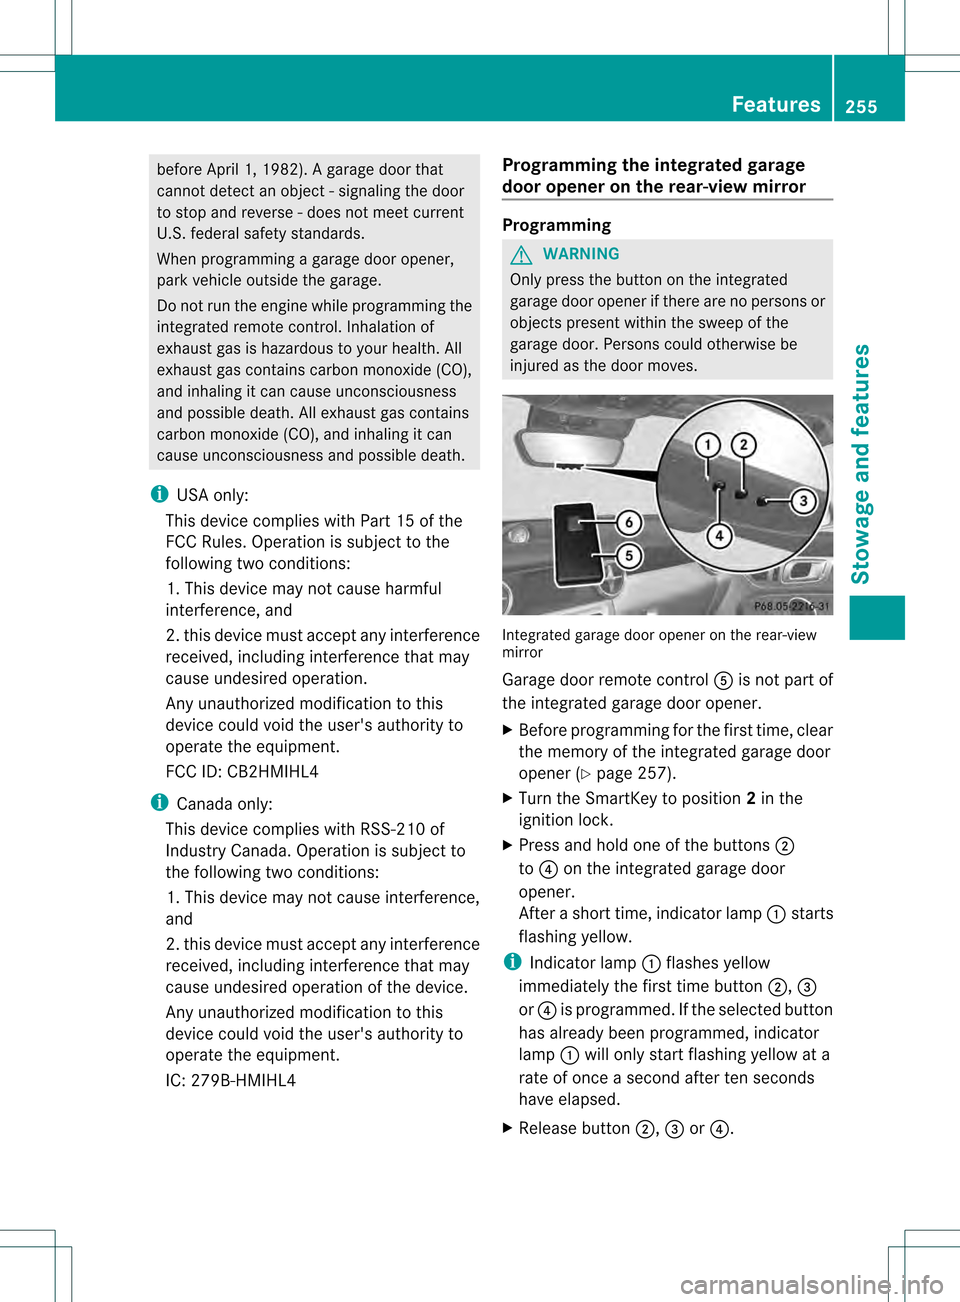
injured as the door moves. Integrated garage door opener on the rear-view
mirror
Garage door remote control
0020is not part of
the integrated garage door opener.
X Before programming for the first time, clear
the memory of the integrated garage door
opener (Y page 257).
X Turn the SmartKey to position 2in the
ignition lock.
X Press and hold one of the buttons 0003
to 0022 on the integrated garage door
opener.
After a short time, indicator lamp 0002starts
flashing yellow.
i Indicator lamp 0002flashes yellow
immediately the first time button 0003,0023
or 0022 is programmed. If the selected button
has already been programmed, indicator
lamp 0002will only start flashing yellow at a
rate of once a second after ten seconds
have elapsed.
X Release button 0003,0023or0022. Features
255Stowage and features Z