2012 MERCEDES-BENZ SLK ROADSTER trailer
[x] Cancel search: trailerPage 171 of 321

Fron
tsensors Centre approximately 10
0cm Corners approximately 60 cm
Rea
rsensors Centre approximately 12
0cm Corners approximately 80 cm
!
When parking, pay particula rattention to
objects above or below the sensors, such
as flower pots or trailer drawbars. PARK-
TRONIC does not detect such objects when
they are in the immediate vicinity of the
vehicle. You could damage the vehicle or
the objects.
The sensors may not detect snow and
objects which absorb ultrasonic sources.
Ultrasonic sources, such as an automatic
car wash, a lorry's compressed-air brakes
or a pneumati cdrill, coul dcause PARK-
TRONIC to malfunction.
PARKTRONIC may no tfunction correctly on
uneven terrain.
Minimum distance Centre approximately 20 cm
Corners approximately 15 cm
If there is an obstacle within this range, the
relevan
twarning displays light up and a warn-
ing tone sounds. If th edistance falls below
the minimum, the distanc emay no longer be
shown.
Warning displays The warning displays show the distance
between the sensors and th eobstacle. The
warning display for the fron tarea is located
on the dashboard above the centre air vents.
The warning display for the rear area is loca-
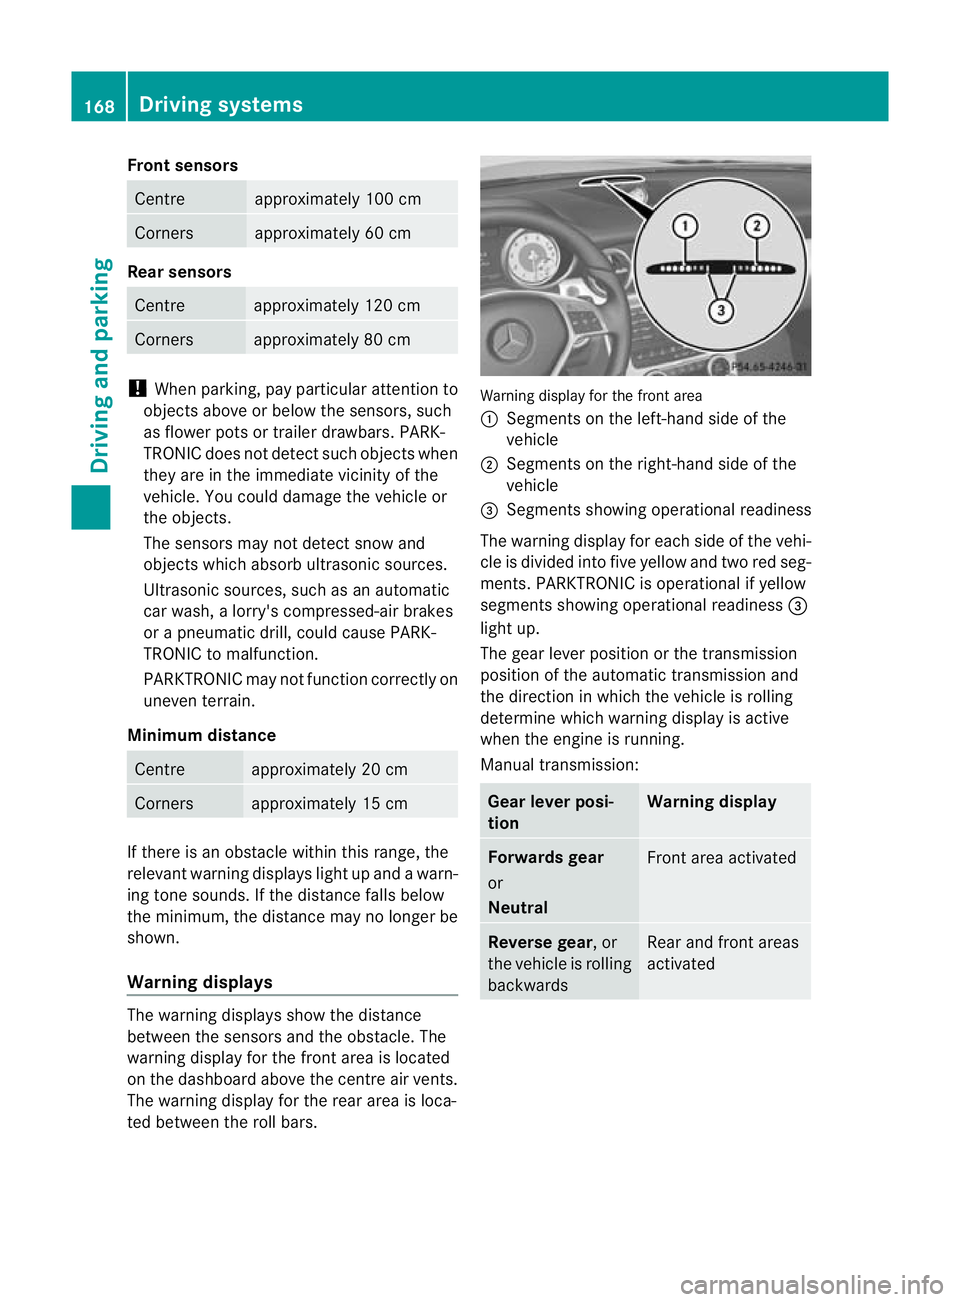
ted between the roll bars. Warning display for the front area
:
Segments on the left-hand side of the
vehicle
; Segments on the right-hand side of the
vehicle
= Segments showing operational readiness
The warning display for each side of the vehi-
cle is divided into five yellow and two red seg-
ments. PARKTRONIC is operational if yellow
segments showing operational readiness =
light up.
The gearl ever position or the transmission
position of the automatic transmission and
the direction in which the vehicle is rolling
determine which warning display is active
when the engine is running.
Manual transmission: Gear lever posi-
tion Warning display
Forwards gear
or
Neutral
Front area activated
Reverse gear
, or
the vehicle is rolling
backwards Rear and front areas
activated168
Driving systemsDriving and parking
Page 174 of 321

might therefore issue steering instructions
too soon. This may lead to a collision. For this
reason, you should avoid using Parking Guid-
ance in such situations. G
WARNING
Make sure that no persons or animals are in
the manoeuvring range. Otherwise, they
could be injured.
When PARKTRONIC is deactivated, Parking
Guidance is also unavailable.
Use Parking Guidance for parking spaces:
R that are parallel to the directio noftravel
R that are on straight roads, not bends
R that are on the same level as the road, i.e.
not on the pavement, for example. Parking
Guidance may not detect flat kerbs
Parking tips:
R on narrow roads, drive as closely as possi-
ble pastt he parking space.
R parking spaces that are littered, overgrown
or partially occupied by trailer drawbars
might be identified incorrectly or not at all.
R snowfall or heavy rain may lead to a parking
space being measured inaccurately.
R pay attention to the PARKTRONIC
(Y page 168) warning messages during the
parking procedure.
R when transporting a load which protrudes
from your vehicle, you must not use Parking
Guidance.
R never use Parking Guidance with snow
chains or an emergency spare wheel fitted.
R make sure that the tyre pressures are
always correct.T his hasadirec teffect on
the steering instructions.
R the way you rvehicle is positioned in the
parking space after parkin gis dependent
on various factors. These include the posi-
tion and shape of the vehicles parked in
front and behind it and the conditions of the
location. In some cases, Parking Guidance
may guide you too far or not far enough into
a parking space. In some cases, it may also lead you across or onto the kerb. If neces-
sary, cancel the parking procedure with
Parking Guidance.
! If unavoidable, you should drive over
obstacles such as kerbs slowly and not at
a sharp angle. Otherwise, you may damage
the wheels or tyres.
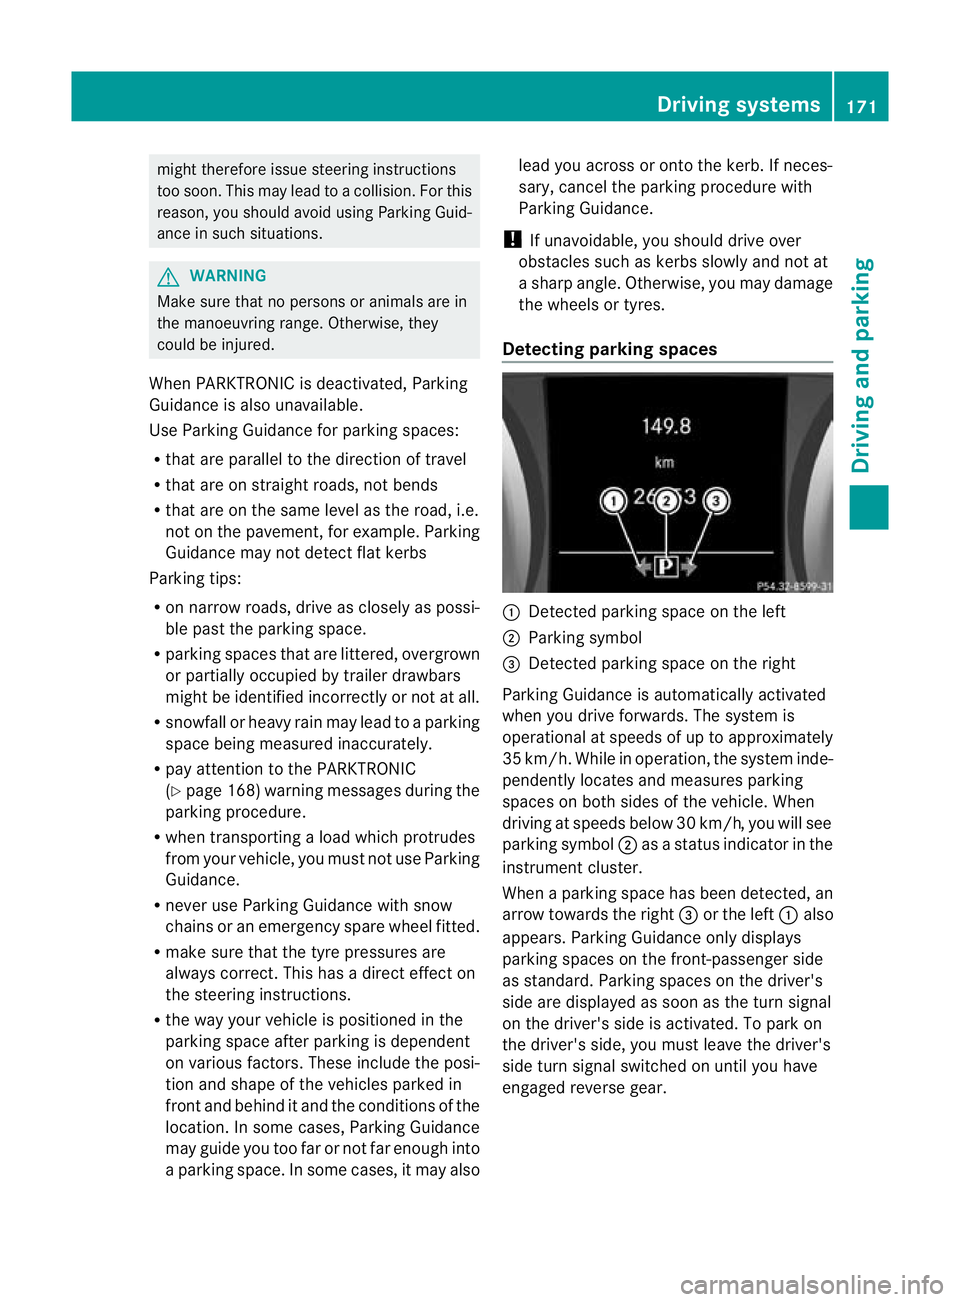
Detecting parking spaces :
Detected parking space on the left
; Parking symbol
= Detected parking space on the right
Parking Guidance is automatically activated
when you drive forwards. The system is
operational at speeds of up to approximately
35 km/h. While in operation, the system inde-
pendently locates and measures parking
spaces on both sides of the vehicle. When
driving at speeds below 30 km/h, you will see
parking symbol ;as a status indicator in the
instrument cluster.
When a parking space has been detected, an
arrow towards the right =or the left :also
appears. Parking Guidance only displays
parking spaces on the front-passenger side
as standard. Parking spaces on the driver's
side are displayed as soon as the turn signal
on the driver's side is activated. To park on
the driver's side, you must leave the driver's
side turn signal switched on until you have
engaged reverse gear. Driving systems
171Driving and parking Z
Page 284 of 321

Transporting the vehicle
The towing eye can be used to pull the vehicle
onto a trailer or transporter for transporting
purposes.
X Vehicles with manual transmission:
shift to neutral.
X Vehicles with automatic transmission:
tur nthe key to position 2in the ignition
lock.
X Move the selector lever to N.
As soon as the vehicle is loaded:
X Prevent the vehicle from rolling away by
applying the parking brake.
X Vehicles with manual transmission:
shift to first gear or reverse gear.
X Vehicles with automatic transmission:
move the selector lever to P.
X Turn the key in the ignition lock to position
0 and remove the key from the ignition
lock.
X Secure the vehicle.
! Only lash the vehicle down by the wheels
or wheel rims, not by parts of the vehicle
such as axle or steering components. Oth-
erwise, the vehicle could be damaged. Tow-starting (emergency engine
starting)
When tow-starting, it is important that you
observe the safety instructions (Y page 278)
and the legal requirements in each respective
country.
! Vehicles with automatic transmission
must not be tow-started. The transmission
may otherwise be damaged.
You can find information on "Jump-starting"
at (Y page 277). Before tow-starting the following conditions
must be fulfilled:
R
the battery is connected.
R the engine has cooled down.
R the catalytic converters have cooled down.
X Switch on the hazard warning lamps
(Y page 103).
X Fit the towing eye (Y page 279).
X Secure the rigid towing bar or the towing
rope.
X Depress and hold the brake pedal.
X Turn the key to position 2in the ignition
lock.
X Depress the clutch pedal and keep it
depressed.
X Engage neutral.
X Release the brake pedal.
X Tow-start the vehicle.
X Engage second gear.
X Release the clutch pedal slowly;d o not
depress the accelerator pedal while doing
so.
The engine is started.
X Depress the clutch pedal and shift to neu-
tral.
X Stop at a suitable place.
X Depress the parking brake.
X Remove the rigid towing bar or towing rope.
X Remove the towing eye (Y page 280).
X Switch off the hazard warning lamps. Electrical fuses
Important safety notes
G
WARNING
Only use fuses that have been approved for
Mercedes-Benz vehicles and which have the
correct fuse rating for the systems con-
cerned. Do not attempt to repair or bridge
faulty fuses. Using fuses which have not been
approved or attempting to repair or bridge
faulty fuses could cause the fuse to be over- Electrical fuses
281Breakdown assistance
Z
Page 293 of 321

Follow recommended tyre inflation pressures
and check the pressure of all the tyres includ-
ing the spare wheel:
R at least every two weeks
R if the load changes
R before beginning a long journey
R for changed operating conditions, e.g. off-
road driving
If necessary, correct the tyre pressure.
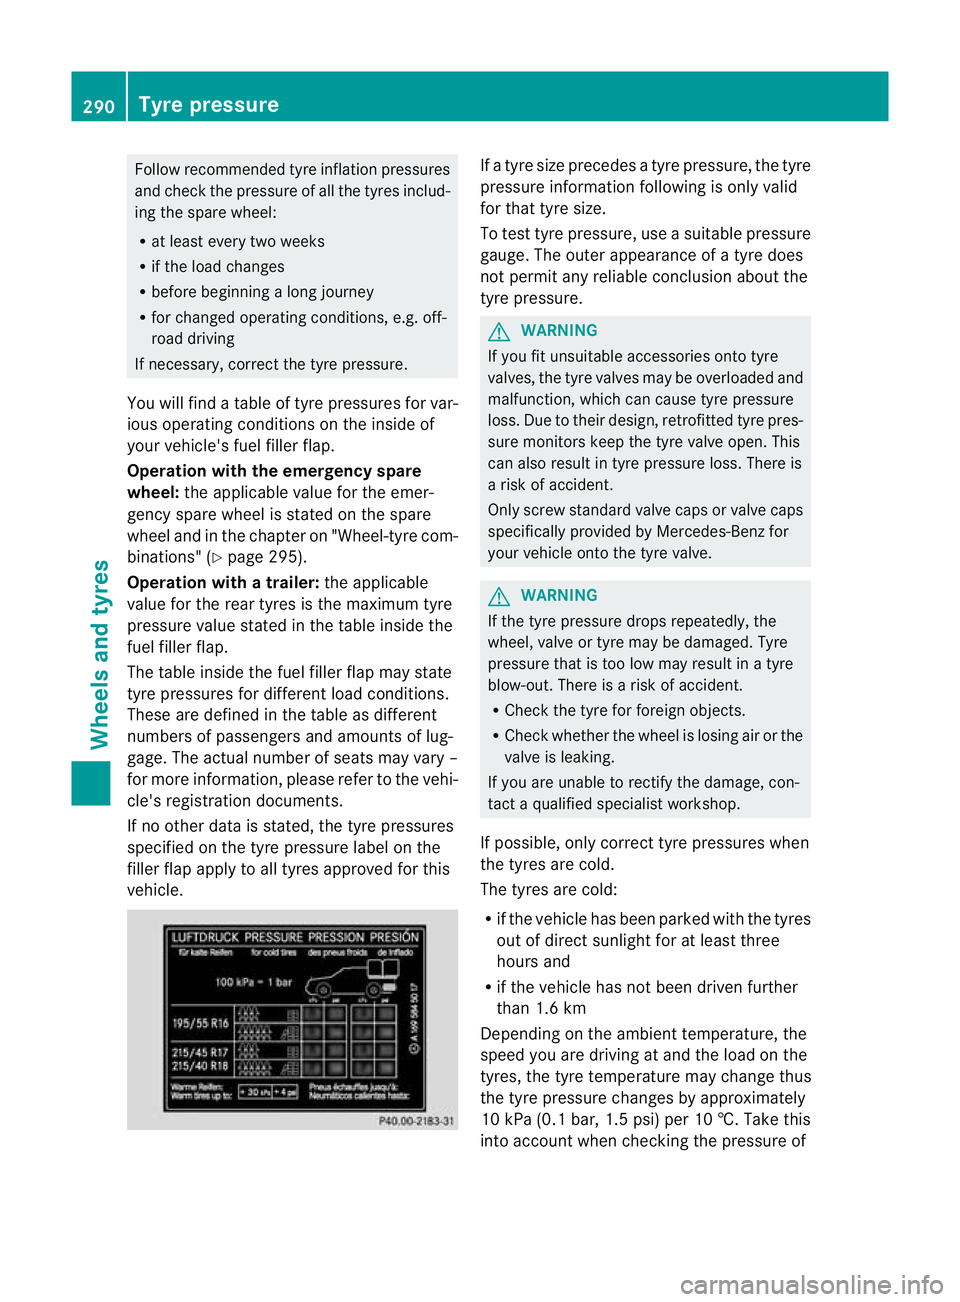
You will find a table of tyre pressures for var-
ious operating conditions on the inside of
your vehicle's fuel filler flap.
Operation with the emergency spare
wheel: the applicable value for the emer-
gency spare wheel is stated on the spare
wheel and in the chapter on "Wheel-tyre com-
binations" (Y page 295).
Operation with a trailer: the applicable
value for the rear tyres is the maximum tyre
pressure value stated in the table inside the
fuel filler flap.
The table inside the fuel filler flap may state
tyre pressures for different load conditions.
These are defined in the table as different
numbers of passengers and amounts of lug-
gage. The actual number of seats may vary –
for more information, please refe rto the vehi-
cle's registration documents.
If no other data is stated, the tyre pressures
specified on the tyre pressure label on the
filler flap apply to all tyres approved for this
vehicle. If a tyre size precedes a tyre pressure, the tyre
pressure information following is only valid
for that tyre size.
To test tyre pressure, use a suitable pressure
gauge. The outer appearance of a tyre does
not permit any reliable conclusion about the
tyre pressure. G
WARNING
If you fit unsuitable accessories onto tyre
valves, the tyre valves may be overloaded and
malfunction, which can cause tyre pressure
loss. Due to their design, retrofitted tyre pres-
sure monitors keep the tyre valve open. This
can also result in tyre pressure loss. There is
a risk of accident.
Only screw standard valve caps or valve caps
specifically provided by Mercedes-Benz for
your vehicle onto the tyre valve. G
WARNING
If the tyre pressure drops repeatedly, the
wheel, valve or tyre may be damaged. Tyre
pressure that is too low may result in a tyre
blow-out. There is a risk of accident.
R Check the tyre for foreign objects.
R Check whether the wheel is losing air or the
valve is leaking.
If you are unable to rectify the damage, con-
tact a qualified specialist workshop.
If possible, only correc ttyre pressures when
the tyres are cold.
The tyres are cold:
R if the vehicle has been parked with the tyres
out of direc tsunlight for at least three
hours and
R if the vehicle has no tbeen driven further
than 1.6 km
Depending on the ambient temperature, the
speed you are driving at and the load on the
tyres, the tyre temperature may change thus
the tyre pressure changes by approximately
10 kPa (0.1 bar, 1.5 psi) per 10 †. Take this
into accoun twhen checking the pressure of 290
Tyre pressureWheels and tyres