2012 MERCEDES-BENZ SLK ROADSTER light
[x] Cancel search: lightPage 121 of 321
ant does no
tcontain chlorofluorocarbons,
and therefore does not damage the ozone
layer.
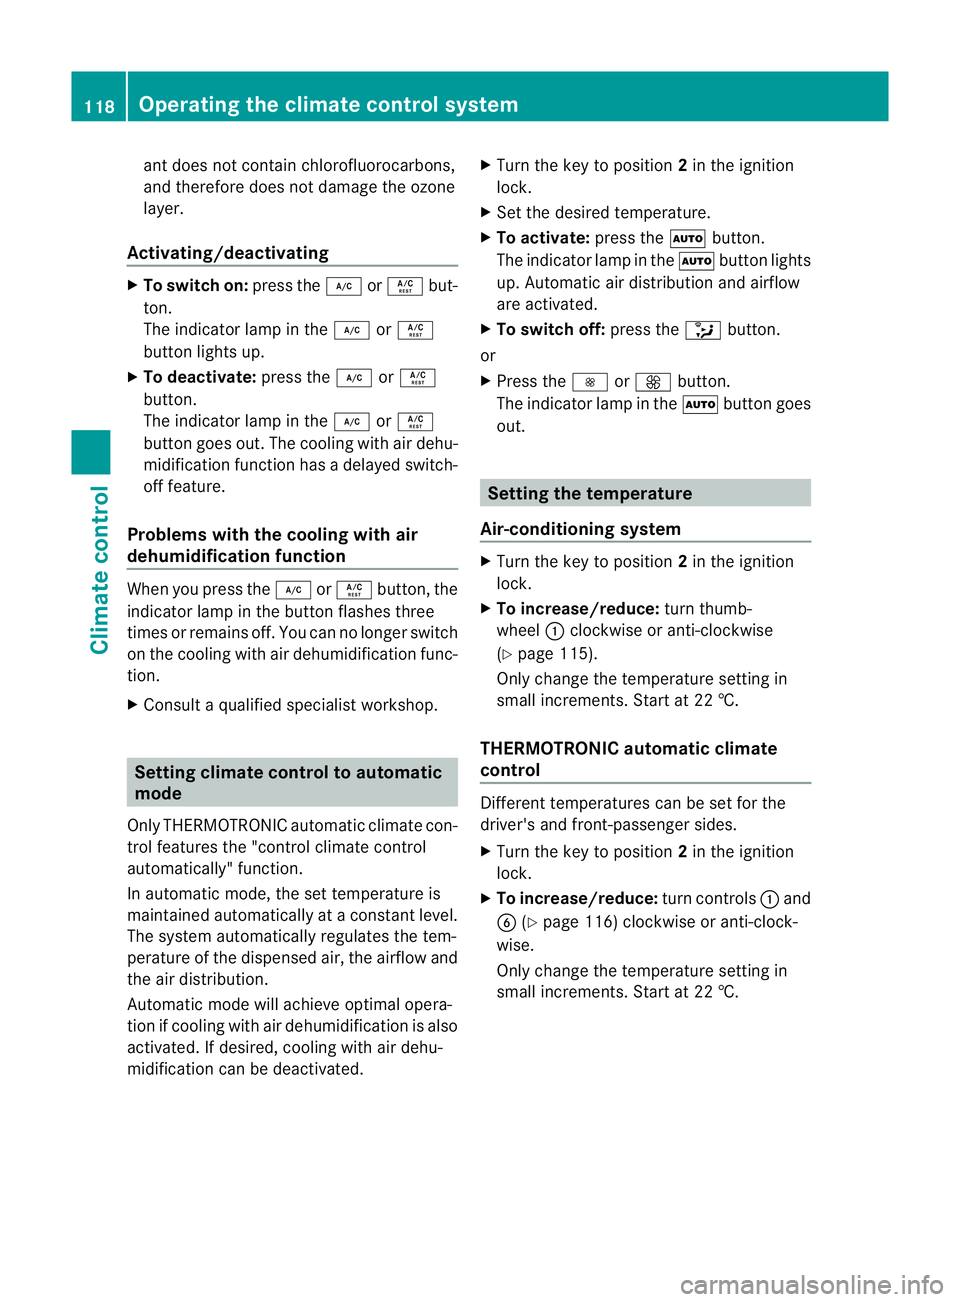
Activating/deactivating X
To switch on: press the¿orÁ but-
ton.
The indicator lamp in the ¿orÁ
button lights up.
X To deactivate: press the¿orÁ
button.
The indicator lamp in the ¿orÁ
button goes out. The cooling with air dehu-
midification function has a delayed switch-
off feature.
Problems with the cooling with air
dehumidification function When you press the
¿orÁ button, the
indicator lamp in the button flashes three
times or remains off. You can no longer switch
on the cooling with air dehumidification func-
tion.
X Consult a qualified specialist workshop. Setting climate control to automatic
mode
Only THERMOTRONIC automatic climate con-
trol features the "control climate control
automatically" function.
In automatic mode, the set temperature is
maintained automatically at a constant level.
The system automatically regulates the tem-
perature of the dispensed air, the airflow and
the air distribution.
Automatic mode will achieve optimal opera-
tion if cooling with air dehumidification is also
activated. If desired, cooling with air dehu-
midification can be deactivated. X
Turn the key to position 2in the ignition
lock.
X Set the desired temperature.
X To activate: press theÃbutton.
The indicator lamp in the Ãbutton lights
up. Automatic air distribution and airflow
are activated.
X To switch off: press the_button.
or
X Press the IorK button.
The indicator lamp in the Ãbutton goes
out. Setting the temperature
Air-conditioning system X
Turn the key to position 2in the ignition
lock.
X To increase/reduce: turn thumb-
wheel :clockwise or anti-clockwise
(Y page 115).
Only change the temperature setting in
small increments. Start at 22 †.
THERMOTRONIC automatic climate
control Different temperatures can be set for the
driver's and front-passenger sides.
X Turn the key to position 2in the ignition
lock.
X To increase/reduce: turn controls:and
B (Ypage 116) clockwise or anti-clock-
wise.
Only change the temperature setting in
small increments. Start at 22 †. 118
Operating the climate control systemClimate control
Page 122 of 321
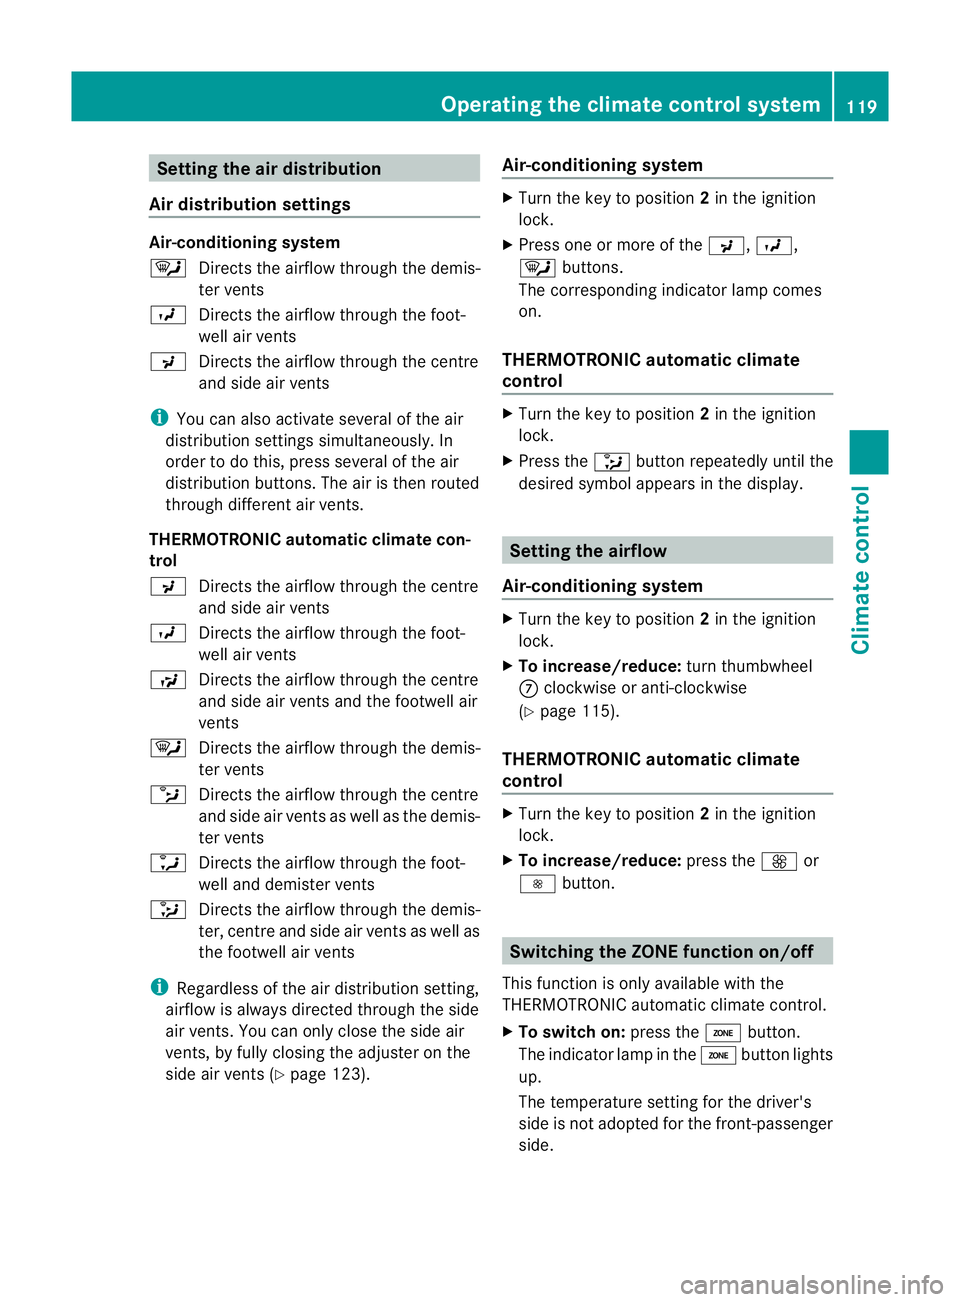
Setting the air distribution
Air distribution settings Air-conditioning system
¯
Directs the airflow through the demis-
ter vents
O Directs the airflow through the foot-
well air vents
P Directs the airflow through the centre
and side air vents
i You can also activate several of the air
distribution settings simultaneously .In
order to do this, press several of the air
distribution buttons. The air is then routed
through different air vents.
THERMOTRONIC automatic climate con-
trol
P Directs the airflow through the centre
and side air vents
O Directs the airflow through the foot-
well air vents
S Directs the airflow through the centre
and side air vents and the footwell air
vents
¯ Directs the airflow through the demis-
ter vents
b Directs the airflow through the centre
and side air vents as well as the demis-
ter vents
a Directs the airflow through the foot-
well and demister vents
_ Directs the airflow through the demis-
ter, centre and side air vents as well as
the footwell air vents
i Regardless of the air distribution setting,
airflow is always directed through the side
air vents. You can only close the side air
vents, by fully closing the adjuster on the
side air vents (Y page 123). Air-conditioning system X
Turn the key to position 2in the ignition
lock.
X Press one or more of the P,O,
¯ buttons.
The corresponding indicator lamp comes
on.
THERMOTRONIC automatic climate
control X
Turn the key to position 2in the ignition
lock.
X Press the _button repeatedly until the
desired symbol appears in the display. Setting the airflow
Air-conditioning system X
Turn the key to position 2in the ignition
lock.
X To increase/reduce: turn thumbwheel
C clockwise or anti-clockwise
(Y page 115).
THERMOTRONIC automatic climate
control X
Turn the key to position 2in the ignition
lock.
X To increase/reduce: press theKor
I button. Switching the ZONE function on/off
This function is only available with the
THERMOTRONIC automatic climate control.
X To switch on: press theábutton.
The indicator lamp in the ábutton lights
up.
The temperature setting for the driver's
side is not adopted for the front-passenger
side. Operating the climate control system
119Climate control Z
Page 123 of 321
When the buttons or controls for tempera-
ture, airflow or air distribution are activated,
the temperature setting for the driver's side
is not adopted for the other climate control
zones.
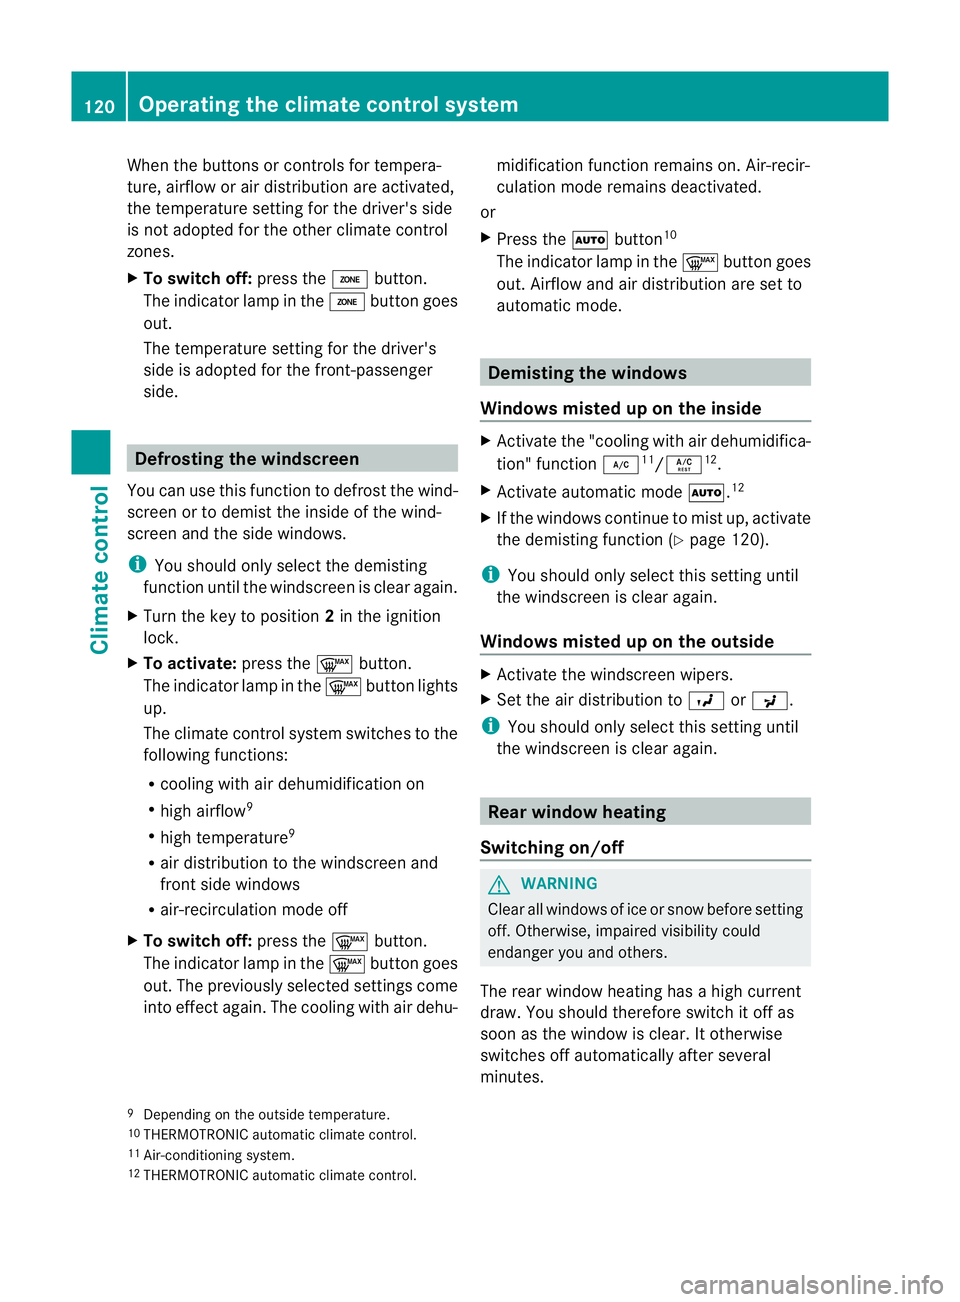
X To switch off: press theábutton.
The indicato rlamp in the ábuttongoes
out.
The temperature setting for the driver's
side is adopted for the front-passenger
side. Defrosting the windscreen
You can use this function to defrost the wind-
screen or to demist the inside of the wind-
screen and the side windows.
i You should only select the demisting
function until the windscreen is clear again.
X Turn the key to position 2in the ignition
lock.
X To activate: press the¬button.
The indicator lamp in the ¬button lights
up.
The climate control system switches to the
following functions:
R cooling with air dehumidification on
R high airflow 9
R high temperature 9
R air distribution to the windscreen and
front side windows
R air-recirculation mode off
X To switch off: press the¬button.
The indicator lamp in the ¬button goes
out. The previously selected settings come
into effect again. The cooling with air dehu- midification function remains on. Air-recir-
culation mode remains deactivated.
or
X Press the Ãbutton 10
The indicator lamp in the ¬button goes
out. Airflow and air distribution are set to
automatic mode. Demisting the windows
Windows misted up on the inside X
Activate the "cooling with air dehumidifica-
tion" function ¿11
/Á 12
.
X Activate automatic mode Ã.12
X If the windows continue to mist up, activate
the demisting function (Y page 120).
i You should only select this setting until
the windscreen is clear again.
Windows misted up on the outside X
Activate the windscreen wipers.
X Set the air distribution to OorP.
i You should only select this setting until
the windscreen is clear again. Rear window heating
Switching on/off G
WARNING
Clear all windows of ice or snow before setting
off. Otherwise, impaired visibility could
endanger you and others.
The rear window heating has ahigh current
draw. You should therefore switch it off as
soon as the window is clear .Itotherwise
switches off automatically after several
minutes.
9 Depending on the outside temperature.
10 THERMOTRONIC automatic climate control.
11 Air-conditioning system.
12 THERMOTRONIC automatic climate control. 120
Operating the climate control systemClimate control
Page 124 of 321
If the battery voltage is too low, the rear win-
dow heating may switch off.
X Turn the key to position 2in the ignition
lock.
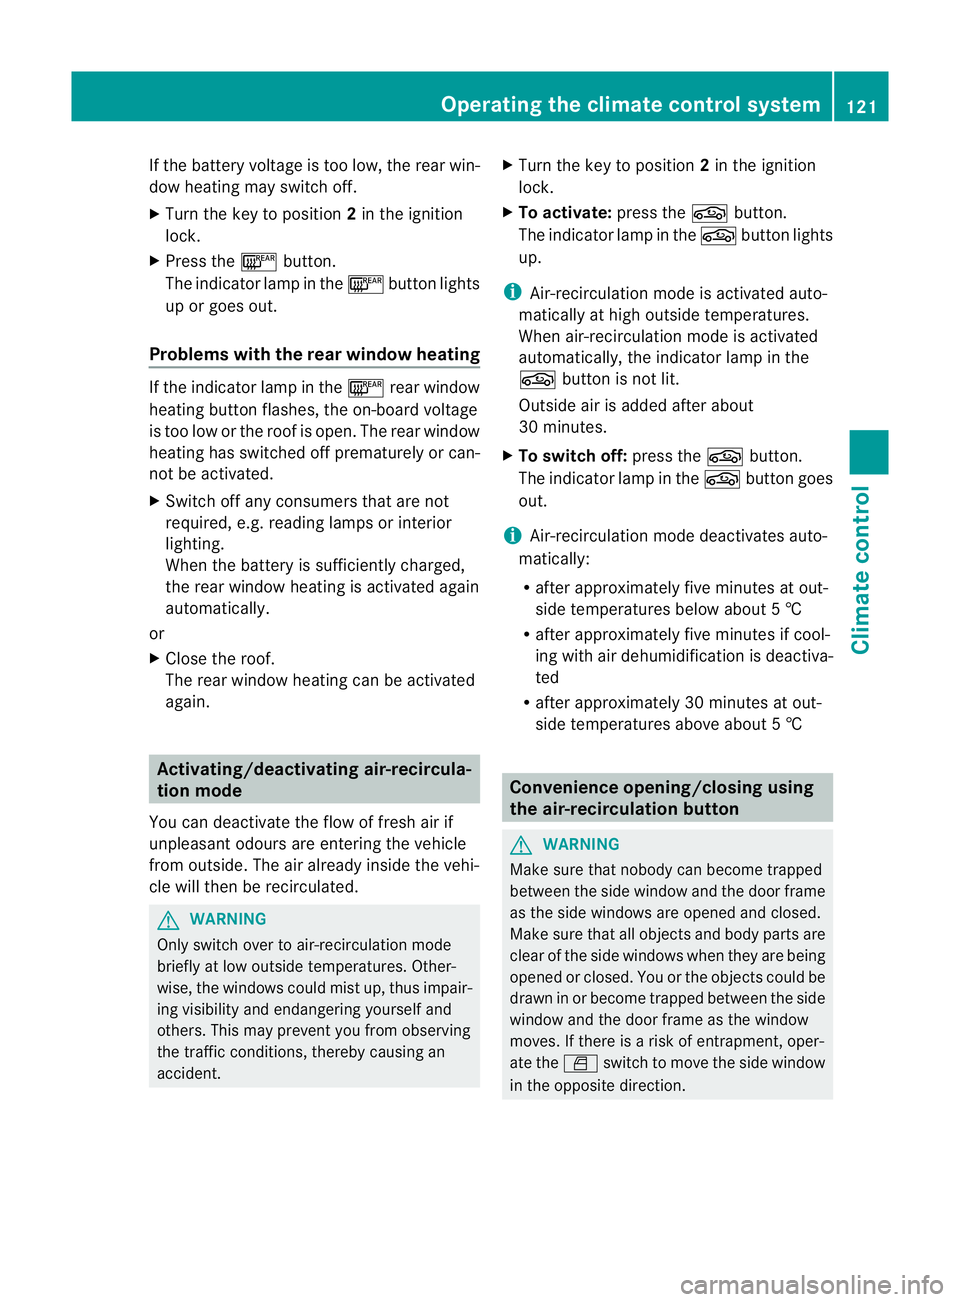
X Press the ¤button.
The indicator lamp in the ¤button lights
up or goes out.
Problems with the rear window heating If the indicator lamp in the
¤rear window
heating button flashes, the on-board voltage
is too low or the roof is open. The rear window
heating has switched off prematurely or can-
not be activated.
X Switch off any consumers that are not
required, e.g. reading lamps or interior
lighting.
When the battery is sufficiently charged,
the rear window heating is activated again
automatically.
or
X Close the roof.
The rear window heating can be activated
again. Activating/deactivating air-recircula-
tion mode
You can deactivate the flow of fresh air if
unpleasant odours are entering the vehicle
from outside. The air already inside the vehi-
cle will then be recirculated. G
WARNING
Only switch over to air-recirculationm ode
briefly at low outside temperatures. Other-
wise, the windows could mist up, thus impair-
ing visibility and endangering yourself and
others. This may prevent you from observing
the traffic conditions, thereby causing an
accident. X
Turn the key to position 2in the ignition
lock.
X To activate: press thegbutton.
The indicator lamp in the gbutton lights
up.
i Air-recirculation mode is activated auto-
matically at high outside temperatures.
When air-recirculation mode is activated
automatically, the indicator lamp in the
g button is not lit.
Outside air is added after about
30 minutes.
X To switch off: press thegbutton.
The indicator lamp in the gbutton goes
out.
i Air-recirculation mode deactivates auto-
matically:
R after approximately five minutes at out-
side temperatures below about 5†
R after approximately five minutes if cool-
ing with air dehumidification is deactiva-
ted
R after approximately 30 minutes at out-
side temperatures above about 5† Convenience opening/closing using
the air-recirculation button
G
WARNING
Make sure that nobody can become trapped
between the side window and the door frame
as the side windows are opened and closed.
Make sure that all object sand body parts are
clear of the side windows when they are being
opened or closed .You or the objects could be
drawn in or become trapped between the side
window and the door frame as the window
moves. If there is arisk of entrapment, oper-
ate the Wswitch to move the side window
in the opposite direction. Operating the climate control system
121Climate control Z
Page 125 of 321
X
Convenience closing feature: press and
hold the gbutton until the side win-
dows are closed.
The indicator lamp in the gbutton lights
up. Air-recirculation mode is activated.
X Convenience opening feature: press and
hold the gbutton until the side win-
dows are opened. The side windows move
back to their original positions.
The indicator lamp in the gbutton goes
out .Air-recirculation mode is deactivated.
i If you open the side windows manually
after closing them with the convenience
closing feature, they will remain in this posi-
tion when opened using the convenience
opening feature. Activating/deactivating the residual
heat function
It is possible to make use of the residual heat
of the engine to continue heating the station-
ary vehicle for up to 30 minutes after the
engine has been switched off .The heating
time depends on the temperature that has
been set.
Depending on the equipment level, the con-
trol panel has either the Ìbutton or the
Á button.
i The blower will run at a low speed regard-
less of the airflow setting.
i If you activate the residual heat function
at high temperatures, only the ventilation
will be activated. The blower runs at
medium speed.
X Turn the key to position 0in the ignition
lock or remove it.
X To switch on: press theÌorÁ but-
ton.
The indicator lamp in the ÌorÁ
button lights up. X
To deactivate: press theÌorÁ
button.
The indicator lamp in the ÌorÁ
button goes out.
i Residual heat is deactivated automati-
cally:
R after about 30 minutes
R when the ignition is switched on
R if the battery voltage drops
R if the coolant temperature is too low Adjusting the air vents
Important safety notes
G
WARNING
Very hot or very cold air can flow from the air
vents.T his could cause burns or frostbite to
bare skin in the immediate vicinity of the
vents.K eep bare skin away from these air
outlets. If necessary, direct the airflow away
to a different area of the vehicle interior.
In order to ensure the direct flow of fresh air
through the air vents into the vehicle interior,
please observe the following notes:
R keep the air inlet grille on the bonnet and
in the engine compartment on the front-
passenger side free of blockages, such as
ice, snow or leaves.
R never cover the vents or ventilation grilles
in the vehicle interior.
i You can move the adjuster sfor the air
vents vertically or horizontally, to set the
direction of the airflow.
i Optimal climate control function is ach-
ieved by opening the air vents fully and set-
ting the adjusters to the middle position. 122
Adjusting the air ventsClimate control
Page 132 of 321
Manual transmission
X
Depress the brake pedal and keep it
depressed.
X Fully depress the clutch pedal.
X Shift to neutral N.
i You can only start the engine when the
clutch pedal is fully depressed.
Automatic transmission X
Shift the transmission to position P.
The transmission position display in the
multifunction display shows P.
i You can also start the engine when the
transmission is in position N.
Starting procedure with the key i
To start the engine using the key instead
of KEYLESS-GO, pullt he Start/Stop button
out of the ignition lock.
X To start a petrol engine: turn the key to
position 3in the ignition lock
(Y page 127) and release it as soon as the
engine is running.
X To startad iesel engine: turn the key to
position 2in the ignition lock
(Y page 127).
The % preglow indicator lamp in the
instrumen tcluster lights up.
X When the %preglow indicator lamp
goes out, tur nthe key to position 3
(Y page 127) and release it as soon as the
engine is running.
i You can start the engine without preglow
if the engine is warm.
i Vehicles with automatic transmis-
sion: you can also use the touch-start func-
tion. To do this, turn the key to position 3
(Y page 127) and release it immediately.
The engine then starts automatically. Using KEYLESS-GO to startt
he engine G
WARNING
You rvehicle can be started using a valid KEY-
LESS-GO key. For this reason, children should
never be left unsupervised in the vehicle.
Always take the key with you when leaving the
vehicle, even if you are only leaving it for a
short time.
i The Start/Stop button can be used to
start the vehicle manually without inserting
the key into the ignition lock. The key must
be in the vehicle and the Start/Stop button
must be inserted in the ignition lock. This
mode for starting the engine operates inde-
pendently of the ECO start/stop automatic
engine start function.
X Depress the brake pedal and keep it
depressed.
X To star tapetrol engine: press the Start/
Stop button (Y page 127) once.
The engine starts.
X To start adiesel engine: press the Start/
Stop button (Y page 127) once.
Preglow is activated and the engine starts. Pulling away
Manual transmission X
Depress the brake pedal and keep it
depressed.
X Fully depress the clutch pedal.
X Shift to either first gear or reverse gear R.
X Release the electric parking brake
(Y page 147).
X Release the brake pedal.
X Slowly release the clutch pedal and gently
depress the accelerato rpedal.
! Change gear in good time and avoid spin-
ning the wheels. Otherwise, you could dam-
age the vehicle. Driving
129Driving and parking Z
Page 136 of 321
engine will then not be switched off auto-
matically when the vehicle stops.
i The ECO start/stop function is activated
every time you restart the engine, and the
automatic transmission switches into auto-
matic drive program E(AMG vehicles: drive
program C).
Deactivating (except for AMG vehicles)
X Press button :.
Indicator lamp ;on button :and the
¤ symbol in the multifunction display go
out.
Deactivating (AMG vehicles)
X Press button :in drive program C.
or
X Switch to drive program Sor M
(Y page 138).
Indicator lamp ;on button :and the
¤ symbol in the multifunction display go
out.
The Stop/Start active or
Stop/Start inactive message in the AMG menu in the
multifunction display goes out.
Activating (except for AMG vehicles)
X Press button :.
Indicator lamp ;lights up. If all conditions
for automatic engine switch-off
(Y page 131)a re fulfilled, the ¤symbol
is show ninthe multifunction display.
If not all conditions for automatic engine
switch-off (Y page 131) are fulfilled, the
¤ symbol is not shown in the multifunc-
tion display. If this is the case, the ECO
start/stop function is not available.
Activating (AMG vehicles)
X Press button :.
Indicator lamp ;lights up. If drive pro-
gram Sor Mis active, the automatic trans-
mission switches to drive program C.
If all conditions for automatic engine
switch-off (Y page 131) are fulfilled, the
¤ symbol is shown in the multifunction display. In addition, the
Stop/Start active message is shown in the AMG
menu in the multifunction display.
If not all conditions have been fulfilled for
automatic engine switch-off (Y page 131),
the Stop/Start inactive message is
shown in the AMG menu of the multifunc-
tion display and the border of the ECO sym-
bol disappears. If this is the case, the ECO
start/stop function is not available. Driving
133Driving and parking Z
Page 137 of 321
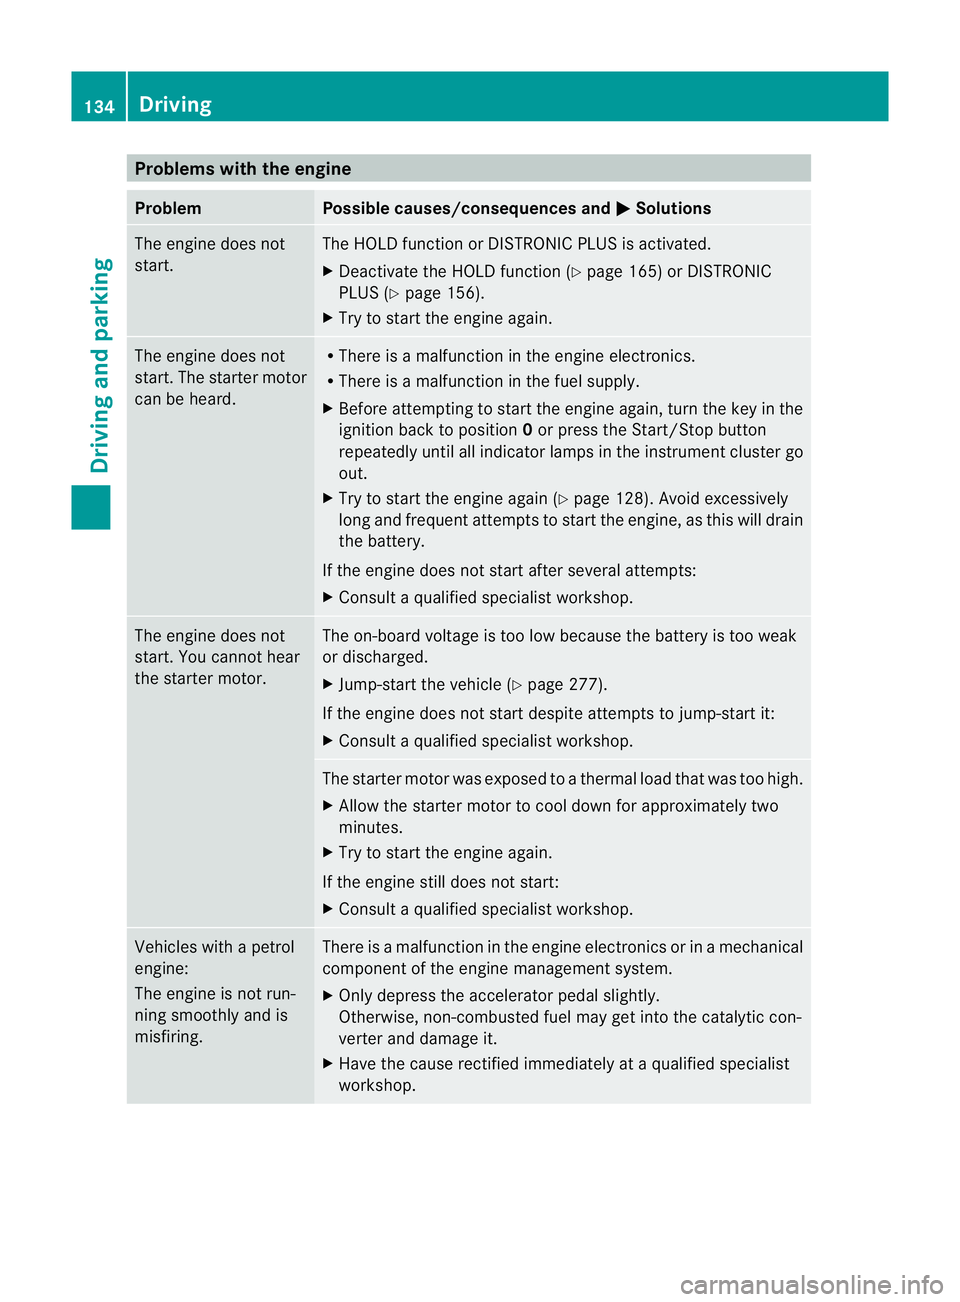
Problems with the engine
Problem Possible causes/consequences and
M Solutions
The engine does not
start. The HOLD function or DISTRONIC PLUS is activated.
X
Deactivate the HOLD function (Y page 165) or DISTRONIC
PLUS (Y page 156).
X Try to start the engine again. The engine does not
start. The starter motor
can be heard. R
There is a malfunction in the engine electronics.
R There is a malfunction in the fuel supply.
X Before attempting to start the engine again, turn the key in the
ignition back to position 0or press the Start/Stop button
repeatedly until all indicator lamps in the instrumen tcluster go
out.
X Try to start the engine again (Y page 128). Avoid excessively
long and frequent attempts to start the engine, as this will drain
the battery.
If the engine does not start after several attempts:
X Consult a qualified specialist workshop. The engine does not
start. You cannot hear
the starter motor. The on-board voltage is too low because the battery is too weak
or discharged.
X
Jump-star tthe vehicle (Y page 277).
If the engine does not start despite attempts to jump-start it:
X Consult a qualified specialist workshop. The starter motor was exposed to a thermal load that was too high.
X
Allow the starter motor to cool down for approximately two
minutes.
X Try to start the engine again.
If the engine still does not start:
X Consult a qualified specialist workshop. Vehicles with a petrol
engine:
The engine is not run-
ning smoothly and is
misfiring. There is a malfunction in the engine electronics or in a mechanical
component of the engine management system.
X
Only depress the accelerator pedal slightly.
Otherwise, non-combusted fuel may get into the catalytic con-
verter and damage it.
X Have the cause rectified immediately at a qualified specialist
workshop. 134
DrivingDriving and parking