2012 MERCEDES-BENZ SLK ROADSTER light
[x] Cancel search: lightPage 166 of 321
Deactivating DISTRONIC PLUS
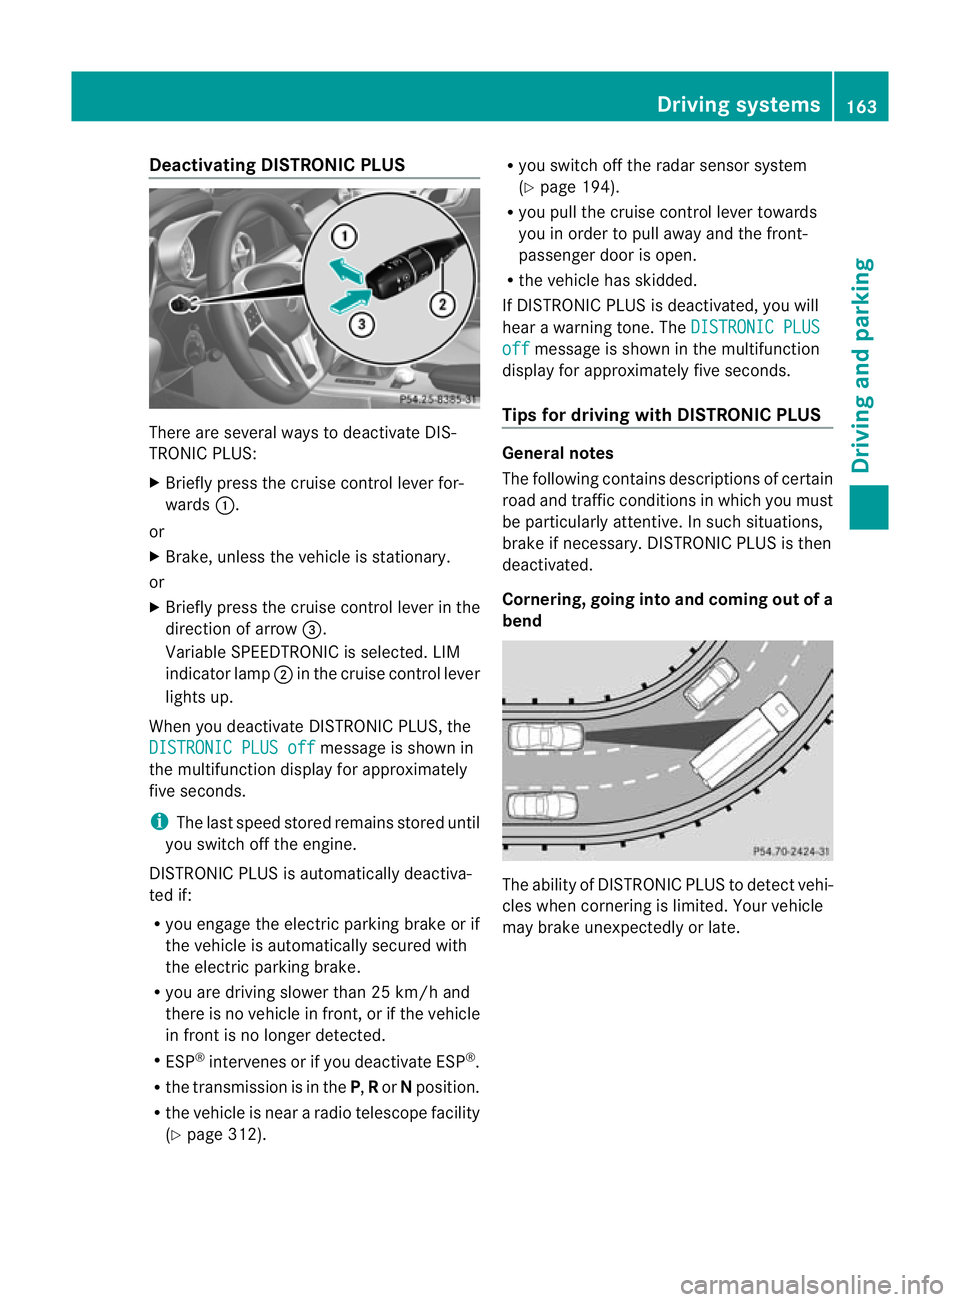
There are several ways to deactivate DIS-
TRONIC PLUS:
X Briefly press the cruise control lever for-
wards :.
or
X Brake, unless the vehicle is stationary.
or
X Briefly press the cruise control lever in the
direction of arrow =.
Variable SPEEDTRONIC is selected. LIM
indicator lamp ;in the cruise contro llever
lights up.
When you deactivate DISTRONIC PLUS, the
DISTRONIC PLUS off message is shown in
the multifunction display for approximately
five seconds.
i The last speed stored remains stored until
you switch off the engine.
DISTRONIC PLUS is automatically deactiva-
ted if:
R you engage the electric parking brake or if
the vehicle is automatically secured with
the electric parking brake.
R you are driving slower than 25 km/h and
there is no vehicle in front, or if the vehicle
in front is no longer detected.
R ESP ®
intervenes or if you deactivate ESP ®
.
R the transmission is in the P,Ror Nposition.
R the vehicle is near a radio telescope facility
(Y page 312). R
you switch off the radar sensor system
(Y page 194).
R you pull the cruise control lever towards
you in order to pull away and the front-
passenger door is open.
R the vehicle has skidded.
If DISTRONIC PLUS is deactivated, you will
hear a warning tone. The DISTRONIC PLUS off message is shown in the multifunction
display for approximately five seconds.
Tips for driving with DISTRONIC PLUS General notes
The following contains descriptions of certain
road and traffic conditions in which you must
be particularly attentive. In such situations,
brake if necessary. DISTRONIC PLUS is then
deactivated.
Cornering, going into and coming out of a
bend
The ability of DISTRONIC PLUS to detec
tvehi-
cles when cornering is limited. Your vehicle
may brake unexpectedly or late. Driving systems
163Driving and parking Z
Page 167 of 321
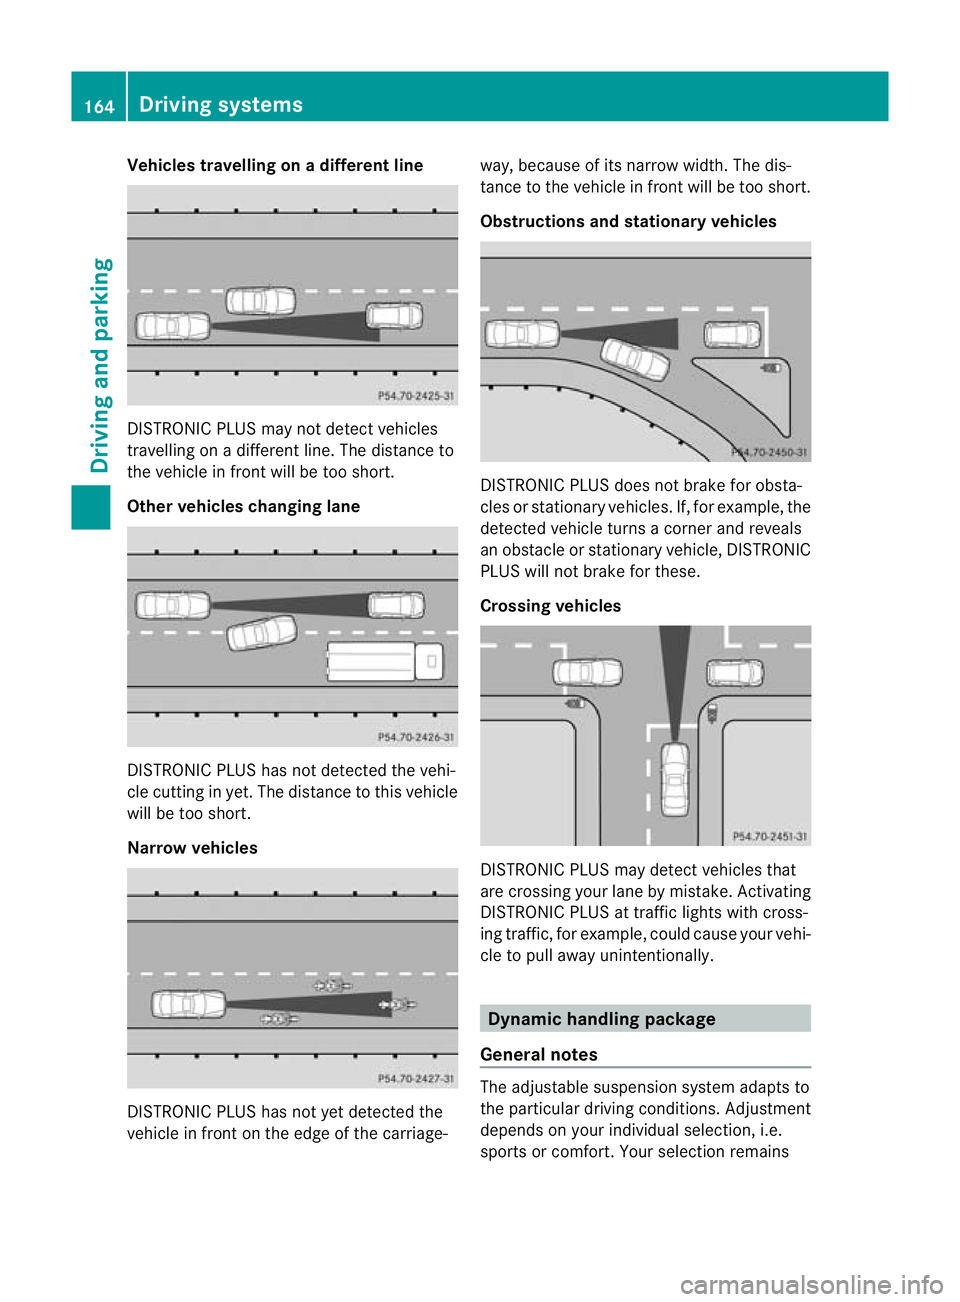
Vehicles travelling on
adifferent line DISTRONIC PLUS may not detect vehicles
travelling on a different line. The distance to
the vehicle in fron
twill be too short.
Other vehicles changing lane DISTRONIC PLUS has not detected the vehi-
cle cutting in yet. The distance to this vehicle
will be too short.
Narrow vehicles
DISTRONIC PLUS has not yet detected the
vehicle in front on the edge of the carriage- way, because of its narrow width
.The dis-
tance to the vehicle in front will be too short.
Obstructions and stationary vehicles DISTRONIC PLUS does not brake for obsta-
cles or stationary vehicles. If, for example, the
detected vehicle turns a corner and reveals
an obstacle or stationary vehicle, DISTRONIC
PLUS will not brake for these.
Crossing vehicles DISTRONIC PLUS may detect vehicles that
are crossing your lane by mistake. Activating
DISTRONIC PLUS at traffic lights with cross-
ing traffic, for example, could cause your vehi-
cle to pull away unintentionally. Dynamic handling package
General notes The adjustable suspension system adapts to
the particular driving conditions. Adjustment
depends on your individual selection, i.e.
sports or comfort. Your selection remains 164
Driving systemsDriving and parking
Page 168 of 321
stored even if you remove the key from the
ignition lock.
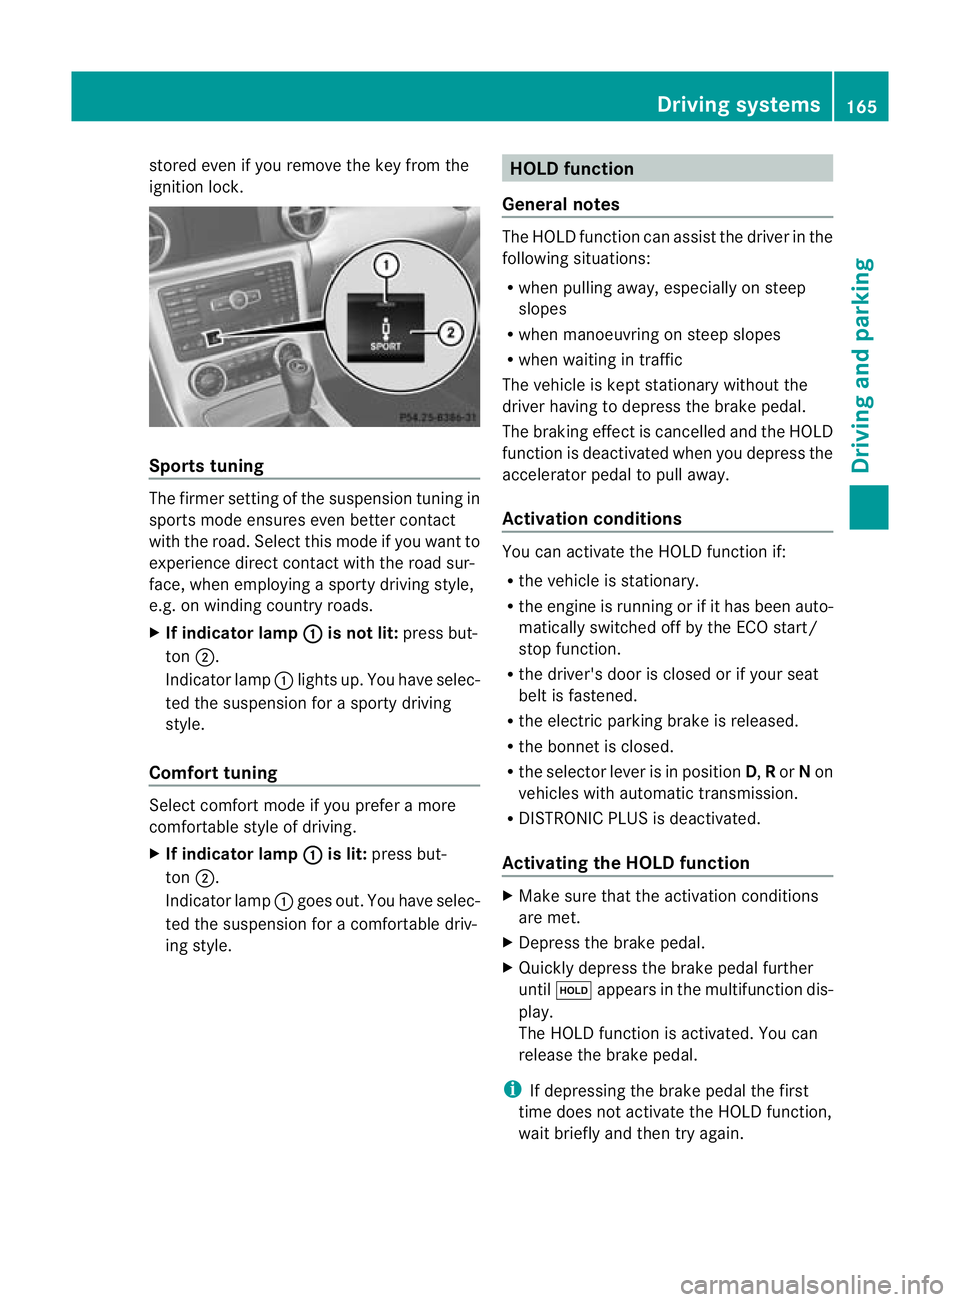
Sports tuning
The firmer setting of the suspension tuning in
sports mode ensures even better contact
with the road. Select this mode if you want to
experience direct contact with the road sur-
face, when employing a sporty driving style,
e.g. on winding country roads.
X If indicator lamp : is not lit:
press but-
ton ;.
Indicator lamp :lights up. You have selec-
ted the suspension for a sporty driving
style.
Comfort tuning Select comfort mode if you prefer a more
comfortable style of driving.
X
If indicator lamp : is lit:
press but-
ton ;.
Indicator lamp :goes out. You have selec-
ted the suspension for a comfortable driv-
ing style. HOLD function
General notes The HOLD function can assist the driver in the
following situations:
R
when pulling away, especially on steep
slopes
R when manoeuvring on steep slopes
R when waiting in traffic
The vehicle is kept stationary without the
driver having to depress the brake pedal.
The braking effect is cancelled and the HOLD
function is deactivated when you depress the
accelerator pedal to pull away.
Activation conditions You can activate the HOLD function if:
R
the vehicle is stationary.
R the engine is running or if it has been auto-
matically switched off by the ECO start/
stop function.
R the driver's door is closed or if your seat
belt is fastened.
R the electric parking brake is released.
R the bonnet is closed.
R the selector lever is in position D,Ror Non
vehicles with automatic transmission.
R DISTRONIC PLUS is deactivated.
Activating the HOLD function X
Make sure that the activation conditions
are met.
X Depress the brake pedal.
X Quickly depress the brake pedal further
until ë appears in the multifunction dis-
play.
The HOLD function is activated. You can
release the brake pedal.
i If depressing the brake pedal the first
time does not activate the HOLD function,
wait briefly and then try again. Driving systems
165Driving and parking Z
Page 171 of 321
Fron
tsensors Centre approximately 10
0cm Corners approximately 60 cm
Rea
rsensors Centre approximately 12
0cm Corners approximately 80 cm
!
When parking, pay particula rattention to
objects above or below the sensors, such
as flower pots or trailer drawbars. PARK-
TRONIC does not detect such objects when
they are in the immediate vicinity of the
vehicle. You could damage the vehicle or
the objects.
The sensors may not detect snow and
objects which absorb ultrasonic sources.
Ultrasonic sources, such as an automatic
car wash, a lorry's compressed-air brakes
or a pneumati cdrill, coul dcause PARK-
TRONIC to malfunction.
PARKTRONIC may no tfunction correctly on
uneven terrain.
Minimum distance Centre approximately 20 cm
Corners approximately 15 cm
If there is an obstacle within this range, the
relevan
twarning displays light up and a warn-
ing tone sounds. If th edistance falls below
the minimum, the distanc emay no longer be
shown.
Warning displays The warning displays show the distance
between the sensors and th eobstacle. The
warning display for the fron tarea is located
on the dashboard above the centre air vents.
The warning display for the rear area is loca-
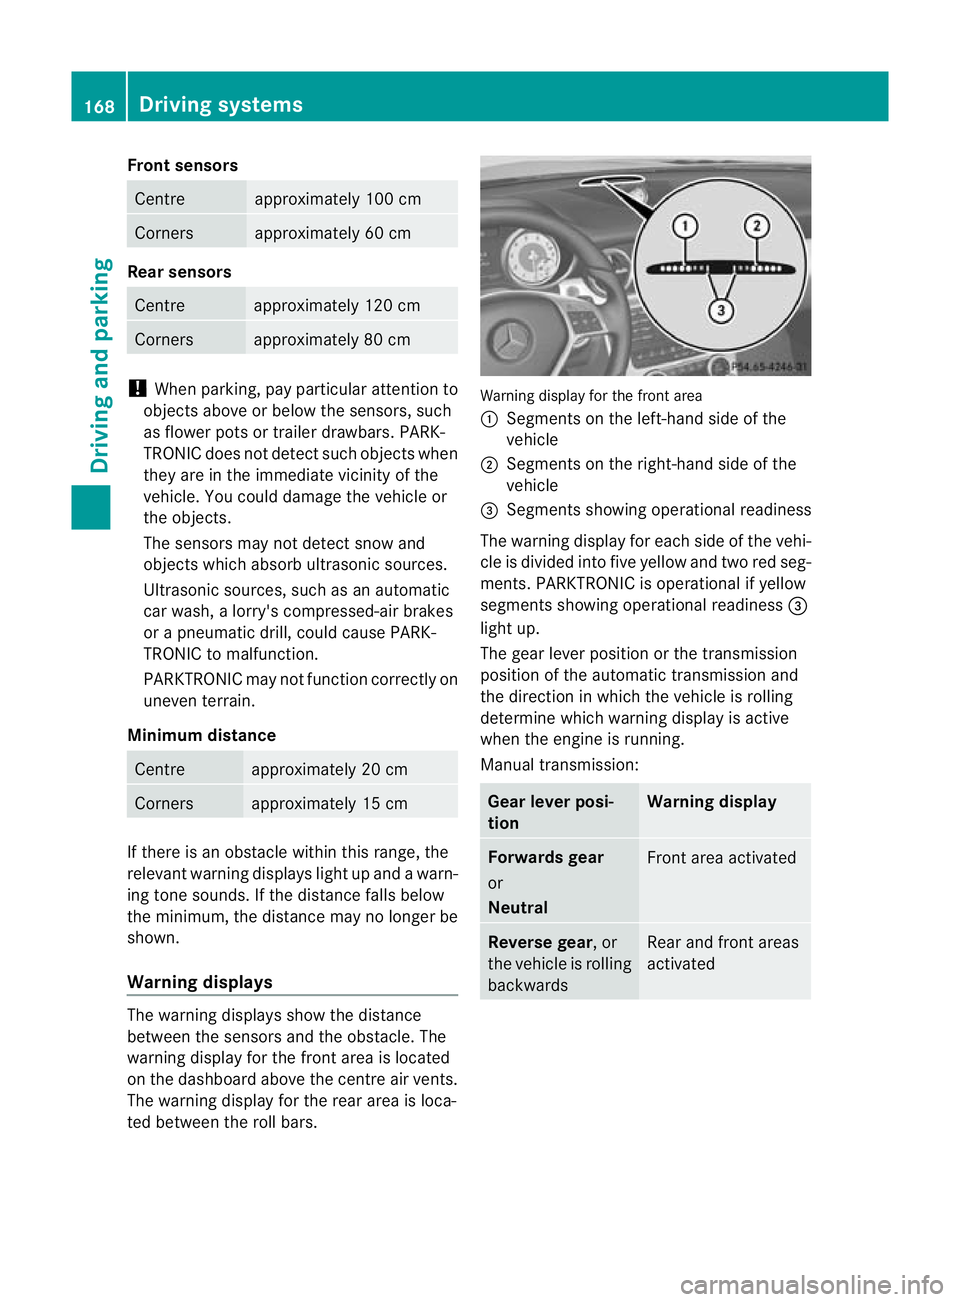
ted between the roll bars. Warning display for the front area
:
Segments on the left-hand side of the
vehicle
; Segments on the right-hand side of the
vehicle
= Segments showing operational readiness
The warning display for each side of the vehi-
cle is divided into five yellow and two red seg-
ments. PARKTRONIC is operational if yellow
segments showing operational readiness =
light up.
The gearl ever position or the transmission
position of the automatic transmission and
the direction in which the vehicle is rolling
determine which warning display is active
when the engine is running.
Manual transmission: Gear lever posi-
tion Warning display
Forwards gear
or
Neutral
Front area activated
Reverse gear
, or
the vehicle is rolling
backwards Rear and front areas
activated168
Driving systemsDriving and parking
Page 172 of 321
Automatic transmission:
Transmission
position Warning display
D
Front area activated
R,
Nor the vehicle
is rolling back-
wards Rear and front areas
activated
P
No areas activated
One or more segments light up as the vehicle
approaches an obstacle, depending on the
vehicle's distance fro
mthe obstacle.
From the:
R sixth segment onwards, you will hear an
intermittent warning tone for approx-
imately two seconds.
R seventh segment onwards, you will hear a
warning tone for approximately two sec-
onds. This indicates that you have now
reached the minimum distance.
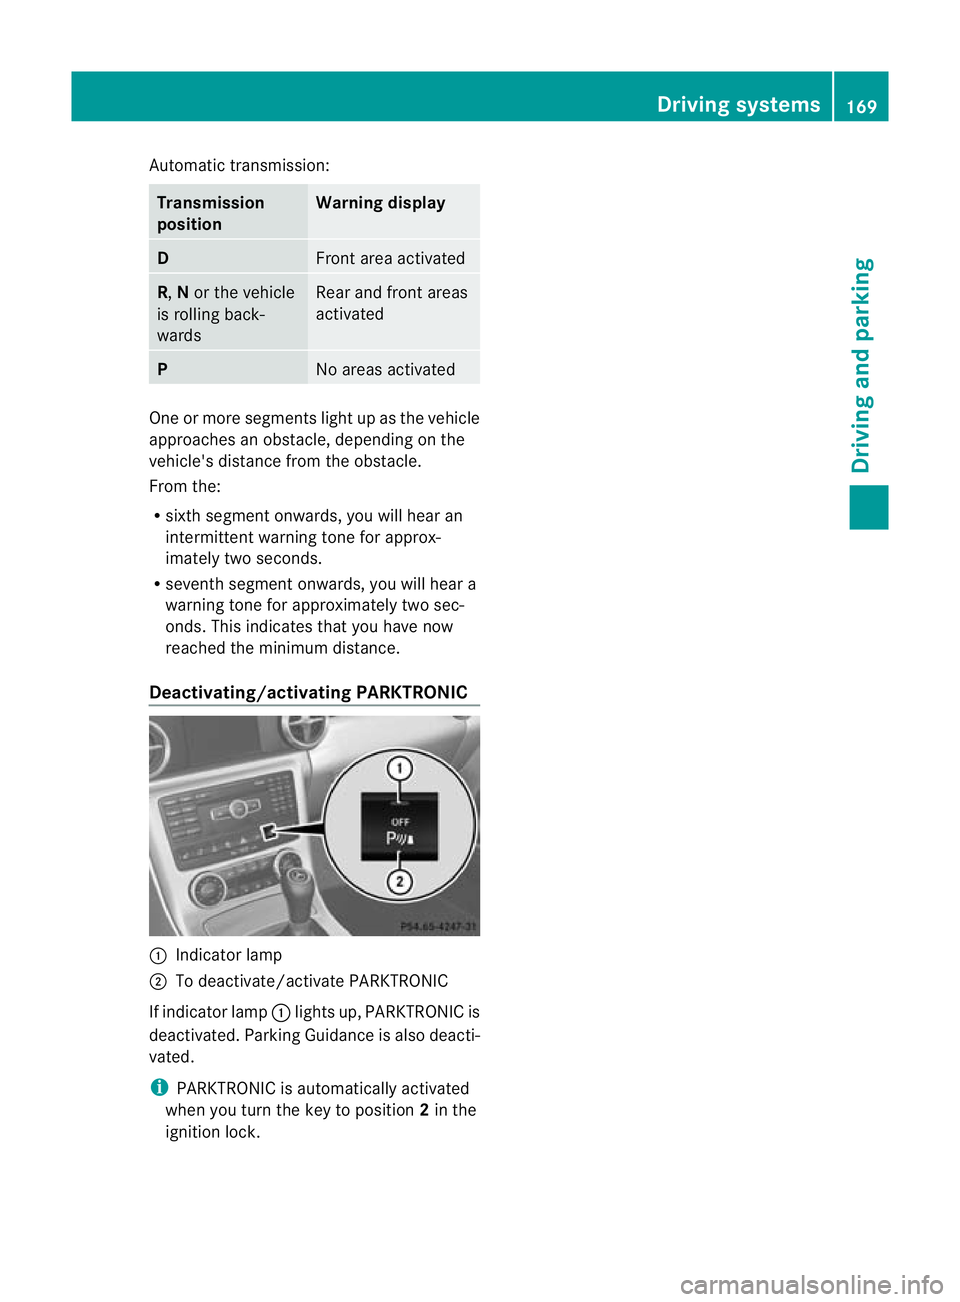
Deactivating/activating PARKTRONIC :
Indicator lamp
; To deactivate/activate PARKTRONIC
If indicator lamp :lights up, PARKTRONIC is
deactivated. Parking Guidance is also deacti-
vated.
i PARKTRONIC is automatically activated
when you turn the key to position 2in the
ignition lock. Driving systems
169Driving and parking Z
Page 173 of 321
Problems with PARKTRONIC
Problem Possible causes/consequences and
M Solutions
Only the red segments
in the PARKTRONIC
warning displays are lit.
You also hear a warning
tone for approximately
two seconds.
PARKTRONIC is deacti-
vated after approx-
imately 20 seconds,
and the indicator lamp
in the PARKTRONIC
button lights up. PARKTRONIC has malfunctioned and has switched off.
X
If problems persist, have PARKTRONIC checked at a qualified
specialist workshop. Only the red segments
in the PARKTRONIC
warning displays are lit.
PARKTRONIC is deacti-
vated after approx-
imately 20 seconds. The PARKTRONIC sensors are dirty or there is interference.
X
Cleant he PARKTRONIC sensors (Y page 257).
X Switch the ignition back on. The problem may be caused by an external source of radio or
ultrasound waves.
X
See if PARKTRONIC functions in a different location. Parking Guidance
Important safety notes Parking Guidance is an electronic parking aid
with ultrasound. Ultrasound is used to meas-
ure the road on both sides of the vehicle. A
suitable parking space is indicated by the
parking symbol. You receive steering instruc-
tions when parking. You may also use PARK-
TRONIC (Y
page 167). G
WARNING
Parking Guidance is merely an aid and may
recommend parking spaces that are not suit-
able for parking. For example, these might be
spaces where parking is prohibited, drive-
ways, unsuitable surfaces, etc.
Parking Guidance measures the parking
space as you drive past it. Any later changes
to the parking space are not taken into
account. For instance, this may be the case when the vehicle parked in front of or behind
the space changes its position or when an
obstacle is moved into the parking space.
Parking Guidance does not relieve you of the
responsibility for paying attention. If you rely
solely on Parking Guidance, you could cause
an accident and injure yourself and others.
You are always responsible for safety and
must continue to pay attention to your imme-
diate surroundings when parking and
manoeuvring. G
WARNING
Objects located above the height range of
Parking Guidance will not be detected when
the parking space is measured. These are not
taken into account when the parking proce-
dure is calculated, e.g. overhanging loads, tail
sections or loading ramps of goods vehicles.
In some circumstances, Parking Guidance 170
Driving systemsDriving and parking
Page 181 of 321
Useful information
i This Owner's Manual describes all models
and all standard and optional equipment
available to your vehicle at the time of pub-
lication of the Owner's Manual. Country-
specific deviations are possible. Please
note that your vehicle may not be equipped
with all features described. This also
applies to safety-relevan tsystems and
functions.
i Please read the information on qualified
specialist workshops (Y page 22).Important safety notes
You will find an illustration of the instrument
cluster in the "At a glance" section
(Y page 28). G
WARNING
Only use the on-board computer when road
and traffic conditions permit .You would oth-
erwise be distracted and unable to concen-
trate properly on driving, and could cause an
accident. G
WARNING
No messages will be displayed if either the
instrument cluster or the multifunction dis-
play is inoperative.
As a result, you will not be able to see infor-
mation about your driving conditions, such as
speed, outside temperature, warning and indi-
cator lamps, display messages or system fail-
ures. Driving characteristics may be impaired.
Adjust your driving style and vehicle speed
accordingly.
Contact a qualified specialist workshop
immediately. G
WARNING
The on-board computer only records and dis-
plays malfunctions and warnings from certain
systems. For this reason, you should always make sure that your vehicle is safe to use. You
could otherwise cause an accident by driving
an unsafe vehicle.
G
WARNING
The operating safety of your vehicle could be
impaired if maintenance work is carried out
incorrectly. This could cause you to lose con-
trol of your vehicle and cause an accident.
Moreover, the safety systems may no longer
be able to protect you or others as they are
designed to do.
Always have service work carried out at a
qualified specialist workshop. Displays and operation
Instrument cluster lighting
The brightness control knob is located on the
bottom left of the instrument cluster
(Y page 28).
X Turn the brightness control knob clockwise
or anti-clockwise.
Instrument cluster: if the light switch is set
to Ã, TorL, brightness control
takes ambient light conditions into account.
i The light sensor in the instrument cluster
automatically controls the brightness of
the multifunction display.
In daylight, the displays in the instrument
cluster are not illuminated.
Displays and switches in the vehicle
interior: if the light switch is set to Ã,
brightness control takes ambient light condi-
tions into account .Ifthe light switch is set to
T orL, brightness control does not
take ambient light conditions into account. Coolant temperature gauge
The coolant temperature gauge is in the
instrumentc lusteront he right-hand side. 178
Displays and operationOn-board computer and displays
Page 182 of 321
The reading may rise up to 120
†undernor-
mal driving conditions if the coolant has been
filled correctly.
At high outside temperatures and when driv-
ing uphill, the coolant temperature may rise
to the end of the scale. Rev counter
The red band in the rev counter indicates the
engine's overrevving range.
! Do not drive in the overrevving range.
Doing so will damage the engine.
The fuel supply is interrupted to protec tthe
engine when the red band is reached. Outside temperature display
The outside temperature displayi s in the mul-
tifunction display (Y page 180). G
WARNING
At temperatures just above freezing point, the
street may be icy, especially in wooded areas
or on bridges. If you do not adapty our driving
style to the conditions, the vehicle could skid.
For this reason, adapt your driving style and
speed to the weather conditions.
Changes in the outside temperature are dis-
played after a short delay. Speedometer with segments
The segments in the speedometer indicate
which speed range is available.
Cruise control (Y page 151) activated:
The segments light up from the stored speed
to the maximum speed.
Variable SPEEDTRONIC (Y page 153) activa-
ted:
The segments light up from the start of the
scale to the selected limit speed.
DISTRONIC PLUS (Y page 156) activated: One or two segments in the set speed range
light up.
DISTRONIC PLUS detects a vehicle in front:
The segments between the speed of the vehi-
cle in front and the stored speed light up.
Operating the on-board computer
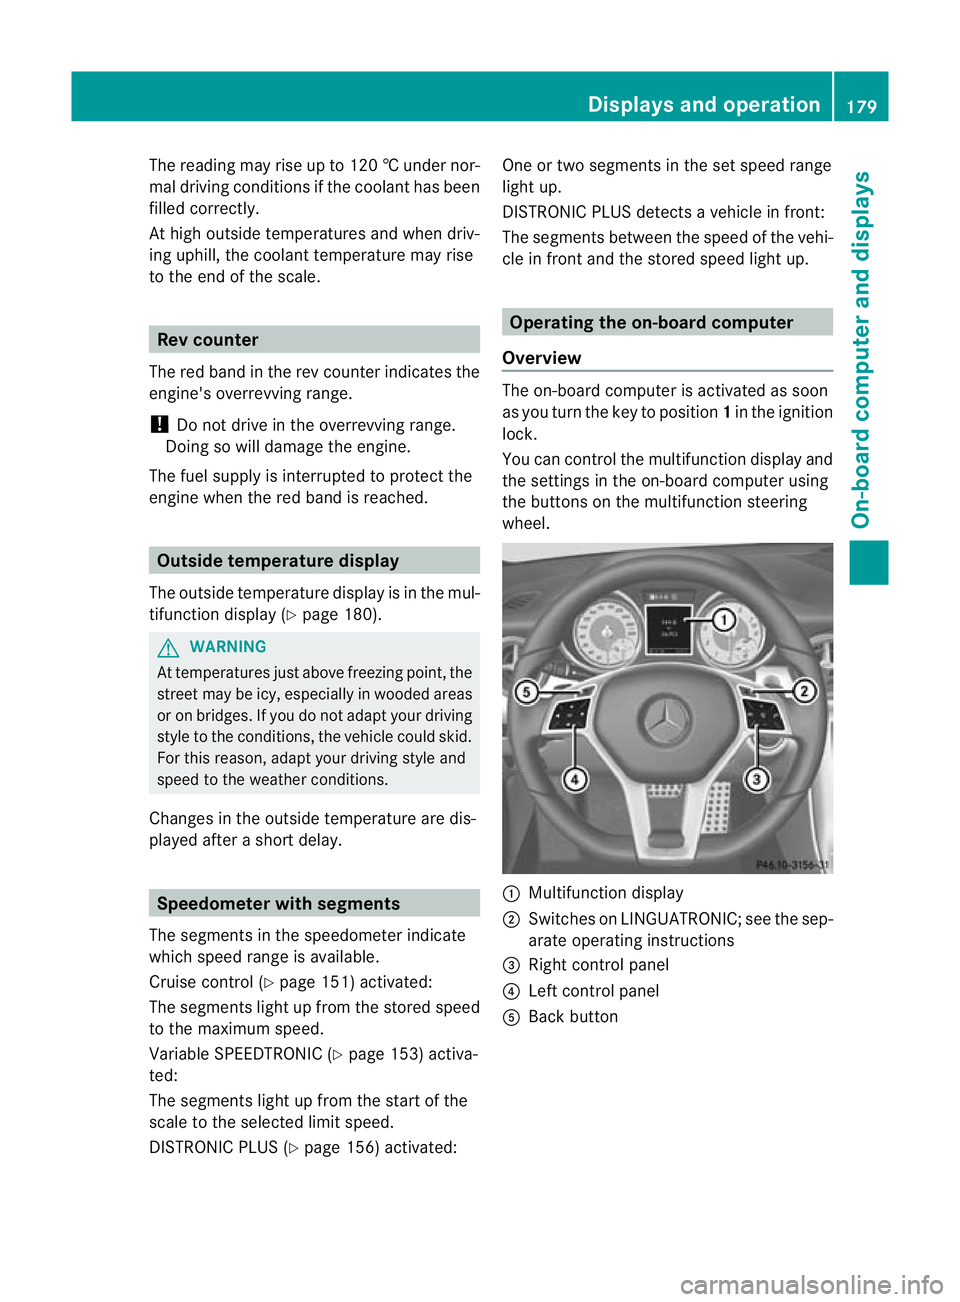
Overview The on-board computer is activated as soon
as you turn the key to position
1in the ignition
lock.
You can control the multifunction display and
the settings in the on-board computer using
the buttons on the multifunction steering
wheel. :
Multifunction display
; Switches on LINGUATRONIC; see the sep-
arate operating instructions
= Right control panel
? Left control panel
A Back button Displays and operation
179On-board computer and displays Z