2012 MERCEDES-BENZ SL-Class audio
[x] Cancel search: audioPage 158 of 210
X
Sel ect Menulan guage or
Aud io lan
guage and
pressthe 9button to
confi rm.
In both cases, amenu appe ars afte rafew
seconds. The#dot infront ofan entry
indi cates thecurrently selected langua ge.
X Select asetting using the 9:
buttons andpress the9button toconfirm.
X To exitthe menu: pressthe=
or ; button. Subtitle
sand camera angle
These functions arenot available onallDVDs.
The numbe rofsubt itle lang uages andcam era
ang lesavailab ledepe ndson theco nten to f
the DVD. Itis po ssi ble tha tthe settin gsmay
also beaccessed inthe DVD menu
(Y page 154).
X Show themenu (Ypage 152).
X Select DVD-Video in
the menu using
the :=; buttonsandpress the
9 button toconfirm .
X Select DVDFunctions and
press the9
button toconfirm .
X Select Subtitles or
Camera Angle and
press the9button toconfirm .
In both cases, amenu appears.The #dot
in front ofan entr yindicates thecurrent
settin g.
X Select asettin gusing the9:
buttons andpress the9button toconfirm .
X To exit themenu: pressthe=
or ; button. Interactive
content
DVD scan cont aininteract ivecont ent(e.g. a
video game). Inavideo game, forexample,
you may beable toinfluence eventsby
selecting andtriggering actions.Thetype and
number ofactions depend onthe DVD . X
Select anaction usingthe
9:=; buttonsandpress
the 9button toexecute it.
A menu appearsand thefirst entry,
Select ,
is highlighted.
X Press the9button.
or
X Show thecont rolmenu whileinvideo DVD
mode, ifnecessary.
X Select Menu using
the=;
9: buttonsandpress the9button
to confirm .
X Select DVD-V in
the menu usingthe
=;9: buttonsandpress
the 9button toconfirm .
X Select DVDFunctions and
press the9
button toconfirm .
X Select orexecute anaction usingthearrow
keys. Video
AUXmode Conne
ctingexternal videosources
If your vehicle isequipp edwith aMedia
Int erface, youcan conn ectanextern alvideo
source.
You require anadditional audio/video cable
set toconn ectanextern alvideo source to
Media Interface.
For details, pleaseconsult anauthorized
Mercedes-Ben zCenter orvisit http://
www .mer<00030005000400050013002500020005000E001D00210003000F000D00220003
000FB nnect.and
proceed asdescribed under"Media
Int erface".
The conn ection jacksarelocated:
R in the cent erconsole stowage
compartmen t(SL)
R in the glove box 156
Video
AUXmodeVideo
Page 159 of 210
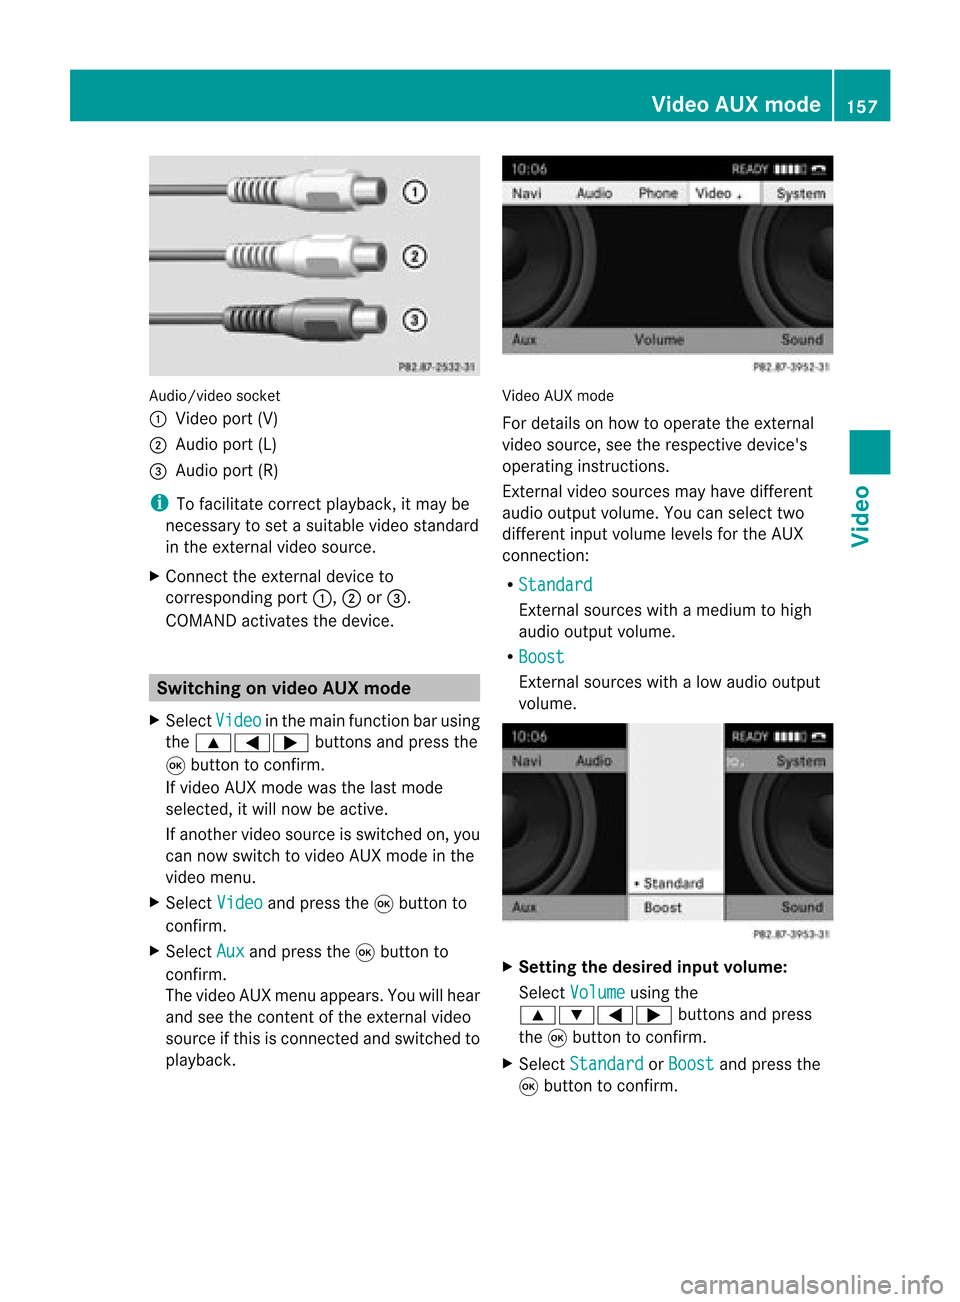
Aud
io/vid eosocke t
: Videopor t(V)
; Audio port(L)
= Audio port(R)
i Tofacilitate correctplayback, itmay be
necessary toset asuitab levideo standard
in the external videosource.
X Connect theexternal deviceto
corresponding port:,;or=.
COMAND activatesthedevice. Switchi
ngon video AUXmode
X Select Video in
the main function barusing
the 9=; buttonsandpress the
9 button toconfirm.
If video AUXmode wasthelast mode
selected, itwill now beactive.
If another videosource isswitched on,you
can now switch tovideo AUXmode inthe
video menu.
X Select Video and
press the9button to
confirm.
X Select Aux and
press the9button to
confirm.
The video AUXmenu appears.You willhear
and seetheconten tof the external video
source ifthis isconnect edand switched to
play back. Video
AUXmode
For detail son how tooperate theexternal
video source, seetherespective device's
operating instructions.
Ext ernal video sources mayhave different
aud iooutput volume. Youcanselect two
different inputvolume levelsforthe AUX
connect ion:
R Standard Ext
ernal sources withamediu mtohigh
audio output volume.
R Boost Ex
tern alsources withalow audio output
volume. X
Setting thedesired inputvolume:
Select Volume using
the
9:=; buttonsand press
the 9button toconf irm.
X Select Standard or
Boost and
press the
9 button toconf irm. Video
AUXmode
157Video Z
Page 161 of 210

COMAN
Dfea tures ........ .......... ........... 160
Gener alinfor mation <0023002300230023002300230023002300230023002300230023002300230023
002300230023002300230023002300230023> 160
Basic functions <0023002300230023002300230023002300230023002300230023002300230023
0023002300230023002300230023002300230023002300230023002300230023
0023> 161
System settings <0023002300230023002300230023002300230023002300230023002300230023
0023002300230023002300230023002300230023002300230023002300230023> 163
Audio CD/DVD andMP3 mode ........ 164
Video DVDmode <0023002300230023002300230023002300230023002300230023002300230023
002300230023002300230023002300230023002300230023002300230023> 169
AUX mode <0023002300230023002300230023002300230023002300230023002300230023
0023002300230023002300230023002300230023002300230023002300230023
0023002300230023002300230023002300230023> 173 159Rear
Entert ainmentSystem
Page 163 of 210
X
Insert thenew batteries. Observethe
pola ritymarkings onthe batteries and
battery compartment whendoing so.
Left-hand battery:thepositive pole(+)
must faceupwards.
Rig ht-hand battery: thepositive pole(+)
must facedownwa rds.
X To clo sethe battery compartment:
insert battery compartment cover=
starting withretaining lugs? into the
battery compartment andallow catch
tab ;toengage inpla ce.
On the cordle ssheadphones The
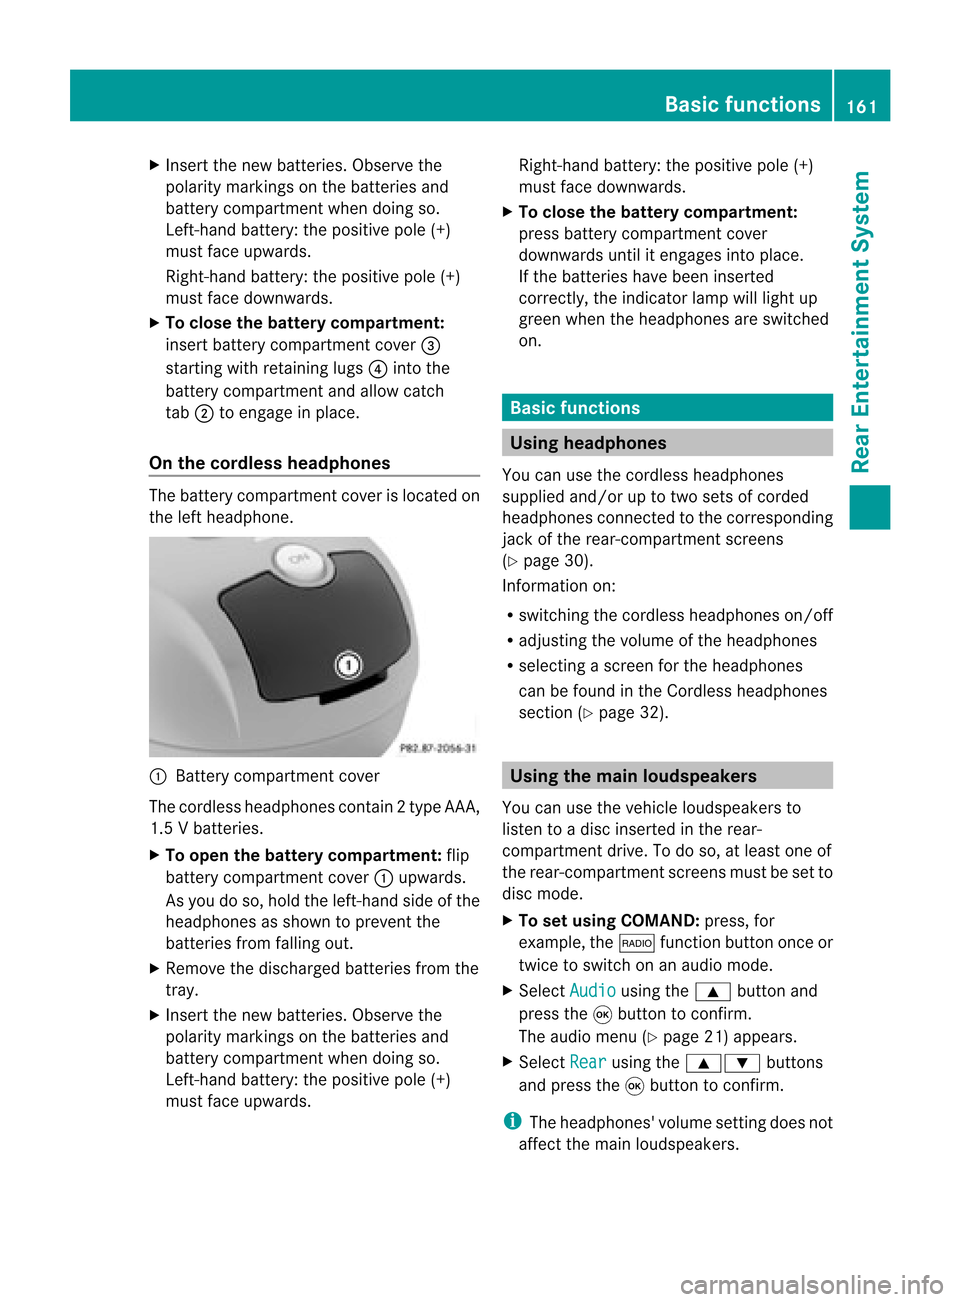
battery compartment coverislocated on
the left head phone. :
Battery compartment cover
The cordless headphones contain 2type AAA,
1. 5V bat terie s.
X To ope nth ebat tery com partme nt:fli p
bat tery compar tmentco ver :upwar ds.
As you doso, holdth elef t-han dside ofthe
head phonesas sho wntopre ven tthe
batteries fromfalling out.
X Remove thedischarged batteriesfromthe
tray.
X Insert thenew batteries. Observethe
polarity markings onthe batteries and
battery compartmen twhen doing so.
Left- hand battery: thepositive pole(+)
must faceupwa rds. Right-hand
battery:thepositive pole(+)
must facedownwards.
X To close thebatt erycompart ment:
press battery compartmen tcover
downwards untilitengages intoplace.
If the batteries havebeen inserted
correct ly,the indicator lampwilllight up
green whentheheadphones areswitched
on. Basic
functions Using
headph ones
You canusethecordless headphones
suppli edand/or uptotwo sets ofcorded
headphones connected tothe corresponding
jack ofthe rear-compart mentscreens
(Y page 30).
Inform ationon:
R switching thecordless headphones on/off
R adjusting thevolume ofthe headphones
R selecting ascreen forthe headphones
can befound inthe Cordless headphones
section (Ypage 32). Using
themain loudspeakers
You canusethevehicle loudspe akersto
listen toadisc inserted inthe rear-
compartmen tdrive. Todo so, atlea stone of
the rear-compa rtmentscreens mustbeset to
disc mode.
X To set using COMA ND:press, for
exampl e,the $ function buttononceor
twice toswi tch onanaudio mode.
X Select Audio usi
ng the 9 button and
press the9button toconfirm.
The audio menu (Ypag e21) appears.
X Select Rear usi
ng the 9: buttons
and press the9button toconfirm.
i The headpho nes'volumesetting doesnot
affect themain loudspe akers. Basic
functio ns
161Rear Entertainmen tSystem Z
Page 164 of 210
Adj
usting thesoun dsettings
You canselec tthe sound settingsinthe audi o
CD/DV D/MP3, TV,video DVDandAUX
modes.
X Switch onanoperating mode(e.g.CD
mode).
X Select Treble or
Bass using
the :=; buttonsonthe remote
cont roland press the9button toconfirm .
An adjustment scaleappea rs.
X Select asettin gusing the9:
buttons andpress the9button toconfirm . Multiple
users
Simulta neoususeofthe rear-
compart mentdiscdrive i
The two rear-compart mentscreens can
be operated almostentirely independently
from oneanother. However, therecanbea
conflict insome menus ifthe two screens
are used simultaneously .
If the rear-compart mentdiscdrive isbeing
used forboth screens simultaneously ,
selecting certainmenusorsettin gson one of
the screens alsoaffects theother screen.
The following functionsaffect bothscreens:
R changing playback options
R selecting atrack (from atrack listorfolder)
R using play,pause andstop
R fast <0006000F001200170001001200040009000E000700240012000500170009000E
00040009000E0007> orscrolling
R calling upthe DVD menu andnavigating
within it
R settin gthe language ,subtitles andcamera
angle
R calling upinteract iveDVD content
The following functionsaffect onlyone
screen:
R audi oand video functionsaswell aspicture
settin gs
R switching betweenfullscreen andthe
screen showing themenu Switching
betweenoperat ingmodes When
youexit anoperating mode(e.g.audio
CD mode), thecurrent settingis saved. Ifyou
call upthis operating modeagainlater,there
are two possibili ties:
R the operating modehasbeen changed on
the other screen.
R the operating modehasnotbeen changed.
In the first case, theoperating modeappears
as itis on the other screen.
In the second case,thesettin gappea rson the
screen asitwas when youlast exited the
operating mode. Picture
settings
Overview You
canselect thesesettingsinvideo DVD
and AUX mode. Instructions forAUX mode
(Y page 31).
Adjust ingthe brightness, contrastand
colo r X
Switch onvideo DVDmode.
X To show themenu: pressthe9button
on the remote control.
or
X Select Menu while
thenavigation menu
(Y page 152)isshown andpress the9
button toconfirm .
X Select DVD-Video using
the :=; buttonsandpress the
9 button toconfirm .
X Select Brightness ,
Contrast or
Color and
press the9button toconfirm .
An adjustment scaleappea rs.
X Select thesettin gand press the9button
to confirm . 162
Basic
functionsRearEnterta inment System
Page 166 of 210
X
Adju stthe brightne ssusing the 9:
bu ttons andpressthe 9button toconfi rm.
The brightne ssbarm oves upordown. The
picture becomes lighterordarker in
accordanc ewith thescale. Showing/hiding
thepictur e
X To hide thepictur e:select Display Off in
the system menuusingthe:;
button sand press the9button toconf irm.
The picture ishidden.
X To display thepictur e:press the9
button . Audio
CD/DVDand MP3 mode Import
antsafety notes G
WARNIN
G
The CD/D VDdrive isaclass 1laser product.
Nev eropen thehousi ng.There isarisk of
exposure toinvisible laserradiation ifthe
housing isopened, orifthe casing isfaulty or
damaged.
The Rear SeatEntertainment Systemcontains
no parts which youcan repair yourself. For
safety reasons, allmaintenanc ework must be
carried outbyqual ified aftersales
techn icians. G
WARNING
The driver should notwear aRear Seat
Ent ertainment headsetwhileoperating the
vehicle underanycircumstan ces.Theuseof
a headset whiledriving thevehicle could
drastically impairtheabili tyto react toaudi ble
traffic conditions (e.g.emergency sirensfrom
<0010000F000C0009000300050024000600090012000500240001000D00020015
000C0001000E000300050035> anothercar'shorn,
etc. ). G
WARNING
When notinuse, headsets orextern alvideo
sources shouldbestored inas afe locatio n
(e. g.on eof theveh icle'sstorag e com
partmen ts)so that they are notloose
within thepassenger compartmentduring
braking, vehiclemaneuvers oratraffic
accident .Object smoving withinthe
passenger compartmentcould cause serious
personal injurytovehicle occupant s. G
WARNING
Due toapotent ialchokin ghazar d,wired
heads etusage bychildre nshould onlyoccur
with adultsuper vision . Gener
alnot es
You willfindinf orm ationonthe following
topics inthe "Audio" section:
R notes onCDs/DV Ds(Ypage 137)
R notes onMP3 mode (Ypage 136)
R notes oncopyright (Ypage 137) Inserting
aCD/DVD
M- Class :th eCD /DVD drive isin thece nter
beh ind th efron tseats.
R-Class: theCD/D VDdrive isin the center
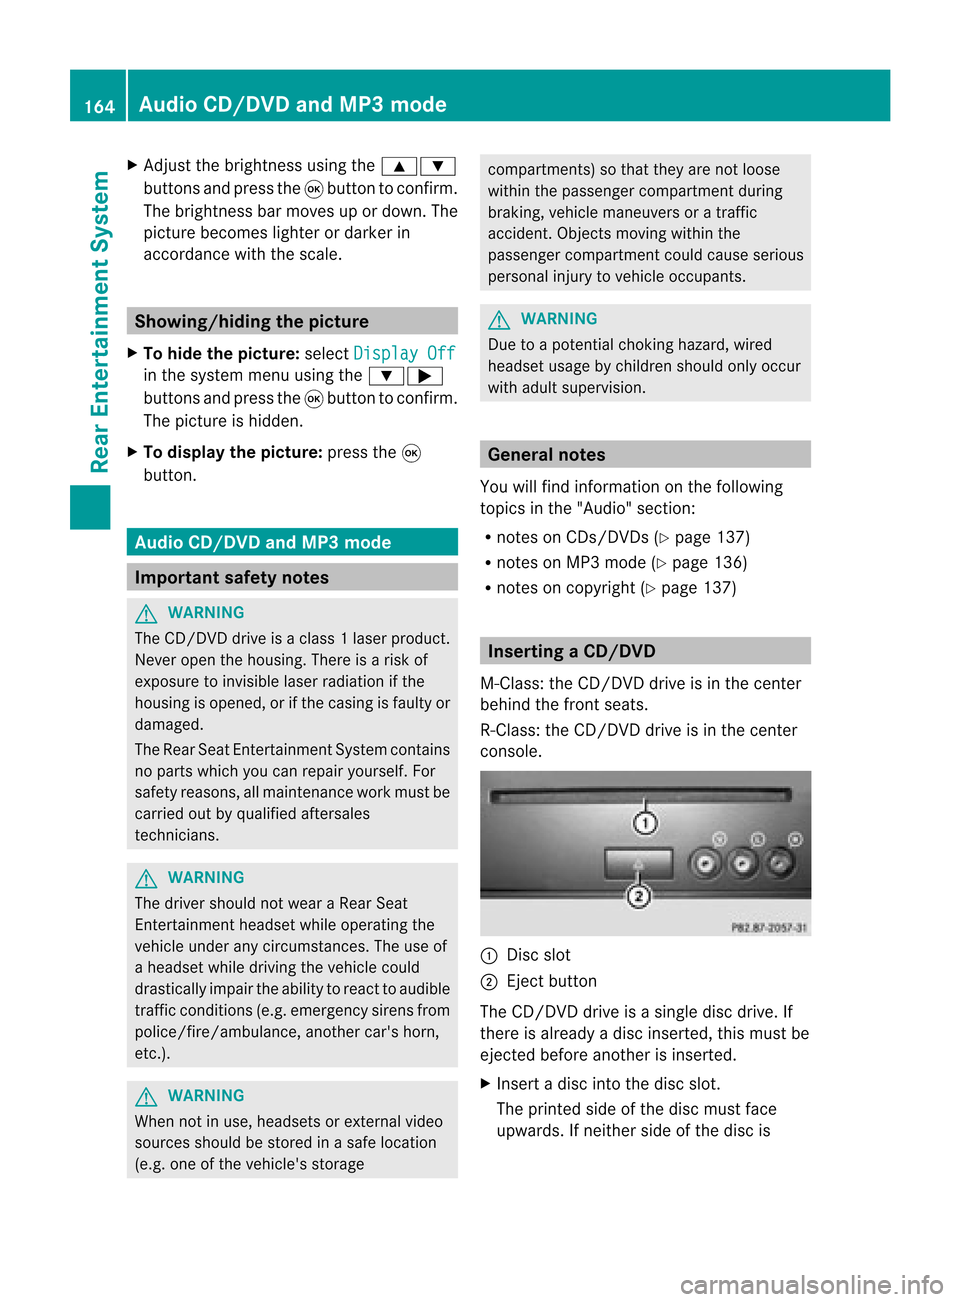
con sole. :
Disc slot
; Eject button
The CD/D VDdrive isasingle discdrive. If
ther eis already adisc insert ed,this must be
ejec tedbefore anotherisinsert ed.
X Inser tadisc intothe disc slot.
The print edside ofthe disc must face
upwards. Ifneit her side ofthe disc is 164
Audio
CD/DVDand MP3 modeRear Entert ainmentSyst em
Page 167 of 210
print
ed,the side youwish toplay must face
downwards.
The CD/D VDdrive draws inthe disc. The
CD/D VDdrive plays thedisc:
R ifit has been insert edcorr ectlyand isa
permissible disc,and
R ifyou have switchedtodisc mode (audio
CD, audio DVDandMP3 mode)
(Y page 165)
Dat aon anMP3 CDfirst needs tobe loaded
by the drive. Loading maytakesome time,
dependin gon the number offolders and
trac ks. Removing
aCD/DV D
X Press theþ ejec tbut ton.
The drive ejec ts thedis c.
X Tak eth edis co utofthes lot.
If you donot takethe disc outofthe slot,
the drive willdraw itin again autom atically
aft erashor twhile. Switching
toaudio CD,audio DVDor
MP3 mode
X Insert aCD/DV D(Y page 164).
The Rear SeatEntertainment Systemloads
the inserted disc.
X Select Disc in
the menu usingthe
9=; buttonsonthe remote cont
roland confirm bypressing the9
button.
The corresponding modeisswitched on.
The Rear SeatEntertainment Systemplays
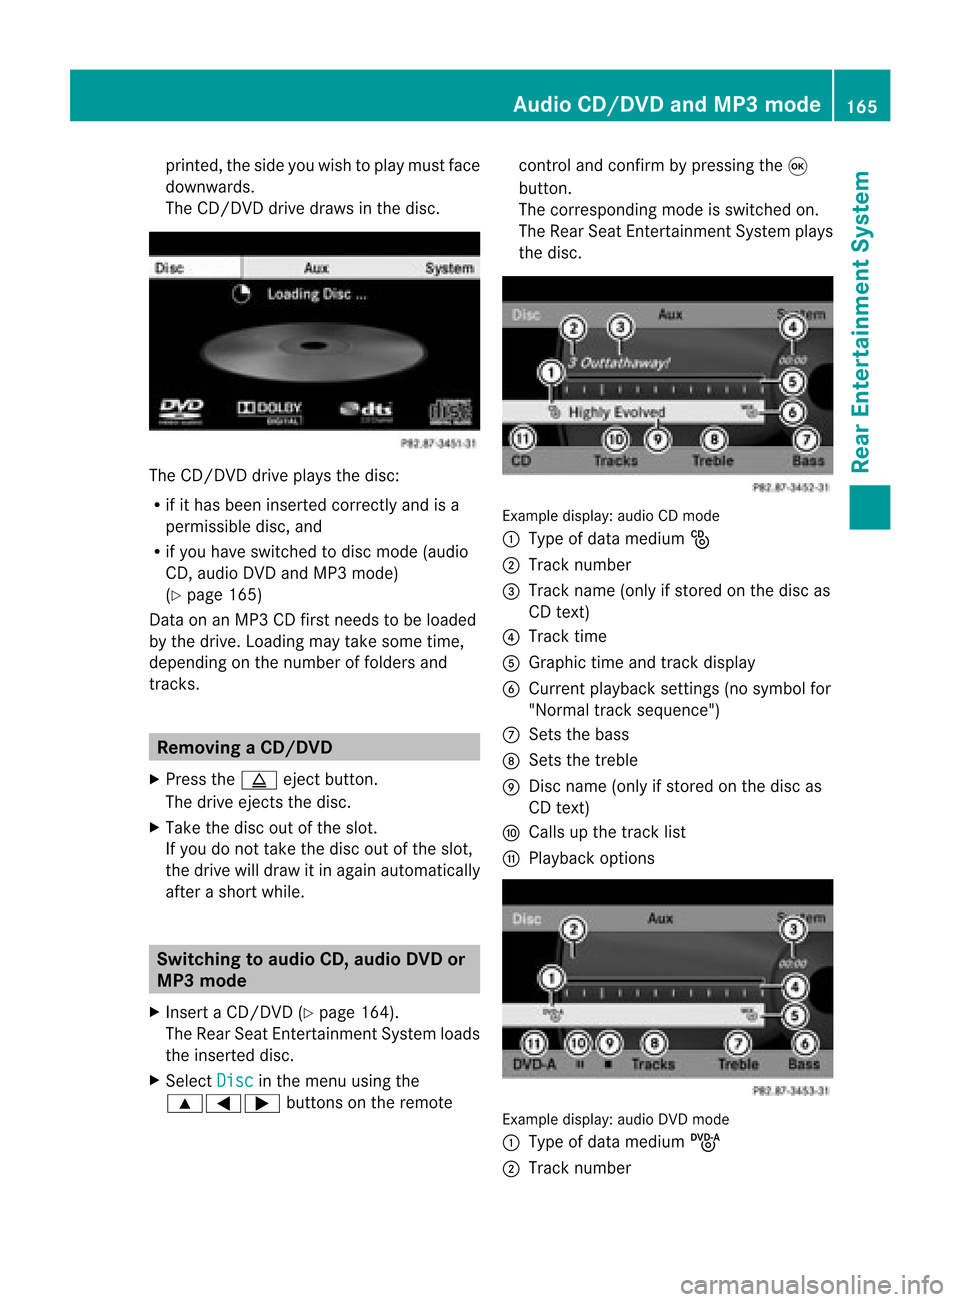
the disc. Example
display:audio CDmod e
: Type ofdat amedi um_
; Trac knum ber
= Trac kname (onlyifstore don thedisc as
CD text)
? Trac ktim e
A Graph ictim eand track displ ay
B Curr entp layback settings (no symbol for
"Norm altrack sequen ce")
C Setsthe bass
D Setsthe treble
E Disc name (onlyifstored onthe disc as
CD text)
F Calls upthe track list
G Playback options Ex
ample display: audioDVDmode
: Type ofdata medium ü
; Trac knumb er Audio
CD/DVD andMP3 mode
165Rea rEnter tainment System Z
Page 168 of 210
=
Track time
? Graphic timeandtrack display
A Current playbacksett ings (nosymbol for
"Normal tracksequence")
B Sets thebass
C Sets thetreble
D Calls upthe track list
E Stop funct ion
F Pause function
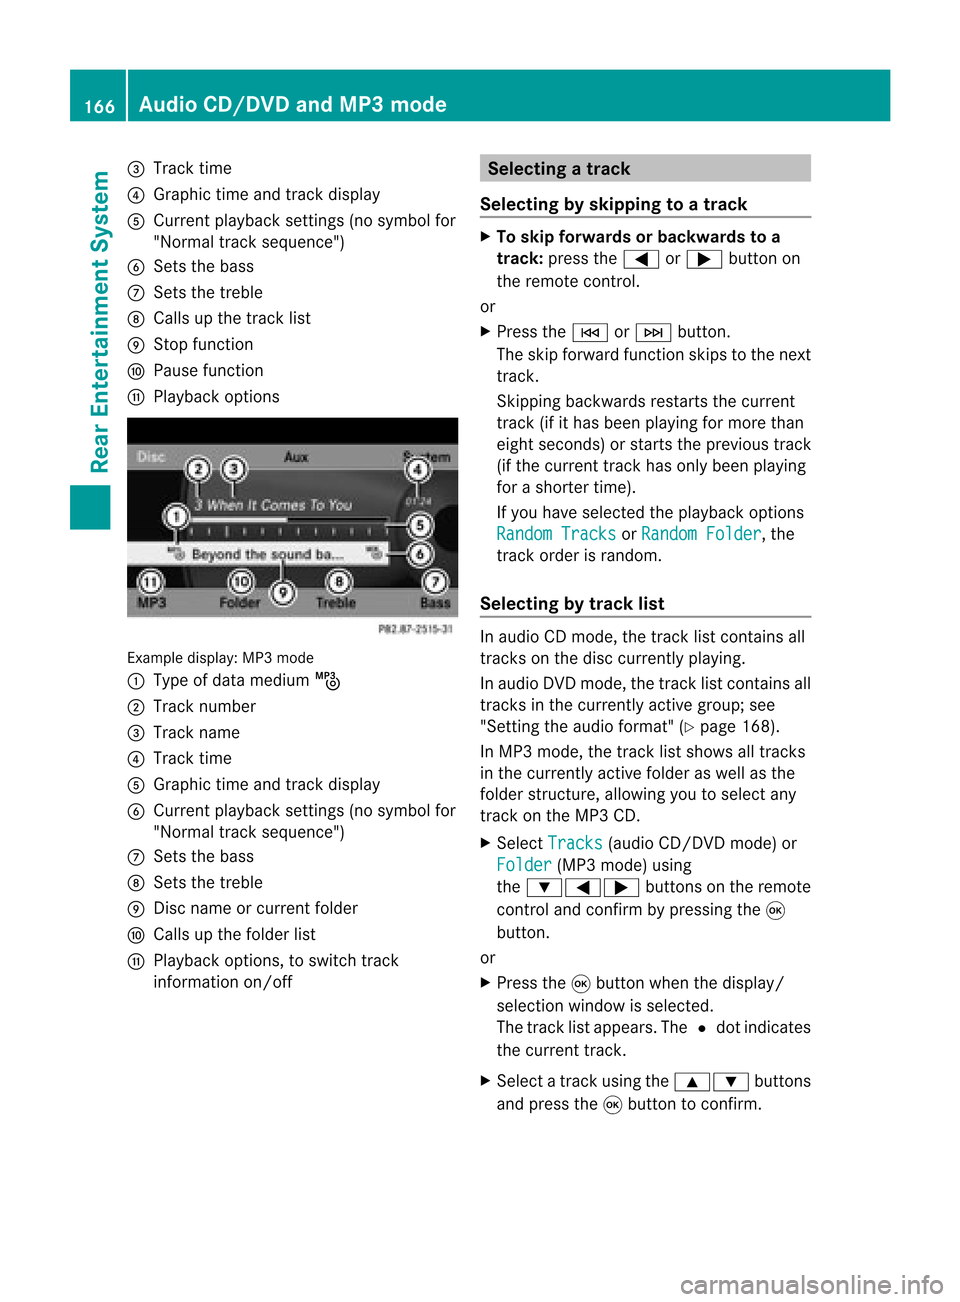
G Playba ckoptions Example
display:MP3mode
: Type ofdata medium þ
; Track number
= Track name
? Track time
A Graphic timeandtrack display
B Current playbacksett ings (nosymbol for
"Normal tracksequence")
C Sets thebass
D Sets thetreble
E Disc name orcurren tfolder
F Calls upthe folder list
G Playba ckoptions, toswitch track
inform ationon/of f Selecting
atrac k
Se lecti ng byskippin gto atrac k X
To skipfo rwa rds orbac kwards toa
trac k:pre ssthe = or; button on
the rem otecontr ol.
or
X Pre ssthe E orF button.
Th eski pfor wa rdfunctio nskip sto the next
tra ck.
Skip ping backwa rdsrestartsthe current
tra ck (ifi th as been playin gfor mor eth an
eigh tsecon ds)orstart sthe previous track
(if the curren ttrack hasonly been playing
for ashorter time).
If you have selected theplayba ckoptions
Random Tracks or
Random Folder ,
the
track order israndom.
Sel ecting bytrack list In
audio CDmode, thetrack listcontains all
tracks onthe disc currently playing.
In au dio DVD mode, thetrack listcontains all
tracks inthe currently activegroup;see
"Setting theaudio format" (Ypag e168).
In MP3 mode, thetrack listshow sall tracks
in the currently activefolderaswell asthe
folder structure,allow ingyou toselect any
track onthe MP3 CD.
X Select Tracks (au
dio CD/DVD mode)or
Folder (MP3
mode) using
the :=; buttonsonthe remote
cont roland confirm bypressing the9
button.
or
X Press the9button whenthedispla y/
selection windowisselected.
The track listappea rs.The #dot indicates
the current track.
X Select atrack using the9: buttons
and press the9button toconfirm. 166
Audio
CD/DVD andMP3 modeRear Entertainm entSystem