2012 MERCEDES-BENZ S-CLASS SEDAN fuse chart
[x] Cancel search: fuse chartPage 14 of 536

ETS/4ETS (Electronic Traction
System) ................................................ 76
Exhaust check ................................... 331
Exhaust tail pipe (cleaning
instructions) ...................................... 470
Exterior lighting see Exterior lighting
Exterior mirror parking position
Adjusting (COMAND) .....................266
Exterior mirrors
Adjusting ....................................... 116
Dipping (automatic) .......................117
Folding in/out (automatically) .......116
Folding in/out (electrically) ...........116
Out of position (troubleshooting) ...116
Storing settings (memory
function) ........................................ 118
Storing the parking position ..........117
Eyeglasses compartment ................. 435
F
Factory setting (reset function) ....... 154
Fader, setting .................................... 139
Fast forward Audio mode (CD, DVD, MP3) .........230
Rear Seat Entertainment System ...260
Video DVD ..................................... 247
Fast rewind
Audio mode (CD, DVD, MP3) .........230
Rear Seat Entertainment System ...260
Video DVD ..................................... 247
Favorites (COMAND) ......................... 124
Filler cap see Fuel filler flap
First-aid kit ......................................... 474
Flat tire Changing a wheel/mounting the
spare wheel ................................... 475
MOExtended run-flat system .........480
Preparing the vehicle .....................475
Raising the vehicle .........................476
Floormat ............................................. 455
Freeway information ......................... 191
Front fog lamps ................................. 282
Display message ............................ 404
Switching on/off ........................... 282
Front-passenger seat
Adjusting from the driver's seat ..... 109
Adjusting from the rear
compartment ................................. 109
Front windshield
see Windshield
Fuel
Additives ........................................ 526
Displaying the current
consumption .................................. 378
Displaying the range ......................378
Driving tips .................................... 330
Fuel gauge ....................................... 37
Grade (gasoline) ............................ 525
Important safety notes ..................525
Premium-grade unleaded gasoline . 525
Problem (malfunction) ...................324
Quality (diesel) ............................... 526
Refueling ........................................ 321
Tank content/reserve fuel .............525
Fuel filler flap, opening/closing ....... 322
Fuel filter (display message) ............ 409
Fuel level Calling up the range (on-board
computer) ...................................... 378
Fuel tank
Capacity ........................................ 525
Problem (malfunction) ...................324
Function buttons (COMAND) ............ 123
Fuses Allocation chart ............................. 488
Before changing ............................. 488
Dashboard fuse box .......................488
Engine emergency stop .................490
Fuse box in the engine
compartment ................................. 489
Fuse box in the rear compartment . 488
Important safety notes ..................487
G
Garage door opener Clearing the memory .....................455
Notes ............................................. 452
12Index
Page 489 of 536

XSwitch on the hazard warning lamps
( Y page 283).XLeave the SmartKey in position 2 in the
ignition lock.
i When towing with the hazard warning
lamps switched on, use the combination
switch as usual to signal a change of
direction. In this case, only the turn signals
for the desired direction flash. When the
combination switch is reset, the hazard
warning lamps start flashing again.
Transporting the vehicle
The towing eye can be used to pull the vehicle
onto a trailer or transporter for transporting
purposes.
XTurn the SmartKey to position 2 in the
ignition lock.XShift the automatic transmission to
position N.
As soon as the vehicle is loaded:
XPrevent the vehicle from rolling away by
applying the electric parking brake.XShift the automatic transmission to
position P.XTurn the SmartKey to position 0 in the
ignition lock and remove the SmartKey
from the ignition lock.XSecure the vehicle.
! Only lash the vehicle down by the wheels
or wheel rims, not by parts of the vehicle
such as axle or steering components.
Otherwise, the vehicle could be damaged.
Notes for 4MATIC vehicles
! Vehicles with 4MATIC must not be towed
with either the front or the rear axle raised,
as doing so will damage the transmission.
If the vehicle has transmission damage or
damage to the front or rear axle, have it
transported on a transporter or trailer.
In the event of damage to the electrical
system
If the battery is defective, the automatic
transmission will be locked in position P. To
shift the automatic transmission to position
N , you must provide power to the vehicle's
electrical system in the same way as when
jump-starting ( Y page 483).
Have the vehicle transported on a transporter
or trailer.
Tow-starting (emergency starting)
! Vehicles with automatic transmission
must not be started by tow-starting. This
could otherwise damage the transmission.
For further information on "Jump-starting"
see ( Y page 483).
Fuses
Important safety notes
GWARNING
Only use fuses that have been approved for
Mercedes-Benz vehicles and that have the
correct fuse rating for the systems
concerned. Do not attempt to repair or bridge
faulty fuses. Using fuses that have not been
approved or attempting to repair or bridge
faulty fuses could cause the fuse to be
overloaded and result in a fire. Have the cause
traced and rectified at a qualified specialist
workshop.
The fuses in your vehicle serve to close down
faulty circuits. If a fuse blows, all the
components on the circuit and their functions
stop operating.
Blown fuses must be replaced with fuses of
the same rating, which you can recognize by
the color and value. The fuse ratings are listed
in the fuse allocation chart.
If a newly inserted fuse also blows, have the
cause traced and rectified at a qualified
Fuses487Breakdown assistanceZ
Page 490 of 536

specialist workshop, e.g. an authorized
Mercedes-Benz Center.
! Only use fuses that have been approved
for Mercedes-Benz vehicles and which
have the correct fuse rating for the system
concerned. Otherwise, components or
systems could be damaged.
Before changing a fuse
XPark the vehicle and apply the electric
parking brake.XSwitch off all electrical consumers.XRemove the SmartKey from the ignition
lock.
The fuses are located in various fuse boxes:
R fuse box on the right and left-hand sides of
the dashboard
R fuse box in the rear
R fuse box in the engine compartment on the
left-hand side of the vehicle, when viewed
in the direction of travel
R fuse box in the engine compartment on the
right-hand side of the vehicle, when viewed
in the direction of travel
The fuse allocation chart is in the vehicle
document wallet.
Dashboard fuse box
There is a fuse box located on both the
driver's side and the front-passenger side.
! Do not use a pointed object such as a
screwdriver to open the cover in the
dashboard. You could damage the
dashboard or the cover.
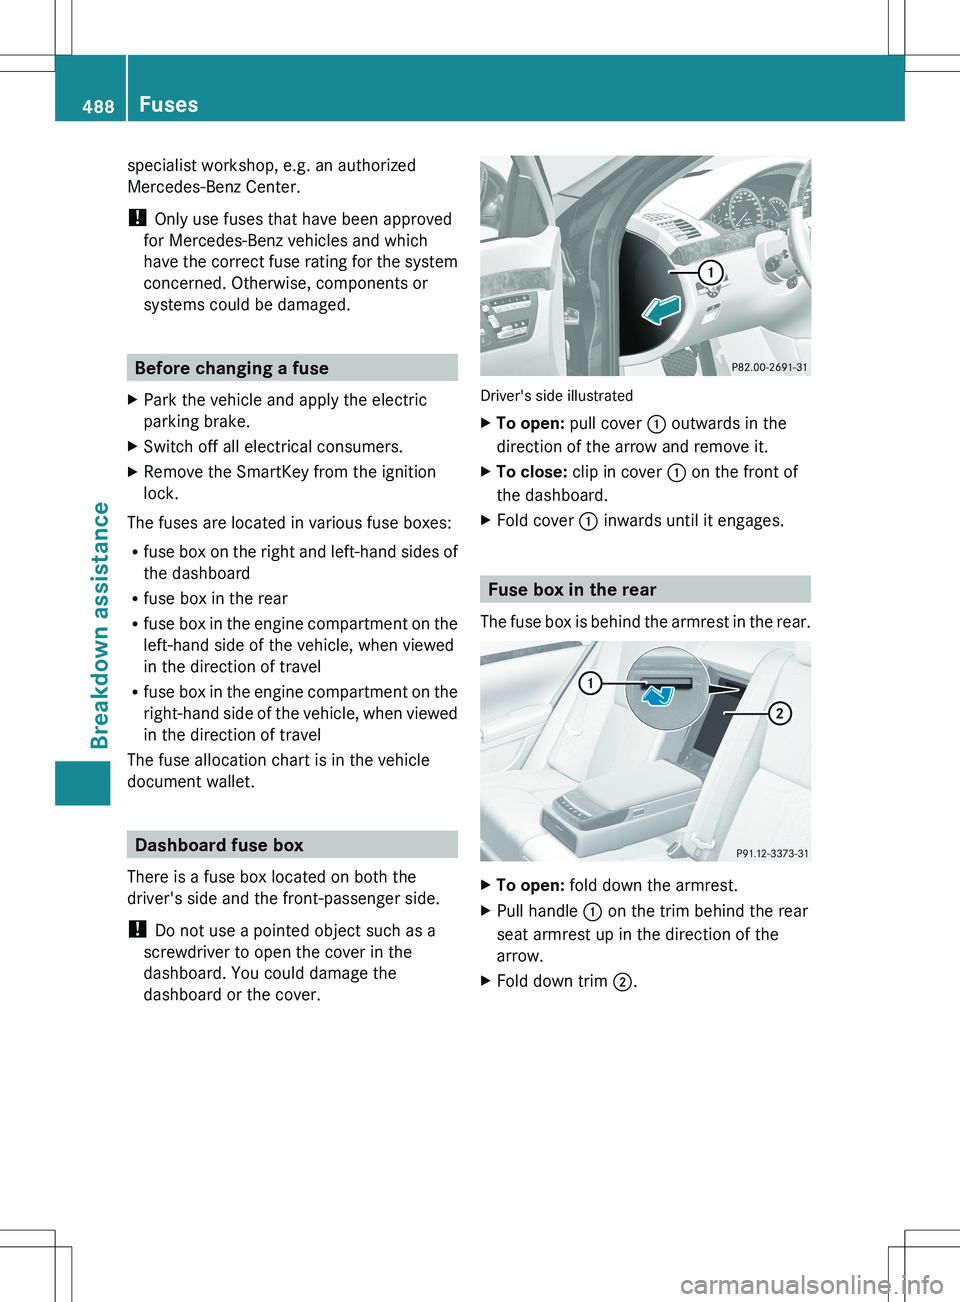
Driver's side illustrated
XTo open: pull cover : outwards in the
direction of the arrow and remove it.XTo close: clip in cover : on the front of
the dashboard.XFold cover : inwards until it engages.
Fuse box in the rear
The fuse box is behind the armrest in the rear.
XTo open: fold down the armrest.XPull handle : on the trim behind the rear
seat armrest up in the direction of the
arrow.XFold down trim ;.488FusesBreakdown assistance
Page 492 of 536

Engine emergency off
If the engine cannot be switched off as
described, observe the following procedure:XTake the fuse allocation chart out of the
vehicle document wallet.XSearch for “Emergency engine shutdown”
in the fuse allocation chart.XRemove the fuses listed under "Emergency
engine shutdown".490FusesBreakdown assistance