2012 MERCEDES-BENZ S-CLASS SEDAN clock setting
[x] Cancel search: clock settingPage 130 of 536

switch SPLITVIEW on and off
( Y page 129).
The SPLITVIEW screen remains on for
approximately 30 minutes after the SmartKey
has been turned to position 0 in the ignition
lock. After this time or after the SmartKey has
been removed, the settings on the front-
passenger side are saved for approximately
30 minutes longer. After this period,
reactivation on the front-passenger side
means that the settings from the driver's side
will be used.
Cordless headphones for the front
passenger
There are different cordless headphones for
the front passenger and the rear
compartment.
The cordless headphones for the front
passenger can be identified by SPLITVIEW
symbol : on the headband.
The cordless headphones for the front
passenger cannot be used in the rear
compartment. Equally, the headphones for
the rear compartment cannot be used by the
front passenger.
Swiveling the COMAND display and
setting the brightness
You can swivel the COMAND display 5
. The
buttons are located beside the COMAND
display.
Swiveling:To swivel the display to the left;To swivel the display to the right
Setting the brightness
:Brightness of the instrument cluster
lighting;Brightness of the COMAND display
Brighter or dimmer:
XTurn control : or ; clockwise or counter-
clockwise.
i If Night View Assist Plus is activated, only
the brightness of the multifunction display
is adjusted with control :.
Display design
When the default settings are selected, the
display automatically switches between day
design and night design.
You can change these settings using
COMAND ( Y page 147).
5
Not with SPLITVIEW.128At a glanceCOMAND
Page 166 of 536

on the same street: call up an address
destination from the last destinations.XSelect Change by turning cVd and sliding
ZV Æ the COMAND controller and press
W to confirm.
All destination entry functions are
available.XEdit/enter the destination as described for
destination entry ( Y page 157).
Entering a destination using the map
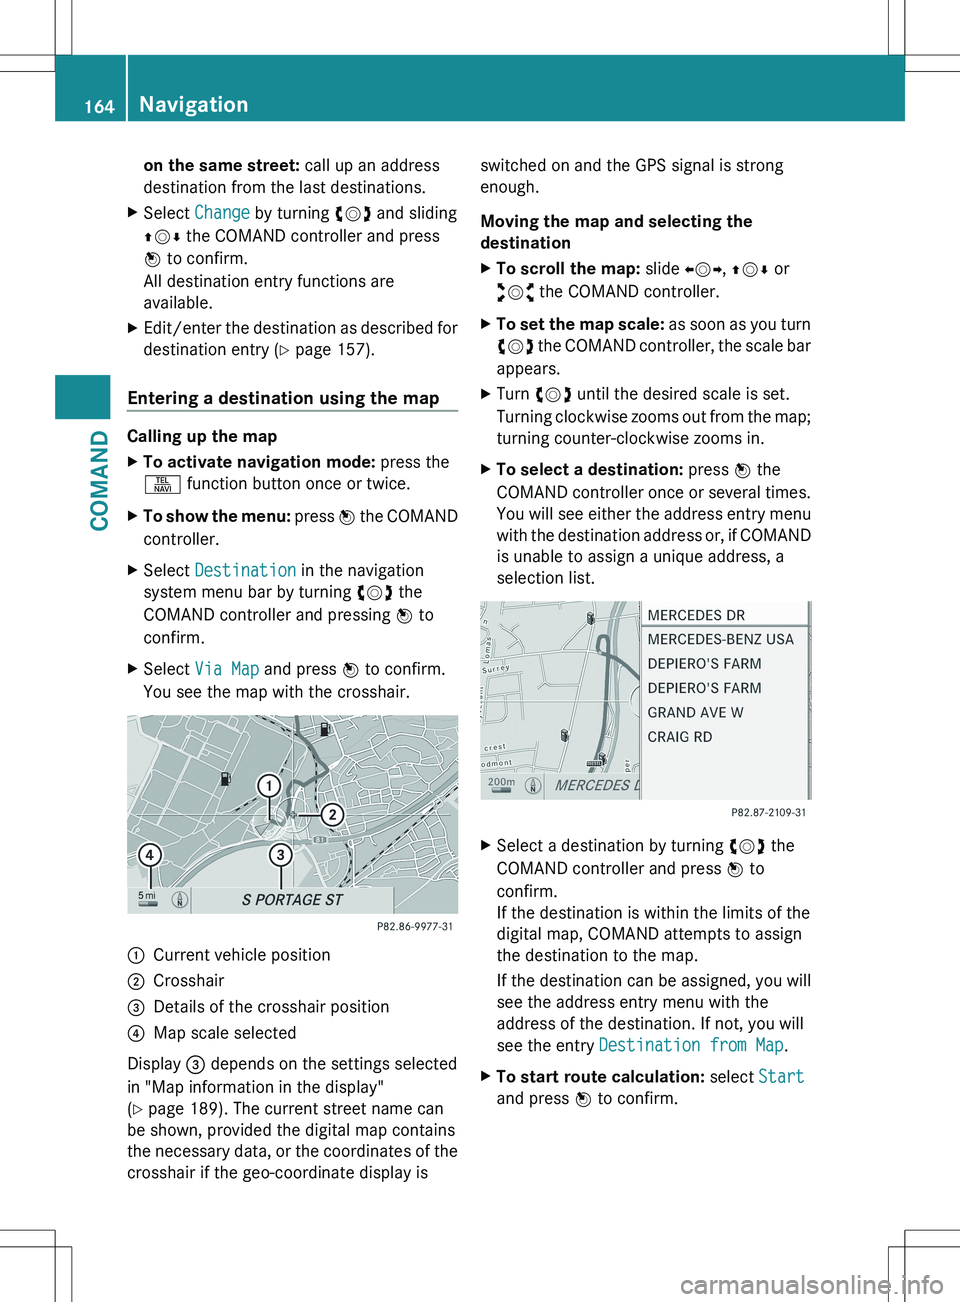
Calling up the map
XTo activate navigation mode: press the
S function button once or twice.XTo show the menu: press W the COMAND
controller.XSelect Destination in the navigation
system menu bar by turning cVd the
COMAND controller and pressing W to
confirm.XSelect Via Map and press W to confirm.
You see the map with the crosshair.:Current vehicle position;Crosshair=Details of the crosshair position?Map scale selected
Display = depends on the settings selected
in "Map information in the display"
( Y page 189). The current street name can
be shown, provided the digital map contains
the necessary data, or the coordinates of the
crosshair if the geo-coordinate display is
switched on and the GPS signal is strong
enough.
Moving the map and selecting the
destinationXTo scroll the map: slide XVY, ZV Æ or
aVb the COMAND controller.XTo set the map scale: as soon as you turn
cVd the COMAND controller, the scale bar
appears.XTurn cVd until the desired scale is set.
Turning clockwise zooms out from the map;
turning counter-clockwise zooms in.XTo select a destination: press W the
COMAND controller once or several times.
You will see either the address entry menu
with the destination address or, if COMAND
is unable to assign a unique address, a
selection list.XSelect a destination by turning cVd the
COMAND controller and press W to
confirm.
If the destination is within the limits of the
digital map, COMAND attempts to assign
the destination to the map.
If the destination can be assigned, you will
see the address entry menu with the
address of the destination. If not, you will
see the entry Destination from Map .XTo start route calculation: select Start
and press W to confirm.164NavigationCOMAND
Page 223 of 536

Displaying program informationXSelect Audio in the main function bar by
sliding ZV and turning cVd the COMAND
controller and press W to confirm.XSelect Audio by sliding ZV the COMAND
controller and pressing W to confirm.
The audio menu appears.XSelect HD Radio by sliding ZV the
COMAND controller and press W to
confirm.XSelect Info in the HD Radio display by
sliding ZV the COMAND controller and
press W to confirm.
Information on the currently selected
station is displayed. The contents and
purpose of the information depend on the
HD Radio station.
Satellite radio
Important notes
This section provides detailed information on
the following topics:
R selecting a channel and program category
R memory functions
R sound settings
i The satellite radio mode described below
requires optionally available satellite radio
equipment and registration with a satellite
radio provider.
i Note that the categories and channels
shown in the illustrations depend on the
program content offered by the provider.
The program contents may vary. The
illustrations and descriptions in these
operating instructions may therefore differ
from the channels and categories offered
by the provider.
Satellite radio mode may be temporarily
unavailable or interrupted for a variety of
reasons. These reasons include
environmental or topographical conditions
as well as other issues beyond the control
of Mercedes-Benz USA, LLC. Operation
may also be impaired in certain locations
(e.g. tunnels, multi-storey car parks or
within as well as close to buildings).
i SIRIUS XM Radio offers more than 130
digital-quality radio channels providing
100% commercial-free music, sport, news
and entertainment.
SIRIUS XM Radio employs a fleet of high-
performance satellites to broadcast around
the clock throughout the USA and Canada.
The satellite radio program is available for
a monthly fee. Details are available from
the SIRIUS XM Service Center and at
http://www.sirius.com (USA) or
http://www.siriuscanada.com
(Canada).
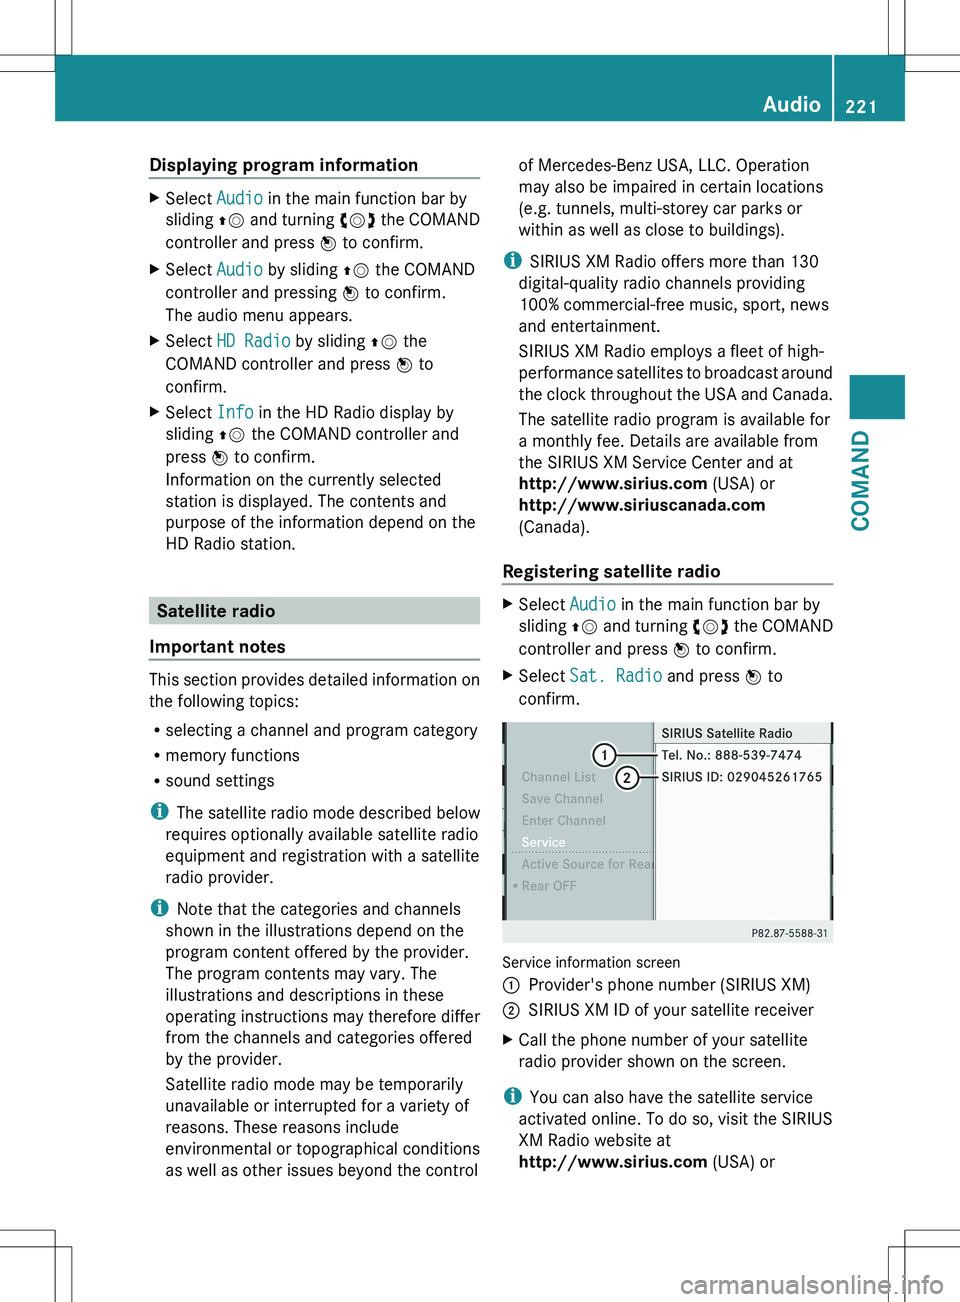
Registering satellite radioXSelect Audio in the main function bar by
sliding ZV and turning cVd the COMAND
controller and press W to confirm.XSelect Sat. Radio and press W to
confirm.
Service information screen
1Provider's phone number (SIRIUS XM)2SIRIUS XM ID of your satellite receiverXCall the phone number of your satellite
radio provider shown on the screen.
i You can also have the satellite service
activated online. To do so, visit the SIRIUS
XM Radio website at
http://www.sirius.com (USA) or
Audio221COMANDZ
Page 305 of 536

?Center vent thumbwheel, leftACenter air vent, leftXTo open/close: turn thumbwheels =
and ? up or down.
Setting the side air vents
XTo open/close: turn thumbwheel = up or
down.
i Side window defroster vent : is never
completely shut, even if side air vent ; is
shut.
Setting the glove box air vent
When automatic climate control is activated,
the glove box can be ventilated, for instance
to cool its contents. The level of airflow
depends on the airflow and air distribution
settings.
! Close the air vent when heating the
vehicle.
At high outside temperatures, open the air
vent and activate the "cooling with air
dehumidification" function. Otherwise,
temperature-sensitive items stored in the
glove box could be damaged.
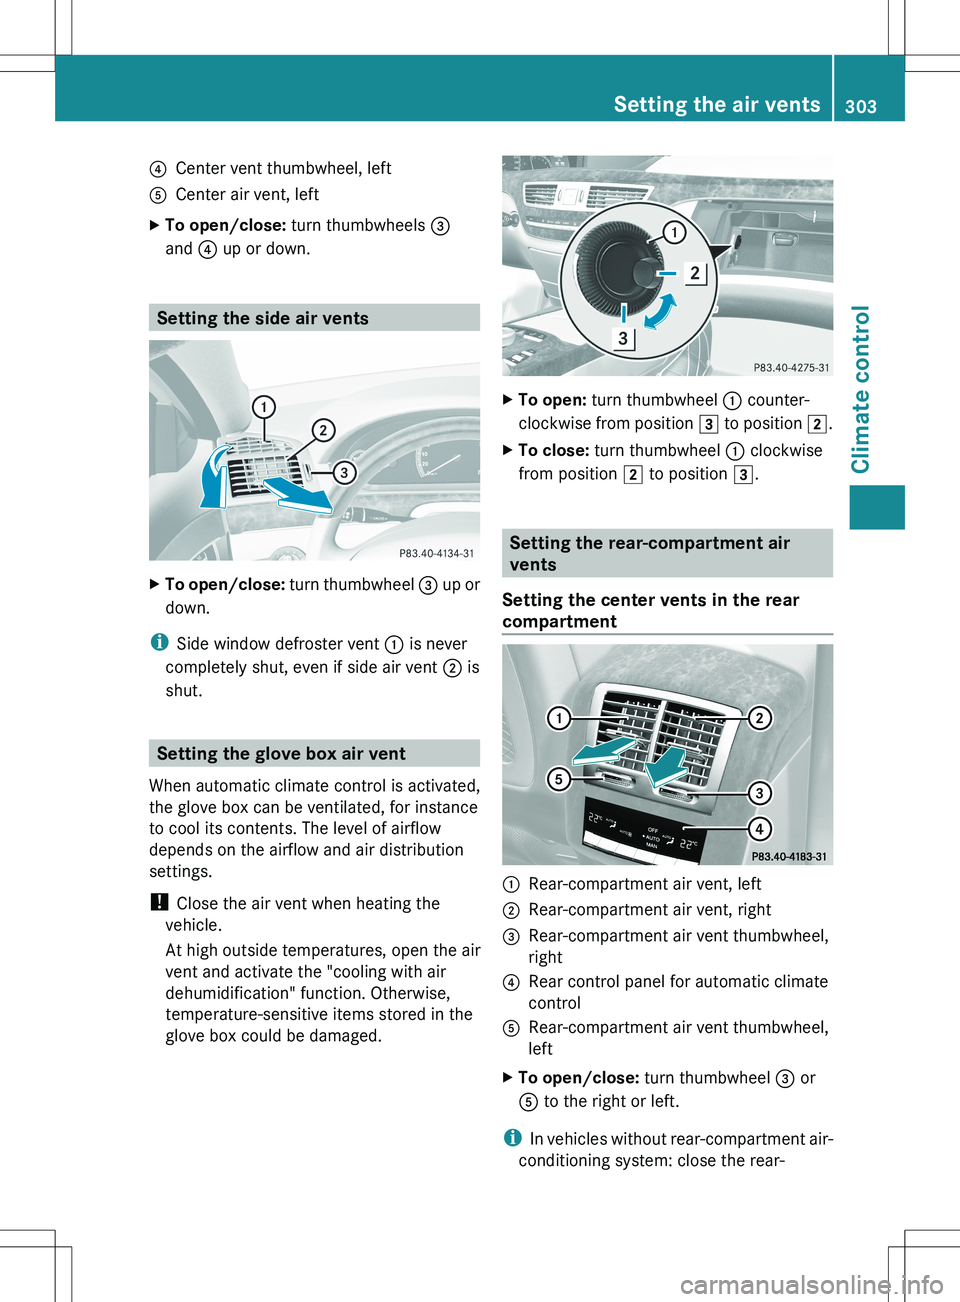
XTo open: turn thumbwheel : counter-
clockwise from position 3 to position 2.XTo close: turn thumbwheel : clockwise
from position 2 to position 3.
Setting the rear-compartment air
vents
Setting the center vents in the rear
compartment
:Rear-compartment air vent, left;Rear-compartment air vent, right=Rear-compartment air vent thumbwheel,
right?Rear control panel for automatic climate
controlARear-compartment air vent thumbwheel,
leftXTo open/close: turn thumbwheel = or
A to the right or left.
i
In vehicles without rear-compartment air-
conditioning system: close the rear-
Setting the air vents303Climate controlZ
Page 364 of 536

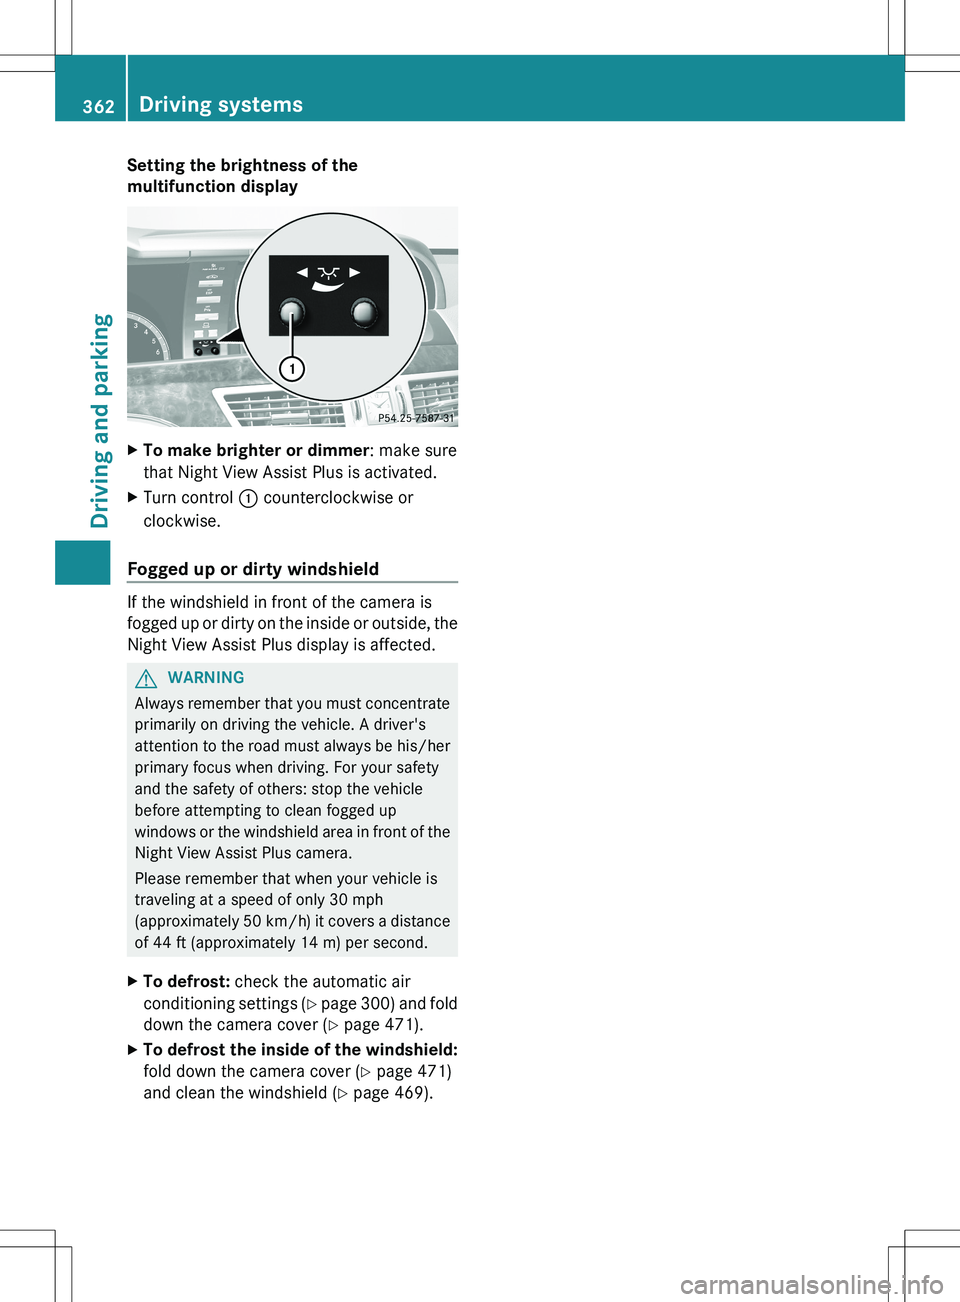
Setting the brightness of the
multifunction displayXTo make brighter or dimmer : make sure
that Night View Assist Plus is activated.XTurn control : counterclockwise or
clockwise.
Fogged up or dirty windshield
If the windshield in front of the camera is
fogged up or dirty on the inside or outside, the
Night View Assist Plus display is affected.
GWARNING
Always remember that you must concentrate
primarily on driving the vehicle. A driver's
attention to the road must always be his/her
primary focus when driving. For your safety
and the safety of others: stop the vehicle
before attempting to clean fogged up
windows or the windshield area in front of the
Night View Assist Plus camera.
Please remember that when your vehicle is
traveling at a speed of only 30 mph
(approximately 50 km/h ) it covers a distance
of 44 ft (approximately 14 m) per second.
XTo defrost: check the automatic air
conditioning settings (Y page 300) and fold
down the camera cover ( Y page 471).XTo defrost the inside of the windshield:
fold down the camera cover ( Y page 471)
and clean the windshield ( Y page 469).362Driving systemsDriving and parking