2012 MERCEDES-BENZ S-CLASS SEDAN tow
[x] Cancel search: towPage 360 of 536
Rthe trunk lid is open
R it is raining or snowing strongly or if it is
foggy
R it is night or if you are parking/
maneuvering your vehicle in a very dark
area
R a very bright white light is affecting the
camera
R the immediate vicinity is illuminated with
fluorescent light (the display of the
COMAND system can flicker)
R temperature changes abruptly, for example
if you drive out of the cold into a heated
garage (condensation on the lens)
R the camera lens is dirty or covered
R the rear of your vehicle is damaged
In this case, have the position and the
setting of the camera checked at a
specialist workshop. Mercedes-Benz
recommends that you consult a Mercedes-
Benz Center for this purpose.
Do not use the rear view camera in these
situations. You could otherwise injure
yourself and other people and/or cause
damage - including damage to your vehicle -
while parking/maneuvering.
Activating the rear view cameraXMake sure that the SmartKey is in position
2 in the ignition lock.XEngage reverse gear.
The area behind the vehicle is shown in the
COMAND display with guide lines.
Guide lines in the COMAND display
GWARNING
Use of rear view camera can be dangerous if
you are color-blind or have impaired color
vision.
Only use rear view camera if you can see and
distinguish all colored guidelines shown by
rear view camera on the COMAND system
display.
GWARNING
Please note that objects that do not touch the
ground may appear to be further away than
they actually are, for example:
R the bumper of a vehicle parked behind you
R the trailer drawbar
R the ball coupling of a trailer tow hitch
R the rear end of a truck
R a slanted post
In such cases, you should not use the guide
lines to judge the distance. You may misjudge
the distance, which increases the risk of
impacting the objects.
Even if the object you approach is directly on
the ground, do not approach the object any
closer than the red guide line.
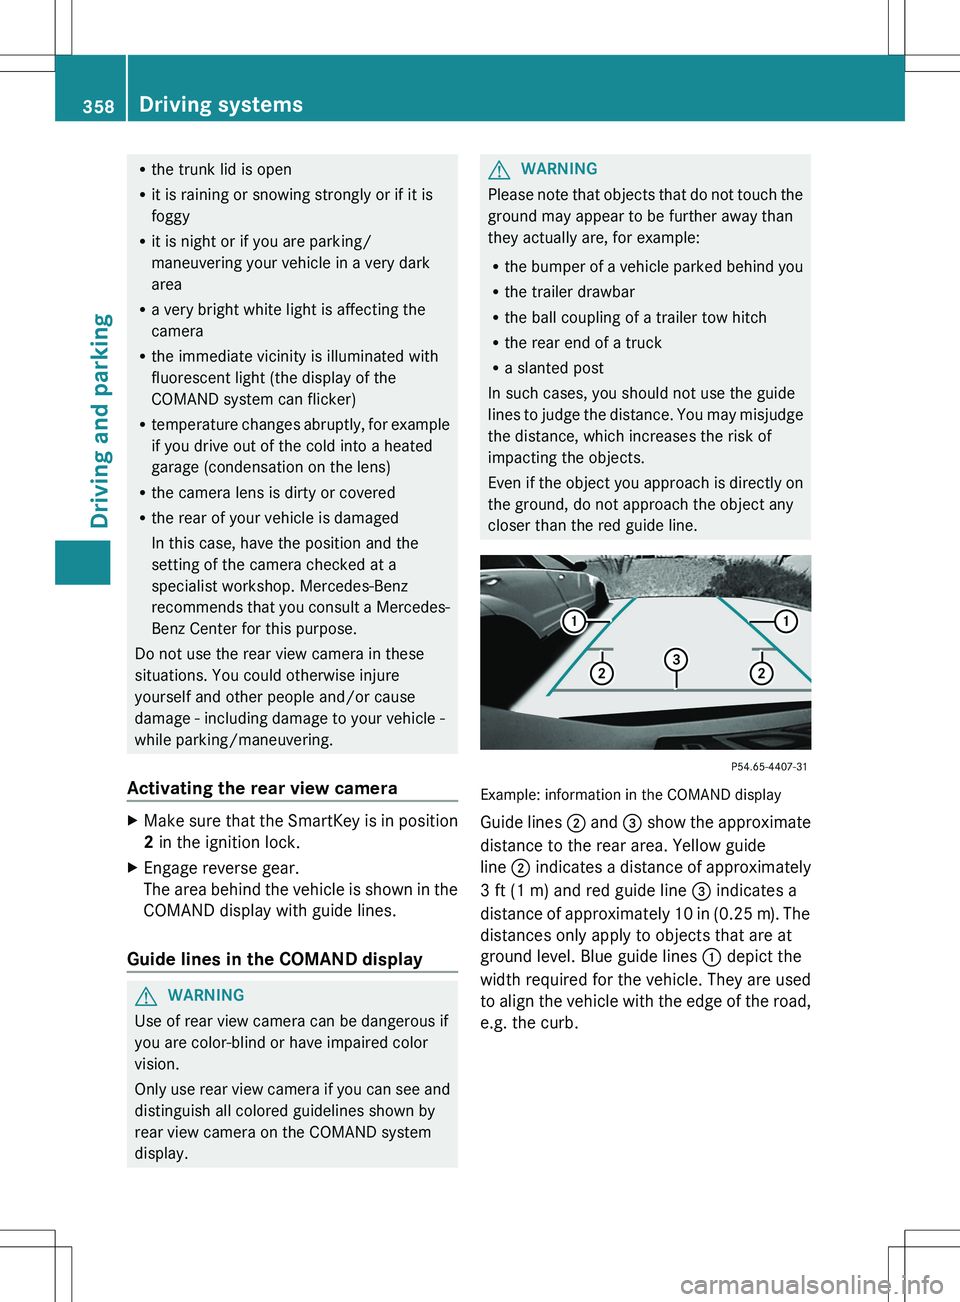
Example: information in the COMAND display
Guide lines ; and = show the approximate
distance to the rear area. Yellow guide
line ; indicates a distance of approximately
3 ft (1 m) and red guide line = indicates a
distance of approximately 10 in (0.25 m). The
distances only apply to objects that are at
ground level. Blue guide lines : depict the
width required for the vehicle. They are used
to align the vehicle with the edge of the road,
e.g. the curb.
358Driving systemsDriving and parking
Page 425 of 536
ProblemPossible causes/consequences and M Solutions7
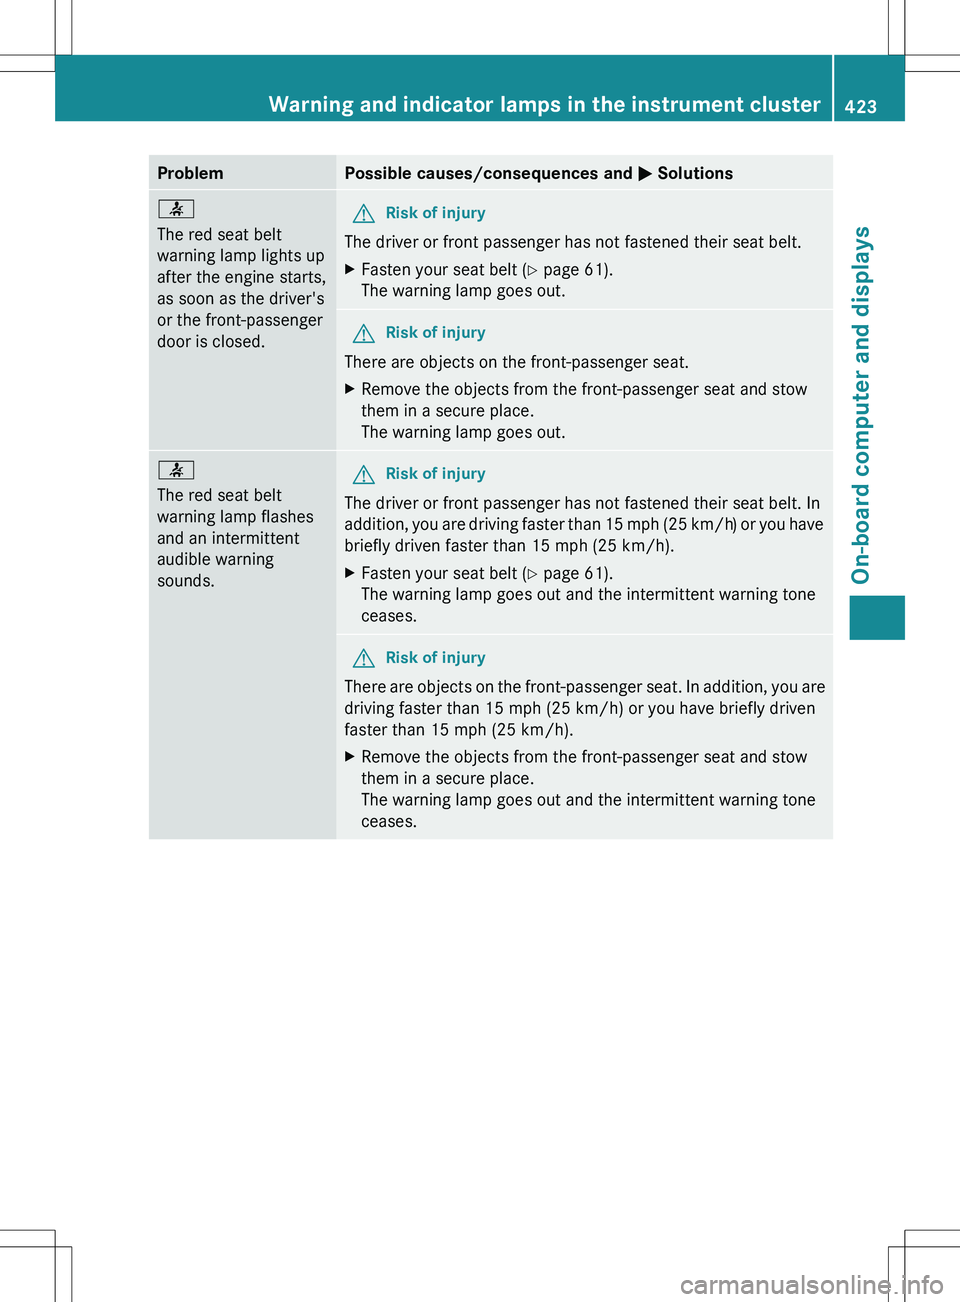
The red seat belt
warning lamp lights up
after the engine starts,
as soon as the driver's
or the front-passenger
door is closed.GRisk of injury
The driver or front passenger has not fastened their seat belt.
XFasten your seat belt ( Y page 61).
The warning lamp goes out.GRisk of injury
There are objects on the front-passenger seat.
XRemove the objects from the front-passenger seat and stow
them in a secure place.
The warning lamp goes out.7
The red seat belt
warning lamp flashes
and an intermittent
audible warning
sounds.GRisk of injury
The driver or front passenger has not fastened their seat belt. In
addition, you are driving faster than 15 mph (25 km/h) or you have
briefly driven faster than 15 mph (25 km/h).
XFasten your seat belt ( Y page 61).
The warning lamp goes out and the intermittent warning tone
ceases.GRisk of injury
There are objects on the front-passenger seat. In addition, you are
driving faster than 15 mph (25 km/h) or you have briefly driven
faster than 15 mph (25 km/h).
XRemove the objects from the front-passenger seat and stow
them in a secure place.
The warning lamp goes out and the intermittent warning tone
ceases.Warning and indicator lamps in the instrument cluster423On-board computer and displaysZ
Page 435 of 536
Useful information ............................434
Loading guidelines ............................434
Stowage areas .................................. 434
Features ............................................. 439433Stowage and features
Page 436 of 536
Useful information
i This Operator's Manual describes all
models and all standard and optional
equipment of your vehicle available at the
time of publication of the Operator's
Manual. Country-specific differences are
possible. Please note that your vehicle may
not be equipped with all features
described. This also applies to safety-
related systems and functions.
i Please read the information on qualified
specialist workshops ( Y page 31).
Loading guidelines
GWARNING
Always fasten items being carried as securely
as possible. Use cargo tie-down rings and
fastening materials appropriate for the weight
and size of the load.
In an accident, during hard braking or sudden
maneuvers, loose items will be thrown around
inside the vehicle. This can cause injury to
vehicle occupants unless the items are
securely fastened in the vehicle.
To help avoid personal injury during a collision
or sudden maneuver, exercise care when
transporting cargo. Do not pile luggage or
cargo higher than the seat backrests.
The trunk is the preferred place to carry
objects.
Never drive a vehicle with the trunk open.
Deadly carbon monoxide (CO) gases may
enter vehicle interior resulting in
unconsciousness and death.
The handling characteristics of a laden
vehicle are dependent on the distribution of
the load within the vehicle. For this reason,
you should observe the following notes when
transporting a load:
R when transporting a load, never exceed the
maximum permissible gross vehicle weight
or the gross axle weight rating of the
vehicle (including occupants). The values
are specified on the vehicle identification
plate on the B-pillar of the driver's door.
R position heavy loads as far forwards as
possible and as low down in the trunk as
possible.
R the load must not protrude above the upper
edge of the seat backrests.
R always place the load against the rear seat
backrests.
R always place the load behind unoccupied
seats if possible.
R secure the load with sufficiently strong and
wear-resistant tie-downs. Pad sharp edges
for protection.
Stowage areas
Stowage space
Important safety notes
GWARNING
To help avoid personal injury during a collision
or sudden maneuver, exercise care when
storing objects in the vehicle. Put luggage or
cargo in the trunk if possible.
Do not pile luggage or cargo higher than the
seat backrests.
Keep compartment lids closed. This will help
to prevent stored objects from being thrown
about and injuring vehicle occupants during
R braking
R vehicle maneuvers
R an accident
Stowage compartments in the front
Glove box
i Depending on the vehicle's equipment,
you will find the following installed in the
glove box: an audio and video AUX jack, a
USB socket or Media Interface, a universal
interface for portable audio equipment, e.g.
for an iPod or USB device, and a bracket for
434Stowage areasStowage and features
Page 437 of 536
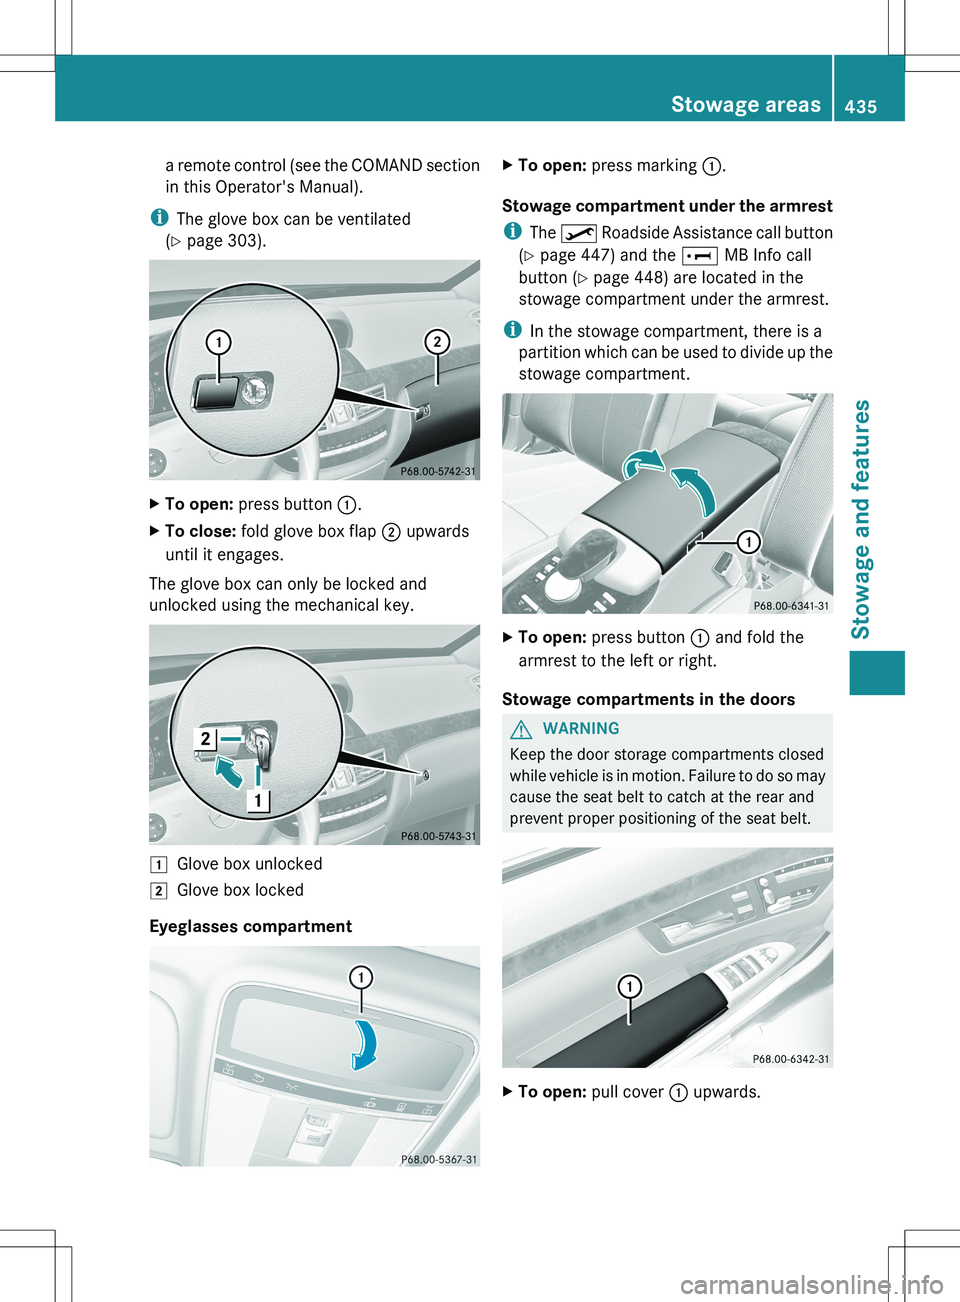
a remote control (see the COMAND section
in this Operator's Manual).
i The glove box can be ventilated
( Y page 303).XTo open: press button :.XTo close: fold glove box flap ; upwards
until it engages.
The glove box can only be locked and
unlocked using the mechanical key.
1Glove box unlocked2Glove box locked
Eyeglasses compartment
XTo open: press marking :.
Stowage compartment under the armrest
i The º Roadside Assistance call button
( Y page 447) and the E MB Info call
button ( Y page 448) are located in the
stowage compartment under the armrest.
i In the stowage compartment, there is a
partition which can be used to divide up the
stowage compartment.
XTo open: press button : and fold the
armrest to the left or right.
Stowage compartments in the doors
GWARNING
Keep the door storage compartments closed
while vehicle is in motion. Failure to do so may
cause the seat belt to catch at the rear and
prevent proper positioning of the seat belt.
XTo open: pull cover : upwards.Stowage areas435Stowage and featuresZ
Page 438 of 536

Coat hook
The coat hooks are located on the left and
right in the headliner in the rear
compartment.
! Only hang light loads on the coat hooks.
Do not place a load of more than 6.6 lbs
(3 kg) on the coat hooks.XTo open: press coat hook :.
The coat hooks fold out.XTo close: press coat hook : until it
engages.
Stowage space in the rear
Stowage compartment in the rear seat
armrest
! Do not sit or lean your bodyweight on the
armrests when they are folded out as you
could damage them.
! Close the cover of the stowage
compartment before folding the rear seat
armrest back into the seat backrest.
Vehicles without a control panel in the rear seat
armrest
XTo open: fold down the seat armrest.XPull handle : and fold the armrests
upwards.
Vehicles with a control panel in the rear seat
armrest
XTo open: press button : and fold up the
armrest.
Stowage box between the rear seats
XTo open: pull handle : backwards in the
direction of the arrow.
Stowage box in the rear seat backrest
! Do not sit or lean your bodyweight on the
armrests when they are folded out as you
could damage them.
436Stowage areasStowage and features
Page 439 of 536
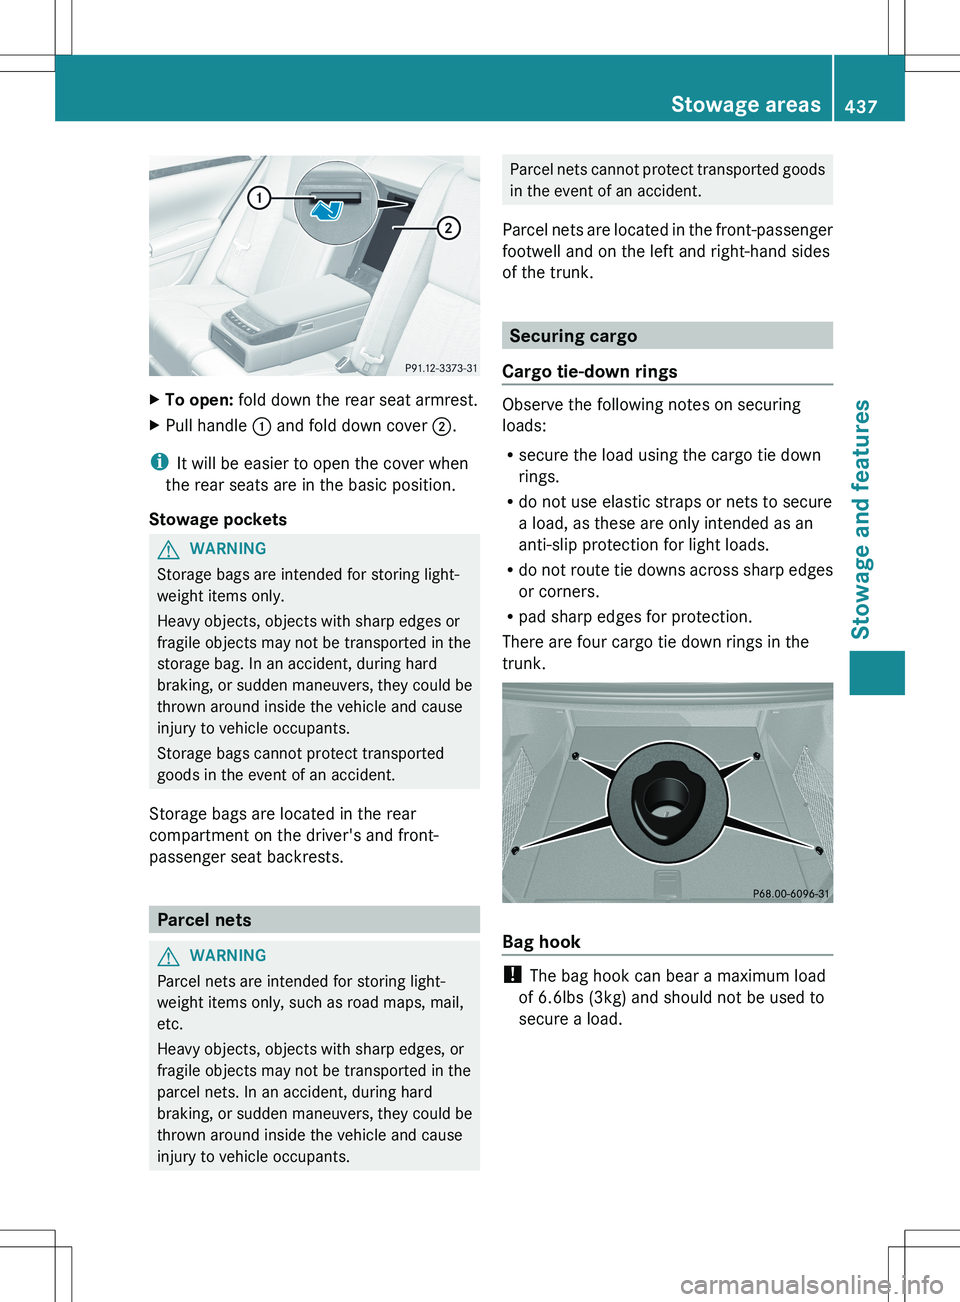
XTo open: fold down the rear seat armrest.XPull handle : and fold down cover ;.
i
It will be easier to open the cover when
the rear seats are in the basic position.
Stowage pockets
GWARNING
Storage bags are intended for storing light-
weight items only.
Heavy objects, objects with sharp edges or
fragile objects may not be transported in the
storage bag. In an accident, during hard
braking, or sudden maneuvers, they could be
thrown around inside the vehicle and cause
injury to vehicle occupants.
Storage bags cannot protect transported
goods in the event of an accident.
Storage bags are located in the rear
compartment on the driver's and front-
passenger seat backrests.
Parcel nets
GWARNING
Parcel nets are intended for storing light-
weight items only, such as road maps, mail,
etc.
Heavy objects, objects with sharp edges, or
fragile objects may not be transported in the
parcel nets. In an accident, during hard
braking, or sudden maneuvers, they could be
thrown around inside the vehicle and cause
injury to vehicle occupants.
Parcel nets cannot protect transported goods
in the event of an accident.
Parcel nets are located in the front-passenger
footwell and on the left and right-hand sides
of the trunk.
Securing cargo
Cargo tie-down rings
Observe the following notes on securing
loads:
R secure the load using the cargo tie down
rings.
R do not use elastic straps or nets to secure
a load, as these are only intended as an
anti-slip protection for light loads.
R do not route tie downs across sharp edges
or corners.
R pad sharp edges for protection.
There are four cargo tie down rings in the
trunk.
Bag hook
! The bag hook can bear a maximum load
of 6.6lbs (3kg) and should not be used to
secure a load.
Stowage areas437Stowage and featuresZ
Page 440 of 536
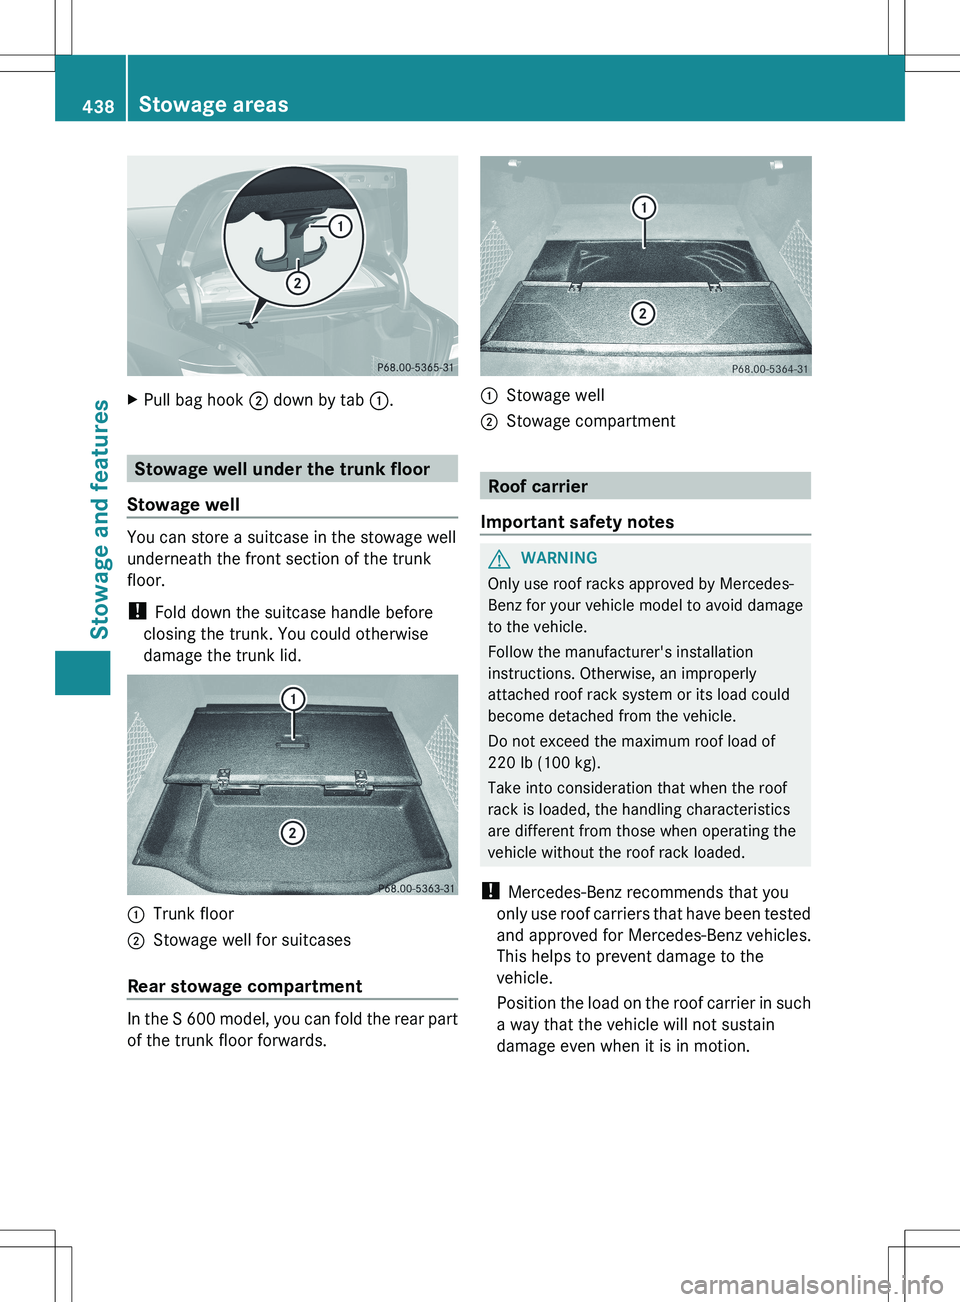
XPull bag hook ; down by tab :.
Stowage well under the trunk floor
Stowage well
You can store a suitcase in the stowage well
underneath the front section of the trunk
floor.
! Fold down the suitcase handle before
closing the trunk. You could otherwise
damage the trunk lid.
:Trunk floor;Stowage well for suitcases
Rear stowage compartment
In the S 600 model, you can fold the rear part
of the trunk floor forwards.
:Stowage well;Stowage compartment
Roof carrier
Important safety notes
GWARNING
Only use roof racks approved by Mercedes-
Benz for your vehicle model to avoid damage
to the vehicle.
Follow the manufacturer's installation
instructions. Otherwise, an improperly
attached roof rack system or its load could
become detached from the vehicle.
Do not exceed the maximum roof load of
220 lb (100 kg).
Take into consideration that when the roof
rack is loaded, the handling characteristics
are different from those when operating the
vehicle without the roof rack loaded.
! Mercedes-Benz recommends that you
only use roof carriers that have been tested
and approved for Mercedes-Benz vehicles.
This helps to prevent damage to the
vehicle.
Position the load on the roof carrier in such
a way that the vehicle will not sustain
damage even when it is in motion.
438Stowage areasStowage and features