2012 MERCEDES-BENZ S-Class language
[x] Cancel search: languagePage 208 of 536

XTo switch from the character bar to the
list: slide ZV the COMAND controller until
the character bar is hidden.
or
XSelect ¬.XTo call a contact: select by sliding ZVÆ
or turning cVd the COMAND controller
and press W to confirm.
i
The phone book is also available via the
on-board computer ( Y page 383).
Calling up contacts using the character
bar
XPhone book: select Name in the telephone
basic menu by sliding VÆ and turning
cVd the COMAND controller and press
W to confirm.XAddress book: select Data/Connections
in the telephone basic menu by sliding
V Æ and turning cVd the COMAND
controller and press W to confirm.XSelect Address Book and press W to
confirm.XTo select a character: select by sliding
ZV Æ or XVY the COMAND controller and
press W to confirm. Repeat this procedure
until COMAND automatically switches over
to the list.
You determine the first letter of the entry
you are looking for with the first character
you enter. If there are similar entries, the
next character which is different will be
displayed and offered for selection.
i You can also use the telephone number
keypad to enter characters.
Creating new contacts/changing
contacts
i In certain countries, this function stops
being available from a vehicle speed of
more than approximately 3 mph (5 km/h).
As soon as the speed falls below
approximately 2 mph (3 km/h), the
function becomes available again.
i You can enter address data directly into
the address book. If you store contacts in
the phone book, these are also saved in the
address book.
i Automatically imported contacts cannot
be edited. They have to be saved first
before being copied to the COMAND
address book.XCall up the contact ( Y page 205) 10
.XSelect Options by sliding VY and turning
cVd the COMAND controller and press
W to confirm.XSelect New Entry or Edit and press W to
confirm.
The input menu with data fields appears.:Entry mark (cursor);Data field=Two-line character barB To select the language10
Only available with the "Change contact" function.206TelephoneCOMAND
Page 239 of 536

For USB mass storage devices, you can
choose to display the metadata contained in
the tags of the encoded music data, or to
display the file and directory names during
playback.XTo display the album and artist name:
select Media Interface in the basic
display by sliding VÆ and turning cVd the
COMAND controller and press W to
confirm.XSelect Display Metadata and press W to
confirm.
Selecting a category and opening a folder
XPress W the COMAND controller when the
display/selection window is active.XSelect Folder by sliding VÆ and turning
cVd the COMAND controller and press
W to confirm.
You will see the available categories or the
folder content (e.g. other folders). The
display's status bar shows the selected
category or the folder name.
i The Music menu item is not available until
the device has been activated.
XSelect the category/folder by turning
cVd the COMAND controller and press
W to confirm.
You will see the content of the selected
category or selected folder.
i If the data needs to be read from the
connected device, the Please wait...
message appears.
XIf necessary, repeat this step until the
tracks in the desired folder/album appear.XSelect the track by turning cVd the
COMAND controller and press W to
confirm.
The track is played.XTo select one folder higher: select the
U icon and confirm with W.
i
The U icon is always shown at the top
of the respective folder.
Playing back the contents of a category
or folderXSelect the category or folder by turning
cVd the COMAND controller.XPress W the COMAND controller for longer
than two seconds.
The content of the category or folder
selected is played in accordance with the
playback option ( Y page 238) selected.
Alphabetical track selection
iPod ®
and MP3 players
This function is available for alphabetically
sorted categories and folders. This function
is not available for albums or playlists, for
example.
XSelect a category, e.g. Artists, by turning
cVd the COMAND controller and press
W to confirm.
The available artists are displayed.XPress the corresponding number key once
or several times to select the first letter of
the artist's name (e.g. for an artist
beginning with the letter "C", press number
key l three times).
The available letters are listed at the lower
edge of the display.
After a message, the first entry in the list
which matches the letter entered is
highlighted.
i If no corresponding entry exists, the last
entry corresponding to a previous letter is
highlighted instead.
i For iPods ®
and MP3 players, the quality
of the search results is highly dependent on
the version and language variant of the
software (e.g. iTunes ®
version) used to
populate the device.
USB mass storage device
This function is available for alphabetically
sorted directories. This function is not
available for albums or playlists, for example.
Audio237COMANDZ
Page 246 of 536

XSelect Title Selection by turning cVd
the COMAND controller and press W to
confirm.XSelect a film/title and press W to confirm.
DVD menu
Calling up the DVD menu
The DVD menu is the menu stored on the DVD
itself. It is structured in various ways
according to the individual DVD and permits
certain actions and settings.
In the case of multi-language DVDs, for
example, you can set the language in the DVD
menu.
XPress W the COMAND controller to show
the menu.XSelect DVD-V in the menu by turning cVd
the COMAND controller and press W to
confirm.XSelect DVD Functions and press W to
confirm.XSelect Menu and press W to confirm.
The DVD menu appears.
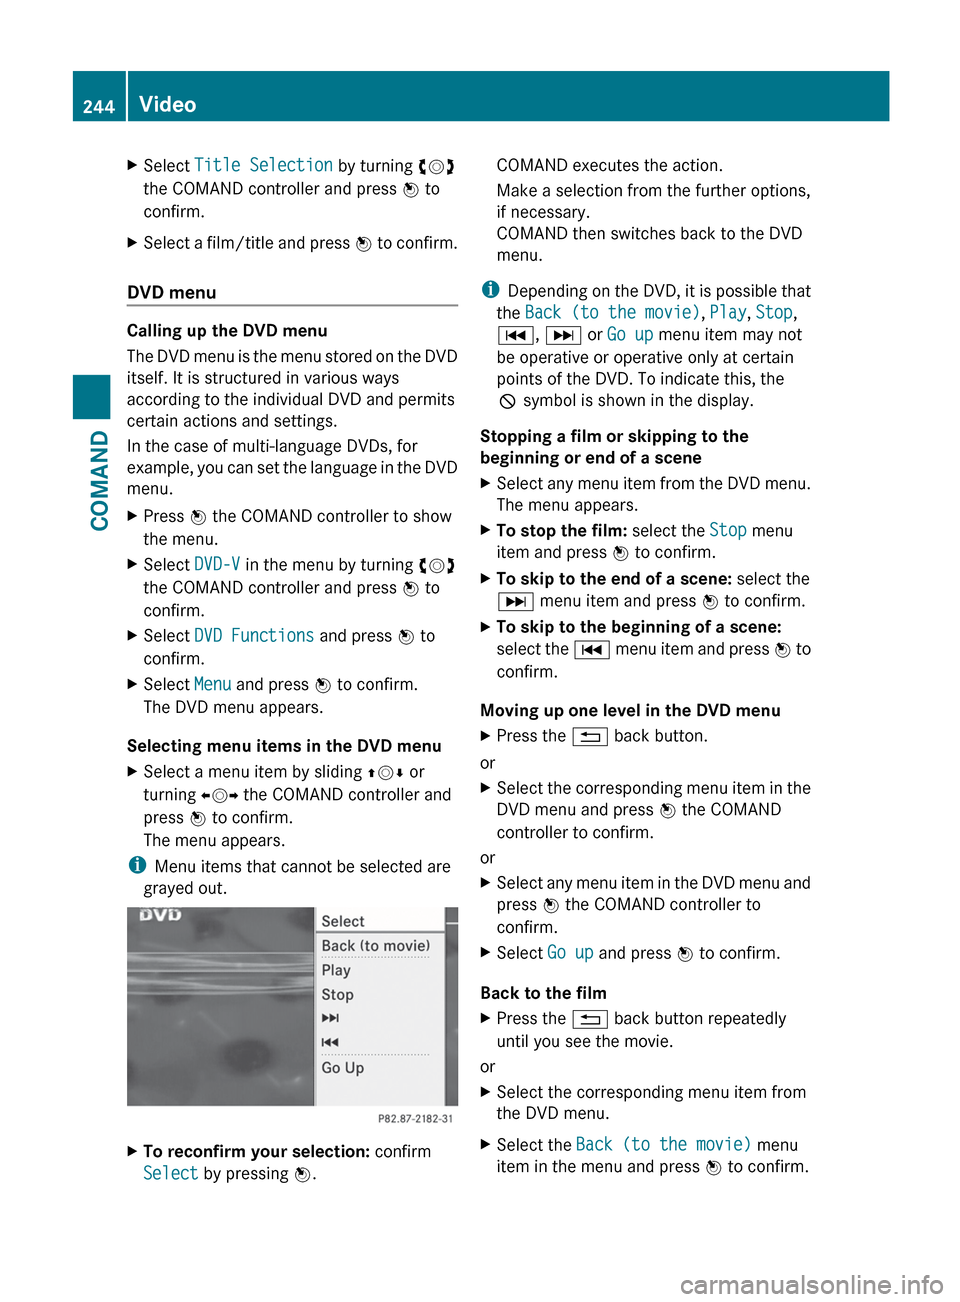
Selecting menu items in the DVD menu
XSelect a menu item by sliding ZVÆ or
turning XVY the COMAND controller and
press W to confirm.
The menu appears.
i Menu items that cannot be selected are
grayed out.
XTo reconfirm your selection: confirm
Select by pressing W.COMAND executes the action.
Make a selection from the further options,
if necessary.
COMAND then switches back to the DVD
menu.
i Depending on the DVD, it is possible that
the Back (to the movie) , Play , Stop ,
C , D or Go up menu item may not
be operative or operative only at certain
points of the DVD. To indicate this, the
K symbol is shown in the display.
Stopping a film or skipping to the
beginning or end of a scene
XSelect any menu item from the DVD menu.
The menu appears.XTo stop the film: select the Stop menu
item and press W to confirm.XTo skip to the end of a scene: select the
D menu item and press W to confirm.XTo skip to the beginning of a scene:
select the C menu item and press W to
confirm.
Moving up one level in the DVD menu
XPress the % back button.
or
XSelect the corresponding menu item in the
DVD menu and press W the COMAND
controller to confirm.
or
XSelect any menu item in the DVD menu and
press W the COMAND controller to
confirm.XSelect Go up and press W to confirm.
Back to the film
XPress the % back button repeatedly
until you see the movie.
or
XSelect the corresponding menu item from
the DVD menu.XSelect the Back (to the movie) menu
item in the menu and press W to confirm.244VideoCOMAND
Page 247 of 536

Setting the language and audio format
This function is not available on all DVDs. If it
is available, you can set the DVD menu
language, the audio language or the audio
format. The number of settings is determined
by the DVD content. It is possible that the
settings may also be accessed in the DVD
menu ( Y page 244).
XPress W the COMAND controller to show
the menu.XSelect DVD-V in the menu by turning cVd
the COMAND controller and press W to
confirm.XSelect DVD Functions and press W to
confirm.XSelect Audio Language and press W to
confirm.
In both cases, a menu appears after a few
seconds. The # dot in front of an entry
indicates the currently selected language.XSelect a setting by turning cVd the
COMAND controller and press W to
confirm.XTo exit the menu: slide XVY the COMAND
controller.
Subtitles and camera angle
These functions are not available on all DVDs.
The number of subtitle languages and camera
angles available depends on the content of
the DVD. It is possible that the settings may
also be accessed in the DVD menu
( Y page 244).
XPress W the COMAND controller to show
the menu.XSelect DVD-V in the menu by turning cVd
the COMAND controller and press W to
confirm.XSelect DVD Functions and press W to
confirm.XSelect Subtitles or Camera angle and
press W to confirm.
In both cases, a menu appears. The # dot
in front of an entry indicates the current
setting.XSelect a setting by turning cVd the
COMAND controller and press W to
confirm.XTo exit the menu: slide XVY the COMAND
controller.
Interactive content
DVDs can contain interactive content (e.g. a
video game). In a video game, for example,
you may be able to influence events by
selecting and triggering actions. The type and
number of actions depend on the DVD.
XSelect an action by sliding ZVÆ or XVY the
COMAND controller and press W to
execute it.
A menu appears and the first entry,
Select , is highlighted.XPress W the COMAND controller.
AUX video mode
AUX jacks
An external video source (video AUX) can be
connected to COMAND via the media
interface (Y page 233) using the AUX jacks in
the glove box.
i In vehicles with a rear view camera, the
video AUX jack cannot be used for external
video sources.
Video245COMANDZ
Page 251 of 536

Rcalling up the DVD menu and navigating
within it
R setting the language, subtitles and camera
angle
R calling up interactive DVD content
The following functions affect only one
screen:
R audio and video functions as well as picture
settings
R switching between full screen and the
menu
Switching between operating modes
When you exit an operating mode (e.g. audio
CD mode), the current setting is saved. If you
call up this operating mode again later, there
are two possibilities:
R the operating mode has been changed on
the other screen.
R the operating mode has not been changed.
In the first case, the operating mode appears
as it is on the other screen.
In the second case, the setting appears on the
screen as it was when you last exited the
operating mode.
Picture settings
Overview
You can select these settings in video DVD
and AUX mode. Instructions for AUX mode
are detailed later ( Y page 258).
Adjusting the brightness, contrast and
color
XSwitch on video DVD mode ( Y page 241).XTo show the menu: press the 9 button
on the remote control.
or
XSelect Menu while the navigation menu
( Y page 241) is shown and press the 9
button to confirm.XIn both cases, select Video DVD using
the :=; buttons and press the
9 button to confirm.XSelect Brightness , Contrast , Color or
Auto using the 9: buttons and
press 9 to confirm.
An adjustment scale appears.XSelect a setting using the 9:
buttons and press the 9 button to confirm.
Changing the picture format
XTo show the menu: press the 9 button
on the remote control.
or
XSelect Menu while the navigation menu
( Y page 241) is shown and press the 9
button to confirm.XSelect Video DVD using
the :=; buttons and press the
9 button to confirm.
The ä symbol in front of the Auto, 16:9
Optimized , 4:3 or Widescreen menu item
indicates the format currently set.XSelect a format using the 9:
buttons and press the 9 button to confirm.
System settings
Note
You can adjust almost all system settings
individually for each screen without affecting
the other screen. You make these settings
using the remote control.
Selecting the display language
XSelect System using the 9=;
buttons on the remote control and press
the 9 button to confirm.
You see the system menu on the selected
rear screen.Rear Seat Entertainment System249COMANDZ
Page 252 of 536

XSelect Settings using the : button
and confirm with the 9 button.XSelect Language using the 9:
buttons and press the 9 button to confirm.
The list of languages appears. The # dot
indicates the current setting.XSelect a language using the 9:
buttons and press the 9 button to confirm.
The Rear Seat Entertainment System
activates the respective language.
Switching the display design
XSelect Settings using the : button
and confirm with the 9 button.XSelect Day Mode , Night Mode or
Automatic using the 9: buttons
and press the 9 button to confirm.
The ä icon indicates the current setting.DesignExplanationDay ModeThe display is set
permanently to day
design.Night ModeThe display is set
permanently to night
design.AutomaticThe display design
changes depending on
the vehicle instrument
cluster illumination.Setting the brightnessXSelect Settings using the : button
and confirm with the 9 button.XSelect Brightness using the 9:
buttons and press the 9 button to confirm.
A scale appears.XAdjust the brightness using the 9:
buttons and press the 9 button to confirm.
The brightness bar moves up or down. The
picture becomes lighter or darker in
accordance with the scale.
Showing/hiding the picture
XTo hide the picture: select Display OFF
in the system menu using the :;
buttons on the remote control and press
the 9 button to confirm.
The picture is hidden.XTo display the picture: press the 9
button.
Audio CD/DVD and MP3 mode
Safety note
GWARNING
The RSE CD/DVD player is a Class 1 laser
product. There is a danger of invisible laser
radiation when you open or damage the cover.
Do not remove the cover. The RSE CD/DVD
player does not contain any parts which can
be serviced by the user. For safety reasons,
have any necessary service work performed
by qualified personnel.
General notes
You will find information on the following
topics in the Audio section:
R notes on CDs/DVDs ( Y page 229)
R notes on MP3 mode ( Y page 228)
R notes on copyright ( Y page 229)
250Rear Seat Entertainment SystemCOMAND
Page 260 of 536

XOption 2: select any menu item in the DVD
menu.XSelect the Go up menu item in the menu
and press the 9 button to confirm.
Back to the film
XOption 1: press the % back button on
the remote control repeatedly until you see
the film or select the corresponding menu
item in the DVD menu.XOption 2: select any menu item in the DVD
menu and press the 9 button to confirm.XSelect the Back (to the movie) menu
item in the menu and press the 9 button
to confirm.
Setting the audio format
This function is not available on all DVDs. If it
is available, you can set the audio language
or the audio format. The number of settings
is determined by the DVD content. It is
possible that the settings may also be
accessed from the DVD menu.
XPress the 9 button on the remote control
and show the menu.XSelect Video DVD and press the 9 button
on the remote control to confirm.XSelect DVD Functions and press the 9
button to confirm.XSelect Audio Language and press the 9
button to confirm.
A menu appears after a short while. The
# dot in front of an entry indicates the
currently selected language.XSelect a language using the 9 or :
button and press the 9 button to confirm.XTo exit the menu: press the =
or ; button.
Subtitles and camera angle
These functions are not available on all DVDs.
The number of subtitle languages and camera
angles available depends on the content of
the DVD. It is possible that the settings may
also be accessed from the DVD menu.XPress the 9 button on the remote control
and show the menu.XSelect Video DVD and press the 9 button
on the remote control to confirm.XSelect DVD Functions and press the 9
button to confirm.XSelect Subtitles or Camera Angle and
press the 9 button to confirm.
In both cases, a menu appears after a few
seconds. The # dot in front of an entry
indicates the current setting.XSelect the setting using the 9 or :
button and press the 9 button to confirm.XTo exit the menu: press the =
or ; button.
Interactive content
DVDs can also contain interactive content
(e.g. a video game). In a video game, you may
be able to influence events by selecting and
triggering actions. The type and number of
actions depend on the DVD.
XSelect an action using the
9;:= buttons on the
remote control and press the 9 button to
execute it.
A menu appears and the first entry,
Select , is highlighted.XPress the 9 button.
AUX mode
Introduction
You can connect one external video source to
each of the displays of the Rear Seat
Entertainment System (AUX display) and also
one external video source to the rear-seat
CD/DVD drive (AUX drive) with a sound and
video signal.
258Rear Seat Entertainment SystemCOMAND