2012 MERCEDES-BENZ GLK SUV fuse
[x] Cancel search: fusePage 14 of 381

E
EASY-ENTRY feature Activating/deactivating (12-but-
ton multifunction steering wheel) ..243
Function/notes ............................. 102
EASY-EXIT feature
Activating/deactivating (12-but-
ton multifunction steering wheel) ..243
Crash-responsive ........................... 103
Function/notes ............................. 102
EBD (electronic brake force distri-
bution)
Display message (12 button mul-
tifunction steering wheel) ..............253
Function/notes ................................ 69
EBD (Electronic Brake-force Distri-
bution)
Display message (4-button multi-
function steering wheel) ................248
ECO display
Function/notes ............................. 166
On-board computer (12-button
multifunction steering wheel) ........231
ECO start/stop function
Deactivating/activating .................150
General information .......................150
Electrical fuses
see Fuses
Electronic Stability Program
see ESP ®
(Electronic Stability Program)
Electronic Traction System
see ETS/4ETS (Electronic Trac-
tion System)
Emergency key
Unlocking the driver's door ..............84
Emergency key element
Function/notes ................................ 78
Locking vehicle ................................ 84
Emergency release
Driver's door .................................... 84
Emergency spare wheel
Inflating the collapsible spare
wheel ............................................. 336
Notes/data .................................... 359
Storage location ............................ 328
Stowing .......................................... 328 Emergency unlocking
Tailgate ............................................ 88
Vehicle ............................................. 84
Engine
ECO start/stop function ................150
Engine number ............................... 365
Jump-starting ................................. 341
Running irregularl y......................... 153
Starting problems ..........................153
Starting the engine with the key ....148
Starting with KEYLESS GO .............149
Stopping ........................................ 164
Tow-starting (vehicle) ..................... 345
Warning lamp (engine diagnos-
tics) ............................................... 291
Engine electronics
Notes ............................................. 363
Problem (fault) ............................... 153
Engine oil
Additives ........................................ 370
Checking the oil level ..................... 315
Checking the oil level using the
dipstick .......................................... 315
Display message (12-button mul-
tifunction steering wheel) ..............268
Display message (4-button multi-
function steering wheel) ................265
Filling capacity ............................... 370
Notes about oil grades ................... 369
Notes on oil level/consumption ....315
Topping up ..................................... 316
Viscosity ........................................ 370
Environmental protection
Returning an end-of-life vehicle .......25
ESP ®
(Electronic Stability Pro-
gram) Deactivating/activating ...................68
Display message (12-button mul-
tifunction steering wheel) ..............252
Display message (4-button multi-
function steering wheel) ................247
ETS/4ETS ........................................ 68
Function/notes ................................ 67
Important safety guidelines .............67
Trailer stabilisatio n.......................... 69
Warning lamp ................................. 288
ETS/4ETS (Electronic Traction Sys-
tem) ...................................................... 68 Index
11
Page 15 of 381
Exhaust tail pipe (cleaning instruc-
tions) .................................................. 321
Exterior lighting Settings options ............................ .110
see Lights
Exterior mirrors
Adjusting ....................................... 103
Anti-dazzle mode (automatic) ........105
Folding in/out (automatically). ......104
Folding in/out (electrically). ..........104
Folding in (12-button multifunc-
tion steering wheel) .......................244
Out of position (troubleshooting) ...104
Parking position ............................. 105
Resetting ....................................... 104
Storing settings (memory func-
tion) ............................................... 106F
Fault message see Display messages
Filler cap
see Fuel filler flap
Fire extinguisher ............................... 326
First-aid kit ......................................... 326
Flat tyre Changing a wheel/fitting the
spare wheel ................................... 332
Preparing the vehicle .....................329
Raising the vehicle .........................333
TIREFIT kit ...................................... 329
see Emergency spare wheel
Floormat ............................................ .310
Foglamps Extended range .............................. 115
Switching on/off ........................... 112
Folding the rear bench seat for-
wards/back ....................................... 298
Fording Off-road ......................................... 169
On flooded roads ........................... 168
Frequencies
Mobile phone ................................. 363
Two-way radio ................................ 363
Front foglamp
Display message (12-button mul-
tifunction steering wheel) ..............262Front foglamps
Display message (4-button multi-
function steering wheel) ................259
Fuel
Additives ........................................ 366
Consumption information ..............368
Displaying the range (12-button
multifunction steering wheel) ........231
Displaying the range (4-button
multifunction steering wheel) ........226
Grade (petrol) ................................ 366
Important safety notes ..................365
Problem (malfunction) ...................163
Quality (diesel )............................... 367
Refuelling ...................................... .161
Tank content/reserve fuel .............366
Tank content display (12-button
multifunction steering wheel) ..........33
Tank content display (4-button
multifunction steering wheel) ..........31
Fuel consumption
Current (12-button multifunction
steering wheel) .............................. 231
Fuel filler flap
Opening/closing ............................ 162
Fuel filter
Display message (12-button mul-
tifunction steering wheel) ..............269
Display message (4-button multi-
function steering wheel) ................266
Fuel reserve
Display message (12-button mul-
tifunction steering wheel) ..............268
Display message (4-button multi-
function steering wheel) ................265
see Fuel
Fuel tank
Capacity ........................................ 366
Problem (malfunction) ...................163
Fuse allocation chart (vehicle tool
kit) ...................................................... 327
Fuses Allocation chart ............................. 346
Before changing ............................. 346
Dashboard fuse box .......................347
Fuse box in the engine compart-
ment .............................................. 34712
Index
Page 16 of 381

Fuse box in the luggage compart-
ment
.............................................. 347
Important safety notes ..................346 G
Gear or selector lever (cleaning
instructions) ...................................... 322
Genuine Mercedes-Benz parts .........362
Glove compartment ..........................297 H
Handbrake see Parking brake
Hazard warning lamps ......................114
Headlamp Cleaning system (function) ............114
Cleaning system (notes) ................372
Headlamps
Misting up ...................................... 117
Topping up the cleaning system ....317
see Automatic headlamp mode
Head restraints
Adjusting ......................................... 98
Adjusting (electrically) .....................99
Adjusting (manually). .......................98
Adjusting (rear) ................................ 99
Fitting/removing (rear) ....................99
see NECK-PRO head restraints
see NECK-PRO head restraints/
NECK-PRO luxury head restraints
Heating
see Climate control
High-pressure cleaners ....................318
Hill start assist .................................. 150
HOLD function Display message (12-button mul-
tifunction steering wheel) ..............271
Display message (4-button multi-
function steering wheel) ................270
Function/notes ............................. 186 I
Ignition lock see Key positions
Immobiliser .......................................... 71Indicator and warning lamps
Coolant .......................................... 292
DISTRONIC PLUS ........................... 294
Engine diagnostics .........................291
Fuel tank ........................................ 292
Overview (12-button multifunc-
tion steering wheel) .........................34
Overview (4-button multifunction
steering wheel) ................................ 32
Indicator lamps
see Warning and indicator lamps
Insect protection on the radiator ....315
Inspection see ASSYST PLUS
Instrument cluster (12-button mul-
tifunction steering wheel)
Indicator and warning lamps ............34
Overview .......................................... 33
Settings ......................................... 238
Instrument cluster (4-button mul-
tifunction steering wheel)
Indicator and warning lamps ............32
Overview .......................................... 31
Instrument cluster lighting ..............239
Multifunction steering wheel with
4 buttons ....................................... 224
Intelligent Light System
Activating/deactivating (12-but-
ton multifunction steering wheel) ..240
Display message (12-button mul-
tifunction steering wheel) ..............263
Overview ........................................ 114
Interior lighting ................................. 117
Automatic control system ..............118
Delayed switch-off (12-button
multifunction steering wheel) ........241
Emergency lighting ........................118
Manual control ............................... 118
Overview ........................................ 117
Reading lamp ................................. 117
Setting brightness for display/
switches (on-board computer) .......239
Interior motion sensor ........................73
ISOFIX child seat securing system ....57 Index
13
Page 134 of 381
Notes on using THERMOTRONIC auto-
matic climate control
The following contains instructions and rec-
ommendations to enable you to get the most
out of your THERMOTRONIC automatic cli-
mate control.
R Activate climate control using the Ãand
¿ buttons. The indicator lamps in the
à and¿ buttons light up.
R In automatic mode, you can also use the
ñ button to set a climate mode
(FOCUS/MEDIUM/DIFFUSE). The
MEDIUM level is recommended.
R Set the temperature to 22 †.
R Only use the demisting function briefly until
the windscreen is clear again.
R Only use the air-recirculation mode briefly,
e.g. if there are unpleasant outside odours
or when in a tunnel. The windows could
otherwise mist up as no fresh air is drawn
into the vehicle in air-recirculation mode.
R Use the ZONE function to adopt the tem-
perature settings on the driver's side for
the front-passenger side and the rear com-
partment as well. The indicator lamp in the
á button goes out.
R Use the residual heat function if you want
to heat or ventilate the vehicle interior
when the ignition is switched off. The resid-
ual heat function can only be activated or
deactivated with the ignition switched off. Operating the climate control system
Switching climate control on/off
Points to observe before use i
If climate control is switched off, the air
supply and air circulation are also switched
off. Only use this setting for a brief period.
The windows could otherwise mist up.
i Switch on climate control primarily using
the à button ( Ypage 132). Switching on/off X
Turn the key to position 2in the ignition
lock.
X To switch on: press theÃbutton.
The indicator lamp in the Ãbutton lights
up. Airflow and air distribution are set to
automatic mode.
or
X Press the ^button.
The indicator lamp in the ^button goes
out. The previous settings are reactivated.
X To switch off: press the^button.
The indicator lamp in the ^button lights
up. Activating/deactivating the cooling
with air dehumidification function
Points to observe before use G
WARNING
If the "cooling with air dehumidification" func-
tion is deactivated, the air inside the vehicle
will not be cooled (during warm weather) or
dehumidified. The windows could mist up
more quickly. This may prevent you from
observing the traffic conditions, thereby caus-
ing an accident.
The cooling with air dehumidification function
is only available when the engine is running.
The air inside the vehicle is cooled and dehu-
midified according to the temperature selec-
ted.
Condensation may drip from the underside of
the vehicle when cooling mode is active. This
is normal and not a sign that there is a mal-
function.
i The cooling with air dehumidification
function uses refrigerant R134a. This
refrigerant does not contain chlorofluoro-
carbons, and therefore does not damage
the ozone layer. Operating the climate control system
131Climate control Z
Page 135 of 381
Switching on/off
X
To activate: press the¿button.
The indicator lamp in the ¿button lights
up.
X To deactivate: press the¿button.
The indicator lamp in the ¿button goes
out. The cooling with air dehumidification
function has a delayed switch-off feature.
Problems with the cooling with air
dehumidification function When you press the
¿button, the indica-
tor lamp in the button flashes three times or
remains off. You can no longer switch on the
cooling with air dehumidification function.
X Visit a qualified specialist workshop. Setting climate control to automatic
mode
In automatic mode, the set temperature is
maintained automatically at a constant level.
The system automatically regulates the tem-
perature of the dispensed air, the airflow and
the air distribution.
Automatic mode will achieve optimal opera-
tion if cooling with air dehumidification is also
activated. If desired, cooling with air dehu-
midification can be deactivated.
X Turn the key to position 2in the ignition
lock.
X Set the desired temperature.
X To activate: press theÃbutton.
The indicator lamp in the Ãbutton lights
up. Automatic air distribution and airflow
are activated.
X To select manually: press the_but-
ton.
or
X Press the KorI button.
The indicator lamp in the Ãbutton goes
out. Automatic air distribution and airflow
are deactivated. Setting the climate mode
This function is only available with the
THERMOTRONIC automatic climate control.
In automatic mode you can select the follow-
ing climate modes:
FOCUS high airflow that is set slightly cooler
MEDIUM medium airflow, standard setting
DIFFUSE low airflow that is set slightly warmer and with less of a draught
X Turn the key to position 2in the ignition
lock.
X Press the Ãbutton.
X Press the ñbutton repeatedly until the
desired climate mode appears in the dis-
play. Setting the temperature
THERMATIC automatic climate control Different temperatures can be set for the
driver's and front-passenger sides.
X
Turn the key to position 2in the ignition
lock.
X To increase/reduce: turn control:or
B clockwise or anti-clockwise
(Y page 129).
Only change the temperature setting in
small increments. Start at 22 †. 132
Operating the climate control systemClimate control
Page 185 of 381
DISTRONIC PLUS must also never be oper-
ated, activated or deactivated by a passenger
or from outside the vehicle.
DISTRONIC PLUS does not replace the park-
ing brake and must not be used for parking.
The DISTRONIC PLUS braking effect is can-
celled and the vehicle can start moving if:
R DISTRONIC PLUS is deactivated using the
cruise control lever.
R you accelerate.
R there is a malfunction in the system or an
interruption in the power supply, e.g. bat-
tery failure.
R the electrical system in the engine com-
partment, the battery or the fuses are tam-
pered with.
R the battery is disconnected.
If you wish to leave the vehicle or park it,
deactivate DISTRONIC PLUS and secure the
vehicle against rolling away.
If DISTRONIC PLUS detects that the vehicle
in front is stopping, it brakes your vehicle until
it is stationary.
Once your vehicle is stationary, it remains
stationary and you do not need to depress the
brake.
i Depending on the specified minimum dis-
tance, your vehicle will come to a standstill
at a sufficient distance behind the vehicle
in front. The specified minimum distance is
set using the control on the cruise control
lever.
You will see a warning message in the multi-
function display if DISTRONIC PLUS is acti-
vated and:
R the driver's door is open and the driver's
seat belt is unfastened.
R the engine is switched off, unless it is auto-
matically switched off by the ECO start/
stop function.
R the bonnet is opened.
Select Park (P)
Select Park (P) X
Shift the transmission to position Pto pre-
vent the vehicle from rolling away.
DISTRONIC PLUS is deactivated. The warn-
ing message in the multifunction display
disappears.
The horn will also sound at regular intervals if
DISTRONIC PLUS is activated and you:
R switch the engine off, open the driver's
door and take off your seat belt
R open the bonnet
The sounding of the horn alerts you to the fact
that the vehicle has been parked while DIS-
TRONIC PLUS is still activated. The sound
becomes louder if you attempt to lock the
vehicle. The vehicle is not locked until DIS-
TRONIC PLUS is deactivated.
i If the engine has been switched off, it
cannot be started again until DISTRONIC
PLUS has been deactivated.
If DISTRONIC PLUS is activated and a fault
occurs in the system or if there is a disruption
in the power supply, the Brake immedi‐ Brake immedi‐
ately
ately message is shown in the multifunction
display. Immediately depress the brake firmly
until the warning message in the multifunc-
tion display goes out or shift the transmission
to position P. DISTRONIC PLUS is deactiva-
ted.
Setting a speed X
Press the cruise control lever up :for a
higher speed or down Afor a lower speed.
X Keep the cruise control lever pressed until
the desired speed is reached.
X Release the cruise control lever.
The new speed is stored. DISTRONIC PLUS
is activated and adjusts the vehicle's speed
to the new speed stored.
X To adjust the set speed in 1 km/h incre-
ments: briefly press the cruise control 182
Driving systemsDriving an
d parking
Page 190 of 381
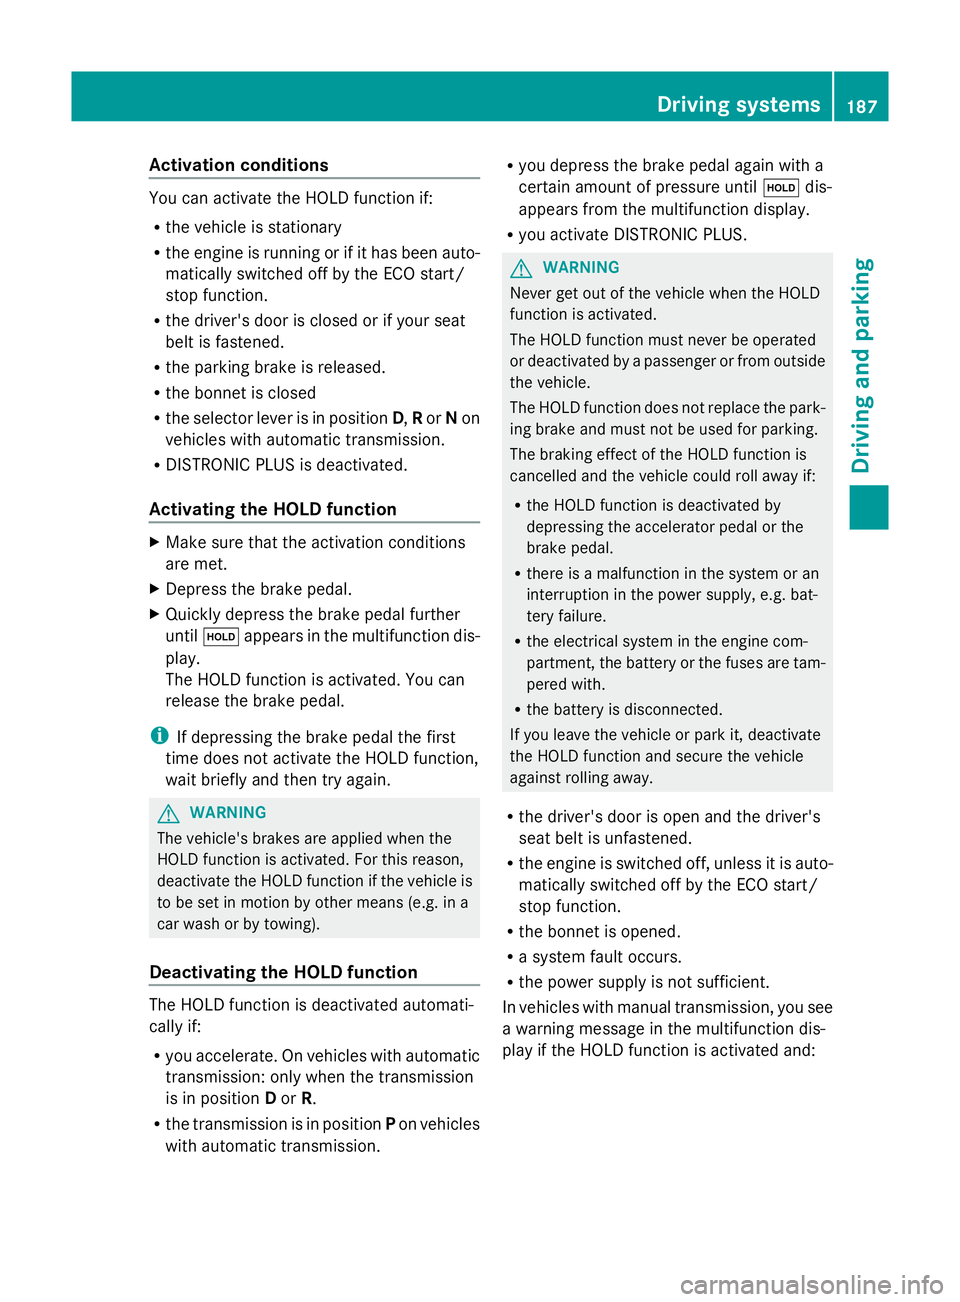
Activation conditions
You can activate the HOLD function if:
R the vehicle is stationary
R the engine is running or if it has been auto-
matically switched off by the ECO start/
stop function.
R the driver's door is closed or if your seat
belt is fastened.
R the parking brake is released.
R the bonnet is closed
R the selector lever is in position D,Ror Non
vehicles with automatic transmission.
R DISTRONIC PLUS is deactivated.
Activating the HOLD function X
Make sure that the activation conditions
are met.
X Depress the brake pedal.
X Quickly depress the brake pedal further
until ë appears in the multifunction dis-
play.
The HOLD function is activated. You can
release the brake pedal.
i If depressing the brake pedal the first
time does not activate the HOLD function,
wait briefly and then try again. G
WARNING
The vehicle's brakes are applied when the
HOLD function is activated. For this reason,
deactivate the HOLD function if the vehicle is
to be set in motion by other means (e.g. in a
car wash or by towing).
Deactivating the HOLD function The HOLD function is deactivated automati-
cally if:
R
you accelerate. On vehicles with automatic
transmission: only when the transmission
is in position Dor R.
R the transmission is in position Pon vehicles
with automatic transmission. R
you depress the brake pedal again with a
certain amount of pressure until ëdis-
appears from the multifunction display.
R you activate DISTRONIC PLUS. G
WARNING
Never get out of the vehicle when the HOLD
function is activated.
The HOLD function must never be operated
or deactivated by a passenger or from outside
the vehicle.
The HOLD function does not replace the park-
ing brake and must not be used for parking.
The braking effect of the HOLD function is
cancelled and the vehicle could roll away if:
R the HOLD function is deactivated by
depressing the accelerator pedal or the
brake pedal.
R there is a malfunction in the system or an
interruption in the power supply, e.g. bat-
tery failure.
R the electrical system in the engine com-
partment, the battery or the fuses are tam-
pered with.
R the battery is disconnected.
If you leave the vehicle or park it, deactivate
the HOLD function and secure the vehicle
against rolling away.
R the driver's door is open and the driver's
seat belt is unfastened.
R the engine is switched off, unless it is auto-
matically switched off by the ECO start/
stop function.
R the bonnet is opened.
R a system fault occurs.
R the power supply is not sufficient.
In vehicles with manual transmission, you see
a warning message in the multifunction dis-
play if the HOLD function is activated and: Driving systems
187Driving and parking Z
Page 263 of 381
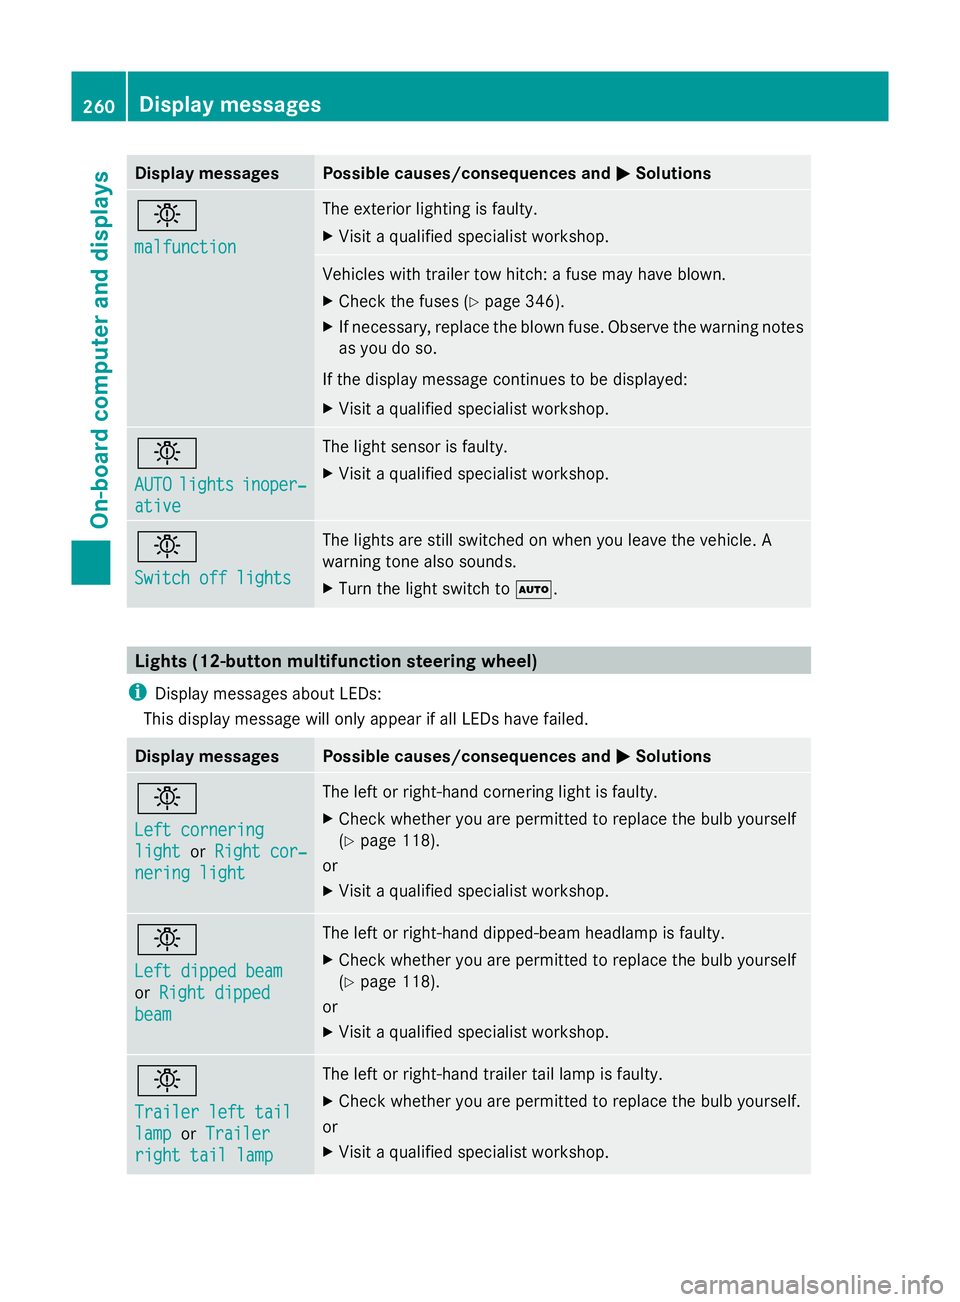
Display messages Possible causes/consequences and
M
MSolutions b
malfunction malfunction The exterior lighting is faulty.
X
Visit a qualified specialist workshop. Vehicles with trailer tow hitch: a fuse may have blown.
X Check the fuses (Y page 346).
X If necessary, replace the blown fuse. Observe the warning notes
as you do so.
If the display message continues to be displayed:
X Visit a qualified specialist workshop. b
AUTO AUTO
lights
lights inoper‐
inoper‐
ative
ative The light sensor is faulty.
X
Visit a qualified specialist workshop. b
Switch off lights Switch off lights The lights are still switched on when you leave the vehicle. A
warning tone also sounds.
X
Turn the light switch to Ã.Lights (12-button multifunction steering wheel)
i Display messages about LEDs:
This display message will only appear if all LEDs have failed. Display messages Possible causes/consequences and
M MSolutions b
Left cornering Left cornering
light light
orRight cor‐
Right cor‐
nering light
nering light The left or right-hand cornering light is faulty.
X
Check whether you are permitted to replace the bulb yourself
(Y page 118).
or
X Visit a qualified specialist workshop. b
Left dipped beam Left dipped beam
or
Right dipped Right dipped
beam
beam The left or right-hand dipped-beam headlamp is faulty.
X
Check whether you are permitted to replace the bulb yourself
(Y page 118).
or
X Visit a qualified specialist workshop. b
Trailer left tail Trailer left tail
lamp lamp
orTrailer
Trailer
right tail lamp right tail lamp The left or right-hand trailer tail lamp is faulty.
X
Check whether you are permitted to replace the bulb yourself.
or
X Visit a qualified specialist workshop. 260
Display
messagesOn-board computer and displays