2012 MERCEDES-BENZ GL remove seats
[x] Cancel search: remove seatsPage 107 of 384
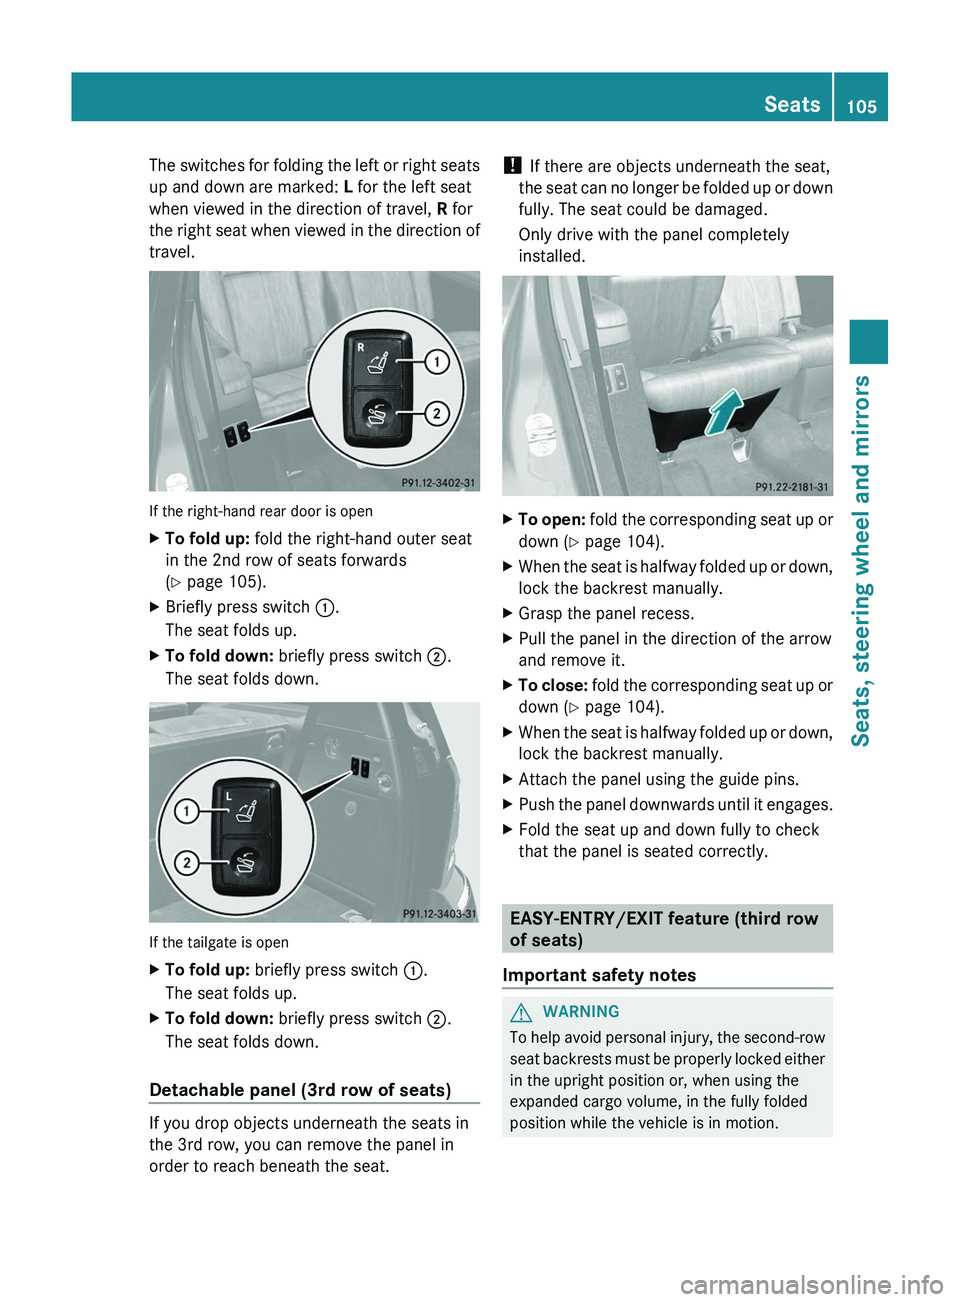
The switches for folding the left or right seats
up and down are marked: L for the left seat
when viewed in the direction of travel, R for
the right seat when viewed in the direction of
travel.
If the right-hand rear door is open
XTo fold up: fold the right-hand outer seat
in the 2nd row of seats forwards
( Y page 105).XBriefly press switch :.
The seat folds up.XTo fold down: briefly press switch ;.
The seat folds down.
If the tailgate is open
XTo fold up: briefly press switch :.
The seat folds up.XTo fold down: briefly press switch ;.
The seat folds down.
Detachable panel (3rd row of seats)
If you drop objects underneath the seats in
the 3rd row, you can remove the panel in
order to reach beneath the seat.
! If there are objects underneath the seat,
the seat can no longer be folded up or down
fully. The seat could be damaged.
Only drive with the panel completely
installed.XTo open: fold the corresponding seat up or
down ( Y page 104).XWhen the seat is halfway folded up or down,
lock the backrest manually.XGrasp the panel recess.XPull the panel in the direction of the arrow
and remove it.XTo close: fold the corresponding seat up or
down ( Y page 104).XWhen the seat is halfway folded up or down,
lock the backrest manually.XAttach the panel using the guide pins.XPush the panel downwards until it engages.XFold the seat up and down fully to check
that the panel is seated correctly.
EASY-ENTRY/EXIT feature (third row
of seats)
Important safety notes
GWARNING
To help avoid personal injury, the second-row
seat backrests must be properly locked either
in the upright position or, when using the
expanded cargo volume, in the fully folded
position while the vehicle is in motion.
Seats105Seats, steering wheel and mirrorsZ
Page 113 of 384
Problems with the steering wheel
heating
If steering wheel heating indicator lamp = is
flashing, the steering wheel heating has
switched off automatically. The vehicle's
electrical system voltage is too low because
too many electrical consumers are switched
on.
XSwitch off electrical consumers which you
do not need, such as the rear window
defroster or interior lighting.
Once the battery is sufficiently charged, the
steering wheel heating will switch back on
automatically.
EASY-ENTRY/EXIT system
Important safety notes
The EASY-ENTRY/EXIT feature makes getting
in and out of your vehicle easier.
You can activate and deactivate the EASY-
ENTRY/EXIT feature in the on-board
computer ( Y page 227).
GWARNING
You must make sure no one can become
trapped or injured by the moving steering
wheel when the easy-entry/exit feature is
activated.
To stop steering wheel movement do one of
the following:
R Move steering wheel adjustment stalk.
R Press one of the memory position buttons.
R Press memory button M.
Do not leave children unattended in the
vehicle, or with access to an unlocked vehicle.
Children could open the driver's door and
unintentionally activate the easy-entry/exit
feature, which could result in an accident
and/or serious personal injury.
GWARNING
Let the system complete the adjustment
procedure before setting the vehicle in
motion. All steering wheel adjustment must
be completed before setting the vehicle in
motion. Driving off with the steering wheel
still adjusting could cause the driver to lose
control of the vehicle.
Position of the steering wheel when the
EASY-ENTRY/EXIT feature is active
The steering wheel swings upwards when
you:
R remove the SmartKey from the ignition lock
R open the driver's door and KEYLESS-GO is
in position 1
R open the driver's door and the SmartKey is
in position 0 or 1 in the ignition lock
i The steering wheel only moves upwards if
it has not already reached the upper end
stop.
Position of the steering wheel for
driving
The steering wheel is moved to the last
selected position when:
R the driver's door is closed.
R you insert the SmartKey into the ignition
lock.
or
R you press the Start/Stop button once on
vehicles with KEYLESS-GO.
When you close the driver's door with the
ignition switched on, the steering wheel is
also automatically moved to the previously
set position.
The last position of the steering wheel is
stored when you switch off the ignition or
when you store the setting with the memory
function ( Y page 114).
Crash-responsive EASY-EXIT feature
If the crash-responsive EASY-EXIT feature is
triggered in an accident, the steering column
will move upwards when the driver's door is
opened. This occurs irrespective of the
Steering wheel111Seats, steering wheel and mirrorsZ
Page 125 of 384
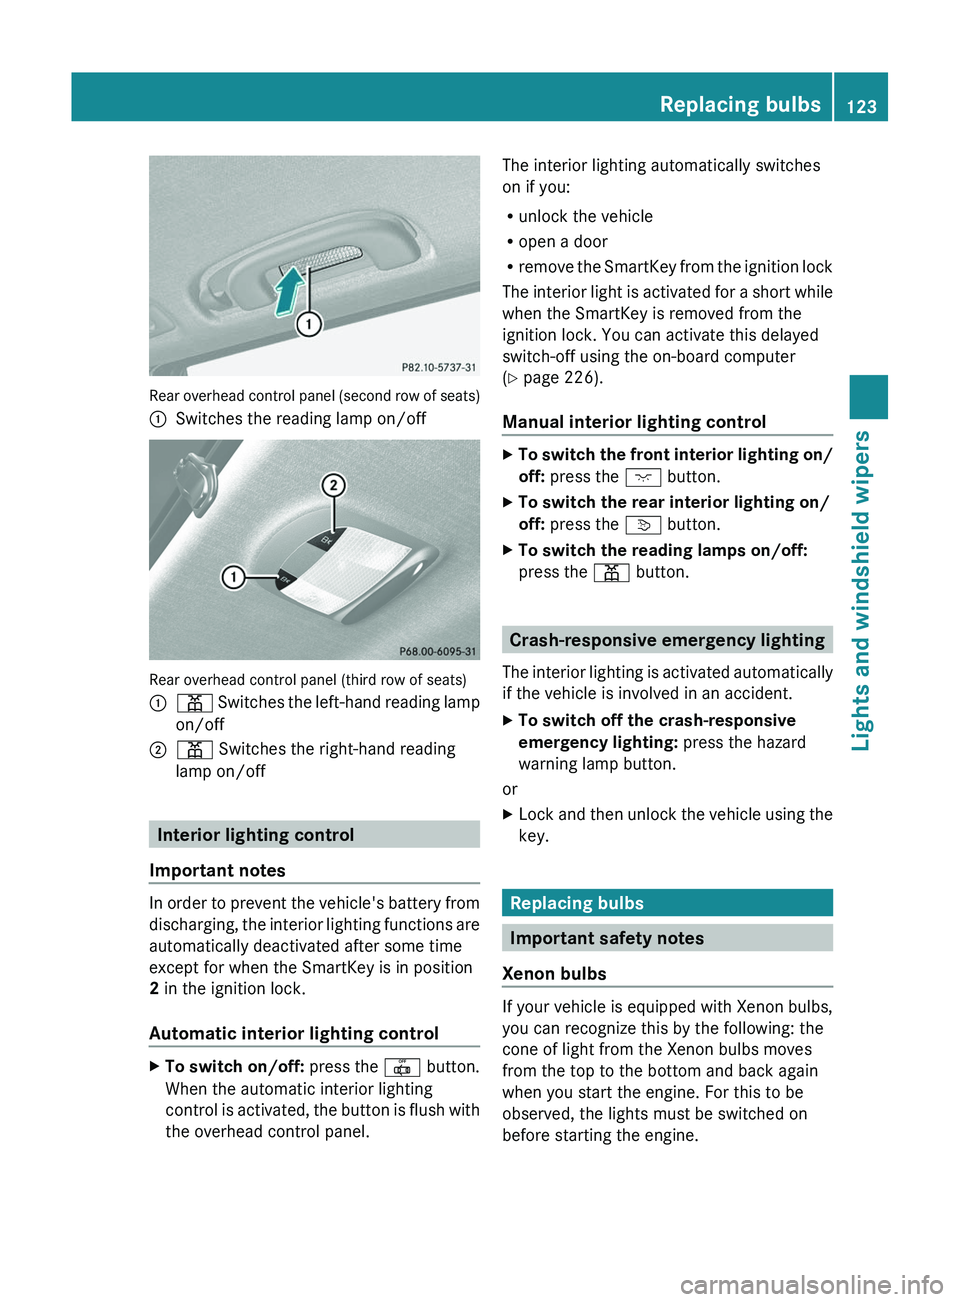
Rear overhead control panel (second row of seats)
:Switches the reading lamp on/off
Rear overhead control panel (third row of seats)
:p Switches the left-hand reading lamp
on/off;p Switches the right-hand reading
lamp on/off
Interior lighting control
Important notes
In order to prevent the vehicle's battery from
discharging, the interior lighting functions are
automatically deactivated after some time
except for when the SmartKey is in position
2 in the ignition lock.
Automatic interior lighting control
XTo switch on/off: press the | button.
When the automatic interior lighting
control is activated, the button is flush with
the overhead control panel.The interior lighting automatically switches
on if you:
R unlock the vehicle
R open a door
R remove the SmartKey from the ignition lock
The interior light is activated for a short while
when the SmartKey is removed from the
ignition lock. You can activate this delayed
switch-off using the on-board computer
( Y page 226).
Manual interior lighting controlXTo switch the front interior lighting on/
off: press the c button.XTo switch the rear interior lighting on/
off: press the v button.XTo switch the reading lamps on/off:
press the p button.
Crash-responsive emergency lighting
The interior lighting is activated automatically
if the vehicle is involved in an accident.
XTo switch off the crash-responsive
emergency lighting: press the hazard
warning lamp button.
or
XLock and then unlock the vehicle using the
key.
Replacing bulbs
Important safety notes
Xenon bulbs
If your vehicle is equipped with Xenon bulbs,
you can recognize this by the following: the
cone of light from the Xenon bulbs moves
from the top to the bottom and back again
when you start the engine. For this to be
observed, the lights must be switched on
before starting the engine.
Replacing bulbs123Lights and windshield wipersZ
Page 275 of 384
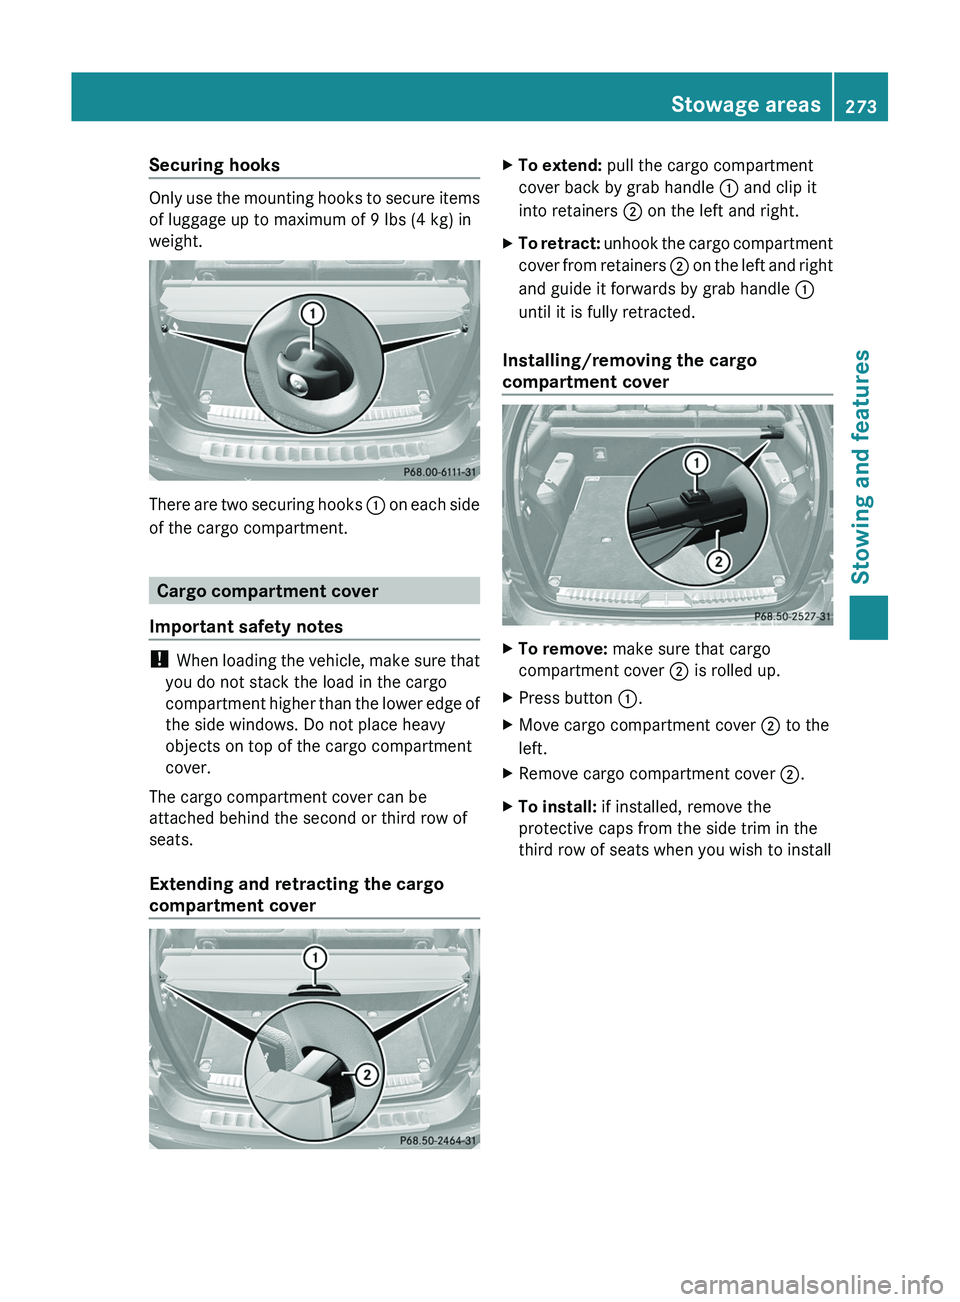
Securing hooks
Only use the mounting hooks to secure items
of luggage up to maximum of 9 lbs (4 kg) in
weight.
There are two securing hooks : on each side
of the cargo compartment.
Cargo compartment cover
Important safety notes
! When loading the vehicle, make sure that
you do not stack the load in the cargo
compartment higher than the lower edge of
the side windows. Do not place heavy
objects on top of the cargo compartment
cover.
The cargo compartment cover can be
attached behind the second or third row of
seats.
Extending and retracting the cargo
compartment cover
XTo extend: pull the cargo compartment
cover back by grab handle : and clip it
into retainers ; on the left and right.XTo retract: unhook the cargo compartment
cover from retainers ; on the left and right
and guide it forwards by grab handle :
until it is fully retracted.
Installing/removing the cargo
compartment cover
XTo remove: make sure that cargo
compartment cover ; is rolled up.XPress button :.XMove cargo compartment cover ; to the
left.XRemove cargo compartment cover ;.XTo install: if installed, remove the
protective caps from the side trim in the
third row of seats when you wish to installStowage areas273Stowing and featuresZ
Page 276 of 384
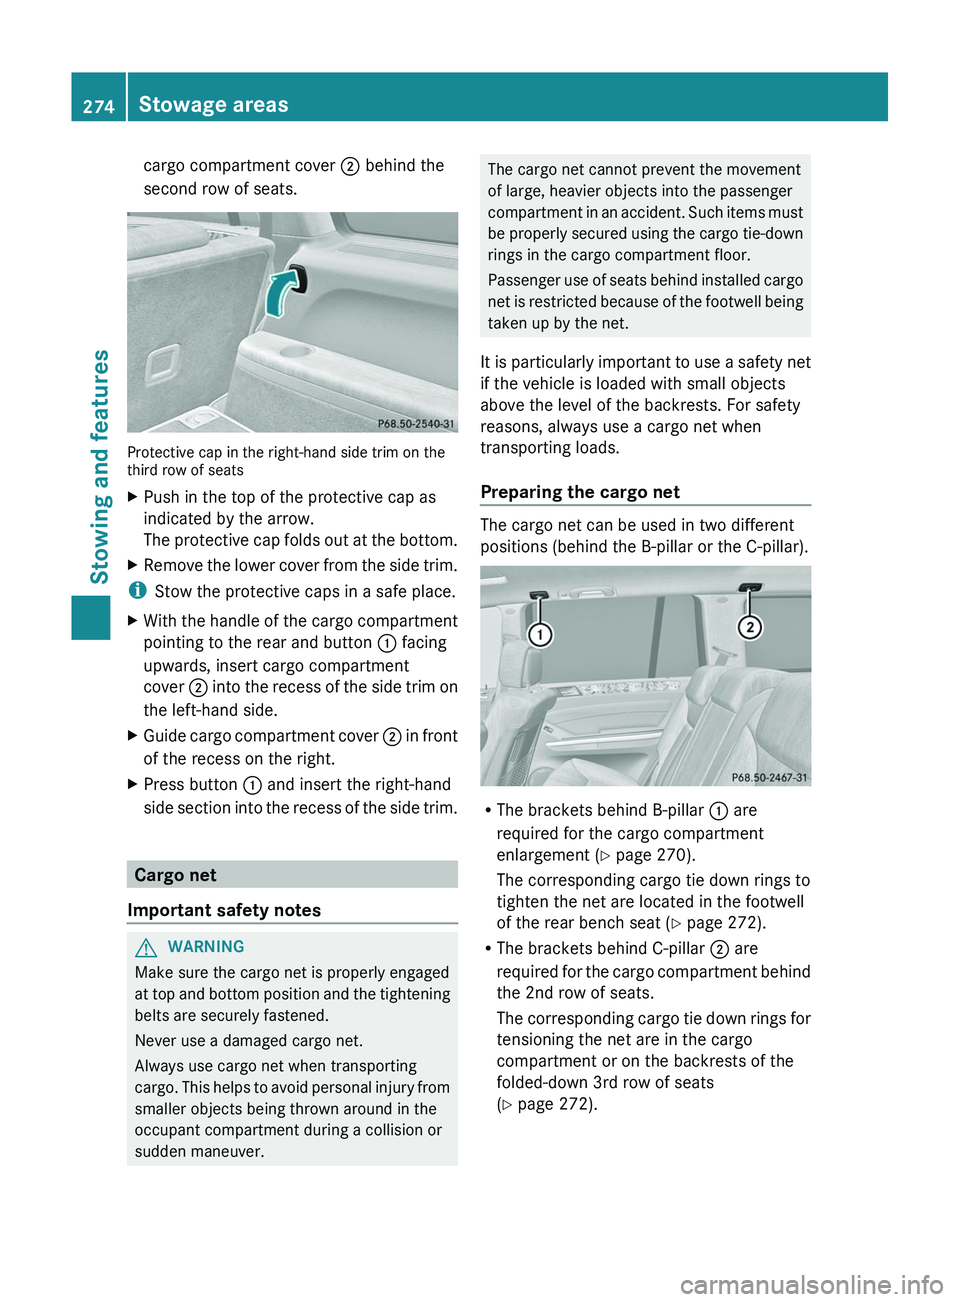
cargo compartment cover ; behind the
second row of seats.
Protective cap in the right-hand side trim on the
third row of seats
XPush in the top of the protective cap as
indicated by the arrow.
The protective cap folds out at the bottom.XRemove the lower cover from the side trim.
i Stow the protective caps in a safe place.
XWith the handle of the cargo compartment
pointing to the rear and button : facing
upwards, insert cargo compartment
cover ; into the recess of the side trim on
the left-hand side.XGuide cargo compartment cover ; in front
of the recess on the right.XPress button : and insert the right-hand
side section into the recess of the side trim.
Cargo net
Important safety notes
GWARNING
Make sure the cargo net is properly engaged
at top and bottom position and the tightening
belts are securely fastened.
Never use a damaged cargo net.
Always use cargo net when transporting
cargo. This helps to avoid personal injury from
smaller objects being thrown around in the
occupant compartment during a collision or
sudden maneuver.
The cargo net cannot prevent the movement
of large, heavier objects into the passenger
compartment in an accident. Such items must
be properly secured using the cargo tie-down
rings in the cargo compartment floor.
Passenger use of seats behind installed cargo
net is restricted because of the footwell being
taken up by the net.
It is particularly important to use a safety net
if the vehicle is loaded with small objects
above the level of the backrests. For safety
reasons, always use a cargo net when
transporting loads.
Preparing the cargo net
The cargo net can be used in two different
positions (behind the B-pillar or the C-pillar).
R The brackets behind B-pillar : are
required for the cargo compartment
enlargement ( Y page 270).
The corresponding cargo tie down rings to
tighten the net are located in the footwell
of the rear bench seat ( Y page 272).
R The brackets behind C-pillar ; are
required for the cargo compartment behind
the 2nd row of seats.
The corresponding cargo tie down rings for
tensioning the net are in the cargo
compartment or on the backrests of the
folded-down 3rd row of seats
( Y page 272).
274Stowage areasStowing and features
Page 284 of 384
Features
Cup holders
Important safety notes
GWARNING
In order to help prevent spilling liquids on
vehicle occupants and/or vehicle equipment,
only use containers that fit into the cup
holder. Use lids on open containers and do
not fill containers to a height where the
contents, especially hot liquids, could spill
during braking, vehicle maneuvers, or in an
accident. Liquids spilled on vehicle occupants
may cause serious personal injury. Liquids
spilled on vehicle equipment may cause
damage not covered by the Mercedes-Benz
Limited Warranty.
When not in use, keep the cup holder closed.
An open cup holder may cause injury to you
or others when contacted during braking,
vehicle maneuvers, or in an accident.
Keep in mind that objects placed in the cup
holder may come loose during braking,
vehicle maneuvers, or in an accident and be
thrown around in the vehicle interior. Objects
thrown around in the vehicle interior may
cause an accident and/or serious personal
injury.
Cup holder in the front-compartment
center console
In the front part of the center console, there
is a cup holder and a removable support with
a card holder.
You can remove the cup holder to clean it.
Clean with clear, lukewarm water only.
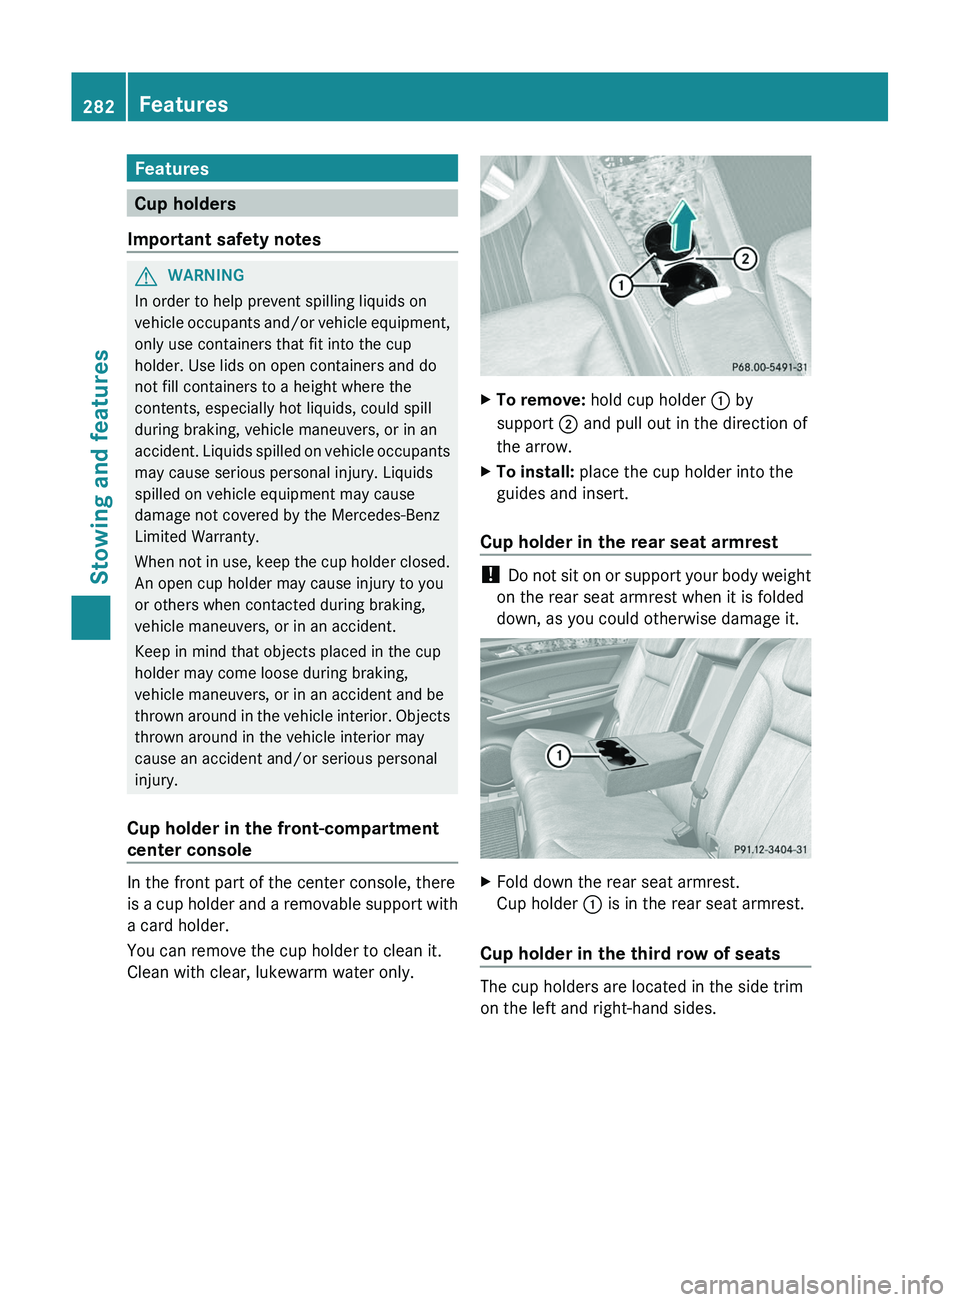
XTo remove: hold cup holder : by
support ; and pull out in the direction of
the arrow.XTo install: place the cup holder into the
guides and insert.
Cup holder in the rear seat armrest
! Do not sit on or support your body weight
on the rear seat armrest when it is folded
down, as you could otherwise damage it.
XFold down the rear seat armrest.
Cup holder : is in the rear seat armrest.
Cup holder in the third row of seats
The cup holders are located in the side trim
on the left and right-hand sides.
282FeaturesStowing and features
Page 286 of 384
XTo close: pull out the roller sunblind using
handle = and attach arm ; to
bracket :.
The roller sunblind engages.XTo open: press release knob ? to release
the roller sunblind from bracket :.XRetract the roller sunblind by hand.
Ashtray
Ashtray in the front-compartment
center console
i You can remove the ashtray insert and
use the resulting compartment for
stowage.
! The stowage space under the ashtray is
not heat resistant. Before placing lit
cigarettes in the ashtray, make sure that
the ashtray is properly engaged. Otherwise,
the stowage space could be damaged.
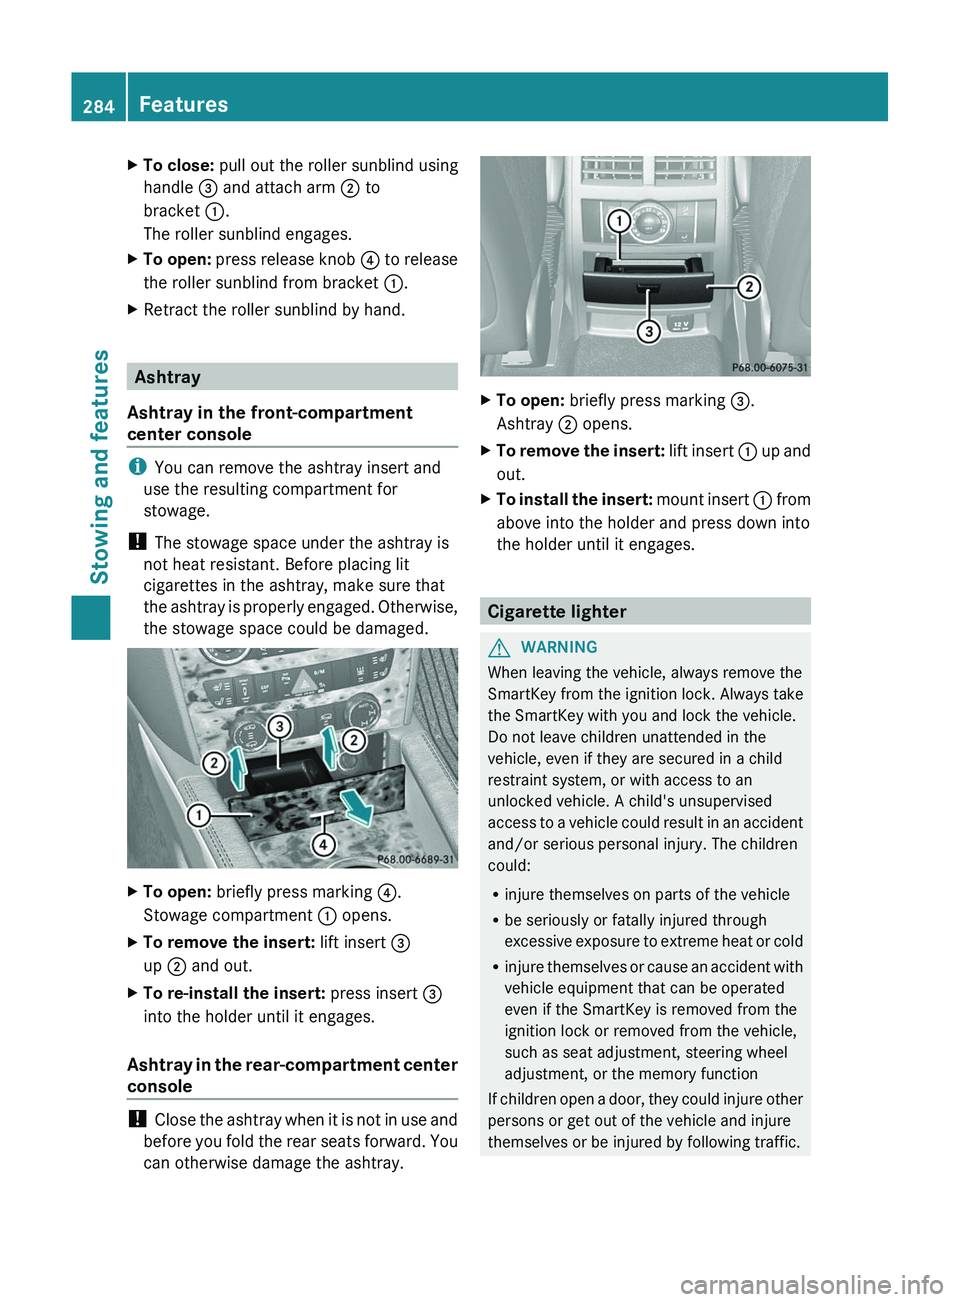
XTo open: briefly press marking ?.
Stowage compartment : opens.XTo remove the insert: lift insert =
up ; and out.XTo re-install the insert: press insert =
into the holder until it engages.
Ashtray in the rear-compartment center
console
! Close the ashtray when it is not in use and
before you fold the rear seats forward. You
can otherwise damage the ashtray.
XTo open: briefly press marking =.
Ashtray ; opens.XTo remove the insert: lift insert : up and
out.XTo install the insert: mount insert : from
above into the holder and press down into
the holder until it engages.
Cigarette lighter
GWARNING
When leaving the vehicle, always remove the
SmartKey from the ignition lock. Always take
the SmartKey with you and lock the vehicle.
Do not leave children unattended in the
vehicle, even if they are secured in a child
restraint system, or with access to an
unlocked vehicle. A child's unsupervised
access to a vehicle could result in an accident
and/or serious personal injury. The children
could:
R injure themselves on parts of the vehicle
R be seriously or fatally injured through
excessive exposure to extreme heat or cold
R injure themselves or cause an accident with
vehicle equipment that can be operated
even if the SmartKey is removed from the
ignition lock or removed from the vehicle,
such as seat adjustment, steering wheel
adjustment, or the memory function
If children open a door, they could injure other
persons or get out of the vehicle and injure
themselves or be injured by following traffic.
284FeaturesStowing and features
Page 318 of 384
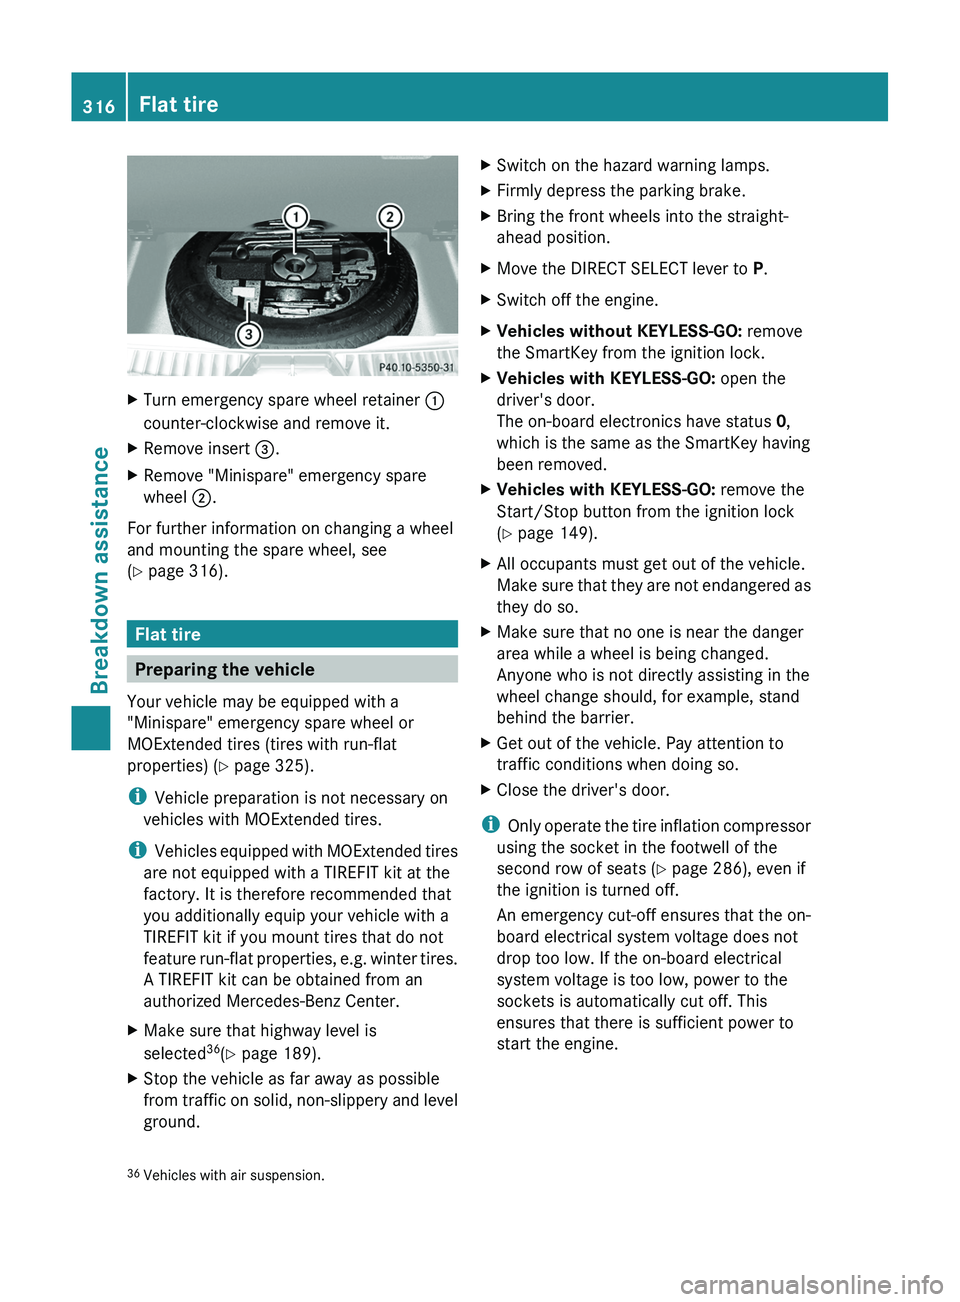
XTurn emergency spare wheel retainer :
counter-clockwise and remove it.XRemove insert =.XRemove "Minispare" emergency spare
wheel ;.
For further information on changing a wheel
and mounting the spare wheel, see
( Y page 316).
Flat tire
Preparing the vehicle
Your vehicle may be equipped with a
"Minispare" emergency spare wheel or
MOExtended tires (tires with run-flat
properties) ( Y page 325).
i Vehicle preparation is not necessary on
vehicles with MOExtended tires.
i Vehicles equipped with MOExtended tires
are not equipped with a TIREFIT kit at the
factory. It is therefore recommended that
you additionally equip your vehicle with a
TIREFIT kit if you mount tires that do not
feature run-flat properties, e.g. winter tires.
A TIREFIT kit can be obtained from an
authorized Mercedes-Benz Center.
XMake sure that highway level is
selected 36
(Y page 189).XStop the vehicle as far away as possible
from traffic on solid, non-slippery and level
ground.XSwitch on the hazard warning lamps.XFirmly depress the parking brake.XBring the front wheels into the straight-
ahead position.XMove the DIRECT SELECT lever to P.XSwitch off the engine.XVehicles without KEYLESS-GO: remove
the SmartKey from the ignition lock.XVehicles with KEYLESS-GO: open the
driver's door.
The on-board electronics have status 0,
which is the same as the SmartKey having
been removed.XVehicles with KEYLESS-GO: remove the
Start/Stop button from the ignition lock
( Y page 149).XAll occupants must get out of the vehicle.
Make sure that they are not endangered as
they do so.XMake sure that no one is near the danger
area while a wheel is being changed.
Anyone who is not directly assisting in the
wheel change should, for example, stand
behind the barrier.XGet out of the vehicle. Pay attention to
traffic conditions when doing so.XClose the driver's door.
i Only operate the tire inflation compressor
using the socket in the footwell of the
second row of seats ( Y page 286), even if
the ignition is turned off.
An emergency cut-off ensures that the on-
board electrical system voltage does not
drop too low. If the on-board electrical
system voltage is too low, power to the
sockets is automatically cut off. This
ensures that there is sufficient power to
start the engine.
36 Vehicles with air suspension.316Flat tireBreakdown assistance