2012 MERCEDES-BENZ G-CLASS SUV fuel fill door release
[x] Cancel search: fuel fill door releasePage 13 of 357

Front-passenger seat
Display message ............................ 249
Fuel
Additives ........................................ 343
Consumption statistics ..................215
Displaying the current consump-
tion ................................................ 215
Displaying the range ......................215
Fuel gauge ..................................... 211
Grade (petrol) ................................ 342
Important safety notes ..................341
Notes for AMG vehicles .................343
Premium-grade unleaded petrol ..... 342
Problem (malfunction) ...................159
Quality (diesel )............................... 343
Refuelling ...................................... .156
Tank content/reserve fuel .............342
Fuel/water separator
Service .......................................... .295
Fuel filler flap
Emergency release ........................158
Opening/closing ............................ 157
Fuel filte r(white display message) .240
Fuel level Calling up the range (on-board
computer) ...................................... 215
Gauge ............................................ 211
Fuel reserve
see Fuel
Fuel tank
Capacity ........................................ 342
Problem (malfunction) ...................159
Fuse allocation chart ........................318
Fuse box Battery case ................................... 320
Dashboard ..................................... 319
Front-passenger footwell ...............319
Transmission tunnel ....................... 319
Fuse extractor ................................... 318
Fuses Allocation chart ............................. 318
Before changing ............................. 318
Dashboard fuse box .......................319
Fuse allocation chart .....................318
Fuse box in the front-passenger
footwell .......................................... 319
Fuse box in the transmission tun-
nel ................................................. 319Important safety notes
..................318
In the battery case .........................320 G
Garage door opener Clearing the memory .....................283
Frequencies ................................... 283
Important safety notes ..................280
Opening/closing the garage door ..282
Programming the remote control ...280
Gear indicator (on-board computer) 225
Gearshift program SETUP (on-board computer) ..........226
Genuine Mercedes-Benz parts .........338
Genuine wood trim and trim strips
(cleaning instructions) ......................300
Glove compartment ..........................267
Gradient-climbing capability (max-
imum) ................................................. 173 H
Hazard warning lamps ......................109
Headlamp Cleaning system (function) ............108
Cleaning system (notes) ................347
Headlamps
Cleaning ......................................... 298
Misting up ...................................... 110
Topping up the cleaning system ....294
see Automatic headlamp mode
Head restraints
Adjusting ......................................... 92
Adjusting (rear) ................................ 93
Fitting/removing (rear) ....................93
Luxury .............................................. 92
Resetting (front) ............................... 93
Heating
see Climate control
High-pressure cleaners ....................296
Hill start assist .................................. 145
HOLD function Function/notes ............................. 19610
Index
Page 73 of 357
neously for approximately si
xseconds until
battery chec klamp :flashes twice.
The key now functions as follows:
X To unlock the driver's door and fuel
filler flap: press the%button once.
X To unlock centrally: press the%but-
ton twice.
X To lock centrally: press the&button. Restoring factor
ysettings X
Press the %and& buttons simulta-
neously for approximately six seconds until
battery check lamp :flashes twice. Emergency key element
General notes If the vehicle can no longer be unlocked with
the key, use the emergency key element.
If you use the emergency key element to
unlock and open the driver's door, the anti-
theft alarm system will be triggered
(Y page 64).
There are several ways to tur noff the alarm:
X Press the %or& button on the key.
or
X Insert the key into the ignition lock.
If you unlock the vehicle using the emergency
key element, the fuel filler flap will not be
unlocked automatically. X
To unlock the fuel filler flap: insert the
key into the ignition lock.
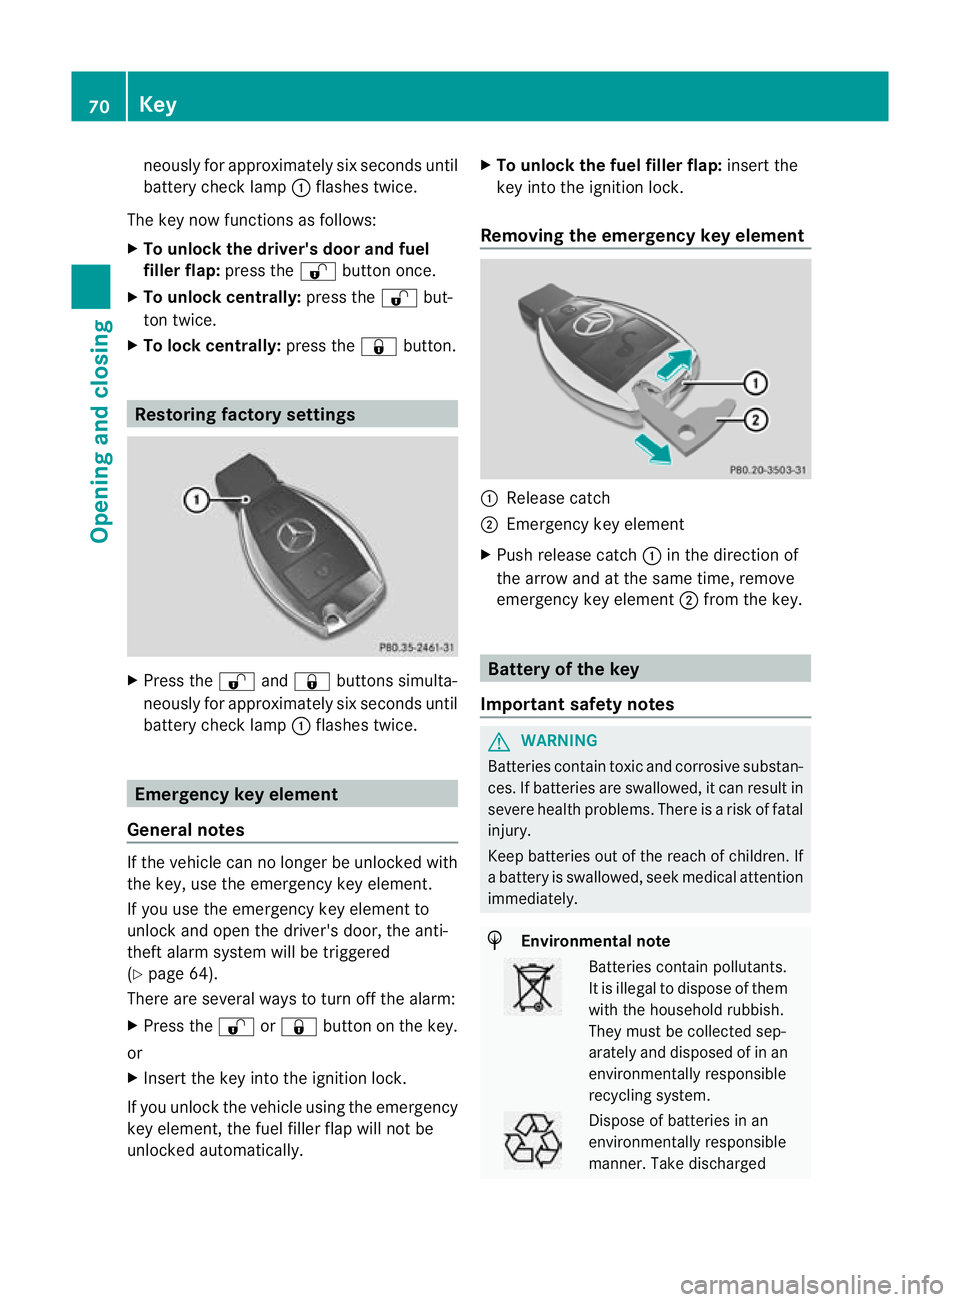
Removing the emergency key element :
Release catch
; Emergency key element
X Push release catch :in the direction of
the arrow and at the same time, remove
emergency key element ;from the key. Battery of the key
Important safety notes G
WARNING
Batteries contain toxic and corrosive substan-
ces. If batteries are swallowed, it can result in
severe health problems. There is a risk of fatal
injury.
Keep batteries out of the reach of children. If
a battery is swallowed, seek medical attention
immediately. H
Environmental note Batteries contain pollutants.
It is illegal to dispose of them
with the household rubbish.
They must be collected sep-
arately and disposed of in an
environmentally responsible
recycling system.
Dispose of batteries in an
environmentally responsible
manner. Take discharged70
KeyOpening and closing
Page 161 of 357
X
Turn the fuel filler cap anti-clockwise and
remove it.
AdBlue ®
vehicles: do not confuse the fuel
filler cap with the blue AdBlue ®
filler cap.
X Insert the fuel filler cap into the holder
bracket on the inside of filler flap ?.
i AdBlue ®
vehicles do not have a bracket
on the inside of the filler flap.
X Completely insert the filler neck of the fuel
pump nozzle into the tank and refuel.
i Do not add any more fuel after the pump
stops filling for the first time. Otherwise,
fuel may leak out.
Closing X
Replace the fuel filler cap and turn it clock-
wise. The fuel filler cap audibly engages.
X Press the fuel filler flap closed until it
engages. Fuel filler flap emergency release
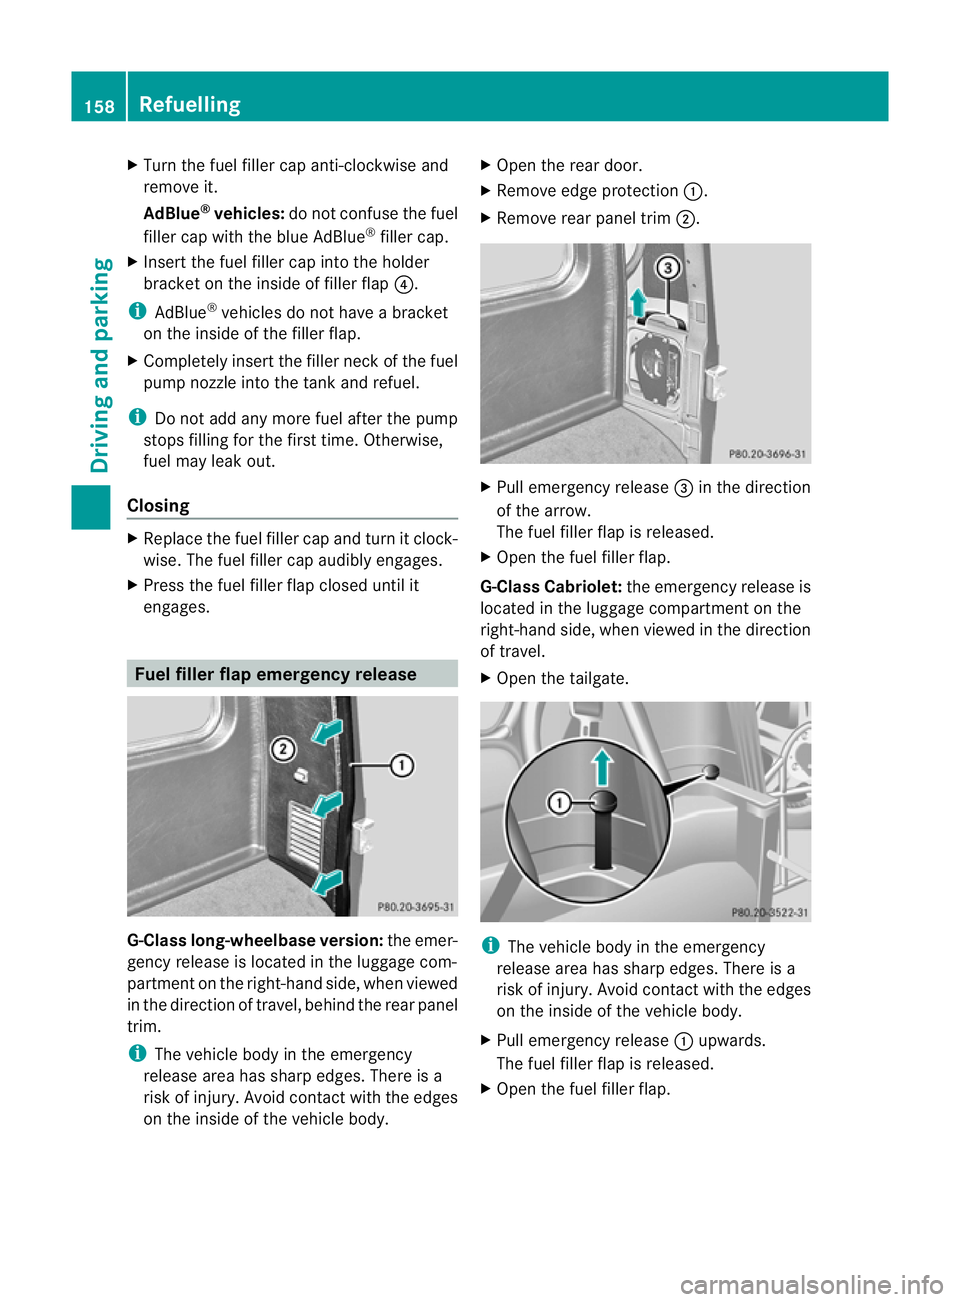
G-Class long-wheelbase version:
the emer-
gency release is located in the luggage com-
partmen tonthe right-hand side, when viewed
in the direction of travel, behind the rear panel
trim.
i The vehicle body in the emergency
release area has sharp edges. There is a
risk of injury. Avoid contact with the edges
on the inside of the vehicle body. X
Open the rear door.
X Remove edge protection :.
X Remove rear panel trim ;. X
Pull emergency release =in the direction
of the arrow.
The fuel filler flap is released.
X Open the fuel filler flap.
G-Class Cabriolet: the emergency release is
located in the luggage compartmentont he
right-hand side, when viewed in the direction
of travel.
X Open the tailgate. i
The vehicle body in the emergency
release area has sharp edges. There is a
risk of injury. Avoid contact with the edges
on the inside of the vehicle body.
X Pull emergency release :upwards.
The fuel filler flap is released.
X Open the fuel filler flap. 158
RefuellingDriving and parking
Page 162 of 357
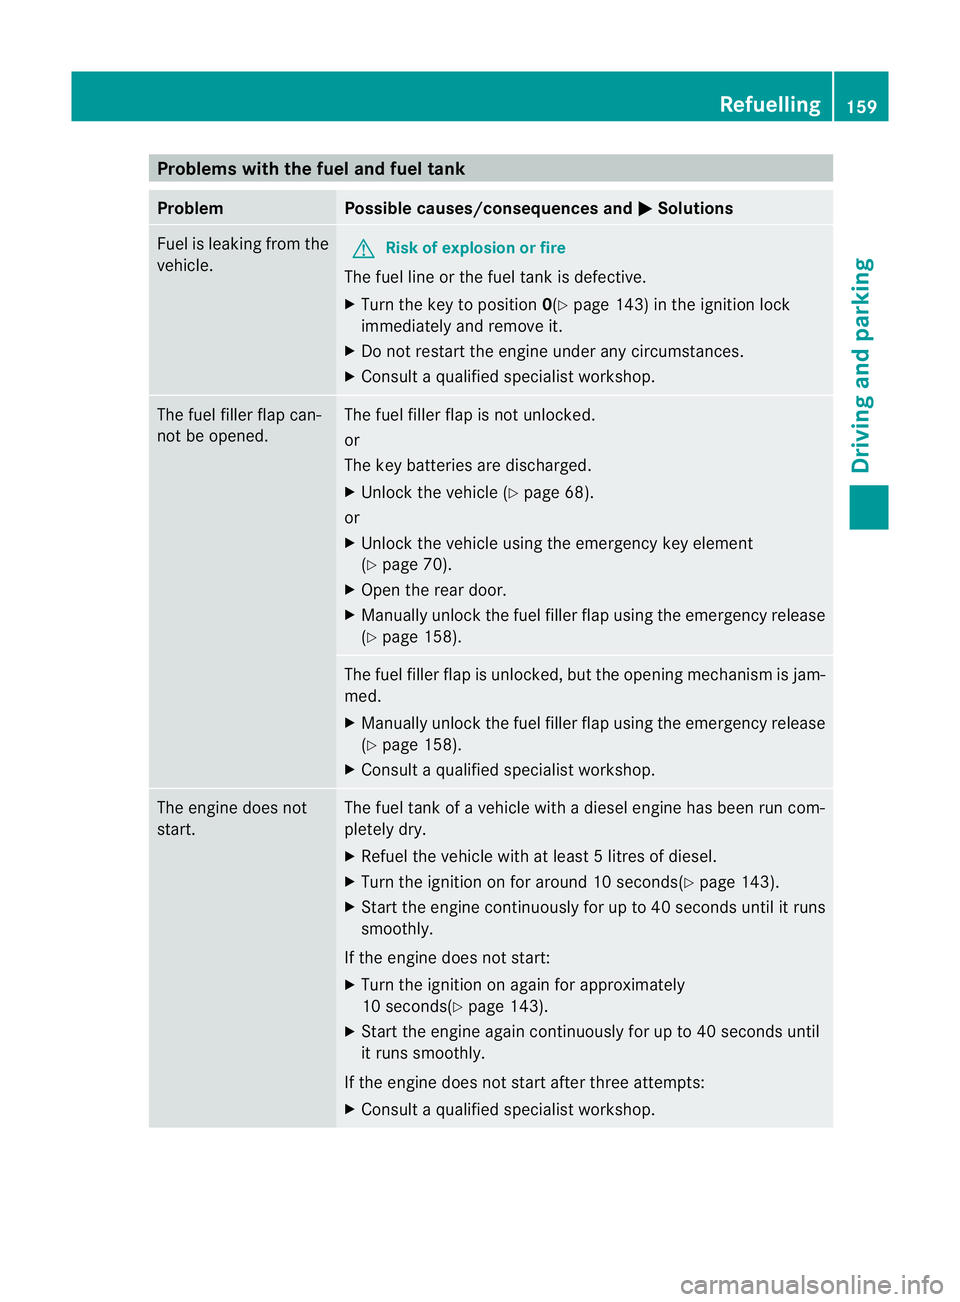
Problems with the fuel and fuel tank
Problem Possible causes/consequences and
M Solutions
Fuel is leaking from the
vehicle.
G
Risk of explosion or fire
The fuel line or the fuel tank is defective.
X Turn the key to position 0(Ypage 143) in the ignition lock
immediately and remove it.
X Do not restart the engine under any circumstances.
X Consult a qualified specialist workshop. The fuel filler flap can-
not be opened. The fuel filler flap is not unlocked.
or
The key batteries are discharged.
X
Unlock the vehicle (Y page 68).
or
X Unlock the vehicle using the emergency key element
(Y page 70).
X Open the rear door.
X Manually unlock the fuel filler flap using the emergency release
(Y page 158). The fuel filler flap is unlocked, but the opening mechanism is jam-
med.
X
Manually unlock the fuel filler flap using the emergency release
(Y page 158).
X Consult a qualified specialist workshop. The engine does not
start. The fuel tank of a vehicle with a diesel engine has been run com-
pletely dry.
X
Refuel the vehicle with at least 5litres of diesel.
X Turn the ignition on for around 10 seconds(Y page 143).
X Start the engine continuously for up to 40 seconds until it runs
smoothly.
If the engine does not start:
X Turn the ignition on again for approximately
10 seconds(Y page 143).
X Start the engine again continuously for up to 40 seconds until
it runs smoothly.
If the engine does not start after three attempts:
X Consult a qualified specialist workshop. Refuelling
159Driving and parking Z