2012 MERCEDES-BENZ G-CLASS SUV window
[x] Cancel search: windowPage 132 of 357
H
To switch climate control on/off (Y page 126)
I To set climate control to automatic mode (Y page 130)
X Press the Ábutton.
The indicator lamp in the Ábutton lights up.
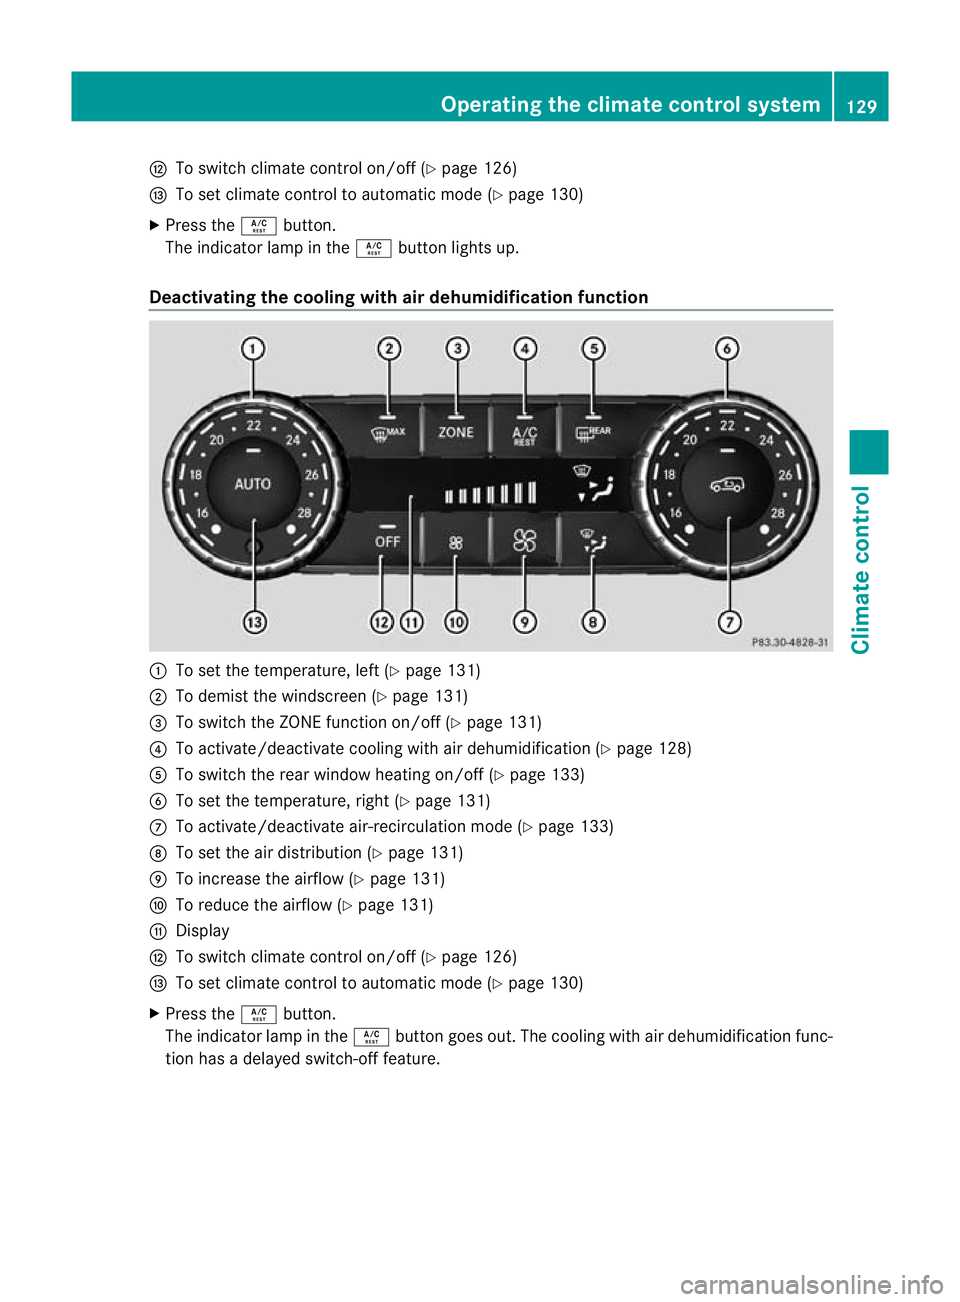
Deactivating the cooling with air dehumidification function :
To set the temperature, left (Y page 131)
; To demist the windscreen (Y page 131)
= To switch the ZONE function on/off (Y page 131)
? To activate/deactivate cooling with air dehumidification (Y page 128)
A To switch the rear window heating on/of f(Ypage 133)
B To set the temperature, right (Y page 131)
C To activate/deactivate air-recirculation mode (Y page 133)
D To set the air distribution (Y page 131)
E To increase the airflow (Y page 131)
F To reduce the airflow (Y page 131)
G Display
H To switch climate control on/off (Y page 126)
I To set climate control to automatic mode (Y page 130)
X Press the Ábutton.
The indicator lamp in the Ábutton goes out. The cooling with air dehumidification func-
tion has a delayed switch-of ffeature. Operating the climate control system
129Climate control Z
Page 133 of 357
Problems with the cooling with air dehumidification function
:
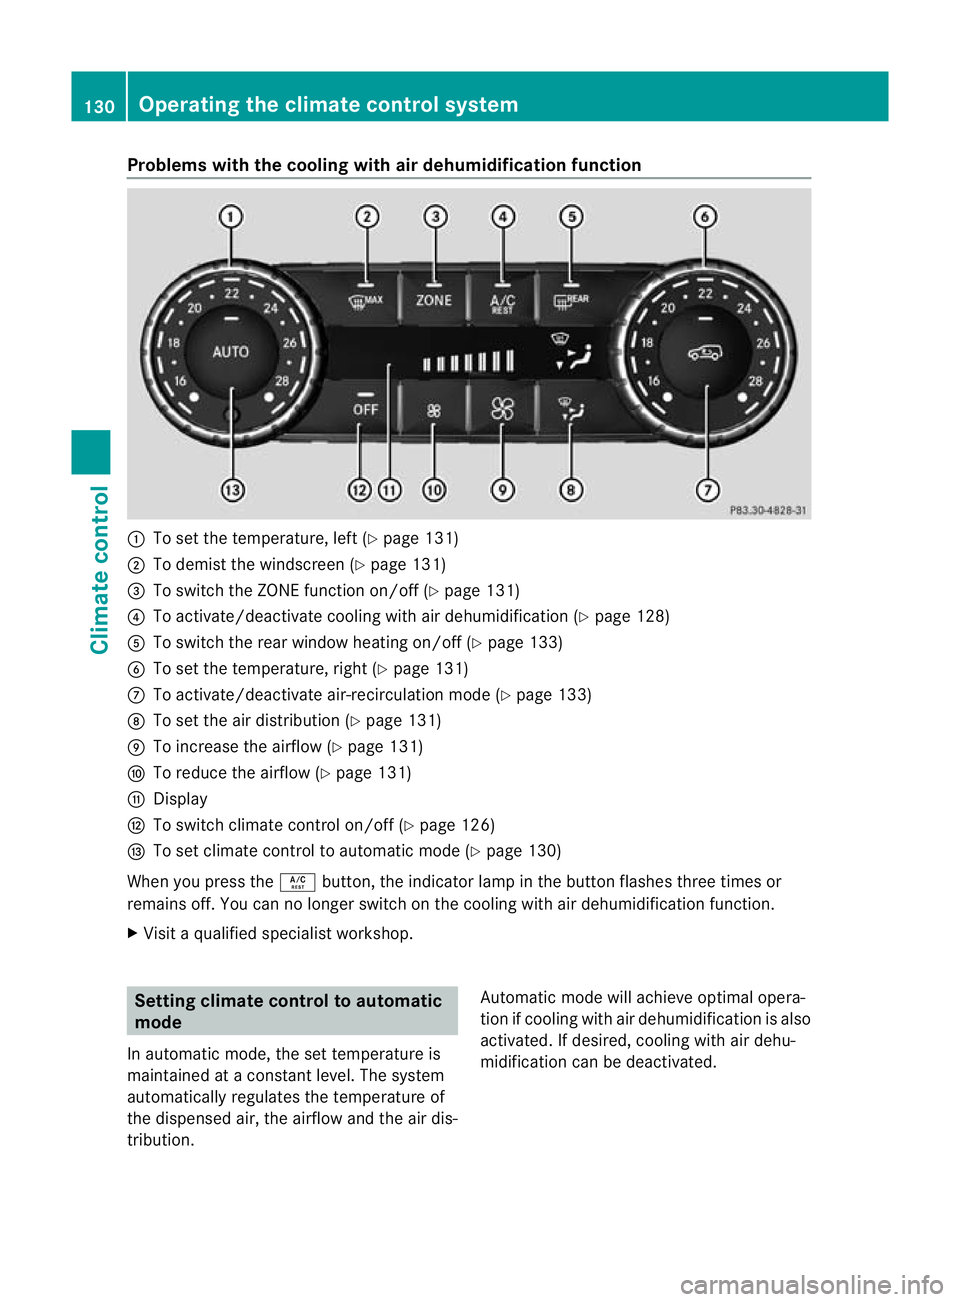
To set the temperature, left (Y page 131)
; To demist the windscreen (Y page 131)
= To switch the ZONE function on/off (Y page 131)
? To activate/deactivate cooling with air dehumidification (Y page 128)
A To switch the rear window heating on/off (Y page 133)
B To set the temperature, right (Y page 131)
C To activate/deactivate air-recirculation mode (Y page 133)
D To set the air distribution (Y page 131)
E To increase the airflow (Y page 131)
F To reduce the airflow (Y page 131)
G Display
H To switch climate control on/off (Y page 126)
I To set climate control to automatic mode (Y page 130)
When you press the Ábutton, the indicator lamp in the button flashes three times or
remains off. You can no longer switch on the cooling with air dehumidification function.
X Visit a qualified specialist workshop. Setting climate control to automatic
mode
In automatic mode, the set temperature is
maintained at a constant level. The system
automatically regulates the temperature of
the dispensed air, the airflow and the air dis-
tribution. Automatic mode will achieve optimal opera-
tion if cooling with air dehumidification is also
activated. If desired, cooling with air dehu-
midification can be deactivated.130
Operating the climate control systemClimate control
Page 134 of 357
X
Turn the key to position 2(Ypage 143) in
the ignition lock.
X Set the desired temperature.
X To switch on: press theÃbutton.
The indicator lamp in the Ãbutton lights
up. Automatic air distribution and airflow
are activated.
X To switch off: press the_button.
or
X Press the IorK button.
The indicator lamp in the Ãbutton goes
out. Setting the temperature
You can set the temperature separately for
the driver's and front-passenger sides with
controls :orB(Y page 125).
X Turn the key to position 2(Ypage 143) in
the ignition lock.
X Set control :orB(Y page 125) to the
desired temperature.
Only change the temperature setting in
small increments. Start at 22 †. Setting the air distribution
X Turn the key to position 2(Ypage 143) in
the ignition lock.
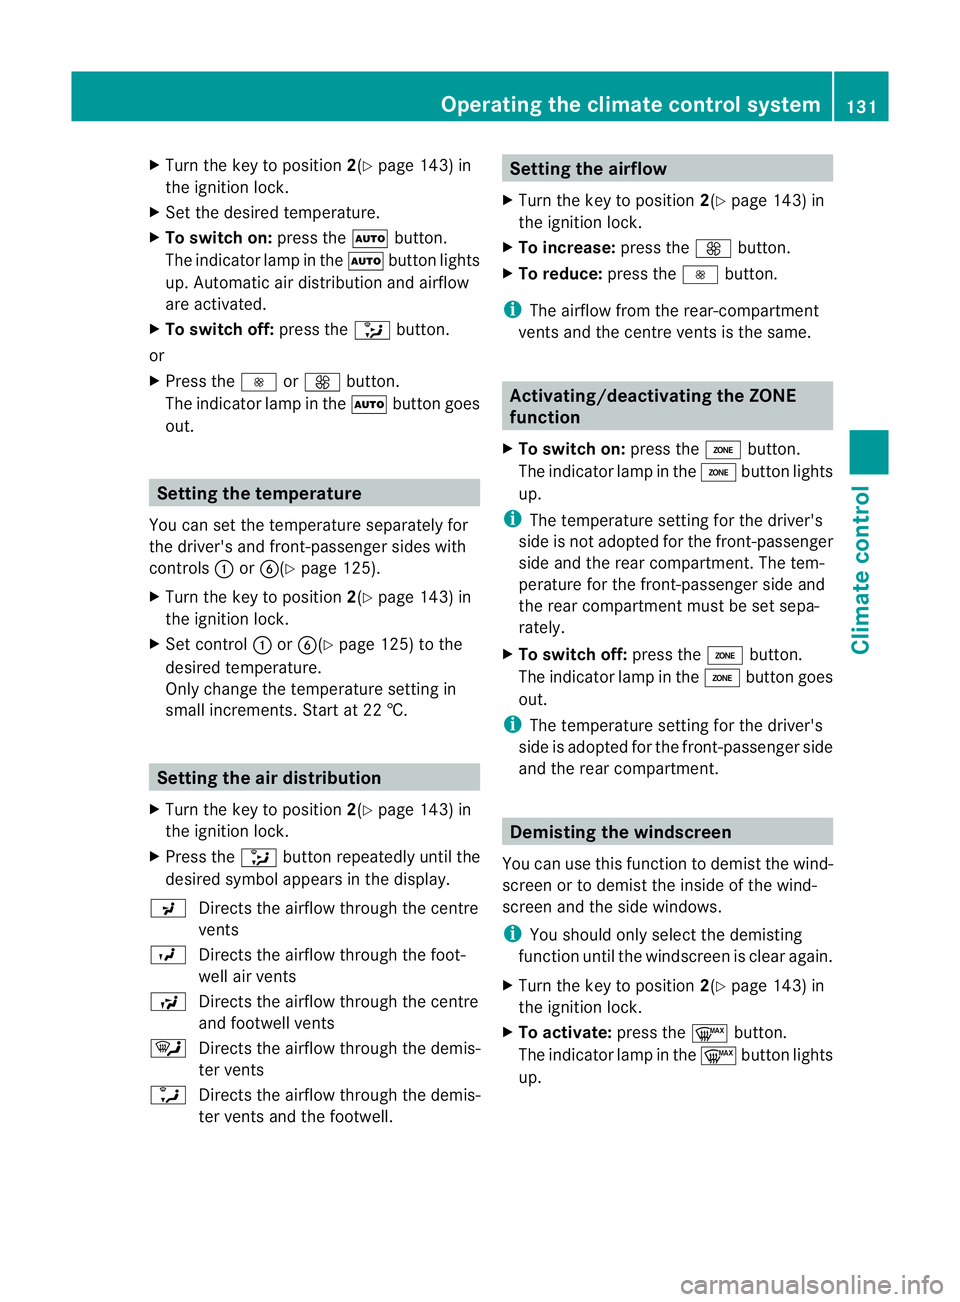
X Press the _button repeatedly until the
desired symbol appears in the display.
P Directs the airflow through the centre
vents
O Directs the airflow through the foot-
well air vents
S Directs the airflow through the centre
and footwell vents
¯ Directs the airflow through the demis-
ter vents
a Directs the airflow through the demis-
ter vents and the footwell. Setting the airflow
X Turn the key to position 2(Ypage 143) in
the ignition lock.
X To increase: press theKbutton.
X To reduce: press theIbutton.
i The airflow from the rear-compartment
vents and the centre vents is the same. Activating/deactivating the ZONE
function
X To switch on: press theábutton.
The indicator lamp in the ábutton lights
up.
i The temperature setting for the driver's
side is not adopted for the front-passenger
side and the rear compartment. The tem-
perature for the front-passenger side and
the rear compartment must be set sepa-
rately.
X To switch off: press theábutton.
The indicator lamp in the ábutton goes
out.
i The temperature setting for the driver's
side is adopted for the front-passenger side
and the rear compartment. Demisting the windscreen
You can use this function to demist the wind-
screen or to demist the inside of the wind-
screen and the side windows.
i You should only select the demisting
function until the windscreen is clear again.
X Turn the key to position 2(Ypage 143) in
the ignition lock.
X To activate: press the¬button.
The indicator lamp in the ¬button lights
up. Operating the climate control system
131Climate control Z
Page 135 of 357

The climate control system switches to the
following functions:
R
cooling with air dehumidification (only
with engine running)
R high airflow (depending on the outside
temperature)
R high temperature (depending on the out-
side temperature)
R air distribution to the windscreen and
fronts ide windows
R air-recirculation mode off
X To deactivate: press the¬button.
The indicator lamp in the ¬button goes
out. The previous settings are reactivated.
The cooling with air dehumidification func-
tion remains on. Air-recirculation mode
remains deactivated.
or
X Press the Ãbutton.
The indicator lamp in the ¬button goes
out. Airflow and air distribution are set to
automatic mode.
or
X Turn controls :orB clockwise or anti-
clockwise (Y page 125).
or
X Press the KorI button. Demisting the windows
Windows misted up on th einside X
Activate the Ácooling with air dehu-
midification function.
X Activate automatic mode Ã.
X If the windows continue to mist up, activate
the demisting function (Y page 131).
i You should only select this setting until
the windscreen is clear again. Windows misted up on the outside X
Switch on the windscreen wipers
(Y page 119).
X Press the _button repeatedly until the
P orO symbol appears in the dis-
play.
i You should only select this setting until
the windscreen is clear again. Switching the windscreen heating
on/off
X
Turn the key to position 2(Ypage 143) in
the ignition lock.
X To switch on: press button;.
Indicator lamp :lights up.
X To switch off: press button;.
Indicator lamp :goes out.
i At outside temperatures above 10 †, the
windscreen heating cannot be activated.
Indicator lamp :lights up briefly when you
attempt to activate it and then goes out
again.
i The windscreen heating has a high cur-
rent draw. You should therefore switch it
off as soon as the windscreen is clear. The
windscreen heating otherwise switches
itself off automatically after 10 minutes.
i If the battery voltage is too low, the wind-
screen heating may switch off. If the wind-
screen heating is automatically deactiva-
ted, indicator lamp :flashes. The wind-
screen heating will automatically switch 132
Operating the climate control systemClimate control
Page 136 of 357
back on as soon as ther
eis sufficient volt-
age. Switching the rear window heating
on/off
Switching on/off G
WARNING
Cleara ll windows of ice or snow before setting
off .O therwise, impaired visibility could
endanger you and others.
X Turn the key to position 2(Ypage 143) in
the ignition lock.
X USA only: press theªbutton.
The indicator lamp in the ªbutton lights
up or goes out.
i The rea rwindow heating has ahigh cur-
ren tdraw.Y ou should therefore switch it
off as soon as the window is clear. It only
switches itself off automatically after a few
minutes.
i If the battery voltage is too low, the rear
window heating may switch off.
Problems with the rear window heating If the indicator lamp in the
ªrear window
heating button flashes, the on-board voltage
is too low. The rear window heating has
switched off prematurely or cannot be acti-
vated.
X Switch off any consumers that are not
required, e.g. reading lamps or interior
lighting.
When the battery is sufficiently charged,
the rear window heating is activated again
automatically. Activating/deactivating air-recircula-
tion mode
G
WARNING
Only switch over to air-recirculation mode
briefly at low outside temperatures. Other-
wise, the windows could mist up, thus impair-
ing visibility and endangering yourself and
others. This may prevent you from observing
the traffic conditions, thereby causing an
accident.
X Turn the key to position 2(Ypage 143) in
the ignition lock.
X To switch on: press thedbutton.
The indicator lamp in the dbutton lights
up.
i Air-recirculation mode is automatically
activated at high levels of pollution or at
high outside temperatures. When air-recir-
culation mode is activated automatically,
the indicator lamp in the dbutton is not
lit.
Outside air is added after approximately
30 minutes.
X To deactivate: press thedbutton.
The indicator lamp in the dbutton goes
out.
i Air-recirculation mode switches off auto-
matically:
R after approximately five minutes at out-
side temperatures below approximately
5 †
R after approximately five minutes if cool-
ing with air dehumidification is deactiva-
ted
R after approximately 30 minutes at out-
side temperatures above approximately
5 † Activating/deactivating the residual
heat function
It is possible to make use of the residual heat
of the engine to continue heating the station- Operating the climate control system
133Climate control Z
Page 171 of 357
R
Clean any mud from the tyre tread after
fording.
R Apply the brakes to dry them after fording.
R Water offers a high degree of resistance,
the ground is slippery and ,insome cases,
unstable. Therefore, it is difficult and dan-
gerous to pull away in the water.
R Ensure that a bow wave does not form as
you drive.
R Clean any mud from the tyre tread after
fording.
R Apply the brakes to dry them after fording. Parking the vehicle after heavy loads
on the engine
! Vehicles with adiesel engine: your
vehicle's exhaust gas turbocharger may get
very hot under heavy engine load, e.g. dur-
ing:
R trailer towing
R longe rmotorway journeys at high speed
R longer journeys through mountainous
terrain
X Let the engine run for approximately
another two minutes while the vehicle is
stationary before switching off the engine.
This way, the exhaust gas turbocharger can
cool down more effectively. Winter driving
General notes G
DANGER
If the exhaust pipe is blocked or adequate
ventilation is not possible, poisonous gases
such as carbon monoxide (CO) may enter the
vehicle. This is the case, e.g. if the vehicle
becomes trapped in snow. There is a risk of
fatal injury.
If you leave the engine or the auxiliary heating
running, make sure the exhaust pipe and area
around the vehicle are clear of snow. To ensure an adequate supply of fresh air, open
a window on the side of the vehicle that is not
facing into the wind. G
WARNING
If you have fitted snow chains to the front
wheels, they may scrape against the vehicle
body or chassis components. This could
cause damage to the vehicle or the tyres.
There is a risk of an accident.
To avoid hazardous situations:
R never fit snow chains on the front wheels
R fit snow chains to the rear wheels in pairs.
At the onset of winter, have your vehicle win-
terproofed at a qualified specialist workshop.
Observe the notes in the "Winter operation"
section (Y page 323).
Driving with summer tyres Observe the notes in the "Winter operation"
section (Y
page 323).
Slippery road surfaces G
WARNING
If you shift down on a slippery road surface in
an attempt to increase the engine's braking
effect, the drive wheels could lose their grip.
This increases the risk of skidding and having
an accident.
Do not shift down for additional engine brak-
ing on a slippery road surface.
You should drive particularly carefully on slip-
pery road surfaces. Avoid sudden accelera-
tion, steering and braking manoeuvres.
If the vehicle threatens to skid or cannot be
stopped when moving at low speed:
X Move the transmission to position N.
X Try to bring the vehicle under control by
using corrective steering.
i For more information on driving with
snow chains, see (Y page 324).168
Driving tipsDriving and parking
Page 237 of 357
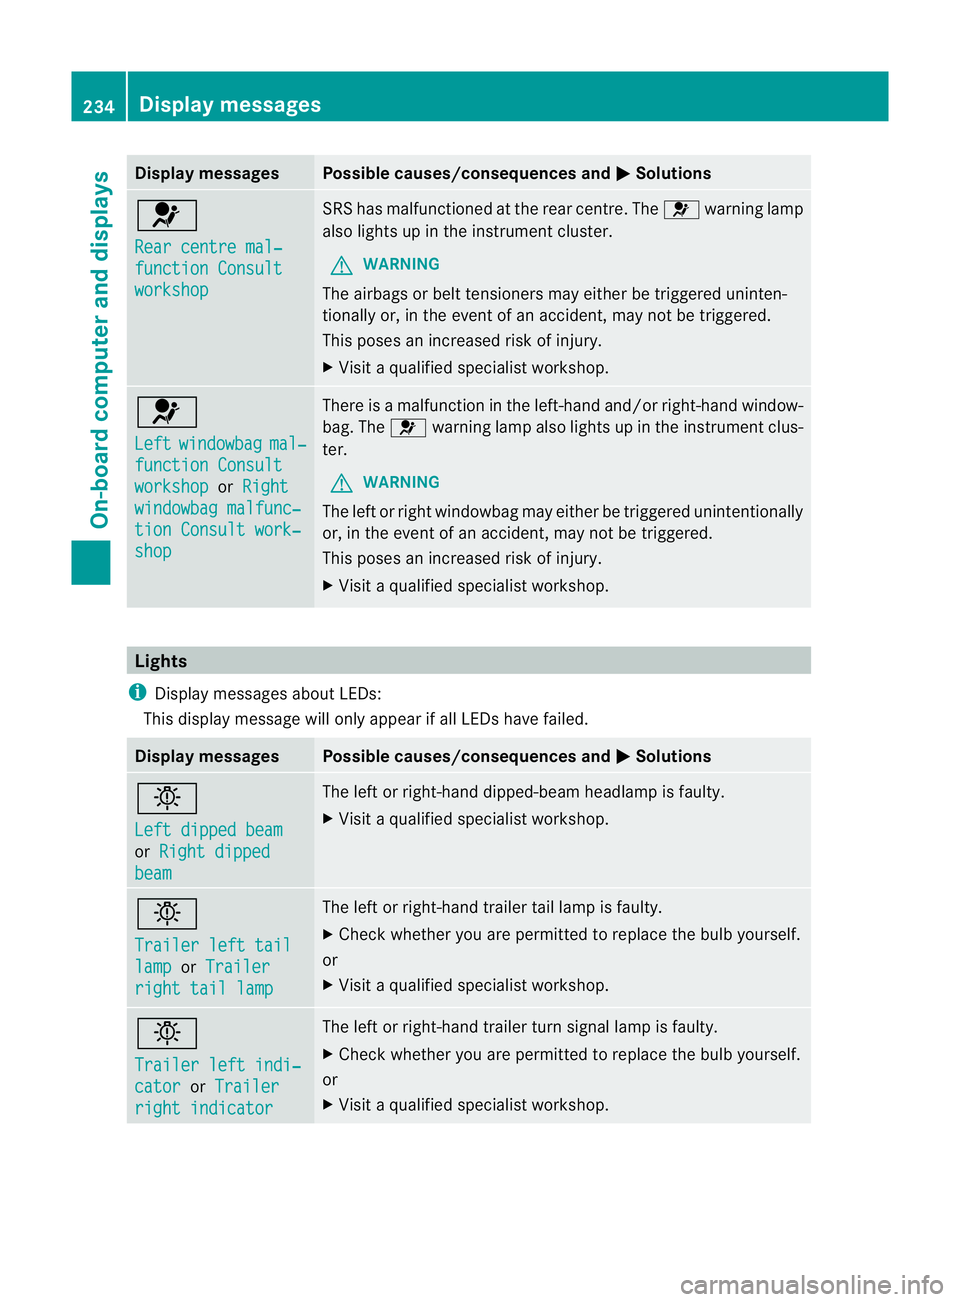
Display messages Possible causes/consequences and
M Solutions
6
Rear centre mal‐
function Consult
workshop SRS has malfunctioned at the rear centre. The
6warning lamp
also lights up in the instrumen tcluster.
G WARNING
The airbags or belt tensioners may either be triggered uninten-
tionally or, in the even tofanaccident, may not be triggered.
This poses an increased ris kofinjury.
X Visi taqualified specialist workshop. 6
Left
windowbag mal‐
function Consult
workshop or
Right windowbag malfunc‐
tion Consult work‐
shop There is a malfunction in the left-hand and/or right-hand window-
bag. The
6warning lamp also lights up in the instrument clus-
ter.
G WARNING
The left or right windowbag may either be triggered unintentionally
or, in the event of an accident, may not be triggered.
This poses an increased risk of injury.
X Visit a qualified specialist workshop. Lights
i Display messages about LEDs:
This display message will only appear if all LEDs have failed. Display messages Possible causes/consequences and
M Solutions
b
Left dipped beam
or
Right dipped beam The left or right-hand dipped-beam headlamp is faulty.
X
Visit a qualified specialist workshop. b
Trailer left tail
lamp or
Trailer right tail lamp The left or right-hand trailer tail lamp is faulty.
X
Check whether you are permitted to replace the bulb yourself.
or
X Visit a qualified specialist workshop. b
Trailer left indi‐
cator or
Trailer right indicator The left or right-hand trailer turn signal lamp is faulty.
X
Check whether you are permitted to replace the bulb yourself.
or
X Visit a qualified specialist workshop. 234
Display messagesOn-board computer and displays
Page 274 of 357
R
do not route lashing materials across sharp
edges or corners.
R Pad sharp edges for protection.
R only use lashing material that has been
checked in accordance with applicable
standards, e.g. lashing nets or lashing
straps.
R fill the spaces between the load and the
load compartment walls and the wheel
mountings in a form-locking way. Only use
dimensionally stable transportation aids
for this, such as chocks, wooden fixings or
padding.
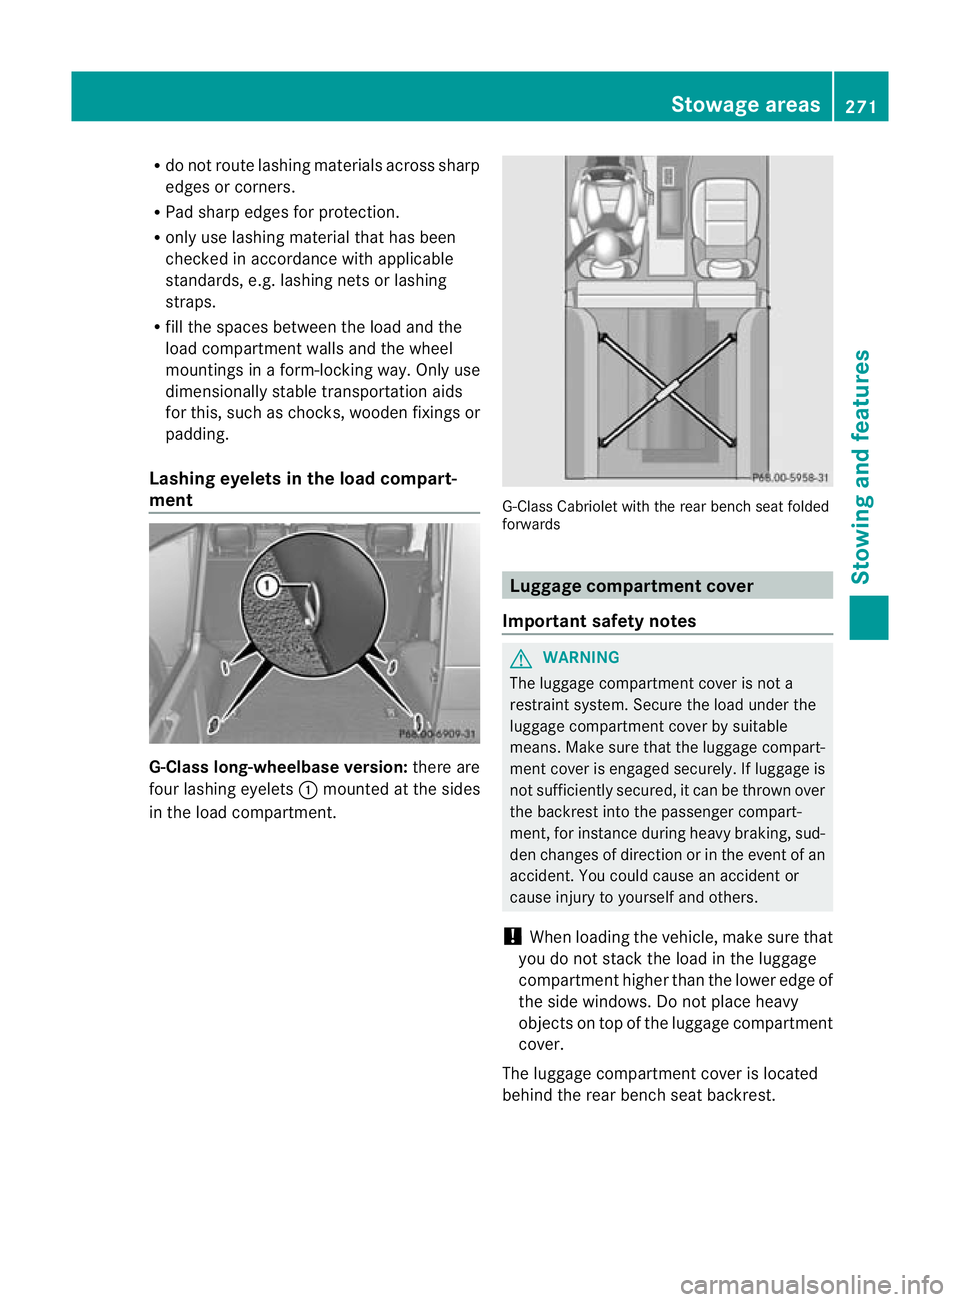
Lashing eyelets in the load compart-
ment G-Class long-wheelbase version:
there are
four lashing eyelets :mounted at the sides
in the load compartment. G-Class Cabriolet with the rear bench seat folded
forwards
Luggage compartment cover
Important safety notes G
WARNING
The luggage compartment cover is not a
restraint system. Secure the load under the
luggage compartment cover by suitable
means. Make sure that the luggage compart-
ment cover is engaged securely. If luggage is
not sufficiently secured, it can be thrown over
the backrest into the passenger compart-
ment, for instance during heavy braking, sud-
den changes of direction or in the event of an
accident. You could cause an acciden tor
cause injury to yoursel fand others.
! Whe nloading the vehicle, make sure that
you do not stack the load in the luggage
compartment higher than the lower edge of
the side windows. Do not place heavy
objects on top of the luggage compartment
cover.
The luggage compartment cover is located
behind the rear bench seat backrest. Stowage areas
271Stowing and features Z