2012 MERCEDES-BENZ E-CLASS COUPE service
[x] Cancel search: servicePage 181 of 389
Switching off the engine
Vehicles with manual transmission X
Shift to either first gear or reverse gear R.
X Turn the key to position 0in the ignition
lock and remove it.
The immobiliser is activated.
X Firmly depress the parking brake.
Vehicles with automatic transmission X
Firmly depress the parking brake.
X Shift the transmission to position P.
Using the key
X Turn the key to position 0in the ignition
lock and remove it.
The immobiliser is activated.
i The key can only be removed if the trans-
mission is in position P.
Using KEYLESS-GO
X Press the Start/Stop button (Y page 159).
The engine stops and all the indicator
lamps in the instrumen tcluster go out.
i When the driver's door is closed, this cor-
responds to key position 1. When the driv-
er's door is open, this corresponds to key
position 0, i.e. key removed.
i The engine can be turned off while the
vehicle is in motion by pressing and holding
the Start/Stop button for about three sec-
onds .This function operates independently
of the ECO start/stop automatic engine
switch-off function. Parking brake
G
WARNING
If you must brake the vehicle with the parking
brake, the braking distance is considerably
longer and the wheels could lock. This increa-
ses the risk of skidding and an accident.
Only use the parking brake to brake the vehi-
cle when the service brake is faulty. Do not apply the parking brake too firmly. If the
wheels lock, release the parking brake until
the wheels begin turning again. G
WARNING
If you leave children unattended in the vehi-
cle, they could set the vehicle in motion by,
for example:
R releasing the parking brake
R shifting an automatic transmission out of
parking position P
R shifting a manual transmission into neutral
R starting the engine
They could also operate vehicle equipment.
There is a risk of an accident and injury.
When leaving the vehicle, always take the key
with you and lock the vehicle. Never leave
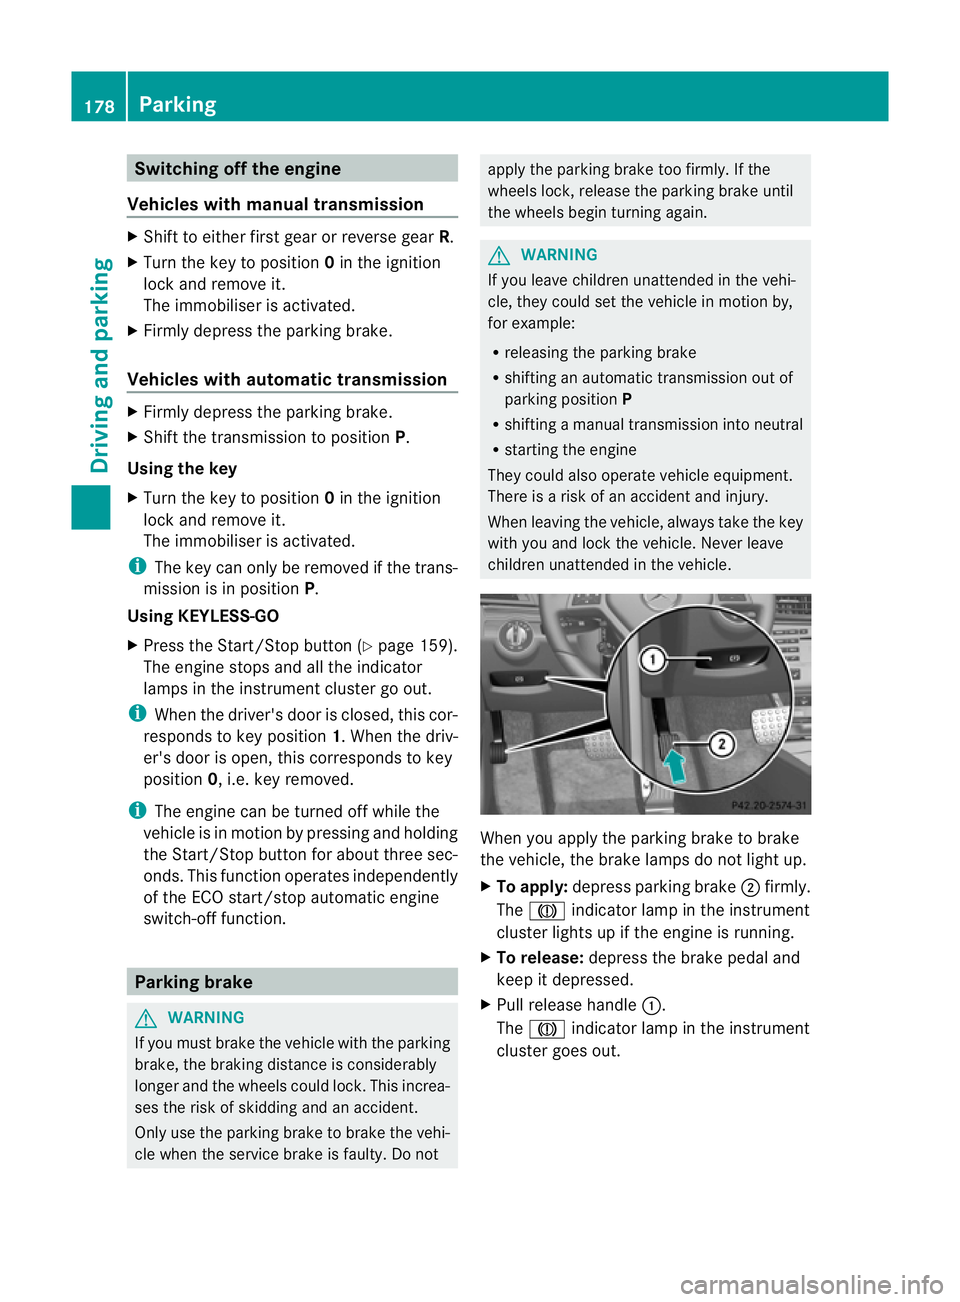
children unattended in the vehicle. When you apply the parking brake to brake
the vehicle, the brake lamps do not light up.
X
To apply: depress parking brake ;firmly.
The J indicator lamp in the instrument
cluster lights up if the engine is running.
X To release: depress the brake pedal and
keep it depressed.
X Pull release handle :.
The J indicator lamp in the instrument
cluster goes out. 178
ParkingDriving and parking
Page 210 of 389

the responsibility to pay attention. The cam-
era cannot show objects:
R very near to the rear bumper
R below the rea rbumper
R that are located above the tailgate handle
recess
You are always responsible for safety and
must continue to pay attentio nto your imme-
diate surroundings when parking and
manoeuvring. This applies to the areas
behind, in front of and next to the vehicle. You
could otherwise endanger yourself and oth-
ers. G
WARNING
Under the following circumstances, the
reversing camera will not function, or will
function in a limited manner:
R if the tailgate is open
R in heavy rain, snow or fog
R at night or in very dark places
R if the camera is exposed to very bright light
R if the area is lit by fluorescent light or LED
lighting (the display may flicker)
R if there is a sudden change in temperature,
e.g. when driving into a heated garage in
winter
R if the camera lens is dirty or obstructed
R if the rear of your vehicle is damaged. In this
event, have the camera position and setting
checked at a qualified specialist workshop.
Mercedes-Benz recommends that you use
a Mercedes-Benz Service Centre for this
purpose.
Do not use the reversing camera in these
types of situation. You could otherwise injure
others or damage objects and your vehicle
while you are parking.
The area behind the vehicle is displayed as a
mirror image, as in the rear-view mirror. Activating the reversing camera X
Make sure that the key is in position 2in
the ignition lock.
X Make sure that the "Reversing camera"
function is selected in COMAND APS (see
the separate operating instructions for
COMAND APS).
X Engage reverse gear.
The area behind the vehicle is shown with
guide lines in the COMAND display.
Guide lines in the COMAND display G
WARNING
Using the reversing camera can be dangerous
if you are colour blind or your ability to distin-
guish colours is impaired.
Only use the reversing camera if you can see
and distinguish between all the coloured
guide lines that are displayed by the reversing
camera in the COMAND display. G
WARNING
Please note that objects not at ground level
may appear to be further away than they
actually are. These include:
R the bumper of a vehicle that is parked
behind your vehicle
R a trailer drawbar
R the ball coupling of a trailer tow hitch
R the tail-end of a lorry
R slanted posts
The lines are only guides, not accurate meas-
urements of the distance to an obstacle.
Therefore, you should never pass the red line
when approaching an obstacle. You could oth-
erwise cause an accident and injure yourself
and others. Driving systems
207Driving and parking Z
Page 231 of 389
Useful information
i This Owner's Manual describes all mod-
els, series and optional equipment for your
vehicle that were available at the time of
going to press. National variations are pos-
sible. Note that your vehicle may not be
equipped with all of the functions descri-
bed. This is also the case for systems and
functions relevant to safety.
i Read the information on qualified special-
ist workshops: (Y page 23). Important safety notes
G
WARNING
Only use the on-board computer when road
and traffic conditions permit .You would oth-
erwise be distracted and unable to concen-
trate properly on driving, and could cause an
accident. G
WARNING
No messages will be displayed if either the
instrument cluster or the multifunction dis-
play is inoperative.
As a result, you will not be able to see infor-
mation about your driving conditions, such as
speed, outside temperature, warning and indi-
cator lamps, display messages or system fail-
ures. Driving characteristics may be impaired.
Adjust your driving style and vehicle speed
accordingly.
Contact a qualified specialist workshop
immediately. G
WARNING
The on-board computer only records and dis-
plays malfunctions and warnings from certain
systems. For this reason, you should always
make sure that your vehicle is safe to use. You
could otherwise cause an accident by driving
an unsafe vehicle. G
WARNING
The operating safety of your vehicle could be
impaired if maintenance work is carried out
incorrectly. This could cause you to lose con-
trol of your vehicle and cause an accident.
Moreover, the safety systems may no longer
be able to protect you or others as they are
designed to do.
Always have service work carried out at a
qualified specialist workshop.
For an illustration of the instrument cluster,
see (Y page 30). 228
Important safety notesOn-board computer and displays
Page 241 of 389
X
To select the next or previous scene:
briefly press the 9or: button.
X To select ascene from the scene list
(rapid scrolling): press and hold the
9 or: buttonuntil desired
scene :has been reached. Telephone menu
Introduction G
WARNING
Observe the legal requirements of the country
in which you are currently driving regarding
the use of mobile phones in the vehicle.
If it is permitted to use mobile phones while
the vehicle is in motion, you should only use
them when the road and traffic conditions
allow. Otherwise, you may be distracted from
the traffic conditions, cause an accident and
injure yoursel fand others.
X Switch on the mobile phone (see the sep-
arate operating instructions).
X Switch on the audio system or COMAND
Online; see the separate operating instruc-
tions.
X Insert the mobile phone into the bracket
(Y page 297).
or
X Establish a Bluetooth ®
connection to the
audio system or COMAND Online; see the
separate operating instructions.
X Press the =or; button on the steer-
ing wheel to select the Tel menu.
You will see one of the following display mes-
sages in the multifunctio ndisplay:
R Please enter PIN :t
he mobile phone has
been placed in the mobile phone bracket
and the PIN has not been entered.
When you enter your PIN via the mobile
phone, LINGUATRONIC, the audio system or COMAND Online, the mobile phone
searches for a network.
R Telephone ready or the name of the net-
work provider: the mobile phone has found
a network and is ready to receive.
R Telephone No service : there is no net-
work available or the mobile phone is
searching for a network.
i You can obtain further information about
suitable mobile phones and connecting
mobile phones via Bluetooth ®
:
R from any Mercedes Benz Service Centre
R on the Internet at: http://
www.mercedes-benz.com/connect
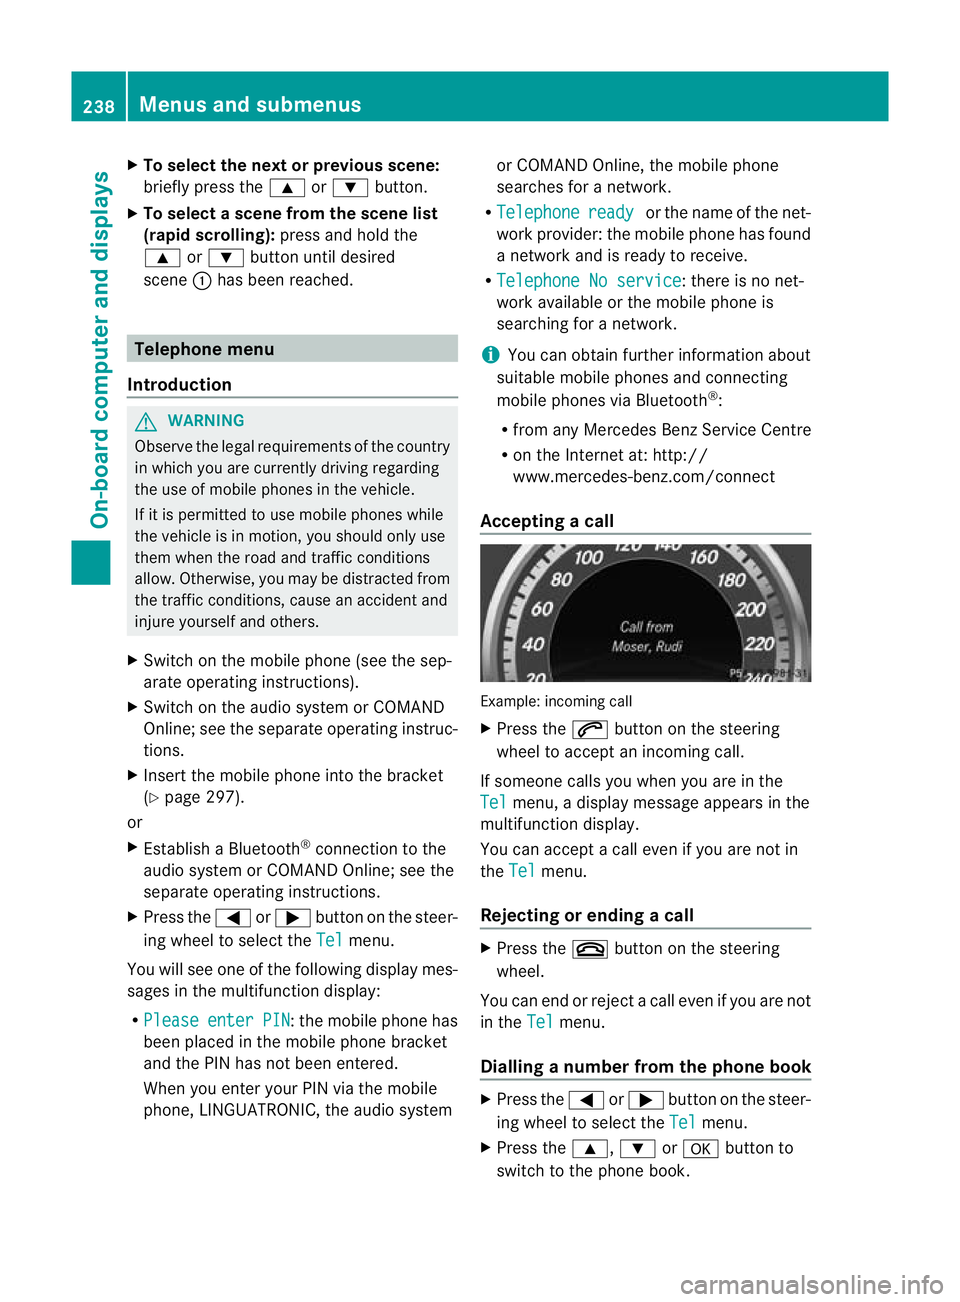
Accepting acall Example: incoming call
X
Press the 6button on the steering
wheel to accep tanincoming call.
If someone calls you when you are in the
Tel menu, a display message appears in the
multifunctio ndisplay.
You can accept a call even if you are not in
the Tel menu.
Rejecting or ending acall X
Press the ~button on the steering
wheel.
You can end or reject a call even if you are not
in the Tel menu.
Dialling anumber from the phone book X
Press the =or; button on the steer-
ing wheel to select the Tel menu.
X Press the 9,:ora button to
switch to the phone book. 238
Menus and submenusOn-board computer and displays
Page 244 of 389

long as the HOLD function is not activated
(Y page 198).
Vehicles with Parking Guidance: if PARK-
TRONIC is activated and you are driving at a
speed under 35 km/h, the jParking Guid-
ance symbol is shown instead of the Ä
symbol ( Ypage 203).
If the PRE-SAFE Brake: Sensors deacti‐ vated message appears, the radar sensor
system is deactivated.
X Check whether or not the radar sensor sys-
tem may be activated (Y page 382).
X Activate the radar sensor system
(Y page 245).
For more information on PRE-SAFE ®
Brake,
see (Y page 69).
Activating/deactivating ATTENTION
ASSIST X
Press the =or; button on the steer-
ing wheel to selec tthe Assist. menu.
X Press the 9or: button to select
Attention Assist .
X Press the abutton.
The current selection is displayed.
X To activate/deactivate: press thea
button again.
When ATTENTION ASSIST is activated, the
À symbol appears in the multifunction
display when the ignition is on.
For further information about ATTENTION
ASSIST, see (Y page 208).
Activating/deactivating Blind Spot
Assist X
Press the =or; button on the steer-
ing wheel to select the Assist. menu.
X Press the 9or: button to select
Blind Spot Asst. .
X Press the abutton.
The current selection is displayed.
X To activate/deactivate: press thea
button again. If the
Blind Spot Assist Sensors deac‐ tivated or
Active blind spot assist. sensor system deactivated message
appears, the radar sensor system is deacti-
vated.
X Check whether or not the radar sensor sys-
tem may be activated (Y page 382).
X Activate the radar sensor system
(Y page 245).
For further information about Blind Spot
Assist, see (Y page 210).
For further information about Active Blind
Spot Assist, see (Y page 214).
Activating/deactivating Lane Keeping
Assist X
Press the =or; button on the steer-
ing wheel to select the Assist. menu.
X Press the 9or: button to select
Lane Keep. Asst. X
Press the abutton.
The current selection is displayed.
X Press ato confirm.
When Lane Keeping Assist or Active Lane
Keeping Assist is activated, the Ãsymbol
appears in the multifunction display when the
ignition is on.
For further information about Active Lane
Keeping Assist, see (Y page 217). Service menu
In the
Serv. menu, you have the following
options: Menus and submenus
241On-board computer and displays Z
Page 245 of 389
R
call up display messages in the message
memory (Y page 249)
R restart the tyre pressure loss warning sys-
tem (Y page 345)
R call up when a service is due
(Y page 311) Settings menu
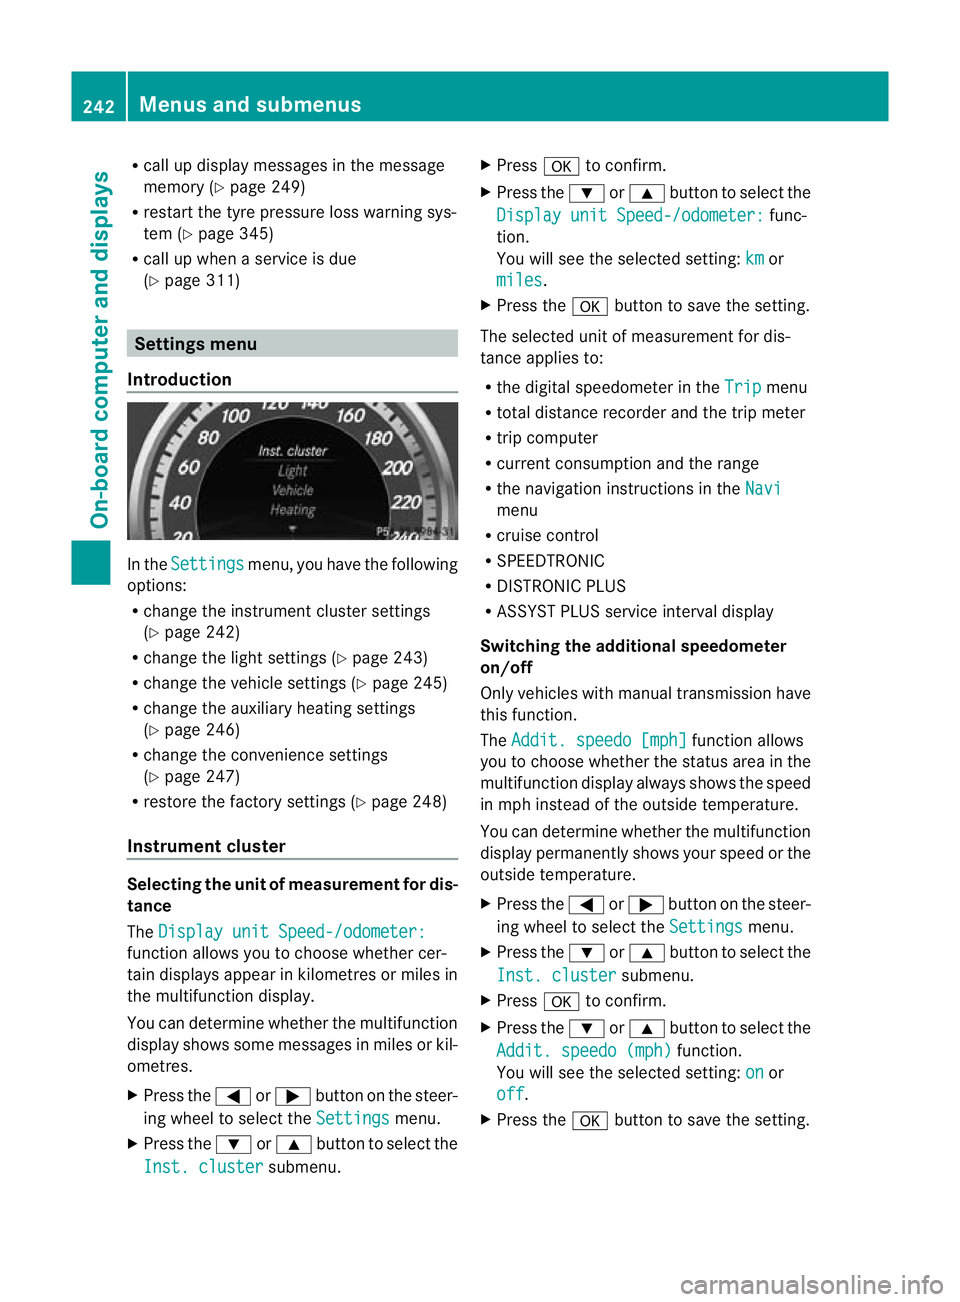
Introduction In the
Settings menu, you have the following
options:
R change the instrument cluster settings
(Y page 242)
R change the light settings ( Ypage 243)
R change the vehicle settings (Y page 245)
R change the auxiliary heating settings
(Y page 246)
R change the convenience settings
(Y page 247)
R restore the factory settings (Y page 248)
Instrumen tcluster Selecting the unit of measurement for dis-
tance
The
Display unit Speed-/odometer: function allows you to choose whether cer-
tain displays appear in kilometres or miles in
the multifunction display.
You can determine whether the multifunction
display shows some messages in miles or kil-
ometres.
X
Press the =or; button on the steer-
ing wheel to selec tthe Settings menu.
X Press the :or9 button to select the
Inst. cluster submenu.X
Press ato confirm.
X Press the :or9 button to select the
Display unit Speed-/odometer: func-
tion.
You will see the selected setting: km or
miles .
X Press the abutton to save the setting.
The selected unit of measurement for dis-
tance applies to:
R the digital speedometer in the Trip menu
R total distance recorder and the trip meter
R trip computer
R current consumption and the range
R the navigation instructions in the Navi menu
R cruise control
R SPEEDTRONIC
R DISTRONIC PLUS
R ASSYST PLUS service interval display
Switching the additional speedometer
on/off
Only vehicles with manual transmission have
this function.
The Addit. speedo [mph] function allows
you to choose whether the status area in the
multifunction display always shows the speed
in mph instead of the outside temperature.
You can determine whether the multifunction
display permanently shows your speed or the
outside temperature.
X Press the =or; button on the steer-
ing wheel to select the Settings menu.
X Press the :or9 button to select the
Inst. cluster submenu.
X Press ato confirm.
X Press the :or9 button to select the
Addit. speedo (mph) function.
You will see the selected setting: on or
off .
X Press the abutton to save the setting. 242
Menus and submenusOn-board computer and displays
Page 276 of 389
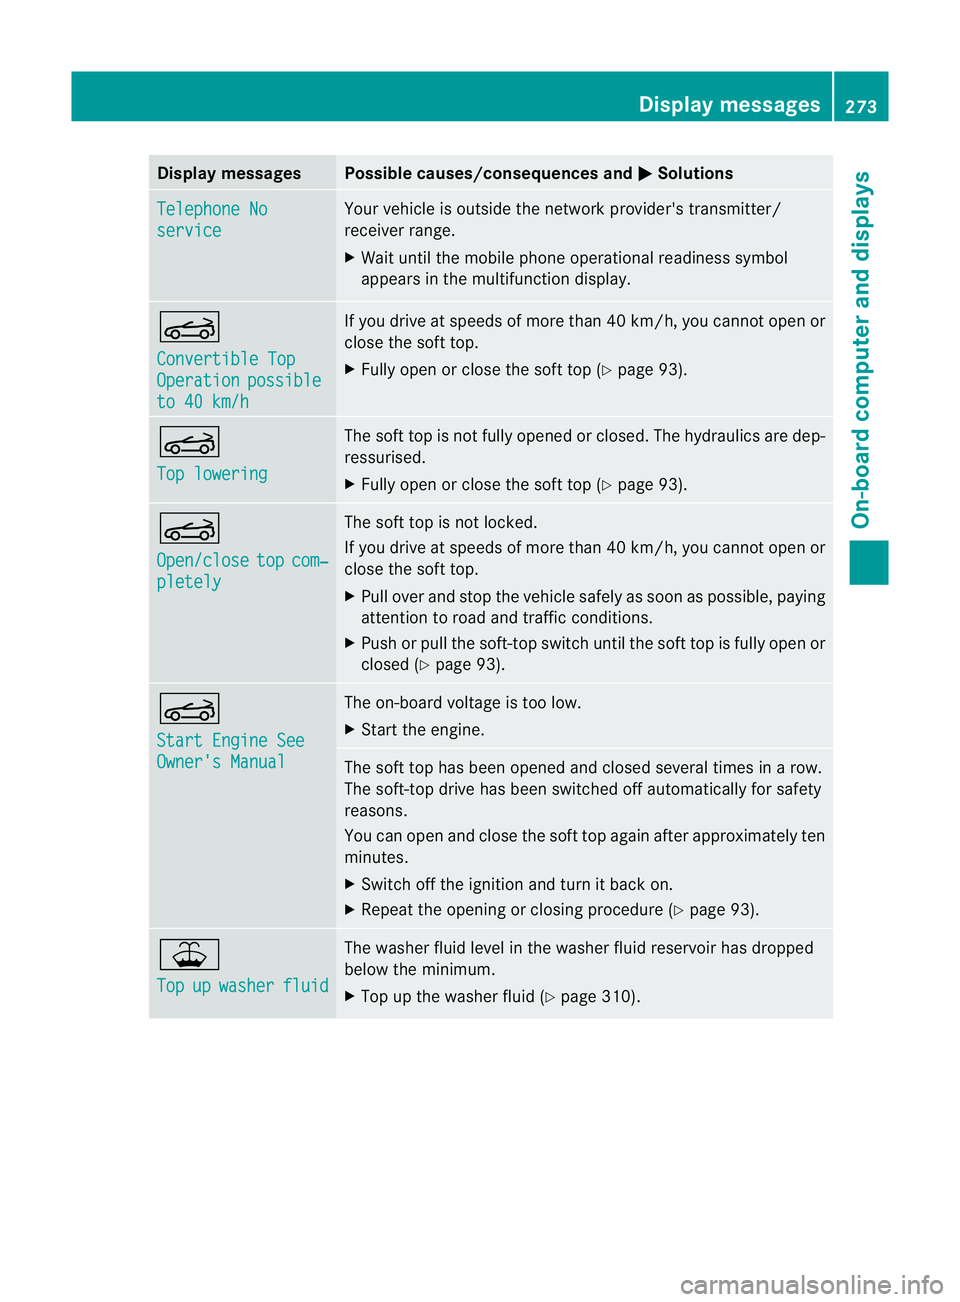
Display messages Possible causes/consequences and
M Solutions
Telephone No
service Your vehicle is outside the network provider's transmitter/
receiver range.
X
Wait until the mobile phone operational readiness symbol
appears in the multifunction display. K
Convertible Top
Operation possible
to 40 km/h If you drive at speeds of more than 40 km/h, you canno
topen or
close the soft top.
X Fully open or close the soft top (Y page 93).K
Top lowering The soft top is not fully opened or closed. The hydraulics are dep-
ressurised.
X
Fully open or close the soft top (Y page 93).K
Open/close
top com‐
pletely The soft top is not locked.
If you drive at speeds of more than 40 km/
h,you canno topen or
close the soft top.
X Pull over and stop the vehicle safely as soon as possible, paying
attention to road and traffic conditions.
X Push or pull the soft-top switch until the soft top is fully open or
closed (Y page 93). K
Start Engine See
Owner's Manual The on-board voltage is too low.
X
Start the engine. The soft top has been opened and closed several times in a row.
The soft-top drive has been switched off automatically for safety
reasons.
You can open and close the soft top again after approximately ten
minutes.
X
Switch off the ignition and turn it back on.
X Repeat the opening or closin gprocedure (Y page 93). ¥
Top
up washer fluid The washer fluid level in the washer fluid reservoi
rhas dropped
below the minimum.
X Top up the washe rfluid (Y page 310). Display messages
273On-board computer and displays Z
Page 289 of 389
Useful information
i This Owner's Manual describes all mod-
els, series and optional equipment for your
vehicle that were available at the time of
going to press. National variations are pos-
sible. Note that your vehicle may not be
equipped with all of the functions descri-
bed. This is also the case for systems and
functions relevant to safety.
i Read the information on qualified special-
ist workshops: (Y page 23). Stowage areas
Loading guidelines (Coupé)
G
WARNING
Secure and position the load as described in
the loading guidelines.
Otherwise, vehicle occupants could
be injured by the load being thrown around in
the even tofsharp braking, a sudden change
in direction or an accident.
You will find further information in the "Secur-
ing a load" section.
Even if you follow all the loading guidelines,
the load will increase the risk of injury in the
event of an accident. G
WARNING
Keep the boot lid closed while the vehicle is
in operation. Otherwise, you could be pois-
oned by exhaust fumes entering the vehicle.
The handling characteristics of a laden vehi-
cle are dependent on the distribution of the
load within the vehicle. For this reason, you
should observe the following notes when
transporting a load:
R when transporting a load, never exceed the
maximum permissible gross vehicle weight or the permissible axle loads for the vehicle
(including occupants).
R position heavy loads as far forwards as pos-
sible and as low down in the boot as pos-
sible.
R the load must not protrude above the upper
edge of the seat backrests.
R always place the load against the rear or
front seat backrests. Make sure that the
seat backrests are securely locked into
place.
R always place the load behind unoccupied
seats if possible.
R secure the load with sufficiently strong and
wear-resistant lashing material. pad sharp
edges for protection.
i Load restraints are available at any quali-
fied specialist workshop, e.g. a Mercedes-
Benz Service Centre. Stowage compartments
Important safety notes G
WARNING
The stowage compartments must be closed
when items are stored in them. Luggage nets
are not designed to secure heavy items of
luggage.
You or other vehicle occupants could be
injured by objects being thrown around if you:
R brake sharply
R change direction suddenly
R are involved in an accident
Sharp-edged and fragile objects must not be
placed in the luggage net.
Do not place hard objects in the map pockets.
Objects must not protrude from the map
pockets. 286
Stowage areasStowing and features