2012 MERCEDES-BENZ E-CLASS COUPE seats
[x] Cancel search: seatsPage 60 of 389

If yourv
ehicle does not have automatic child
seat recognition on the front-passenger seat,
this is indicated by a special sticker. The
sticker is affixed to the side of the dashboard
on the front-passenger side. The sticker is
visible when you open the front-passenger
door.
Vehicles without automatic child seat recog-
nition on the front-passenger seat: when you
turn the key to position 2inthe ignition lock,
the 4 PASSENGER AIRBAG OFF indicator
lamp lights up briefly, but does not have any
function. It does not indicate that there is
automatic child seat recognition on the front-
passenger seat. The front-passenger seat sensor system for
child restraint systems detects whether a
special Mercedes-Ben zchild seat with a
transponder for automatic child seat recog-
nition has been fitted. In this case, 4
PASSENGER AIRBAG OFF indicator lamp :
lights up. The front-passenger front airbag is
disabled. i
If the front-passenger front airbag is dis-
abled by the automatic child seat recogni-
tion, the following remain enabled on the
front-passenger side:
R the sidebag
R the pelvisbag
R Coupé:t he windowbag
R Cabriolet: the headbag
R the belt tensioner
ISOFIX child seat securing system for
the rear seats G
WARNING
Ac hild restraint system secured by the ISOFIX
child seat securing system does not provide
sufficient protection for children weighing
more than 22 kg. For this reason, do not
secure children weighing more than 22 kg in
a child restraint system secured by the ISOFIX
child seat securing system. If the child weighs
more than 22 kg, secure the child restraint
system with the vehicle seat belt as well. In
addition, when fitting a child restraint system,
be sure to observe the manufacturer's instal-
lation instructions and the instructions for
correct use of the child restraint system. G
WARNING
Please note that if child restraint systems, or
their retaining systems, are damaged or sub-
jected to a load in an accident, they may not
be able to provide their protective function.
This could result in serious or even fatal inju-
ries to the secured child in the event of an
accident, heavy braking or a sudden change
in direction.
For this reason, have child restraint systems
and their anchorages which have been dam-
aged or subjected to a load in an accident
checked immediately at a qualified specialist
workshop. Children in the vehicle
57Safety Z
Page 61 of 389
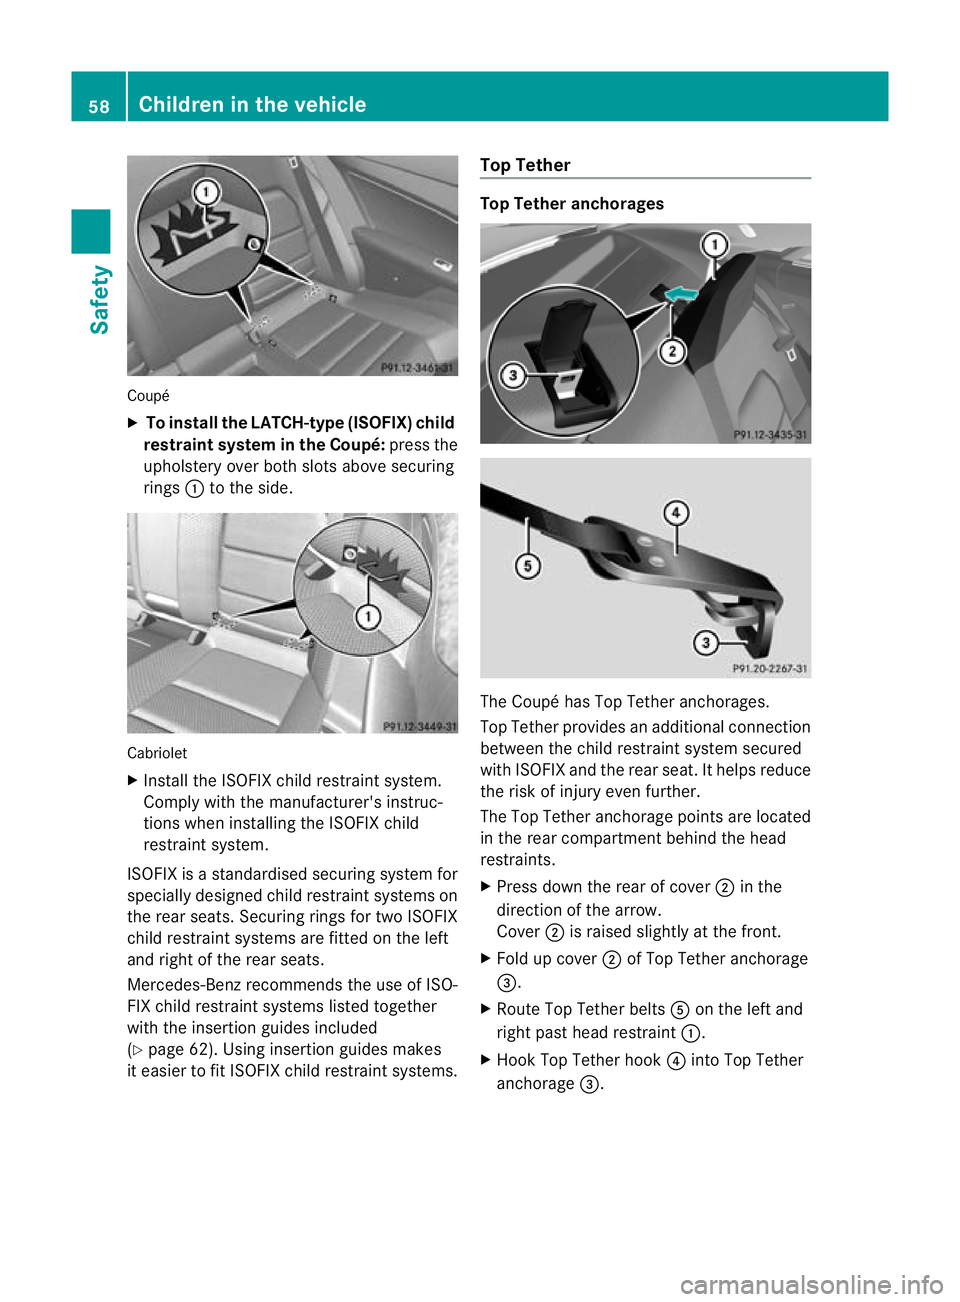
Coupé
X
To install the LATCH-type (ISOFIX) child
restraint system in the Coupé: press the
upholstery ove rboth slots above securing
rings :to the side. Cabriolet
X
Install the ISOFIX child restraint system.
Comply with the manufacturer's instruc-
tions when installing the ISOFIX child
restraint system.
ISOFIX is a standardised securing system for
specially designed child restraint systems on
the rear seats. Securing rings for two ISOFIX
child restraint systems are fitted on the left
and right of the rear seats.
Mercedes-Benz recommends the use of ISO-
FIX child restraint systems listed together
with the insertion guides included
(Y page 62). Using insertion guides makes
it easier to fit ISOFIX child restraint systems. Top Tether Top Tether anchorages
The Coupé has Top Tether anchorages.
Top Tether provides an additional connection
between the child restraint system secured
with ISOFIX and the rear seat. It helps reduce
the risk of injury even further.
The Top Tether anchorage points are located
in the rear compartment behind the head
restraints.
X Press down the rear of cover ;in the
direction of the arrow.
Cover ;is raised slightly at the front.
X Fold up cover ;of Top Tether anchorage
=.
X Route Top Tether belts Aon the left and
right past head restraint :.
X Hook Top Tether hook ?into Top Tether
anchorage =. 58
Children in the vehicleSafety
Page 64 of 389
transponder for automatic child seat recog-
nition must be fitted when the front-
passenge
rairbag is disabled. The 4
PASSENGER AIRBAG OFF indicator lamp
must be lit.
Rear seats Weight categories Left, right
Group 0: up to
10 kg
U
Category 0+: up to
13 kg
U
Category I: 9 to
18 kg
U
Category II: 15 to
25 kg
U
Group III: 22 to
36 kg
U
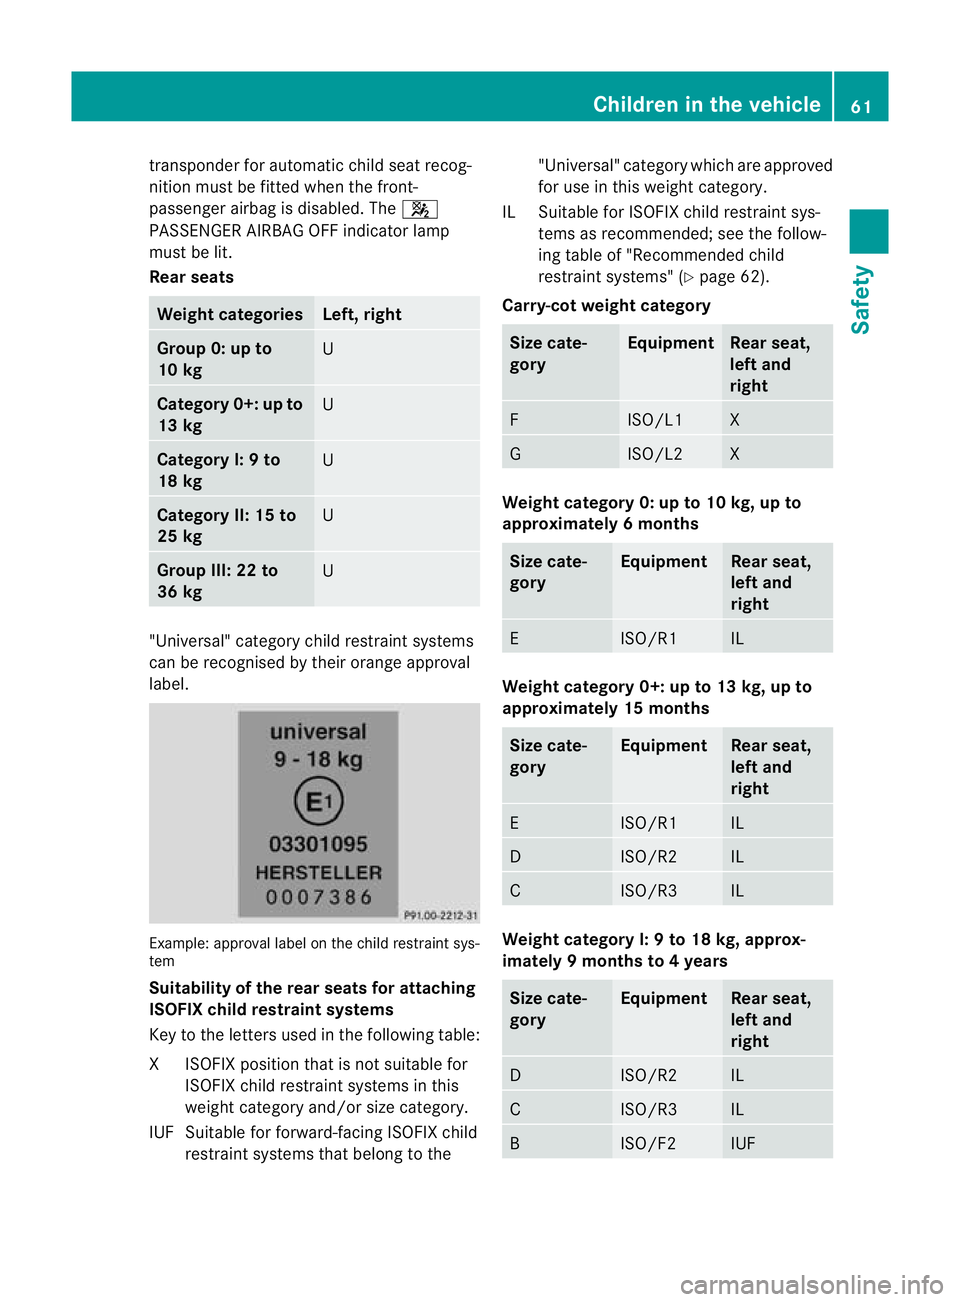
"Universal" category child restraint systems
can be recognised by their orange approval
label. Example: approval label on the child restrain
tsys-
tem
Suitability of th erear seat sfor attaching
ISOFIX child restraint systems
Key to the letters used in the following table:
XI SOFIX position tha tis not suitable for
ISOFIX child restraint systems in this
weight category and/or size category.
IUF Suitable for forward-facing ISOFIX child restraint systems that belong to the "Universal" category which are approved
for use in this weight category.
IL Suitable for ISOFIX child restraint sys- tems as recommended; see the follow-
ing table of "Recommended child
restraint systems" (Y page 62).
Carry-cot weight category Size cate-
gory Equipment Rear seat,
left and
right
F ISO/L1 X
G ISO/L2 X
Weight category 0: up to 10 kg, up to
approximately 6 months
Size cate-
gory Equipment Rear seat,
left and
right
E ISO/R1 IL
Weight category 0+: up to 13 kg, up to
approximately 15 months
Size cate-
gory Equipment Rear seat,
left and
right
E ISO/R1 IL
D ISO/R2 IL
C ISO/R3 IL
Weight category I: 9 to 18 kg, approx-
imately 9 months to 4 years
Size cate-
gory Equipment Rear seat,
left and
right
D ISO/R2 IL
C ISO/R3 IL
B ISO/F2 IUFChildren in the vehicle
61Safety Z
Page 97 of 389
i
The side windows close if you keep on
pressing the soft-top switch. Opening and closing with the key
Important safety notes G
WARNING
Make sure nobody can be trapped or injured
by moving parts such as the soft-top linkage
or soft-top compartment cover when opening
or closing the soft top.
If there is a risk of entrapment, immediately
release the %or& button on the key.
The soft-top mechanism stops immediately.
Opening and closing The key must be close to the driver's door
handle.
X Point the tip of the key at the driver's door
handle.
X To open: press and hold the %button
on the key until the soft top is fully opened.
The Top in operation message appears
in the multifunction display .The seat ven-
tilation is switched on. The rear side win-
dows open.
X To close: press and hold the &button
on the key until the soft top is fully closed.
The Top in operation message appears
in the multifunction display. The soft top
and the side windows close. Closing the soft top manually
Important safety notes G
WARNING
Remove wristwatches and any jewellery such
as rings or bracelets. You could otherwise get
caught, injured and damage the vehicle.
Always grip the soft top at the indicated grip-
ping points when closing the soft top man-
ually. You could otherwise be injured. If the soft top cannot be closed automatically,
check the following points:
R
Is the boot separator engaged
(Y page 99)?
R Are the head restraints on the rear bench
seats extended?
R Is the boot lid closed?
R Is the on-board voltage sufficient?
Start the engine if necessary.
If automatic operation still does not work, the
soft top can be closed manually.
To carry out this work, you will need the assis-
tance of another person.
i Closing the soft top manually is a com-
plex, technically demanding process which
requires a great deal of force. Only close
the soft top manually in extreme emergen-
cies. Preferably, contact a qualified spe-
cialist workshop.
Closing the soft top X
Apply the parking brake.
X Open the side windows.
X Lower the head restraints automatically or
manually, see the Digital Owner's Manual,
keyword "Head restraint".
X Remove the key from the ignition lock.
X Open the boot.
X Take the two straps out of the vehicle tool
kit (Y page 323).
X Take the Allen key out of the Owner's Man-
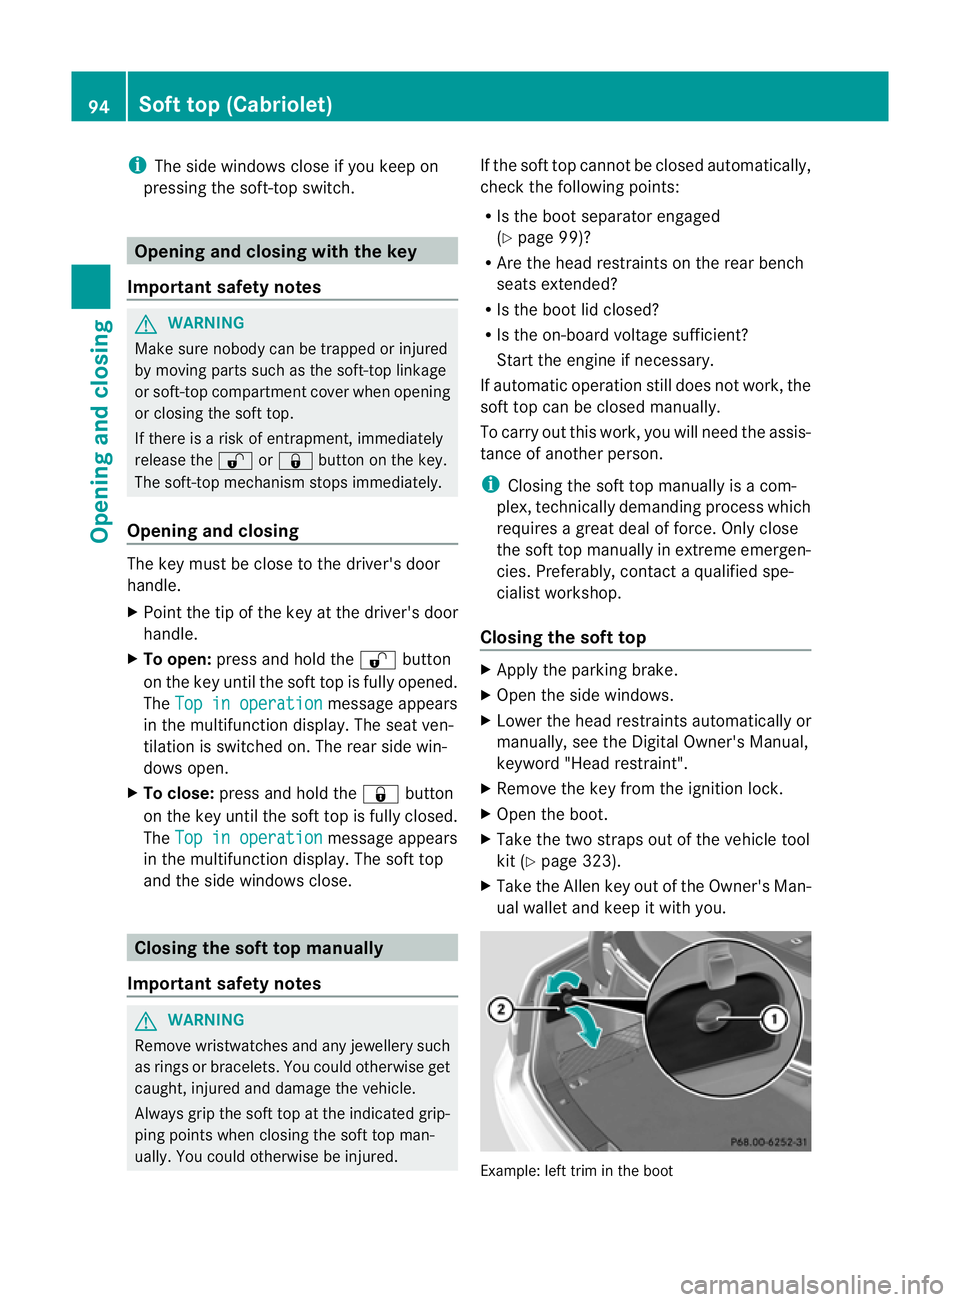
ual wallet and keep it with you. Example: left trim in the boot94
Soft top (Cabriolet)Opening and closing
Page 102 of 389
Locking
You can lock the soft top again if it is not
locked fully.
X Pull over and stop the vehicle safely as soon
as possible, paying attention to road and
traffic conditions.
X Turn the key to position 2in the ignition
lock.
X Press the soft-top switch (Y page 93).Boot separator
General notes !
To avoid damaging the sof ttop or load
when folding back the soft top, observe the
following:
R when the boot separator is open, do not
place any objects in or behind the net on
the side that are so long they could
obstruct the boot separator or damage
the opened soft top.
R make sure that the load does not push
the boot separator upwards.
The soft top can only be opened when the
boot separator is closed.
The boot separator can be used to cover lug-
gage and loads in the boot.
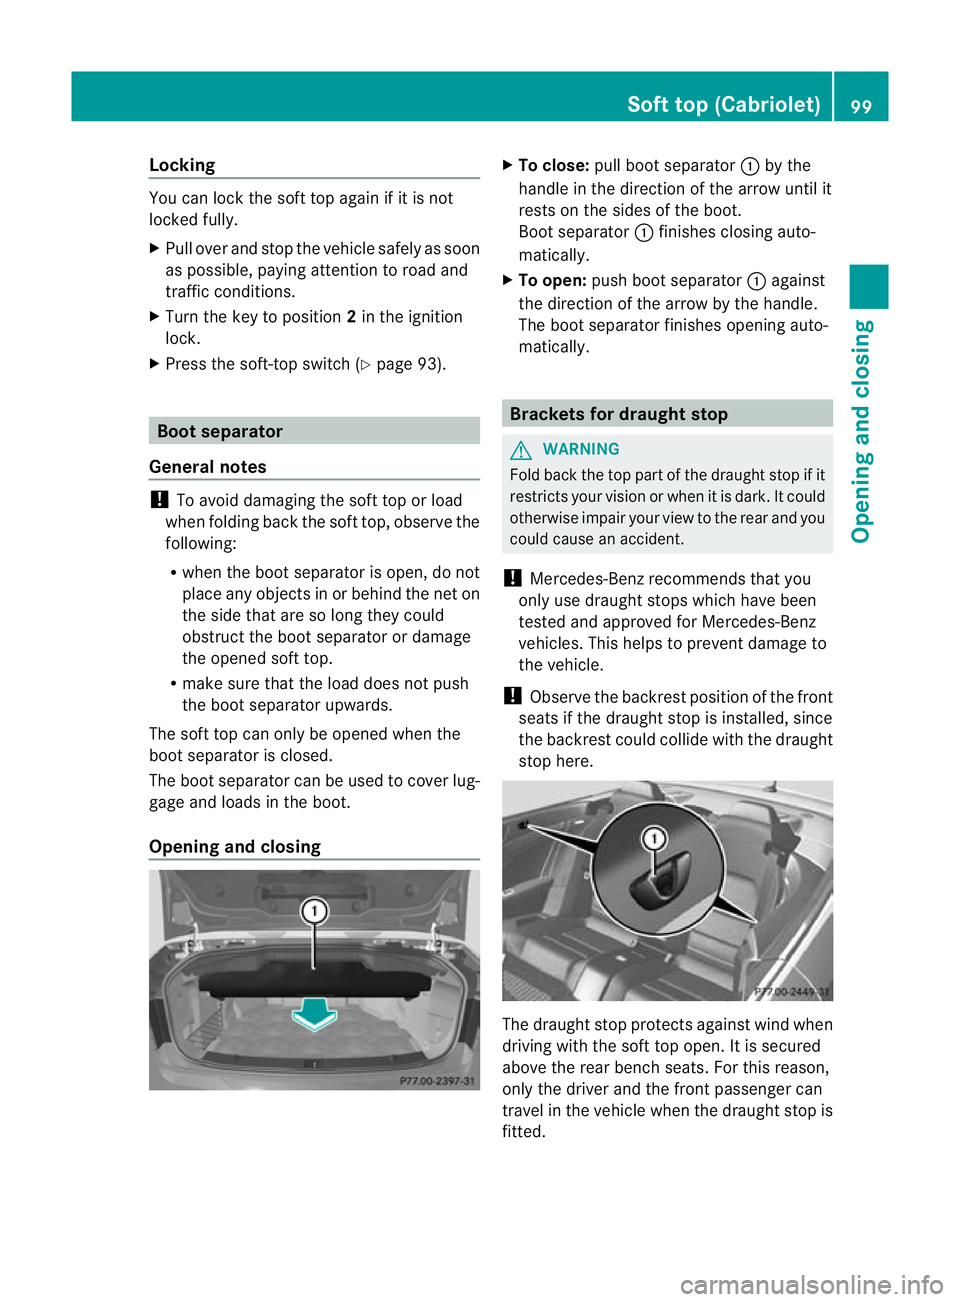
Opening and closing X
To close: pull boot separator :by the
handle in the direction of the arrow until it
rests on the sides of the boot.
Boot separator :finishes closing auto-
matically.
X To open: push boot separator :against
the direction of the arrow by the handle.
The boot separator finishes opening auto-
matically. Brackets for draught stop
G
WARNING
Fold back the top part of the draught stop if it
restricts your vision or when it is dark. It could
otherwise impair your view to the rear and you
could cause an accident.
! Mercedes-Benz recommends that you
only use draught stops which have been
tested and approved for Mercedes-Benz
vehicles. This helps to prevent damage to
the vehicle.
! Observe the backrest position of the front
seats if the draught stop is installed, since
the backrest could collide with the draught
stop here. The draught stop protects against wind when
driving with the soft top open. It is secured
above the rear bench seats. For this reason,
only the driver and the front passenger can
travel in the vehicle when the draught stop is
fitted. Soft top (Cabriolet)
99Opening and closing Z
Page 103 of 389
X
When installing the draught stop, use lat-
eral brackets :.
Observe the manufacturer's installation
instructions. AIRCAP
Important safety notes G
WARNING
When extending and retracting AIRCAP, make
sure that no one can become trapped. If there
is a risk of entrapment, press the button again
to retract AIRCAP again.
With AIRCAP, four people can travel comfort-
ably with the soft top open. AIRCAP reduces
the draught for the driver and passengers in
both the front and the rear compartment in a
vehicle with the soft top down.
You can open or close AIRCAP either when
the vehicle is stationary or when driving up to
a speed of 160 km/h.
AIRCAP has the following components:
R a wind deflector between the windscreen
and the soft top
R an AIRCAP draught stop between the two
head restraints on the rear bench seat
Extending AIRCAP X
Turn the key to position 2in the ignition
lock.
X Open the cover on the lower centre con-
sole.
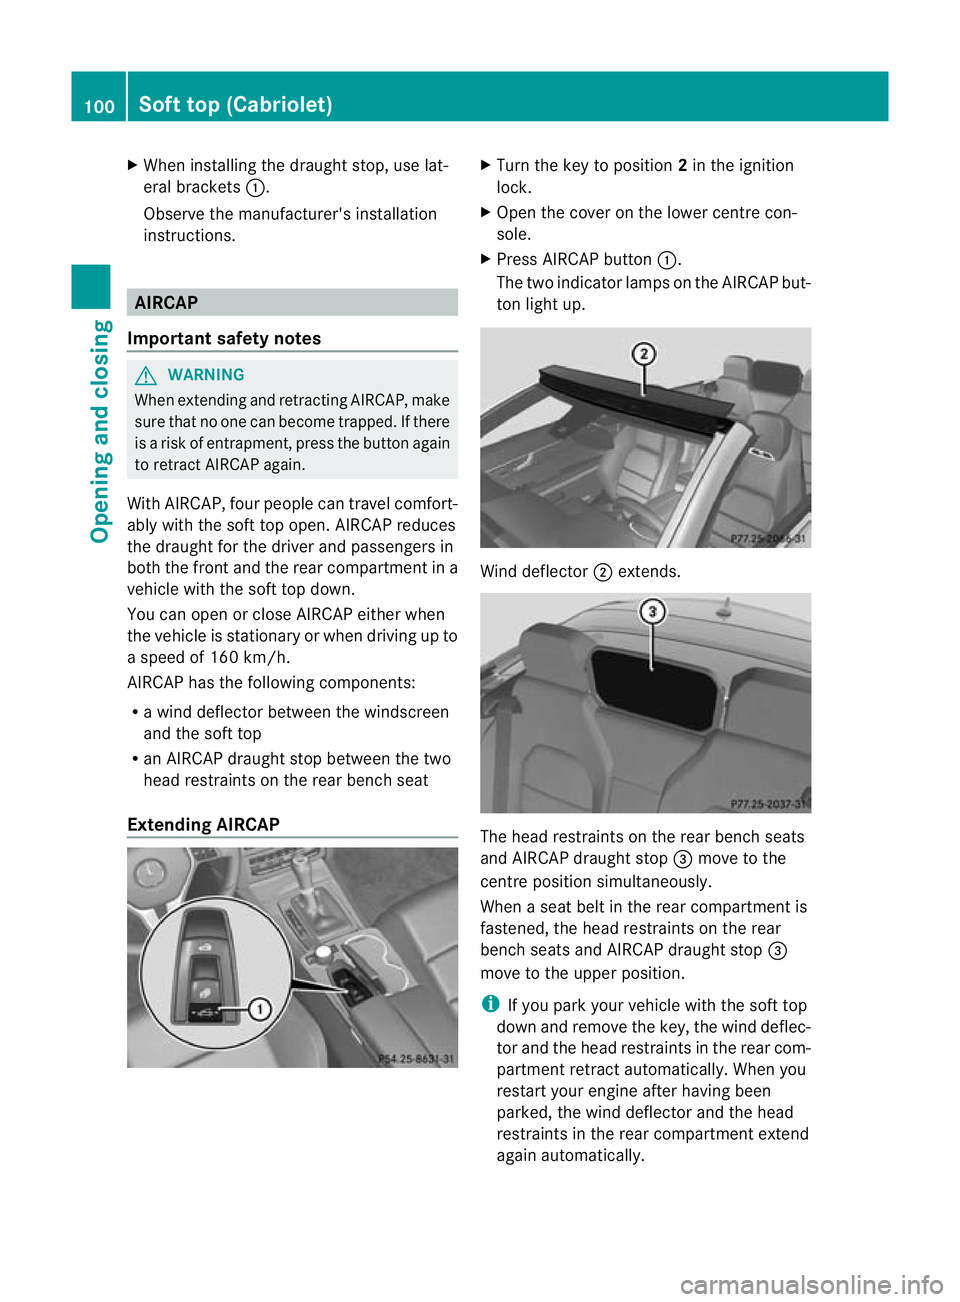
X Press AIRCAP button :.
The two indicato rlamps on the AIRCAP but-
to nl ight up. Wind deflector
;extends. The head restraints on the rear bench seats
and AIRCAP draught stop
=move to the
centre position simultaneously.
When a seat belt in the rear compartment is
fastened, the head restraints on the rear
bench seats and AIRCAP draught stop =
move to the upper position.
i If you park your vehicle with the soft top
down and remove the key, the wind deflec-
tor and the head restraints in the rear com-
partment retract automatically. When you
restart your engine after having been
parked, the wind deflector and the head
restraints in the rear compartment extend
again automatically. 100
Soft top (Cabriolet)Opening and closing
Page 104 of 389
i
AIRCAP cannot be extended or retracted
if the vehicle speed exceeds 160 km/h.
Retracting AIRCAP X
Turn the key to position 2in the ignition
lock.
X Open the cover on the lower centre con-
sole.
X Press AIRCAP button :.
The two indicator lamps on the AIRCAP but-
ton go out. Wind deflector ;retracts.
The head restraints on the rea rbench seats
and AIRCAP draught stop =move to the
lower position simultaneously.
i If there are passengers wearing seat belts
in the rear compartment, the head
restraints on the rear bench seats and the
AIRCAP draught stop remain in the upper
position.
Retracting the head restraints on the
rear bench seats from the driver's seat To improve the rear view, you can retract the
head restraints on the rear bench seats indi-
vidually (Y page 111). The wind deflector
remains in its current position. Fitting/removing the AIRCAP draught
stop
Preparation You will need a
4mmAllen key to fit/remove
the AIRCAP draught stop.
Before fitting or removing the AIRCAP draught
stop:
X Turn the key to position 2in the ignition
lock.
X Open the folding roof fully (Y page 93).
X Extend the head restraints in the rear com-
partment fully (Y page 111). Removing
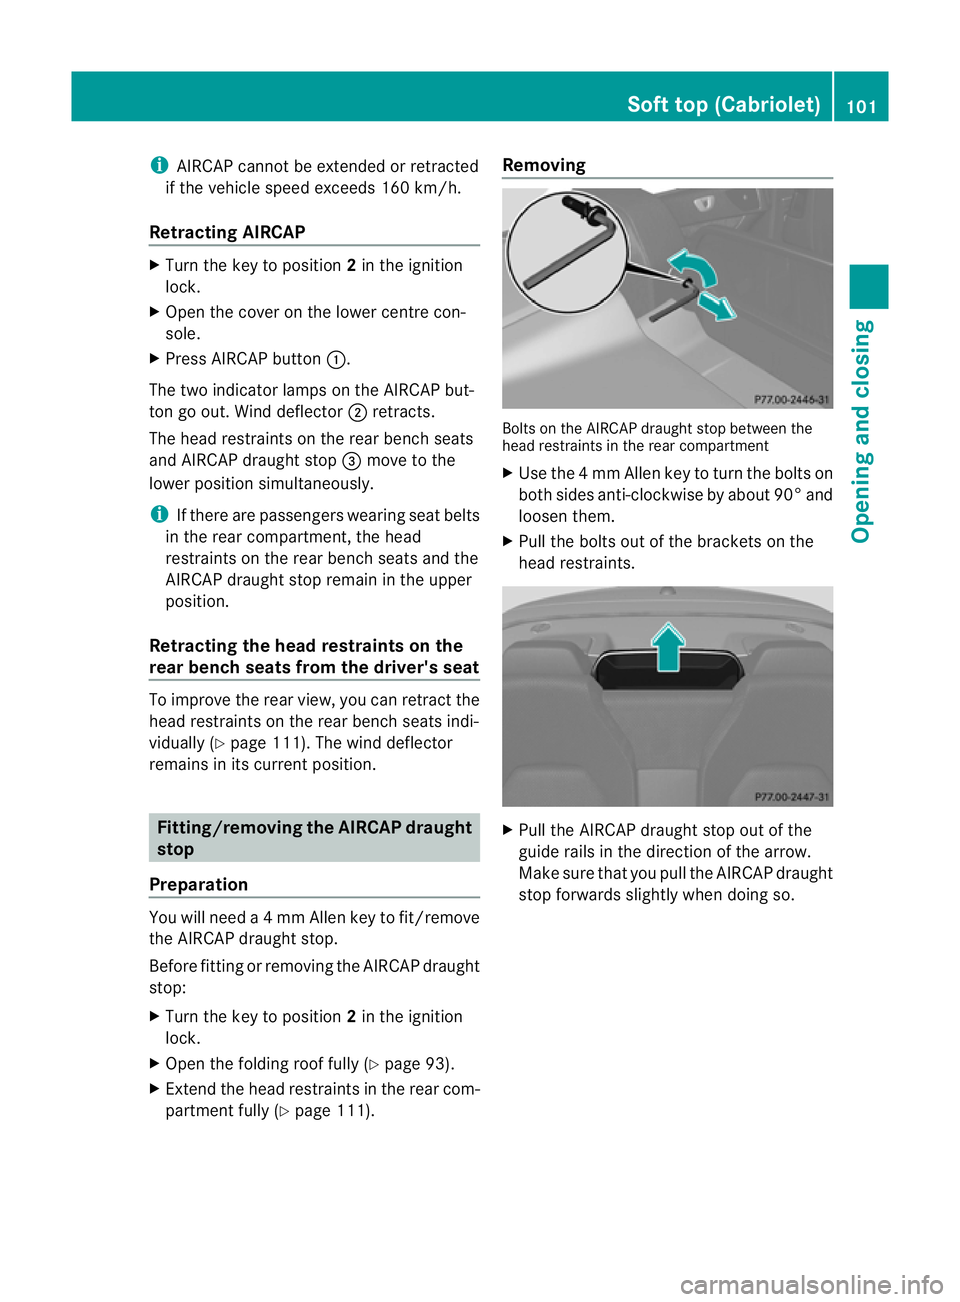
Bolts on the AIRCAP draught stop between the
head restraints in the rear compartment
X
Use the 4mmAllen key to tur nthe bolts on
both sides anti-clockwise by about 90° and
loosen them.
X Pull the bolts out of the brackets on the
head restraints. X
Pull the AIRCAP draught stop out of the
guide rails in the direction of the arrow.
Make sure that you pull the AIRCAP draught
stop forwards slightly when doing so. Soft top (Cabriolet)
101Opening and closing Z
Page 110 of 389
Useful information
............................108
Correct driver's seat position ..........108
Seats .................................................. 109
Steering wheel .................................. 115
Mirrors ............................................... 117
Memory function .............................. 120 107Seats, steering wheel and mirrors