2012 MERCEDES-BENZ CLS SHOOTING BRAKE fuel cap release
[x] Cancel search: fuel cap releasePage 13 of 405

EBD (electronic brake force distri-
bution)
Display message ............................ 252
Function/notes ................................ 69
ECO display
Function/notes ............................. 167
On-board computer .......................231
ECO start/stop function
Deactivating/activating .................152
General information .......................150
Electrical fuses
see Fuses
Electronic Stability Program
see ESP ®
(Electroni cStability Program)
Electronic Traction System
see ETS/4ETS (Electronic Trac-
tionS ystem)
Emergency key
Unlocking the driver's door ..............84
Emergency key element
Function/notes ................................ 78
Locking vehicle ................................ 84
Emergency release
Driver's door .................................... 84
Fuel filler fla p................................. 163
Emergency spare wheel
Important safety notes ..................377
Inflating the collapsible spare
wheel ............................................. 378
Points to remember .......................377
Removing ....................................... 377
Storage location ............................ 377
Stowing .......................................... 378
Technical data ............................... 380
Emergency unlocking
Tailgate ............................................ 88
Vehicle ............................................. 84
Engine
Display message ............................ 259
ECO start/stop function ................150
Engine number ............................... 385
Jump-starting ................................. 344
Running irregularl y......................... 153
Starting problems ..........................153
Starting the engine with the key ....149
Starting with KEYLESS GO .............149
Stopping ........................................ 166Tow-starting (vehicle) ..................... 349
Warning lamp (engine diagnos-
tics)
............................................... 284
Engine electronics
Notes ............................................. 383
Problem (fault) ............................... 153
Engine oil
Additives ........................................ 392
Checking the oil level ..................... 321
Checking the oil level using the
dipstick .......................................... 322
Display message ............................ 260
Filling capacity ............................... 391
Notes about oil grades ................... 391
Notes on oil level/consumption ....321
Temperature (on-board computer) .246
Topping up ..................................... 322
Viscosity ........................................ 392
Environmental protection
Returning an end-of-life vehicle .......22
ESP ®
(Electronic Stability Pro-
gram) AMG menu (on-board computer) ...246
Deactivating/activating (AMG
vehicles) .......................................... 68
Deactivating/activating (except
AMG vehicles) ................................ 237
Deactivating/activating (notes;
except AMG vehicles) ......................67
Display message ............................ 250
ETS/4ETS ........................................ 67
Function/notes ................................ 66
Important safety guidelines .............66
Trailer stabilisatio n.......................... 69
Warning lamp ................................. 281
ETS/4ETS (Electronic Traction Sys-
tem) ...................................................... 67
Exhaus tpipe (cleaning instruc-
tions) .................................................. 329
Exterior lighting Settings options ............................ .114
see Lights
Exterior mirrors
Adjusting ....................................... 108
Anti-dazzle mode (automatic) ........109
Folding in/ou t(automatically) .......109
Folding in/ou t(electrically) ...........109 10
Index
Page 14 of 405

Folding in whe
nlocking (on-board
computer) ...................................... 245
Out of position (troubleshooting) ...109
Parking position ............................. 110
Resetting ....................................... 109
Storing settings (memory func-
tion) ............................................... 111F
Faul tmessage
see Display messages
Filler cap
see Fuel filler flap
Fire extinguisher ............................... 335
First-aid kit ......................................... 334
Fitting awheel
Removing awheel .......................... 365
Fitting wheels
Fitting awheel ............................... 366
Lowering the vehicle ......................366
Raising the vehicle .........................364
Securing the vehicle against roll-
ing away ........................................ 363
Flat tyre
MOExtended tyres .........................337
Preparing the vehicle .....................336
TIREFIT kit ...................................... 338
Floormat ............................................ .317
Foglamps (extende drange) .............. 120
Frequencies Garage door opener .......................314
Mobile phone ................................. 383
Two-way radio ................................ 383
Front foglamps
Display message ............................ 257
Fuel
Additives ........................................ 389
Consumption information ..............390
Consumption statistics ..................231
Displaying the current consump-
tion ................................................ 231
Displaying the range ......................231
Fuel gauge ............................... 30, 227
Grade (petrol) ................................ 387
Important safety notes ..................386
Notes for AMG vehicles .................388
Problem (malfunction) ...................164Quality (diesel
)............................... 389
Refuelling ...................................... .161
Tank content/reserve fuel .............387
Fuel filler flap
Emergency release ........................163
Opening/closing ............................ 162
Fuel filte r(white display message) .261
Fuel level Calling up the range (on-board
computer) ...................................... 231
Gauge ...................................... 30, 227
Fuel reserve
see Fuel
Fuel tank
Capacity ........................................ 387
Problem (malfunction) ...................164
Fuse allocation chart (vehicle tool
kit) ...................................................... 335
Fuses Allocation chart ............................. 350
Before changing ............................. 350
Fuse box in the boot ......................351
Fuse box in the engine compart-
ment .............................................. 350
Fuse box in the luggage compart-
ment .............................................. 351
Important safety notes ..................350 G
Garage door opener Clearing the memory .....................313
Frequencies ................................... 314
Important safety notes ..................311
Opening/closing the garage door ..313
Programming (button in the rear-
view mirror) ................................... 312
Gear indicator (on-board com-
puter) ................................................. .246
Gearshift program SETUP (on-board computer) ..........246
Genuine Mercedes-Benz parts .........382
Glove compartment ..........................291 Index
11
Page 166 of 405

X
CLS Coupé: insert the fuel fille rcap into
the holde ronthe inside of fuel filler
flap ;.
or
X CLS Shooting Brake: insert the fuel filler
cap, held in a horizontal position, in the
recesses in the fuel filler flap hinge arm
from above.
X Completely insert the filler neck of the fuel
pump nozzle into the tank and refuel.
X Only fill the tank until the pump nozzle
switches off.
i Do not add any more fuel after the pump
stops filling for the first time. Otherwise,
fuel may leak out.
Closing X
Replace the cap on the filler neck and turn
clockwise until it engages audibly.
X Close the fuel filler flap.
i Close the fuel filler flap before locking the
vehicle. Otherwise, the locking pin of the
central locking prevents the fuel filler flap
from closing. Fuel filler flap emergency release
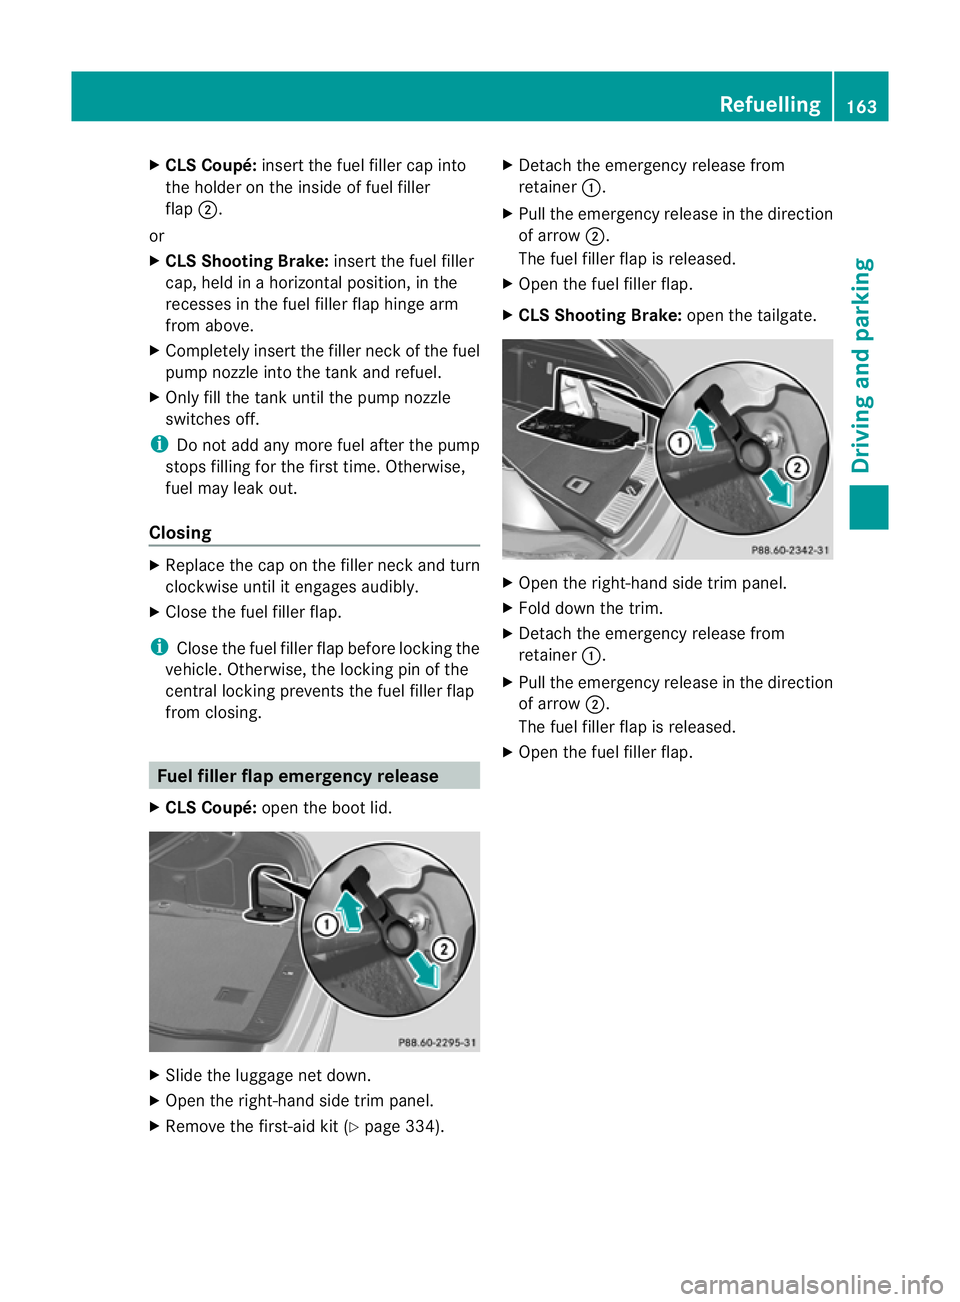
X CLS Coupé: open the boot lid. X
Slide the luggage net down.
X Open the right-hand side trim panel.
X Remove the first-aid kit (Y page 334).X
Detach the emergency release from
retainer :.
X Pull the emergency release in the direction
of arrow ;.
The fuel filler flap is released.
X Open the fuel filler flap.
X CLS Shooting Brake: open the tailgate. X
Open the right-hand side trim panel.
X Fold down the trim.
X Detach the emergency release from
retainer :.
X Pull the emergency release in the direction
of arrow ;.
The fuel filler flap is released.
X Open the fuel filler flap. Refuelling
163Driving and parking Z
Page 343 of 405

!
After use, excess tyre sealant may run out
of the filler hose. This could cause stains.
Therefore, place the filler hose in the plastic
bag which contained the TIREFIT kit. H
Environmental note
Have the used tyre sealant bottle disposed of
professionally, e.g. at aqualified specialist
workshop.
If a tyre pressure of 18 0kPa (1.8 bar/26 psi)
has been attained after five minutes:
X Switch off the tyre inflation compressor.
X Unscrew the filler hose from the valve of
the faulty tyre.
X Stow the tyre sealant bottle, the tyre infla-
tion compressor and the warning triangle.
X Pull away immediately.
The maximum speed for a tyre sealed with
tyre sealant is 80 km/h. The upper part of
the TIREFIT sticker must be affixed to the
instrument cluster in the driver's field of
vision.
X Stop after driving for approximately ten
minutes and check the tyre pressure with
the tyre inflation compressor.
The tyre pressure must now be at least
130 kPa (1.3 bar/19 psi). G
WARNING
If the required tyre pressure is not reached
after driving for a short period, the tyre is too
badly damaged. The tyre sealant cannot
repair the tyre in this instance. Damaged tyres
and a tyre pressure that is too low can signif-
icantly impair the vehicle's braking and driv-
ing characteristics .There is a risk of accident.
Do not continue driving. Contact a qualified
specialist workshop.
X Correct the tyre pressure if it is still at least
130 kPa (1.3 bar/19 psi) (see the fuel filler
flap for values).
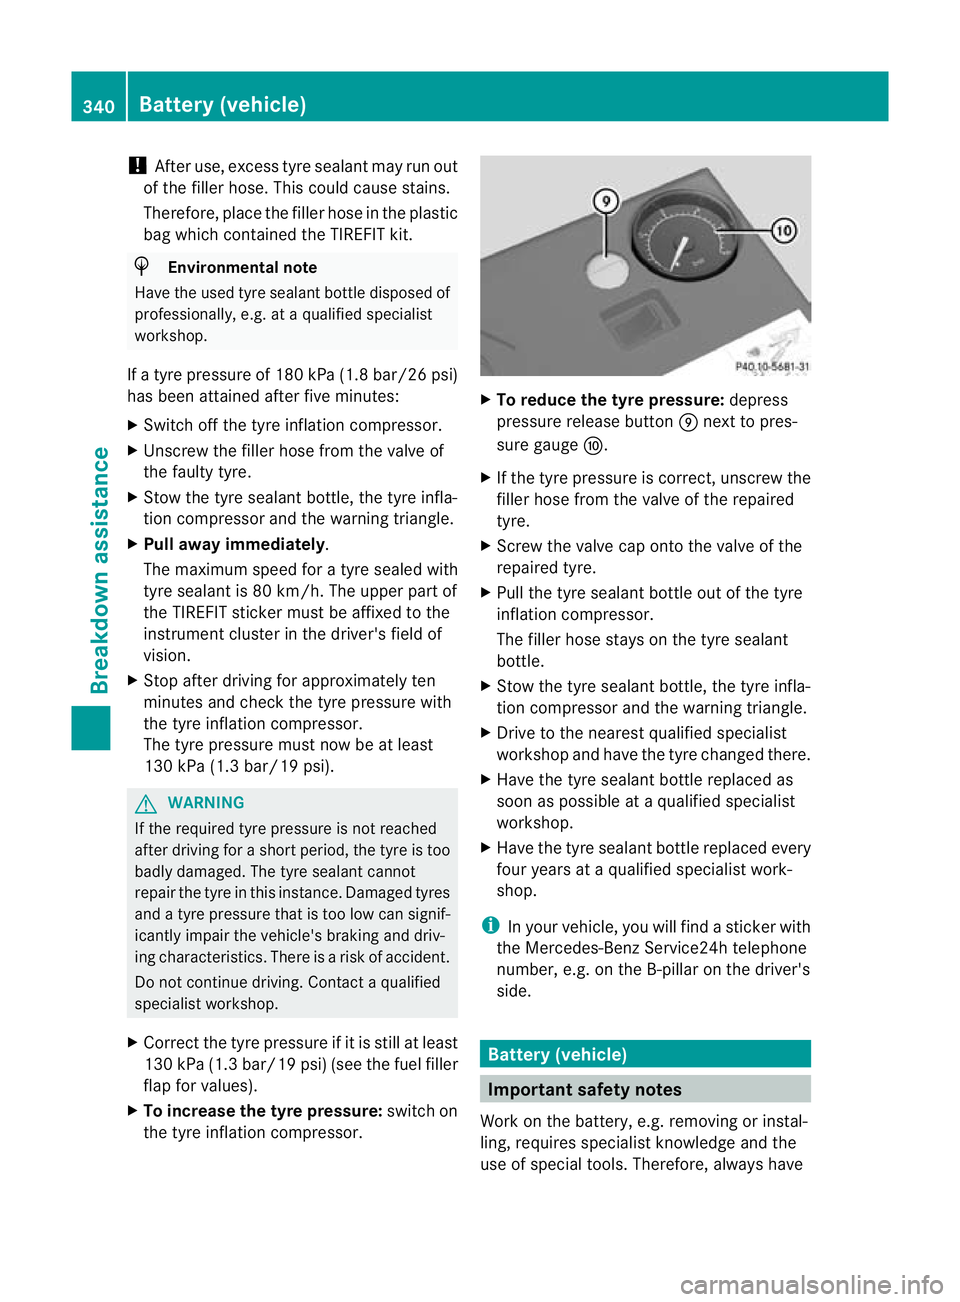
X To increase the tyre pressure: switch on
the tyre inflation compressor. X
To reduce the tyre pressure: depress
pressure release button Enext to pres-
sure gauge F.
X If the tyre pressure is correct, unscrew the
filler hose from the valve of the repaired
tyre.
X Screw the valve cap onto the valve of the
repaired tyre.
X Pull the tyre sealant bottle out of the tyre
inflation compressor.
The filler hose stays on the tyre sealant
bottle.
X Stow the tyre sealant bottle, the tyre infla-
tion compressor and the warning triangle.
X Drive to the nearest qualified specialist
workshop and have the tyre changed there.
X Have the tyre sealant bottle replaced as
soon as possible at a qualified specialist
workshop.
X Have the tyre sealant bottle replaced every
four years at a qualified specialist work-
shop.
i In your vehicle, you will find a sticker with
the Mercedes-Ben zService24h telephone
number, e.g. on the B-pillar on the driver's
side. Battery (vehicle)
Important safety notes
Work on the battery, e.g. removing or instal-
ling, requires specialist knowledge and the
use of special tools. Therefore, always have 340
Battery (vehicle)Breakdown assistance