2012 MERCEDES-BENZ CLS SHOOTING BRAKE trailer
[x] Cancel search: trailerPage 195 of 405
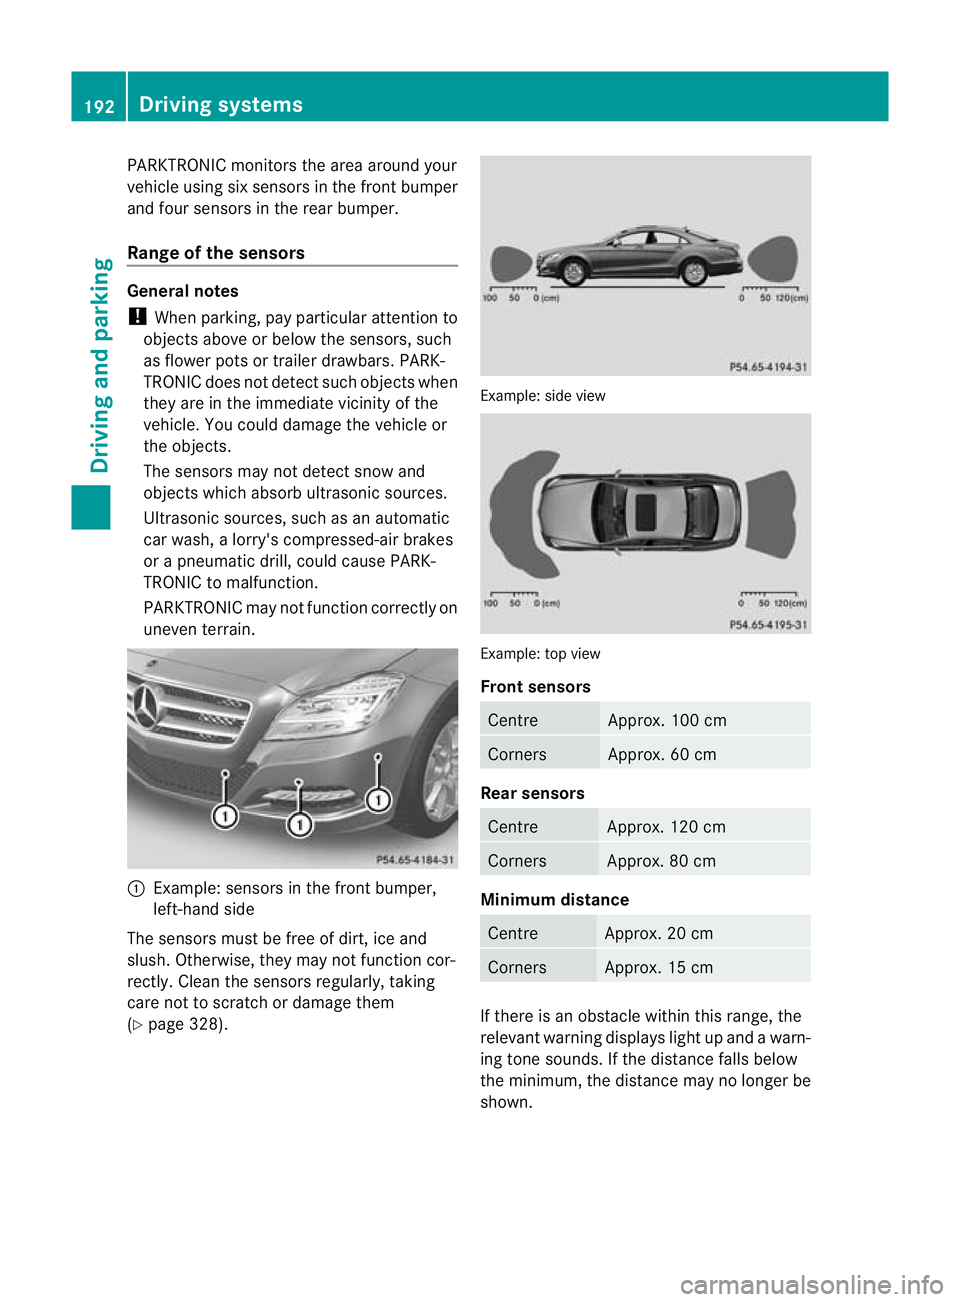
PARKTRONIC monitors the area around your
vehicle using six sensors in the frontb umper
and four sensors in the rear bumper.
Range of the sensors General notes
!
When parking, pay particular attention to
objects above or below the sensors, such
as flower pots or trailer drawbars. PARK-
TRONIC does no tdetec tsuch objects when
they are in the immediat evicinity of the
vehicle. You could damage the vehicle or
the objects.
The sensors may not detect snow and
objects which absorb ultrasonic sources.
Ultrasonic sources, such as an automatic
car wash, a lorry's compressed-air brakes
or a pneumatic drill, could cause PARK-
TRONIC to malfunction.
PARKTRONIC may not function correctly on
uneven terrain. :
Example: sensors in the front bumper,
left-hand side
The sensors must be free of dirt, ice and
slush. Otherwise, they may not function cor-
rectly. Clean the sensors regularly, taking
care not to scratch or damage them
(Y page 328). Example: side view
Example: top view
Front sensors
Centre Approx. 100 cm
Corners Approx. 60 cm
Rea
rsensors Centre Approx. 120 cm
Corners Approx. 80 cm
Minimum distance
Centre Approx. 20 cm
Corners Approx. 15 cm
If there is an obstacle within this range, the
relevant warning displays light up and a warn-
ing tone sounds. If th edistance falls below
the minimum, the distanc emay no longer be
shown. 192
Driving systemsDriving and parking
Page 196 of 405
Warning displays
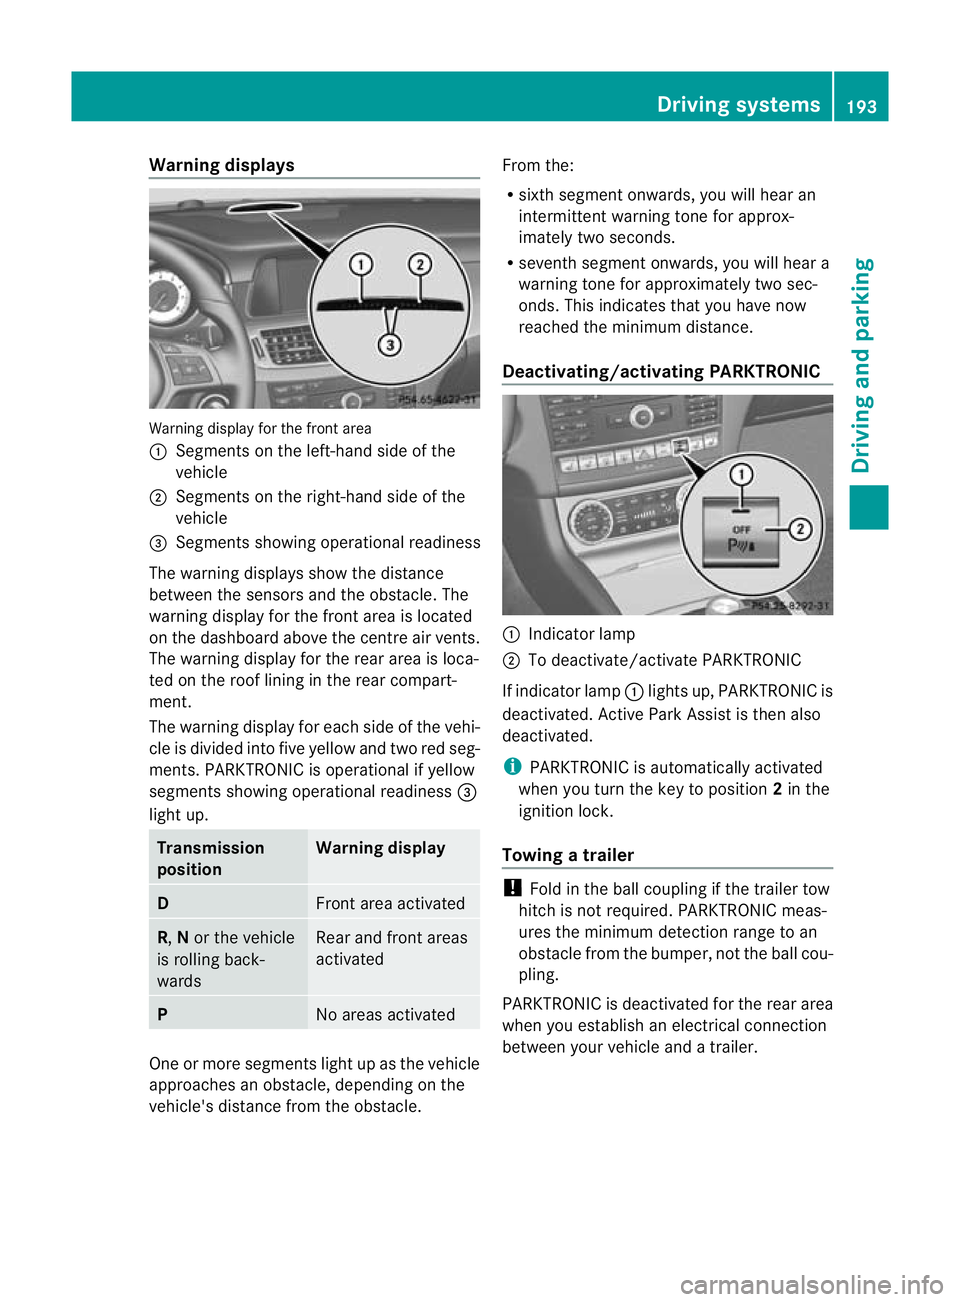
Warning display for the front area
:
Segments on the left-hand side of the
vehicle
; Segments on the right-hand side of the
vehicle
= Segments showing operational readiness
The warning displays show the distance
between the sensors and the obstacle. The
warning display for the front area is located
on the dashboard above the centre airv ents.
The warning display for the rear area is loca-
ted on the roof lining in the rear compart-
ment.
The warning display for each side of the vehi-
cle is divided into five yellow and two red seg-
ments. PARKTRONIC is operational if yellow
segments showing operational readiness =
light up. Transmission
position Warning display
D
Front area activated
R,
Nor the vehicle
is rolling back-
wards Rear and front areas
activated
P
No areas activated
One or more segments light up as the vehicle
approaches an obstacle, depending on the
vehicle's distance from the obstacle. From the:
R
sixth segmen tonwards, you will hea ran
intermittent warning ton efor approx-
imately two seconds.
R seventh segment onwards, you will hear a
warning tone for approximately two sec-
onds. This indicates that you have now
reached the minimum distance.
Deactivating/activating PARKTRONIC :
Indicator lamp
; To deactivate/activate PARKTRONIC
If indicator lamp :lights up, PARKTRONIC is
deactivated. Active Park Assist is then also
deactivated.
i PARKTRONIC is automatically activated
when you turn the key to position 2in the
ignition lock.
Towing atrailer !
Fold in the ball coupling if the trailer tow
hitch is not required .PARKTRONIC meas-
ures the minimum detection range to an
obstacle fro mthe bumper, not the ball cou-
pling.
PARKTRONIC is deactivated for the rear area
when you establish an electrical connection
between your vehicle and a trailer. Driving systems
193Driving and parking Z
Page 198 of 405
G
WARNING
The front of the vehicle will veer out in the
direction of the oncoming traffic during the
parking operation. In some cases the vehicle
will also take you onto sections of the oncom-
ing lane during the parking procedure.
You are responsible for safety at all times and
must pay attention to any road users
approaching or passing. Stop the vehicle if
necessary or cancel the Active Parking Assist
parking procedure. G
WARNING
Make sure that no persons or animals are in
the manoeuvring range. Otherwise, they
could be injured.
! If unavoidable, you should drive over
obstacles such as kerbs slowly and not at
a sharp angle .Otherwise, you may damage
the wheels or tyres.
Active Parking Assist is an electroni cparking
aid with ultrasound. Ultrasound is used to
measure the road on both sides of the vehicle.
As uitable parking space is indicated by the
parking symbol. Active steering intervention
can assis tyou during parking. You may also
use PARKTRONIC (Y page 191). When PARK-
TRONIC is switched off, Active Parking Assist
is also unavailable.
Use Active Parking Assist for parking spaces:
R that are parallel to the direction of travel
R that are on straight roads, not bends
R that are on the same level as the road, e.g.
not on the pavement
Parking tips:
R on narrow roads, drive as closely as possi-
ble past the parking space.
R parking spaces that are littered, overgrown
or partially occupied by trailer drawbars
might be identified incorrectly or not at all.
R snowfall or heavy rain may lead to a parking
space being measured inaccurately. R
pay attention to the PARKTRONIC
(Y page 193) warning messages during the
parking procedure.
R at any time, you can intervene in the steer-
ing procedure to correct it. Active Parking
Assist will then be cancelled.
R when transporting a load which protrudes
from your vehicle, you should not use
Active Parking Assist.
R when snow chains or an emergency spare
wheel are fitted, you should not use Active
Parking Assist here either.
R make sure that the tyre pressures are
always correct. This has adirec tinfluence
on the parking characteristics of the vehi-
cle.
R the way your vehicle is positioned in the
parking space after parking is dependent
on various factors .These include the posi-
tion and shape of the vehicles parked in
front and behind it and the conditions of the
location. It may be the case that Active
Parking Assist guides you too far into a
parking space, or not far enough into it. In
some cases, it may also lead you across or
onto the kerb. If necessary, you should can-
cel the parking procedure with Active Park-
ing Assist.
R you can also engage forward gear prema-
turely. The vehicle redirects and does not
drive as far into the parking space. Should
a gear be changed too early to achieve a
sensible parking position, the parking pro-
cedure will be cancelled. Driving systems
195Driving and parking Z
Page 200 of 405
i
In tight parking spaces, you will achieve
the best parking results by backing up as
far as possible. When doing so, also
observe the PARKTRONIC messages.
X Stop as soon as PARKTRONIC sounds the
continuous warning tone, if not before.
Manoeuvring may be required in tight park-
ing spaces.
The Park Assist active Select D Observe surroundings message appears in
the multifunction display.
X Shift the transmission to position Dwhile
the vehicle is stationary.
Active Parking Assist immediately steers in
the other direction.
The Park Assist active Accelerate and brake Observe surroundings mes-
sage appears in the multifunction display.
i You will achieve the best results by wait-
ing for the steering procedure to complete
before pulling away.
X Drive forwards and be ready to brake at all
times.
X Stop as soon as PARKTRONIC sounds the
continuous warning tone, if not before.
The Park Assist active Select R Observe surroundings message appears in
the multifunction display.
Further transmission shifts may be neces-
sary.
As soon as the parking procedure is com-
plete, the Park Assist switched off mes-
sage appears in the multifunction display.
PARKTRONIC continues to be available.
X Manoeuvre if necessary.
X Always observe the warning messages dis-
played by PARKTRONIC (Y page 193).
Cancelling Active Parking Assist You can cancel Active Parking Assist at any
time. X
Stop the movement of the multifunction
steering wheel or steer yourself.
Active Parking Assist will be cancelled at
once. The Park Assist cancelled mes-
sage appears in the multifunction display.
or
X Press the PARKTRONIC button on the
centre console (Y page 193).
PARKTRONIC is switched off and Active
Parking Assist is immediately cancelled.
The Park Assist cancelled message
appears in the multifunction display.
Active Parking Assist is cancelled automati-
cally if:
R the transmission is shifted too early.
R parking using Active Parking Assist is no
longer possible.
R you are driving faster than 10 km/h.
R a wheel spins and ESP ®
intervenes or fails.
The ä warning lamp lights up in the
instrument cluster.
Aw arning tone sounds. The parking symbol
disappears and the multifunction display
shows the Park Assist cancelled mes-
sage.
When Active Parking Assist is cancelled, you
must steer again yourself.
Towing atrailer For vehicles with a trailer tow hitch, the min-
imum length for parking spaces is slightly
increased.
If you have attached a trailer to your vehicle,
you should not use Active Parking Assist.
Once the electrical connectio
nis established
between your vehicle and the trailer, Active
Parking Assist is no longer available. PARK-
TRONIC is deactivated for the rear area. Driving systems
197Driving and parking Z
Page 202 of 405

Activating/deactivating the reversing
camera
X
To activate: make sure that the key is in
position 2in the ignition lock.
X Make sure that the "Activation by R gear"
setting is active in COMAND Online; see the
separate COMAND Online operating
instructions.
X Engage reverse gear.
The area behind the vehicle is shown with
guide lines in the COMAND display.
X To change the function mode for vehi-
cles with trailer tow hitch: using the
COMAND controller, select symbol :for
the "Reverse parking" function or sym-
bol ;for "Coupling up a trailer" (see the
separate COMAND Online operating
instructions).
The symbol of the selected function is high-
lighted.
To deactivate: the reversing camera is deac-
tivated if you:
R shif tthe transmission to position P
R drive forwards 10 m
R shift the transmission from Rto another
position (after 15 seconds)
R drive forwards at a speed of over
10 km/h Displays in the COMAND display G
WARNING
Using the reversing camera can be dangerous
if you are colour-blind or if your ability to dis-
tinguish colours is impaired.
Only use the reversing camera if you can see
and distinguish between all the coloured
guide lines that are displayed by the reversing
camera in the COMAND display. G
WARNING
Please note that objects not at ground level
may appear to be further away than they
actually are. These include:
R the bumper of a vehicle that is parked
behind your vehicle
R a trailer drawbar
R the ball coupling of a trailer tow hitch
R the tail-end of a lorry
R slanted posts
The lines are only guides, not accurate meas-
urements of the distance to an obstacle.
Therefore, you should never pass the red line
when approaching an obstacle. You could oth-
erwise cause an accident and injure yourself
and others. :
White guide line without turning the steer-
ing wheel, vehicle width including the
exterior mirrors (static)
; Yellow guide line at a distance of approx-
imately 4.0 mfrom the rear of the vehicle Driving systems
199Driving and parking Z
Page 205 of 405
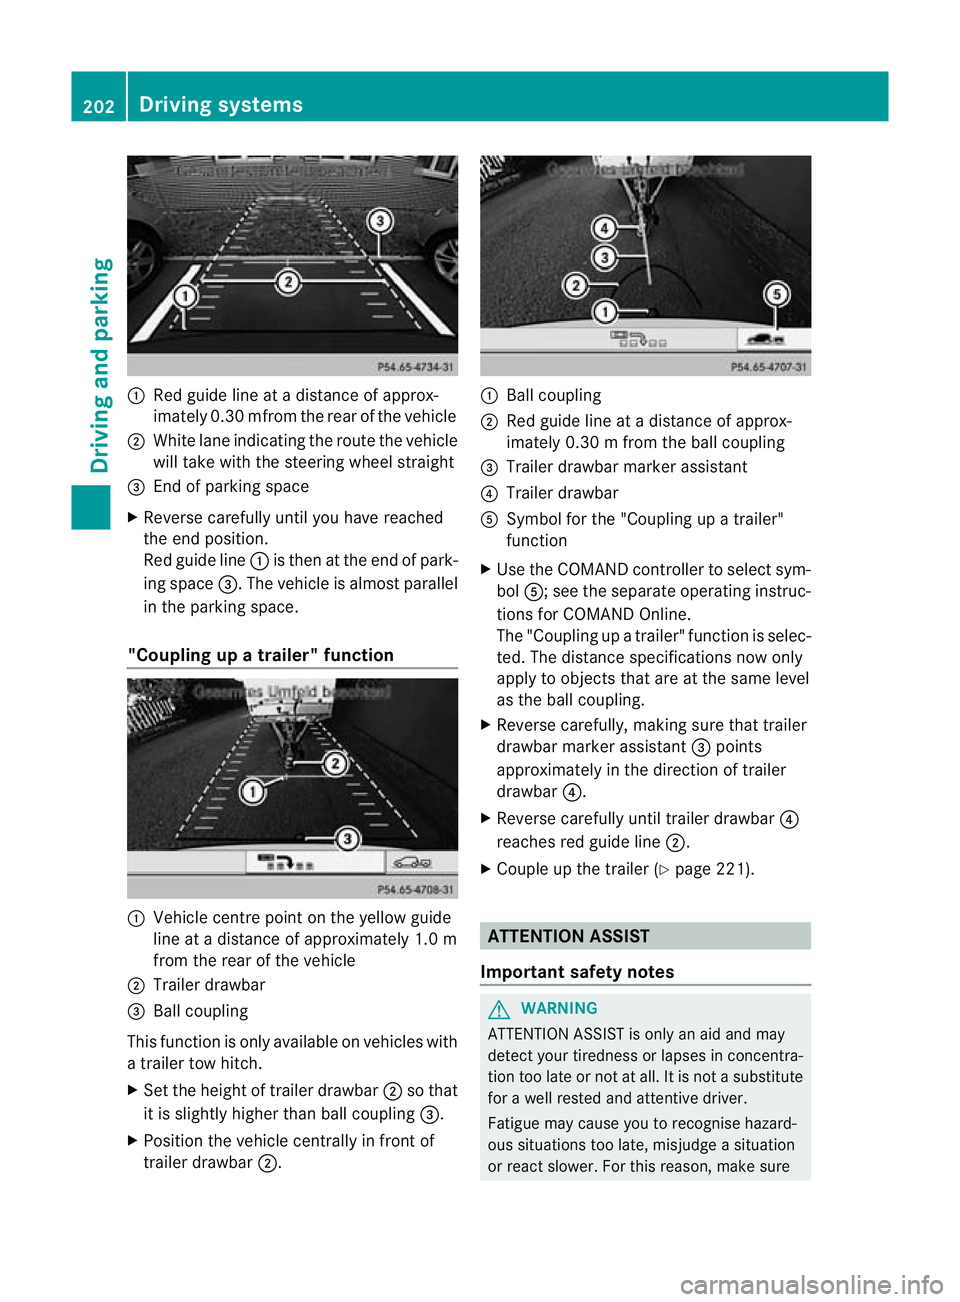
:
Red guide line at a distanc eofapprox-
imately 0.3 0mfrom the rear of the vehicle
; White lane indicating the route the vehicle
will take with the steering wheel straight
= End of parking space
X Reverse carefully until you have reached
the end position.
Red guide line :is then at the end of park-
ing space =.The vehicle is almost parallel
in the parking space.
"Coupling up a trailer" function :
Vehicle centre point on the yellow guide
line at a distance of approximately 1.0 m
from the rear of the vehicle
; Trailer drawbar
= Ball coupling
This function is only available on vehicles with
a trailer tow hitch.
X Set the height of trailer drawbar ;so that
it is slightly higher than ball coupling =.
X Position the vehicle centrally in front of
trailer drawbar ;. :
Ball coupling
; Red guide line at a distance of approx-
imately 0.30 m from the ball coupling
= Trailer drawbarm arker assistant
? Trailer drawbar
A Symbol for the "Coupling up a trailer"
function
X Use the COMAND controller to selec tsym-
bol A; see the separate operating instruc-
tions for COMAND Online.
The "Coupling up a trailer "function is selec-
ted. The distance specifications now only
apply to objects that are at the same level
as the ball coupling.
X Reverse carefully, making sure that trailer
drawbar marke rassistant =points
approximately in the direction of trailer
drawbar ?.
X Reverse carefully until trailer drawbar ?
reaches red guide line ;.
X Couple up the trailer (Y page 221). ATTENTION ASSIST
Important safety notes G
WARNING
ATTENTION ASSIST is only an aid and may
detect your tiredness or lapses in concentra-
tion too late or not at all. It is not asubstitute
for a well rested and attentive driver.
Fatigue may cause you to recognise hazard-
ous situations too late, misjudge a situation
or react slower. For this reason, make sure 202
Driving systemsDriving and pa
rking
Page 213 of 405
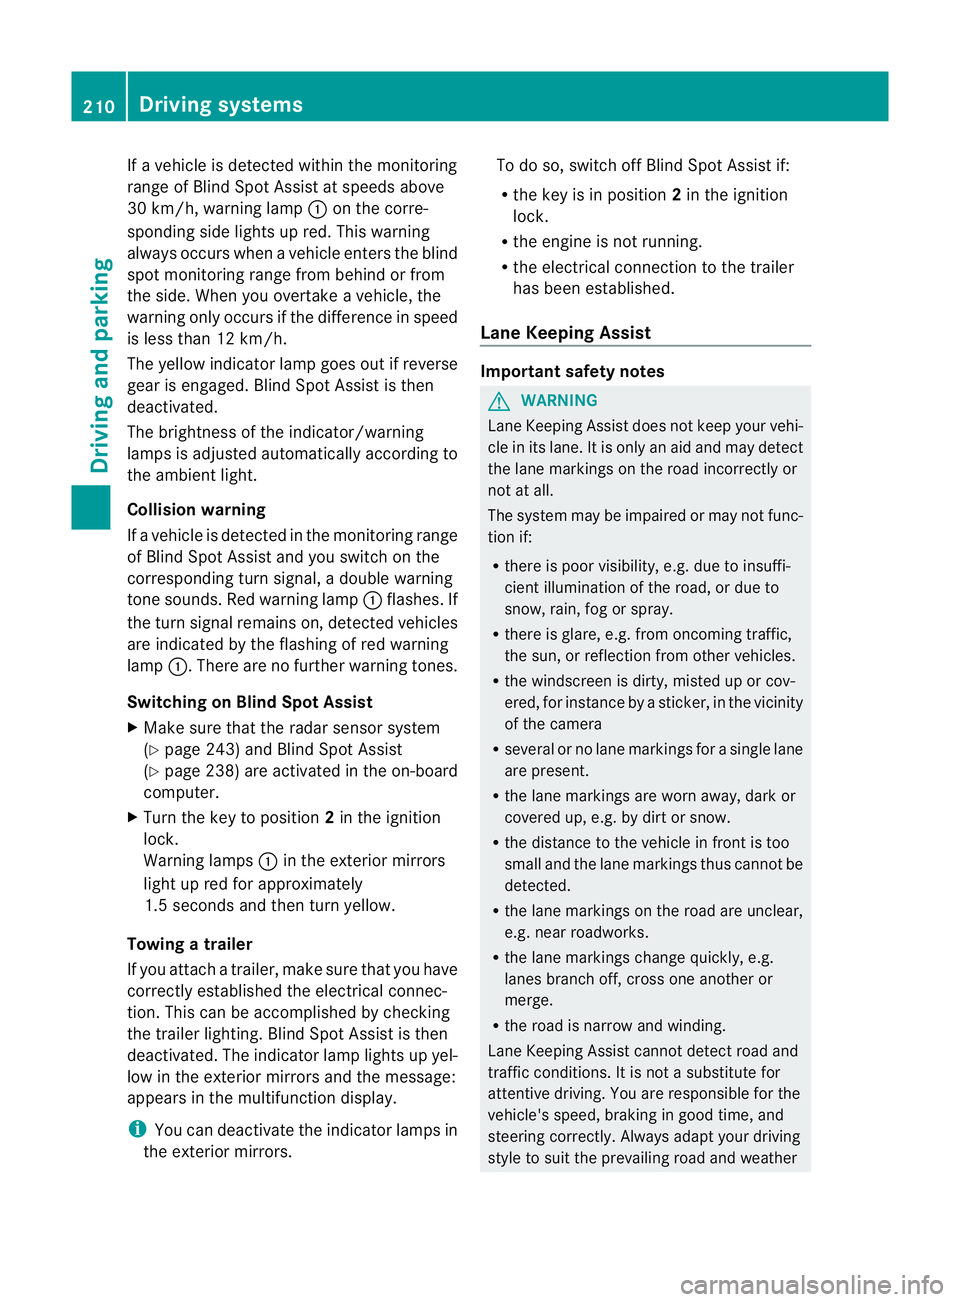
If a vehicle is detected within the monitoring
range of Blind Spot Assist at speeds above
30 km/h, warning lamp
:on the corre-
sponding side lights up red. This warning
always occurs when a vehicle enters the blind
spot monitoring range from behind or from
the side. When you overtake a vehicle, the
warning only occurs if the difference in speed
is less than 12 km/h.
The yellow indicator lamp goes out if reverse
gear is engaged. Blind Spot Assist is then
deactivated.
The brightness of the indicator/warning
lamps is adjusted automatically according to
the ambient light.
Collision warning
If a vehicle is detected in the monitoring range
of Blind Spot Assist and you switch on the
corresponding turn signal, a double warning
tone sounds. Red warning lamp :flashes. If
the turn signal remains on, detected vehicles
are indicated by the flashing of red warning
lamp :.There are no further warning tones.
Switching on Blind Spot Assist
X Make sure that the radar sensor system
(Y page 243) and Blind Spot Assist
(Y page 238) are activated in the on-board
computer.
X Turn the key to position 2in the ignition
lock.
Warning lamps :in the exterior mirrors
light up red for approximately
1.5 seconds and then turn yellow.
Towing atrailer
If you attach a trailer, make sure tha tyou have
correctly established the electrical connec-
tion. This can be accomplished by checking
the trailer lighting. Blind Spot Assist is then
deactivated. The indicator lamp lights up yel-
low in the exterior mirrors and the message:
appears in the multifunction display.
i You can deactivate the indicator lamps in
the exterior mirrors. To do so, switch off Blind Spot Assist if:
R
the key is in position 2in the ignition
lock.
R the engine is not running.
R the electrical connection to the trailer
has been established.
Lane Keeping Assist Important safety notes
G
WARNING
Lane Keeping Assist does not keep your vehi-
cle in its lane. It is only an aid and may detect
the lane markings on the road incorrectly or
not at all.
The system may be impaired or may not func-
tion if:
R there is poor visibility, e.g. due to insuffi-
cient illumination of the road, or due to
snow, rain, fog or spray.
R there is glare, e.g. from oncoming traffic,
the sun, or reflection from other vehicles.
R the windscreen is dirty, misted up or cov-
ered, for instance by a sticker, in the vicinity
of the camera
R several or no lane markings for a single lane
are present.
R the lane markings are worn away, dark or
covered up, e.g. by dirt or snow.
R the distance to the vehicle in front is too
small and the lane markings thus cannot be
detected.
R the lane markings on the road are unclear,
e.g. near roadworks.
R the lane markings change quickly, e.g.
lanes branch off, cross one another or
merge.
R the road is narrow and winding.
Lane Keeping Assist cannot detect road and
traffic conditions. It is not a substitute for
attentive driving. You are responsible for the
vehicle's speed, braking in good time, and
steering correctly. Always adapt your driving
style to suit the prevailing road and weather 210
Driving systemsDriving and parking
Page 218 of 405
R
ESP ®
is deactivated.
R a loss of tyre pressure or a defective tyre is
detected.
Activating Active Blind Spo tAssist
X Make sure that the radar sensor system
(Y page 243) and Active Blind Spot Assist
(Y page 238) are activated in the on-board
computer.
X Turn the key to position 2in the ignition
lock.
Warning lamps :in the exterior mirrors
light up red for approximately
1.5 seconds and then turn yellow.
Towing atrailer
If you attach a trailer, make sure tha tyou have
correctly established the electrical connec-
tion. This can be accomplished by checking
the trailer lighting. Active Blind Spot Assist is
then deactivated. The indicator lamp lights up
yellow in the exterior mirrors and the ActiveBlind Spot Assist currently unavail‐
able See Owner's Manual message
appears in the multifunction display.
Active Lane Keeping Assist Important safety notes
G
WARNING
Active Lane Keeping Assist does not keep
your vehicle in its lane. It is only an aid and
may detect the lane markings on the road
incorrectly or not at all.
The system may be impaired or may not func-
tion if:
R there is poor visibility, e.g. due to inade-
quate illumination of the road surface,
snow, rain, fog or spray.
R there is glare, e.g. from oncoming traffic,
the sun, or reflection from other vehicles.
R the windscreen is dirty, fogged up or cov-
ered, for instance by a sticker, in the vicinity
of the camera. R
several or no lane markings for a single lane
are present.
R the lane markings are worn away, dark or
covered up, e.g. by dirt or snow.
R the distance to the vehicle in front is too
small and as a result the lane markings can-
not be recognised.
R the lane markings on the road are unclear,
e.g. near roadworks.
R the lane markings change quickly, e.g.
branch off, cross, or merge.
R the road is narrow and winding.
Active Lane Keeping Assist cannot detect
road and traffic conditions. It is not a substi-
tute for attentive driving. You are responsible
for the vehicle's speed, braking in good time,
and steering correctly. Always adapt your
driving style to suit the prevailing road and
weather conditions. Always pay attention to
traffic conditions and your surroundings. Oth-
erwise, you may fail to recognise dangers in
time, cause an accident and injure yourself
and others.
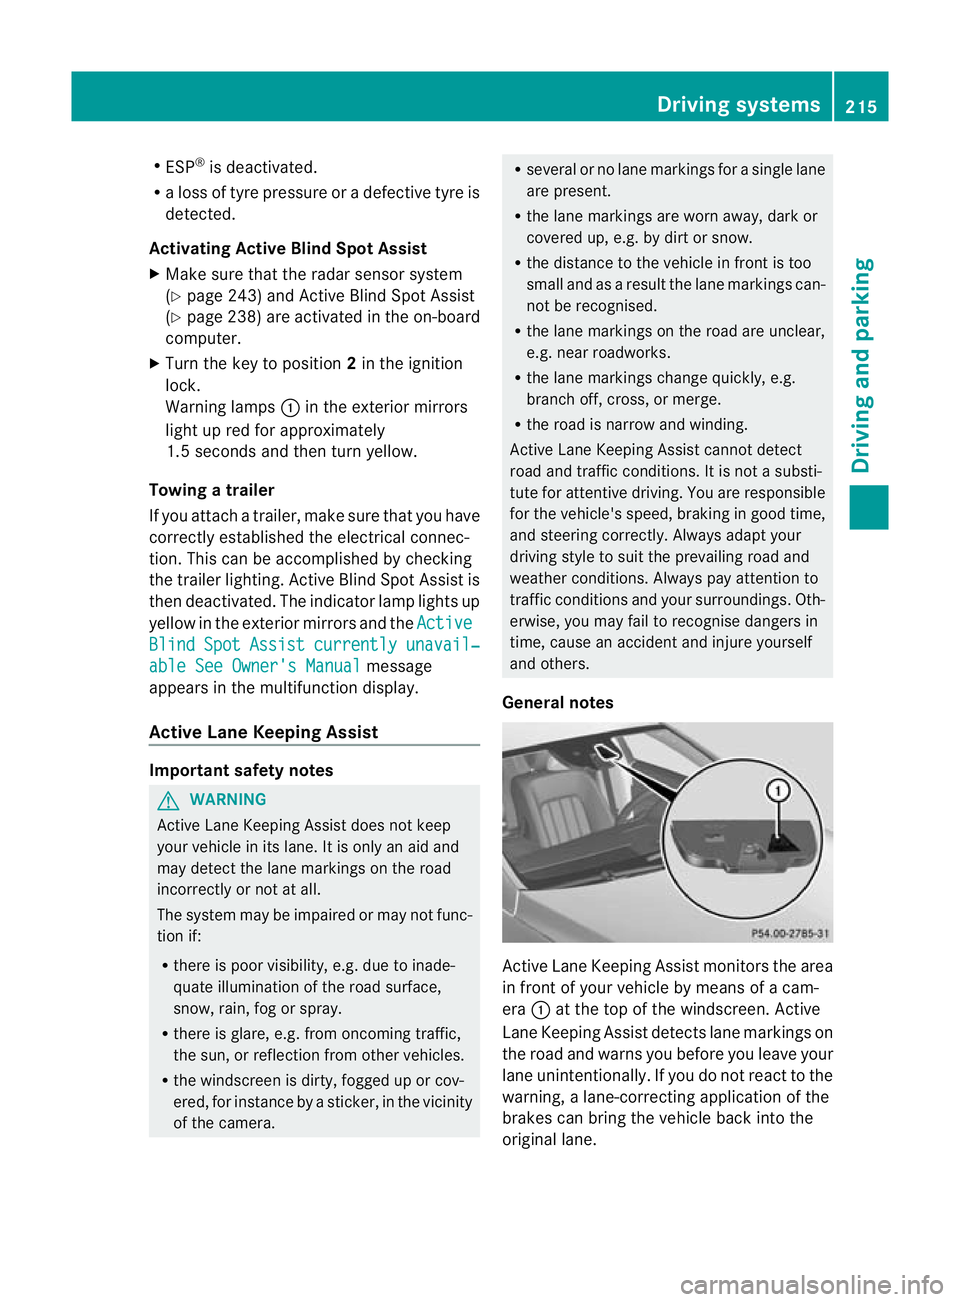
General notes Active Lane Keeping Assist monitors the area
in front of your vehicle by means of a cam-
era
:at the top of the windscreen. Active
Lane Keeping Assist detect slane markings on
the road and warns you before you leave your
lane unintentionally. If you do no treact to the
warning, a lane-correcting application of the
brakes can bring the vehicle back into the
original lane. Driving systems
215Driving and parking Z