2012 MERCEDES-BENZ CLS lights
[x] Cancel search: lightsPage 180 of 356
far as possible. When doing so, also
observe the PARKTRONIC messages.XStop as soon as PARKTRONIC sounds the
continuous warning tone, if not before.
Maneuvering may be required in tight
parking spaces.
The Park Assist Active Select D
Observe Surroundings message appears
in the multifunction display.
XShift the transmission to position D while
the vehicle is stationary.
Active Parking Assist immediately steers in
the other direction.
The Park Assist Active Accelerate
and Brake Observe Surroundings
message appears in the multifunction
display.
i You will achieve the best parking results
by waiting for the steering procedure to
complete before moving forwards.
XDrive forwards and be ready to brake at all
times.XStop as soon as PARKTRONIC sounds the
continuous warning tone, if not before.
The Park Assist Active Select R
Observe Surroundings message appears
in the multifunction display.
XFurther transmission shifts may be
necessary.
As soon as the parking procedure is
complete, the Park Assist Disabled
message appears in the multifunction
display. PARKTRONIC continues to be
available.
XManeuver if necessary.XAlways observe the warning messages
displayed by PARKTRONIC ( Y page 173).
Canceling Active Parking Assist
You can cancel Active Parking Assist at any
time.
XStop the movement of the multifunction
steering wheel or steer yourself.
Active Parking Assist will be canceled at
once. The Park Assist Canceled
message appears in the multifunction
display.
or
XPress the PARKTRONIC button on the
center console ( Y page 173).
PARKTRONIC is switched off and Active
Parking Assist is immediately canceled.
The Park Assist Canceled message
appears in the multifunction display.
Active Parking Assist is canceled
automatically if:
R the transmission is shifted too early.
R parking using Active Parking Assist is no
longer possible.
R you are driving faster than 6 mph
(10 km/h).
R a wheel spins, ESP ®
intervenes or fails. The
ä warning lamp lights up in the
instrument cluster.
A warning tone sounds. The parking space
symbol disappears and the Park Assist
Canceled message appears in the
multifunction display.
When Active Parking Assist is canceled, you
must steer again yourself.
Rear view camera
Important safety notes
The rear view camera is an optical parking aid.
It shows the area behind your vehicle in the
COMAND display.
GWARNING
Make sure that no persons or animals are in
the maneuvering range. Otherwise, they
could be injured.
The rear view camera is located in the handle
strip of the trunk lid.
178Driving systemsDriving and parking
Page 187 of 356
altering of the device will void any
warranties, and is not permitted by the
FCC. Do not tamper with, alter, or use in
any non-approved way.
Any unauthorized modification to this
device could void the user’s authority to
operate the equipment.
For Blind Spot Assist to assist you when
driving, the radar sensor system must be
activated ( Y page 211) and operational.
Monitoring range of the sensors
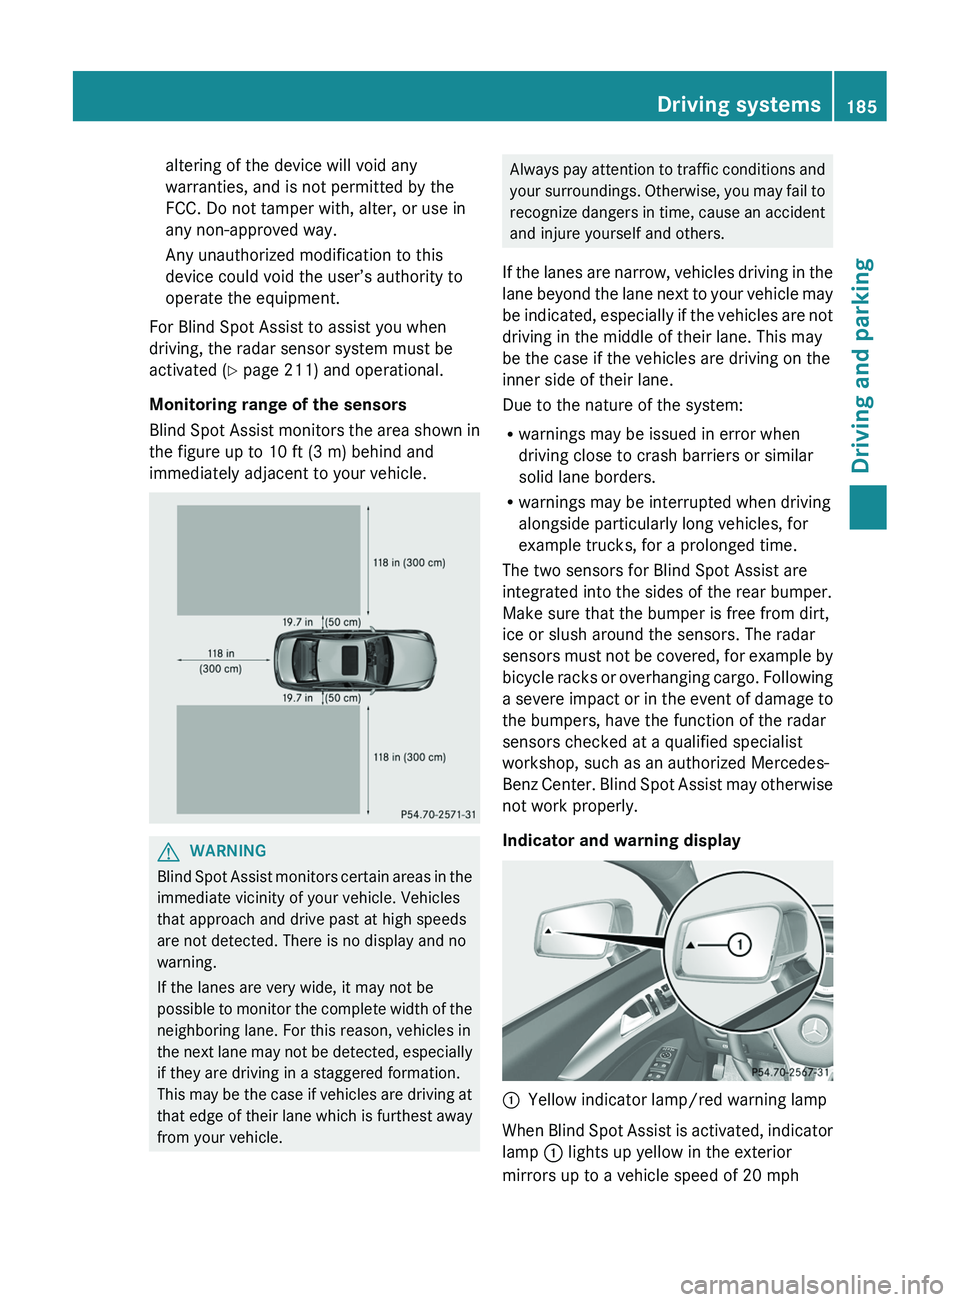
Blind Spot Assist monitors the area shown in
the figure up to 10 ft (3 m) behind and
immediately adjacent to your vehicle.GWARNING
Blind Spot Assist monitors certain areas in the
immediate vicinity of your vehicle. Vehicles
that approach and drive past at high speeds
are not detected. There is no display and no
warning.
If the lanes are very wide, it may not be
possible to monitor the complete width of the
neighboring lane. For this reason, vehicles in
the next lane may not be detected, especially
if they are driving in a staggered formation.
This may be the case if vehicles are driving at
that edge of their lane which is furthest away
from your vehicle.
Always pay attention to traffic conditions and
your surroundings. Otherwise, you may fail to
recognize dangers in time, cause an accident
and injure yourself and others.
If the lanes are narrow, vehicles driving in the
lane beyond the lane next to your vehicle may
be indicated, especially if the vehicles are not
driving in the middle of their lane. This may
be the case if the vehicles are driving on the
inner side of their lane.
Due to the nature of the system:
R warnings may be issued in error when
driving close to crash barriers or similar
solid lane borders.
R warnings may be interrupted when driving
alongside particularly long vehicles, for
example trucks, for a prolonged time.
The two sensors for Blind Spot Assist are
integrated into the sides of the rear bumper.
Make sure that the bumper is free from dirt,
ice or slush around the sensors. The radar
sensors must not be covered, for example by
bicycle racks or overhanging cargo. Following
a severe impact or in the event of damage to
the bumpers, have the function of the radar
sensors checked at a qualified specialist
workshop, such as an authorized Mercedes-
Benz Center. Blind Spot Assist may otherwise
not work properly.
Indicator and warning display:Yellow indicator lamp/red warning lamp
When Blind Spot Assist is activated, indicator
lamp : lights up yellow in the exterior
mirrors up to a vehicle speed of 20 mph
Driving systems185Driving and parkingZ
Page 188 of 356
(30 km/h). When the vehicle speed exceeds
20 mph (30 km/h), the indicator lamp goes
out and Blind Spot Assist is ready for use.
When your speed exceeds approximately
20 mph (30 km/h), warning lamp : lights up
red on the corresponding side whenever a
vehicle is detected in the blind spot
monitoring range. This warning is always
given when a vehicle enters the blind spot
monitoring range from behind or from the
side. When you are passing another vehicle,
the warning is emitted only if the difference
in speed is less than 7 mph (12 km/h).
The yellow indicator lamp goes out if the
reverse gear is engaged. In this event, Blind
Spot Assist is no longer active.
The brightness of the indicator/warning
lamps is adjusted automatically according to
the ambient light.GWARNING
Blind Spot Assist is not active at speeds under
approximately 20 mph (30 km/h). The
indicator lamps in the exterior mirrors are
yellow. Vehicles in the monitoring range are
then not indicated.
Always pay attention to traffic conditions and
your surroundings. Otherwise, you may fail to
recognize dangers in time, cause an accident
and injure yourself and others.
Collision warning
If a vehicle is detected in the monitoring range
of Blind Spot Assist and you switch on the turn
signal, a double warning tone sounds. Red
warning lamp : flashes. If the turn signal
remains on, detected vehicles are indicated
by the flashing of red warning lamp :. There
are no further warning tones.
Switching on Blind Spot Assist
XMake sure that the radar sensor system
( Y page 211) and Blind Spot Assist(Y page 207) are activated in the on-board
computer.XTurn the SmartKey to position 2 in the
ignition lock.
Warning lamps : light up red in the
exterior mirrors for approximately 1.5
seconds and then turn yellow.
Lane Keeping Assist
Important safety notes
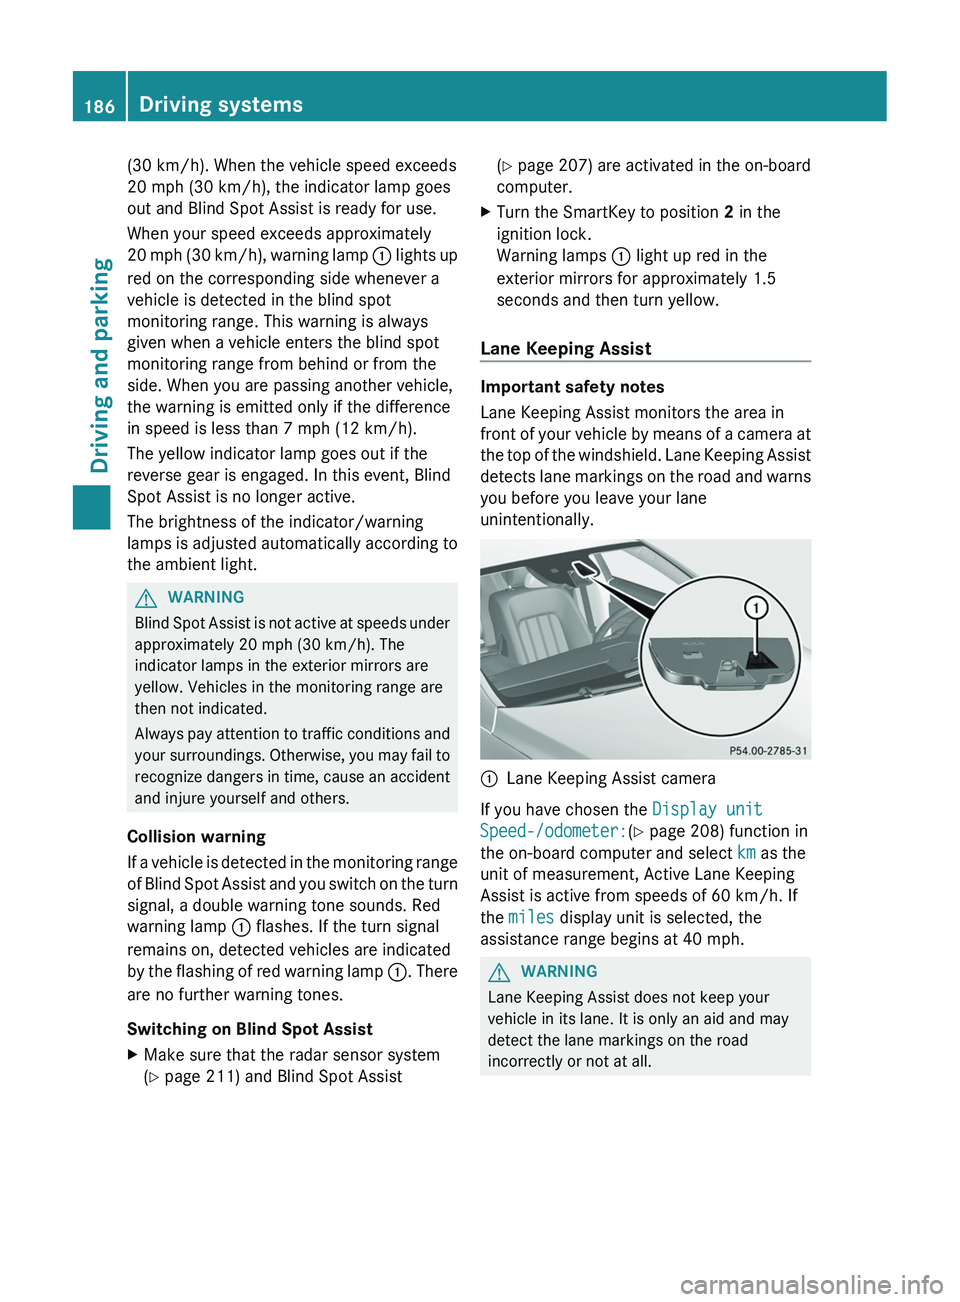
Lane Keeping Assist monitors the area in
front of your vehicle by means of a camera at
the top of the windshield. Lane Keeping Assist
detects lane markings on the road and warns
you before you leave your lane
unintentionally.
:Lane Keeping Assist camera
If you have chosen the Display unit
Speed-/odometer: (Y page 208) function in
the on-board computer and select km as the
unit of measurement, Active Lane Keeping
Assist is active from speeds of 60 km/h. If
the miles display unit is selected, the
assistance range begins at 40 mph.
GWARNING
Lane Keeping Assist does not keep your
vehicle in its lane. It is only an aid and may
detect the lane markings on the road
incorrectly or not at all.
186Driving systemsDriving and parking
Page 191 of 356
If the lanes are very wide, it may not be
possible to monitor the complete width of the
neighboring lane. For this reason, vehicles in
the next lane may not be detected, especially
if they are driving in a staggered formation.
This may be the case if vehicles are driving at
that edge of their lane which is furthest away
from your vehicle.
Always pay attention to traffic conditions and
your surroundings. Otherwise, you may fail to
recognize dangers in time, cause an accident
and injure yourself and others.
If the lanes are narrow, the system may be
unable to distinguish the neighboring lane
from the one beyond it. For this reason,
vehicles in the farther lane may be indicated,
especially if the vehicles are driving in a
staggered formation in different lanes. This
may be the case if there are vehicles driving
at the inner edge of their lanes.
Due to the nature of the system:
R warnings may be issued in error when
driving close to crash barriers or similar
solid lane borders.
R warnings may be interrupted when driving
alongside particularly long vehicles, for
example trucks, for a prolonged time.
Two Active Blind Spot Assist radar sensors
are integrated into the front and rear bumpers
respectively. An additional radar sensor is
located behind the cover in the radiator grill.
Make sure that the sensor areas on the
bumpers and the sensor cover in the radiator
grill are free from dirt, ice and slush. The rear
sensors must not be covered, for example by
cycle racks or overhanging cargo. Following
a severe impact or in the event of damage to
the bumpers, have the function of the radar
sensors checked at a qualified specialist
workshop, e.g. an authorized Mercedes-Benz
Center. Active Blind Spot Assist may
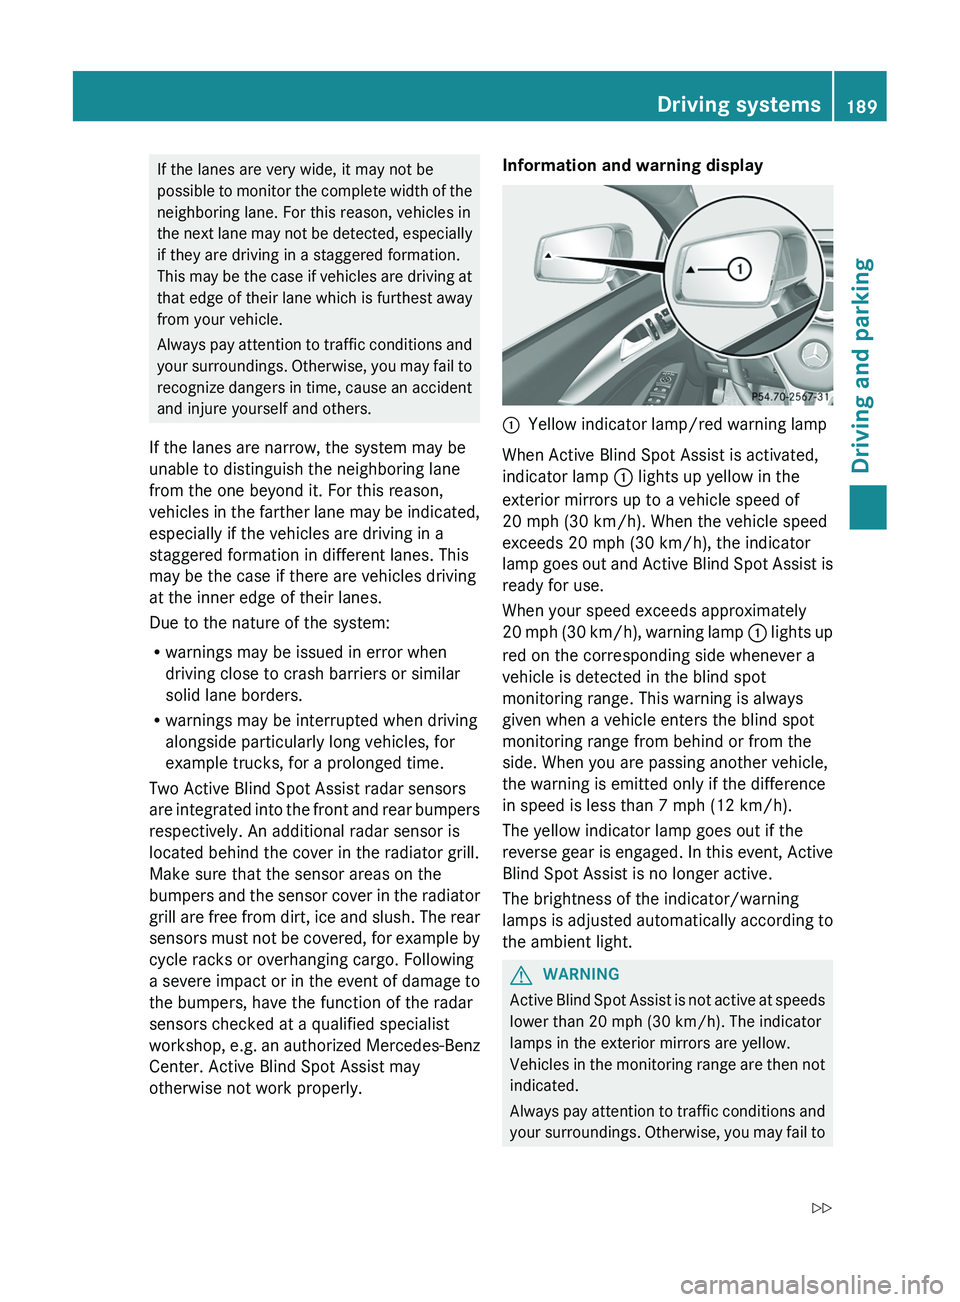
otherwise not work properly.Information and warning display:Yellow indicator lamp/red warning lamp
When Active Blind Spot Assist is activated,
indicator lamp : lights up yellow in the
exterior mirrors up to a vehicle speed of
20 mph (30 km/h). When the vehicle speed
exceeds 20 mph (30 km/h), the indicator
lamp goes out and Active Blind Spot Assist is
ready for use.
When your speed exceeds approximately
20 mph (30 km/h), warning lamp : lights up
red on the corresponding side whenever a
vehicle is detected in the blind spot
monitoring range. This warning is always
given when a vehicle enters the blind spot
monitoring range from behind or from the
side. When you are passing another vehicle,
the warning is emitted only if the difference
in speed is less than 7 mph (12 km/h).
The yellow indicator lamp goes out if the
reverse gear is engaged. In this event, Active
Blind Spot Assist is no longer active.
The brightness of the indicator/warning
lamps is adjusted automatically according to
the ambient light.
GWARNING
Active Blind Spot Assist is not active at speeds
lower than 20 mph (30 km/h). The indicator
lamps in the exterior mirrors are yellow.
Vehicles in the monitoring range are then not
indicated.
Always pay attention to traffic conditions and
your surroundings. Otherwise, you may fail to
Driving systems189Driving and parkingZ
Page 211 of 356
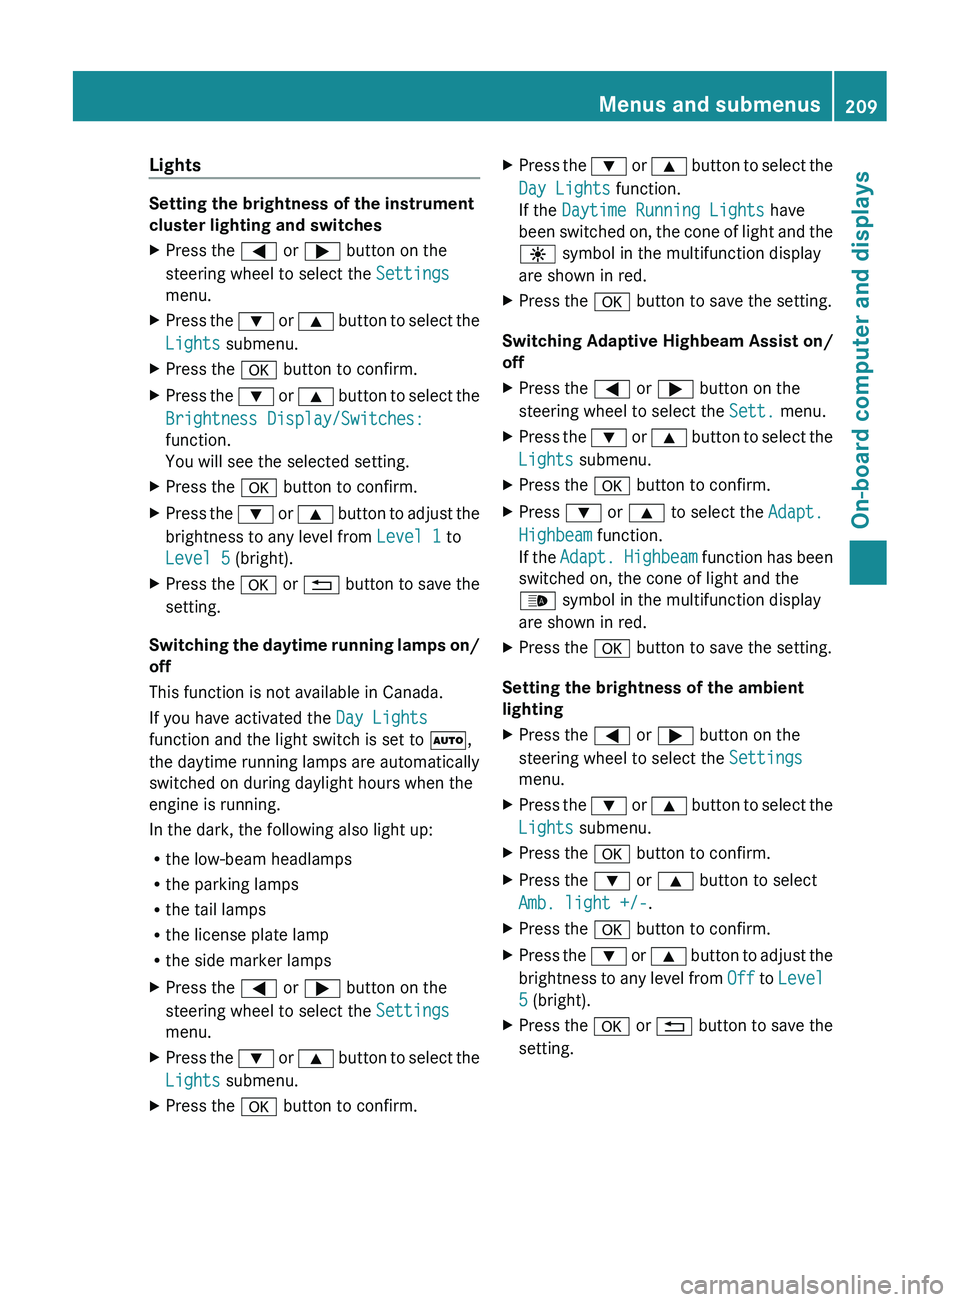
Lights
Setting the brightness of the instrument
cluster lighting and switches
XPress the = or ; button on the
steering wheel to select the Settings
menu.XPress the : or 9 button to select the
Lights submenu.XPress the a button to confirm.XPress the : or 9 button to select the
Brightness Display/Switches:
function.
You will see the selected setting.XPress the a button to confirm.XPress the : or 9 button to adjust the
brightness to any level from Level 1 to
Level 5 (bright).XPress the a or % button to save the
setting.
Switching the daytime running lamps on/
off
This function is not available in Canada.
If you have activated the Day Lights
function and the light switch is set to Ã,
the daytime running lamps are automatically
switched on during daylight hours when the
engine is running.
In the dark, the following also light up:
R the low-beam headlamps
R the parking lamps
R the tail lamps
R the license plate lamp
R the side marker lamps
XPress the = or ; button on the
steering wheel to select the Settings
menu.XPress the : or 9 button to select the
Lights submenu.XPress the a button to confirm.XPress the : or 9 button to select the
Day Lights function.
If the Daytime Running Lights have
been switched on, the cone of light and the
W symbol in the multifunction display
are shown in red.XPress the a button to save the setting.
Switching Adaptive Highbeam Assist on/
off
XPress the = or ; button on the
steering wheel to select the Sett. menu.XPress the : or 9 button to select the
Lights submenu.XPress the a button to confirm.XPress : or 9 to select the Adapt.
Highbeam function.
If the Adapt. Highbeam function has been
switched on, the cone of light and the
_ symbol in the multifunction display
are shown in red.XPress the a button to save the setting.
Setting the brightness of the ambient
lighting
XPress the = or ; button on the
steering wheel to select the Settings
menu.XPress the : or 9 button to select the
Lights submenu.XPress the a button to confirm.XPress the : or 9 button to select
Amb. light +/- .XPress the a button to confirm.XPress the : or 9 button to adjust the
brightness to any level from Off to Level
5 (bright).XPress the a or % button to save the
setting.Menus and submenus209On-board computer and displaysZ
Page 212 of 356
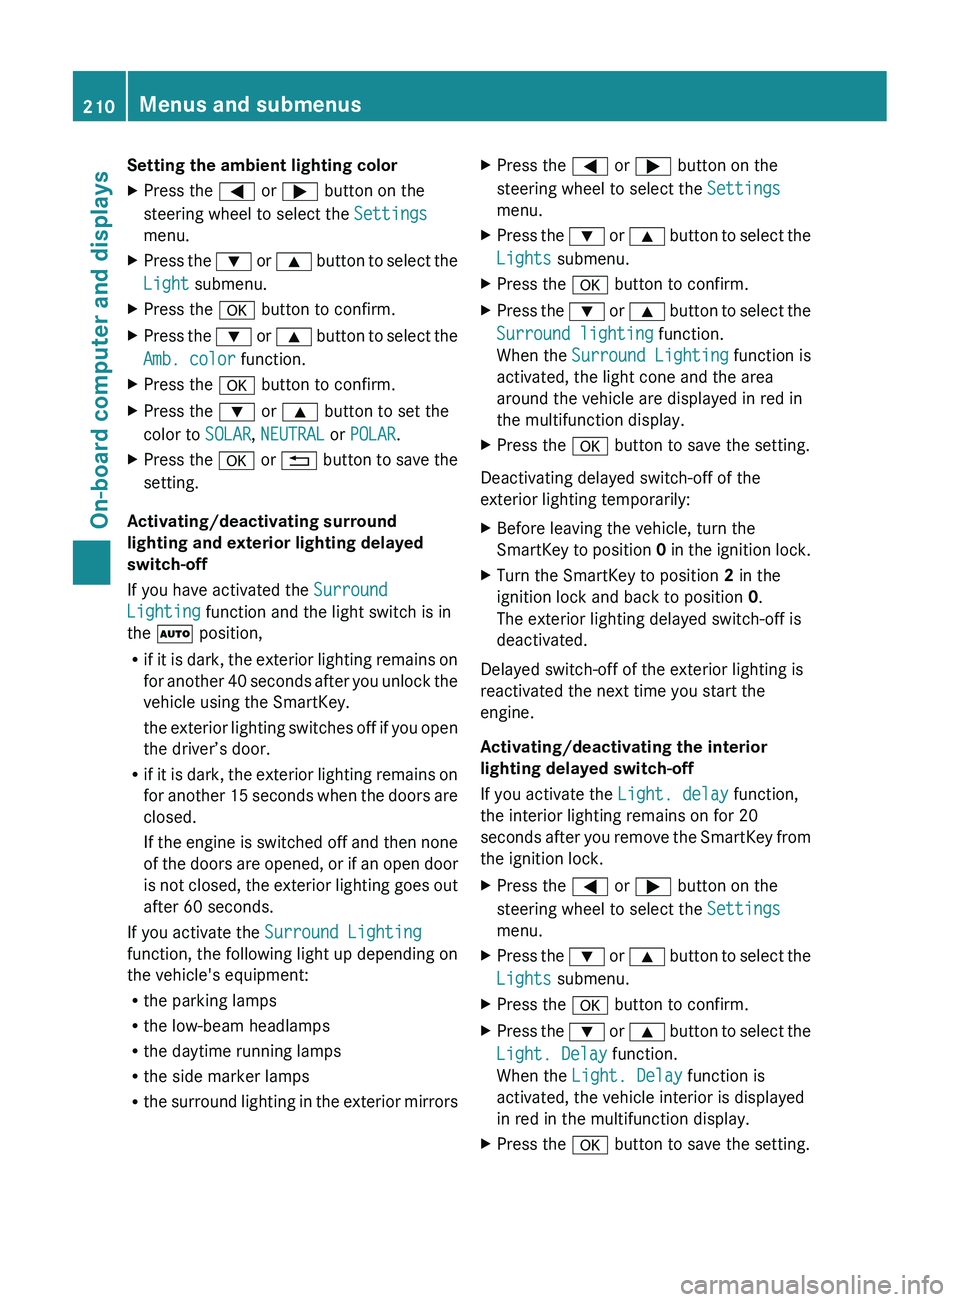
Setting the ambient lighting colorXPress the = or ; button on the
steering wheel to select the Settings
menu.XPress the : or 9 button to select the
Light submenu.XPress the a button to confirm.XPress the : or 9 button to select the
Amb. color function.XPress the a button to confirm.XPress the : or 9 button to set the
color to SOLAR, NEUTRAL or POLAR .XPress the a or % button to save the
setting.
Activating/deactivating surround
lighting and exterior lighting delayed
switch-off
If you have activated the Surround
Lighting function and the light switch is in
the à position,
R if it is dark, the exterior lighting remains on
for another 40 seconds after you unlock the
vehicle using the SmartKey.
the exterior lighting switches off if you open
the driver’s door.
R if it is dark, the exterior lighting remains on
for another 15 seconds when the doors are
closed.
If the engine is switched off and then none
of the doors are opened, or if an open door
is not closed, the exterior lighting goes out
after 60 seconds.
If you activate the Surround Lighting
function, the following light up depending on
the vehicle's equipment:
R the parking lamps
R the low-beam headlamps
R the daytime running lamps
R the side marker lamps
R the surround lighting in the exterior mirrors
XPress the = or ; button on the
steering wheel to select the Settings
menu.XPress the : or 9 button to select the
Lights submenu.XPress the a button to confirm.XPress the : or 9 button to select the
Surround lighting function.
When the Surround Lighting function is
activated, the light cone and the area
around the vehicle are displayed in red in
the multifunction display.XPress the a button to save the setting.
Deactivating delayed switch-off of the
exterior lighting temporarily:
XBefore leaving the vehicle, turn the
SmartKey to position 0 in the ignition lock.XTurn the SmartKey to position 2 in the
ignition lock and back to position 0.
The exterior lighting delayed switch-off is
deactivated.
Delayed switch-off of the exterior lighting is
reactivated the next time you start the
engine.
Activating/deactivating the interior
lighting delayed switch-off
If you activate the Light. delay function,
the interior lighting remains on for 20
seconds after you remove the SmartKey from
the ignition lock.
XPress the = or ; button on the
steering wheel to select the Settings
menu.XPress the : or 9 button to select the
Lights submenu.XPress the a button to confirm.XPress the : or 9 button to select the
Light. Delay function.
When the Light. Delay function is
activated, the vehicle interior is displayed
in red in the multifunction display.XPress the a button to save the setting.210Menus and submenusOn-board computer and displays
Page 213 of 356
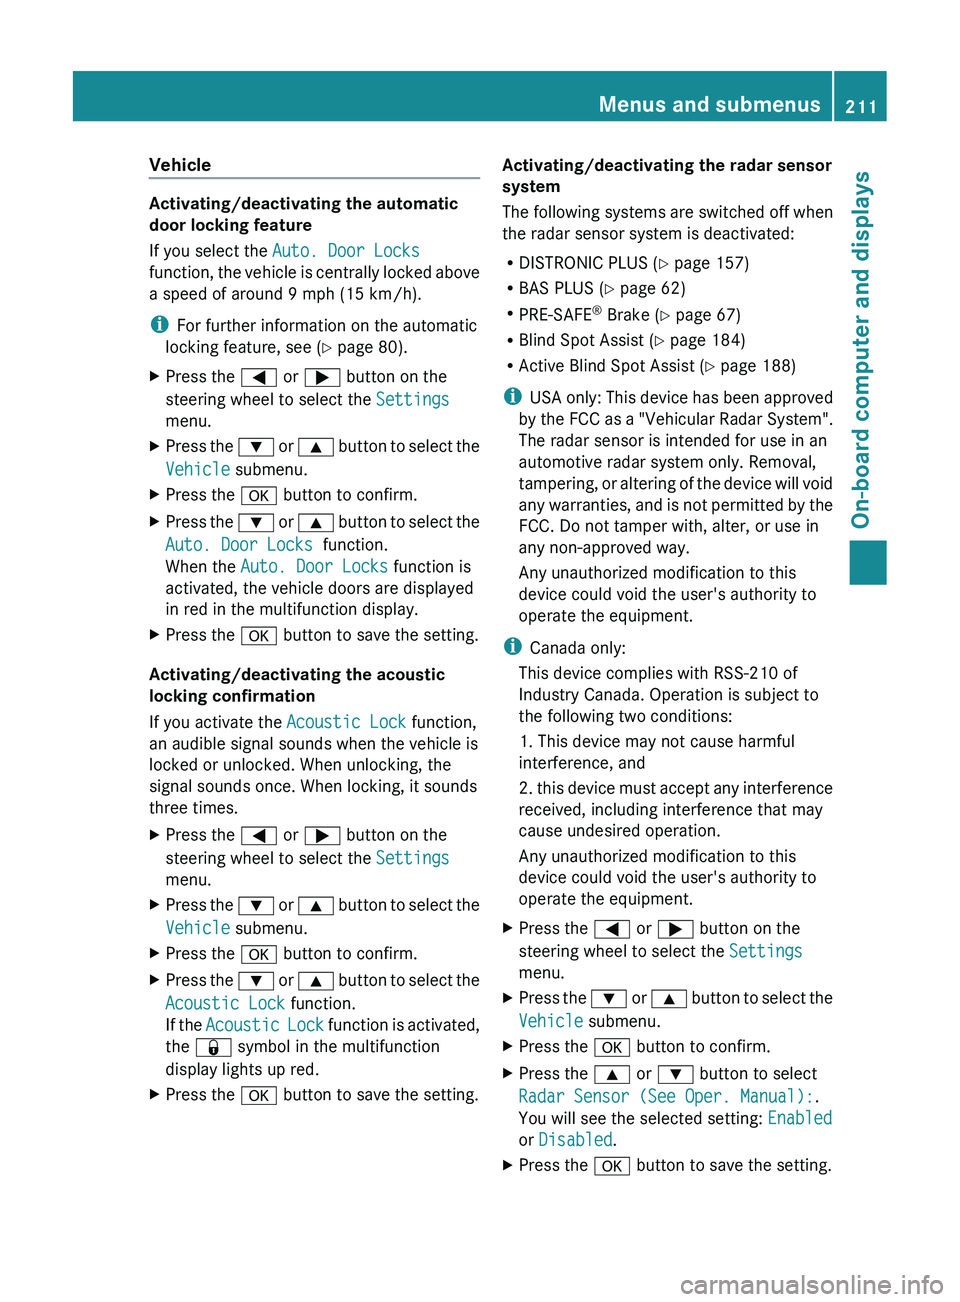
Vehicle
Activating/deactivating the automatic
door locking feature
If you select the Auto. Door Locks
function, the vehicle is centrally locked above
a speed of around 9 mph (15 km/h).
i For further information on the automatic
locking feature, see ( Y page 80).
XPress the = or ; button on the
steering wheel to select the Settings
menu.XPress the : or 9 button to select the
Vehicle submenu.XPress the a button to confirm.XPress the : or 9 button to select the
Auto. Door Locks function.
When the Auto. Door Locks function is
activated, the vehicle doors are displayed
in red in the multifunction display.XPress the a button to save the setting.
Activating/deactivating the acoustic
locking confirmation
If you activate the Acoustic Lock function,
an audible signal sounds when the vehicle is
locked or unlocked. When unlocking, the
signal sounds once. When locking, it sounds
three times.
XPress the = or ; button on the
steering wheel to select the Settings
menu.XPress the : or 9 button to select the
Vehicle submenu.XPress the a button to confirm.XPress the : or 9 button to select the
Acoustic Lock function.
If the Acoustic Lock function is activated,
the & symbol in the multifunction
display lights up red.XPress the a button to save the setting.Activating/deactivating the radar sensor
system
The following systems are switched off when
the radar sensor system is deactivated:
R DISTRONIC PLUS ( Y page 157)
R BAS PLUS ( Y page 62)
R PRE-SAFE ®
Brake ( Y page 67)
R Blind Spot Assist ( Y page 184)
R Active Blind Spot Assist ( Y page 188)
i USA only: This device has been approved
by the FCC as a "Vehicular Radar System".
The radar sensor is intended for use in an
automotive radar system only. Removal,
tampering, or altering of the device will void
any warranties, and is not permitted by the
FCC. Do not tamper with, alter, or use in
any non-approved way.
Any unauthorized modification to this
device could void the user's authority to
operate the equipment.
i Canada only:
This device complies with RSS-210 of
Industry Canada. Operation is subject to
the following two conditions:
1. This device may not cause harmful
interference, and
2. this device must accept any interference
received, including interference that may
cause undesired operation.
Any unauthorized modification to this
device could void the user's authority to
operate the equipment.XPress the = or ; button on the
steering wheel to select the Settings
menu.XPress the : or 9 button to select the
Vehicle submenu.XPress the a button to confirm.XPress the 9 or : button to select
Radar Sensor (See Oper. Manual): .
You will see the selected setting: Enabled
or Disabled .XPress the a button to save the setting.Menus and submenus211On-board computer and displaysZ
Page 214 of 356

Convenience
Activating/deactivating the EASY-
ENTRY/EXIT feature
You can use the Easy Entry/Exit: function
to activate or deactivate the EASY ENTRY/
EXIT feature ( Y page 99).
GWARNING
You must make sure no one can become
trapped or injured by the moving steering
wheel when the easy-entry/exit feature is
activated.
To stop steering wheel movement, move
steering wheel adjustment lever or press one
of the memory position buttons.
Do not leave children unattended in the
vehicle, or with access to an unlocked vehicle.
Children could open the driver's door and
unintentionally activate the easy-entry/exit
feature, which could result in an accident
and/or serious personal injury.
XPress the = or ; button on the
steering wheel to select the Settings
menu.XPress the : or 9 button to select the
Convenience submenu.XPress the a button to confirm.XPress the : or 9 button to select the
Easy-entry function.
If the Easy Entry/Exit function is
activated, the vehicle steering wheel is
displayed in red in the multifunction
display.XPress the a button to save the setting.
Switching the belt adjustment on/off
For further information on belt adjustment
( Y page 53).
XPress the = or ; button on the
steering wheel to select the Settings
menu.XPress the : or 9 button to select the
Convenience submenu.XPress the a button to confirm.XPress the : or 9 button to select the
Belt Adjustment function.
When the Belt Adjustment function is
activated, the vehicle seat belt is displayed
in red in the multifunction display.XPress the a button to save the setting.
Switching the Fold in mirrors when
locking function on/off
This function is only available in Canada.
If you switch on the Auto. Mirror
Folding function, the exterior mirrors fold in
when you lock the vehicle. If you unlock the
vehicle and then open the driver's or front-
passenger door, the exterior mirrors fold out
again.
If you have switched the function on and you
fold the exterior mirrors in using the button
on the door ( Y page 101), they will not fold
out automatically. The exterior mirrors can
then only be folded out using the button on
the door.
XPress the = or ; button on the
steering wheel to select the Settings
menu.XPress the : or 9 button to select the
Convenience submenu.XPress the a button to confirm.XPress the : or 9 to select the
Auto. Mirror Folding function.
If the Auto. Mirror Folding function is
activated, the vehicle's exterior mirror is
displayed in red in the multifunction
display.XPress the a button to save the setting.
Resetting to factory settings
For safety reasons, the Day Lights function
in the Lights submenu is only reset when the
vehicle is stationary.
212Menus and submenusOn-board computer and displays